Wednesday, December 21, 2005

SEASON'S GREETINGS

I wish you a MERRY XMAS and a HAPPY NEW YEAR 2006!


May you have an enjoyable time during this period of festivities and plenty of yummy food to eat!!!

I'll be taking a few days holidays in Grisons where the mountains are beautiful and the snow is plentiful....


I'm already looking forward to the nice meals and fine foods that I'm going to eat!

Anyway, I'll be back very soon...

(House -Pic by http://christmasdrawingart.net)
(Cat In Sock -Pic by
www.lefever.com)
(Cat & Wreath -Pic by www.leolicensing.com)

Tuesday, December 20, 2005

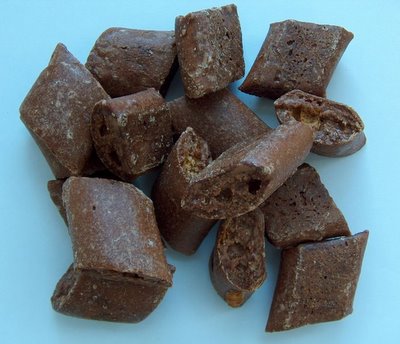
MAGENBROT

“MAGENBROT” is a kind of spice bread hailing from Switzerland which is made during the Christmas period. It is of the same family as the French “Pain D’Épice” or the German “Lebkuchen”. At the origin, it was baked with honey, but nawadays the use of sugar is well-spread and very common.

“MAGENBROT” is very spongy, light and has a crunchy icing coating to die for. With it’s yummy blend of spices this Christmas bread will beautifully perfume your apartment while baking. “MAGENBROT” has a taste that will bewitch you totally and get you addicted to it's splendid aromas. And, don't worry, you can eat it (or gobble it) without an ounce of bad conscience as it’s totally lacking the usual amount (high) of calories that are contained in such festive treats!…

This recipe is based on that of Betty Bossi and was modified slightly to meet my personal taste...

Ingredients:
500g Plain white flour or rye flour
1 Tbs Baking Powder
2 1/2 Tbs Chocolate powder or cocoa powder
2 Pinches salt
1 1/2 Tsp Ground cinnamon
3/4 Tsp Ground cloves
1/4 Tsp Ground nutmeg
450g Castor sugar
150ml Water
150ml Milk
1 Tbs Kirsch
Coating:
100g Dark cooking chocolate (60-70%)
20g Unsalted butter
100ml water
250g Powder sugar
1/2 Tsp Ground cinnamon
1/3 Tsp Ground cloves
1/4 Tsp Ground nutmeg

Method:
1. Preheat oven to 180°C (350°F).
2. In a bowl, mix all the dry ingredients (flour, baking powder, cocoa, salt, cinnamon, cloves, nutmeg and sugar) together.
3. Add the water, milk and kirsch. Beat until you get a smooth batter.
4. Pour the batter into a rectangular brownie tray (25X30cm) lined with baking sheet.
5. Bake for about 20 minutes in the inferior half of the oven.
6. Set aside for a very short time and turn onto a rack.
7. Remove the baking sheet and let cool.
8. Cut slices (2X4cm).
9. Place in a big bowl.
10. In a pan, melt the chocolate with the butter and water. Set aside.
11. Add the powder sugar and spices. Mix well.
12. Pour the icing/coating mixture over the slices and mix very gently until they are all evenly covered/coated.
13. Place on a rack and let dry for about 1 hour.
14. Keep in a tin for 1-2 weeks.

Remarks:
Instead of kirsch, you can use any distilled alcohol such as Brandy, Cognac, Bourbon or Rum, etc…
Spread the batter with a wet spatula; it will then be easier.

Serving suggestions:
Serve with a good cup of tea (ex. Earl Grey).

(Magenbrot -Pic by http://de.wikipedia.org)
(Dalpe -Pic by Christian Mariotti www.trekearth.com)

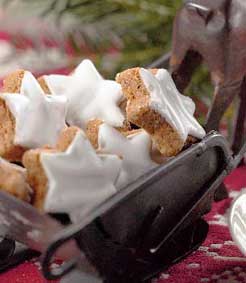
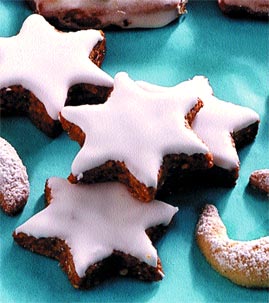
ZIMTSTERNE

“ZIMTSTERNE“ or "cinnamon star cookies" are well spread in Switzerland, Austria and Germany where they are also known as “Erstesstern” meaning “first star” (the German Jewish communities bake them for Yom Kippur, the "Day of Atonement"). Although we share similar recipes with those countries, in Switzerland, some say that the “ZIMTSTERNE” originate from Chur in Grisons…

Those nut meringues are absolutely yummy and aromatic to please. “ZIMTSTERNE” are crunchy on the outside, but deliciously mellow in their center. It’s a classic Christmas biscuit that will enchant everybody with it's interesting spiciness. “ZIMTSTERNE” also make an ideal gift. But, be careful, the only little problem about "ZIMTSTERNE" is that they are quite messy to make so you are warned!!!...

Makes around 40-50 biscuits

Ingredients:
3 Egg whites (~50g)
A pinch of salt
300g Powder sugar
1 1/2 - 1 3/4 Tbp Cinnamon powder
1 - 1 1/2 Tbs Kirsch
350g Finely ground almonds
20g Candied orange peels, chopped (optional) or 3/4 Tbs Lemon zest
A bit of plain flour

Method:
1. In a bowl, whisk the egg whites with the salt until stiff and standing up in well-defined peaks.
2. Sieve the sugar and progressively incorporate it in the egg whites while continuesly beating.
3. Set aside 1dl of this mixture for the icing (at the end).
4. Add the cinnamon and kirsch to the leftover egg mixture.
5. Delicately incorporate the almonds and candied oranges to the mixture and "knead" very lightly.
6. Roll the pastry (8-10mm thickness) on a floured surface.
7. Cut out stars using a cookie cutter.
8. Place the cut out shapes on a baking tray lined with baking paper.
9. Brush with the leftover 1dl icing mixture (see point 3) and refrigerate.
10. Cook in a preheated oven 250°C (500°F) for 3-5 minutes.
11. Detach delicately with a spatula.

Remarks:
Always work the pastry very delicately.
If you can’t roll out the dough with a pinroll, then do it with your hands without heating it too much.
If you don’t have kirsch, you can either use another type of distilled alcohol (Cognac, Rum, Brandy, etc…), otherwise use the same quantity of lemon juice.

Serving suggestions:
Eat the “ZIMTSTERNE” with a cup of tea, hot chocolate or a fine cup of coffee.

(Zimtsterne 1 -Pic by www.allpresan.de)
(Lenzerheide, Graubunden -Pic by Daniele Zola www.trekearth.com)
(Zimtsterne 2 -Pic by www.livingathome.de)

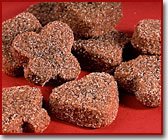
BRUNSLIS

“BRUNSLIS“ or "bruns" (in French) are the pride of the people from Basel (Northern Switzerland) and are the obligatory traditional Christmas biscuits that people bake during this period of festivities.

Their warm chocolaty flavor is very sweet to the palate and the kirsch adds a lovely and unneglectable perfume to the dough. With their sugar coating that crunches under the teeeth and their soft chewy texture that melts beautifully in the mouth, “BRUNSLIS” are a delicacy which will overwhelm you with intense pleasure…


Makes about 30

Ingredients:
2 Egg whites (~50g eggs)
A pinch of salt
100g Castor sugar
150g Dark cooking chocolate (40-60% cocoa)
250g Ground almonds
2-2 1/2 Tbs Kirsch
A bit of sugar to coat the biscuits

Method:
1. Whisk the egg whites with the salt until they are stiff, fluffy and standing up in well-defined peaks.
2. Progressively incorporate the sugar while still whisking the mixture.
3. Slowly melt the chocolate over a bain-marie.
4. Add to the egg white mixture.
5. Incorporate the almonds while lifting the mixture.
6. Add the Kirsch and mix carefully.
7. Wrap the dough with plastic cellophane and put in the refrigerator for a few hours.
8. Preheat the oven to 180°C (350°F).
9. Roll out the dough (1-1,2cm thickness) on lightly sugared surface.
10. Cut out shapes with the cookie cutter of your choice.
11. Place on a baking tray lined with baking paper.
12. Bake for 8-10 minutes.

Remarks:
You can replace the Kirsch by an other type of distilled alcohol (ex. Cognac, Bourbon or Brandy).
Don’t worry if the dough is quite wet, that’s the way it should be.
In reality, the biscuits should dry rather than bake. Test them after 8 minutes. They should be soft and chewy in the center, so don’t overbake them.
If you wish you can also shape the “BRUNSLIS” in order to get 7-10cm long and 1cm thick sticks/logs.

Serving suggestions:
Like for all Christmas biscuits, “BRUNSLIS” are always fine at any moment with a good hot beverage.


(Brunslis -Pic by
www.coco-lm.co)
(Xmas In Basel -Pic by
www.baslerweihnacht.ch)

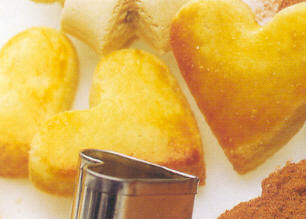
MAILANDER

Also known as “Milanais“ (in French) or “Milanese” (in Italian), these biscuits were originally native of Italy (Milan). The original “MAILANDER” had been adapted and modified in order to meet our limited choice of ingredients as well as our cultural habits. The Italian version was prepared with almonds and candied fruits, but as we weren’t used to have such ingredients in our traditional Swiss confections, they were taken away. And contrarily to us, the Italians ate those biscuits all year round and not uniquely for Christmas like we do in Switzerland.

“MAILANDER” are magnificently crunchy on the outside and soft on the inside, and are very seducing taste-wise although they are simple cookies. The addition of lemon zest gives them a beautiful and delicate perfume, thus adding a little fancy twist to their delectable roundness of taste. You’ll find out that they go very fast and will not last very long, so you’d better try them out now as you’ll not regret baking such heavenly biscuits…

Makes around 40 biscuits

Ingredients:
250g Unsalted butter
240g Castor sugar
A pinch of salt
3 Eggs (~50g)
The zest of 1 lemon
500g Plain white flour
Glazing:
1 Egg yolk
1 Tsp water

Method:
1. Cream the butter, add the sugar and eggs one after another. Beat well the mixture until it is smooth in consistency.
2. Add the salt and lemon zest.
3. Incorporate the flour until you get a soft dough.
4. Wrap the dough in plastic cellophane and refrigerate for a few hours.
5. Preheat the oven to 200°C (400°F).
6. Roll out the dough (7mm thickness) on a lightly floured surface.
7. Cut out shapes with the cookie cutters of your choice.
8. Place cut out shapes on a baking tray lined with baking paper.
9. Brush the tops with the egg yolk and water mixture.
10. Bake for about 10 minutes.

Remarks:
Do not knead the dough, otherwise the biscuits would be too hard. You have carefully to work the dough like shortcrust pastry (see the shortcrust recipe in the “sweets” category of my blog).
The “MAILANDER” should not be rolled out too thinly nor too thickly, therefore you should rigorously respect the instructions.
If you wish you can cut out the biscuits with a hole in the center so that you can hang them on the Christmas tree.

Serving suggestions:
Eat these "MAILANDER" with a good cup of tea, coffee or hot chocolate at any time of the day.

(Mailander -Pic by www.gastronomias.com)
(Milan -Pic by Letizia Falini
www.trekearth.com)
(Milander Getting Brushed -Pic by www.cooperation-online.ch)

Sunday, December 18, 2005

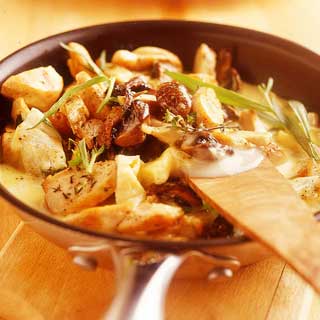
CHICKEN AND MUSHROOMS IN CREAMY SAINT MARCELLIN SAUCE

Now that we have seen our very first snow falls, I only crave for rich comfort/soul food! I love cheese, mushrooms and chicken meat, so this opulent recipe has caught up my attention!

Saint Marcellin is a very popular soft cheese from France which is sold in pots (sometimes reusable small clay pots) so much it is runny. In the past, it was made with goat’s milk, but nowadays it is produced with cow’s milk. Saint Marcellin is a cheese with character that has a pleasant creamy texture, a nutty flavor and is slightly acid in taste. Due to it’s lemony note, Saint Marcellin goes perfectly well with a herb such as tarragon that offers bittersweet and zesty aromas of fennel, licorice and anise.

This recipe was originally released in the November 2005 issue of “Cuisine Et Vins De France” and created by Pascal Mosnier. As I always have to change or adapt things, I have added my own touch to this excellent dish and decided to freely modify it according to my own likings...

Serves 2

Ingredients:
30g Unsalted butter
1 Shallot, chopped
300g Champignons de Paris (Parisian button mushrooms), cut in two and sliced
2 Chicken breasts, not too thinly sliced
250ml Double cream
2 Saint Marcellin cheeses (100g each), cut in slices
3-4 Tbs Fresh tarragon leaves (Mexican tarragon), chopped or entire
Salt to taste
Pepper to taste

Method:
1. Heat a frying pan, add the butter and chicken. Sizzle over high temperature while continuesly stirring.
2. Add the mushrooms, continue sizzling and stirring until they are golden.
3. Add the shallots and cook until they are translucid.
4. Then, incorporate the cream and cheese. Stir and let simmer gently over low temperature for about 10 minutes.
5. At the very end, add the tarragon leaves, salt and pepper to taste.
6. Serve, sprinkled with more tarragon leaves.

Remarks:
If you don’t have any fresh tarragon, then use the dried herb, but don’t sprikle any on top of the dish. The herb should only be used inside the sauce. And, of course, don't forget that dried tarragon is a lot stronger than when it's fresh so use about 1 1/2 Tsp.
The dish is ready once the cheese sauce has thickened.

Serving suggestions:
Serve with pastas (ex. tagliatele), spetzle or white rice.

(Chicken with St. Marcellin -Pic by www.cuisineetvinsdefrance.com)
(France -pic by Xavier D'Abrigeon www.trekearth.com)
(Saint Marcellin -Pic by www.fromagefrancais.com)
(Grenoble, Isère -Pic by http://photoenligne2.free.fr/Isere/Grenoble/Grenoble.html)

GUATCHUP

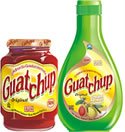
Have you ever wondered if there would be another kind of sauce that could replace your good old ketchup?!? Well, actually the Brazilian’s have come up with a totally inventive version of ketchup that has been funkily named “GUATCHUP”. So, what exactly is “GUATCHUP”, you might ask, a bit puzzled?!!!…

This new and innovative product from Brazil is made with red guavas and is produced under the control of the Guava Producers’ Association (GOIABRAS) who not only protects the producers’ interests, but also encourages the developpment of guava culture in disfavored regions. This special exploitation of the country’s natural resources is also respectful to the environment. In that way, your moral conscienceness will be freed from any reserve, as when you buy this unique product your act will enhance your health, and have a social and ecological impact on Brazil. All of that can’t be achieved with your normal ketchup which you find in every local supermarket or fast-food! “GUATCHUP” is not any ketchup; it is exceptional and different in many ways!!!

The other incomparable aspect of “GUATCHUP” is it’s fabulous and exotic taste of guava! For the most reticent of you, I can assure you that you’ll be positively surprised by this alternative ketchup. It’s flavor is, in a sense, quite similar to Uncle Sam’s ketchup, but “GUATCHUP” is sweeter, surprisingly fruity and is a little less vinegary than the latter. In fact, you will not have any problem to replace your usual ketchup sauce by it’s multifaceted Brazilian cousin! And, you’ll see that you will also not come to miss the other!!!

“GUATCHUP” is absolutely yummy with barbecues, French fries, meat, pastas, potatoes, rice, fish, Asian food, with tortilla chips, crisps and vegetables. It is also perfectly fit to be used as a base to sweet and sour sauces or mixed in mayonnaise. One can use it in any manner that can be imagined…

“GUATCHUP” is a 100% natural salsa that rocks the palate and offers a sunny fortaste of paradise!

Guatchup link: www.guatchup.com.br/ingles/index.html

(Guatchup -Pic by www.jetbras.co.jp)
(Guava -Pic by
www.agridept.gov.lk)
(Ipanema Beach -Pic by Marcus Antonio Machado de Moura www.trekearth.com)

Saturday, December 17, 2005

CATS & DOGS FUN!

Bad taste joke...
(Cat Pancake -Pic by http://go.to/funpic)

Not enough sleep!!!..
(Coffee Break www.offthemark.com)

Cats and chicks...
(Chick Flick -Pic by www.offthemark.com)

Sunday, December 11, 2005

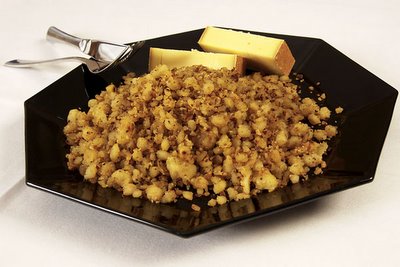
MALUNS

"Maluns" is an ancestral dish from Grisons (Southeastern Switzerland) that was generally eaten by the mountain people who needed rich and stocky staples in order to be strong enough to face the harsh labor which they had to supply at the farm.


"Maluns" is a simple meal which is very useful to make if you have some leftover potatoes. Apart from being very economical, this dish is also really fine and comforting.

At the origin, the farmers didn’t eat "Maluns" with apple sauce, plum or cherry puree like we do now, but they used to dip a spoonful of "Maluns" into their ‘café au lait’!

Quantity for 2-3 people

Ingredients:
600g Cooked potatoes, one or two days old
200-230g Plain white flour (depending on how wet the potatoes are)
2 Tsp Salt (+ more to taste)
120g Unsalted butter

Method:
1. Into a bowl, grate the potatoes with a “Rösti” grater or with the larger holes of a normal grater.
2. Add the flour and salt. Mix well.
3. In a frying pan melt the butter, then add the potatoe mixture and stir well in order to wet the whole mixture with the butter (there should be no dry mixture left).
4. Fry very slowly over low heat for about 45 minutes while continously stirring.

Remarks:
If you use floury potatoes, you might need more butter.
When mixing the flour with the potatoes, be careful to get a flaky mixture; it should not stick together or be moist.
Don’t prepare the Maluns mixture in advance, otherwise it will be sticky and it will lose of it’s flakiness.
Use an antiadhesive pan to fry.
The end product should be soft, look like small pebbles and only slightly fried (not too crispy).

Serving suggestions:
Serve with apple sauce (apple puree), plum or cherry puree. You can also eat Maluns with cheese or in the traditional way, with ‘café au lait’.

(Maluns -Pic by www.gourmet-catering.ch)

(Train To Disentis -Pic by www.psbellamy.com)

MONK'S HEAD

This classic dairy product is a very popular semi-hard cheese from Switzerland. It is made with unpasturized milk coming from cow’s which only graze outside in green pasturelands from spring till autumn. “Tête de Moine” is made in the Franches Montagnes, Moutier and Courtelary in the Jura region (Northwestern Switzerland). This cheese was invented 800 years ago by the monks from the Bellalay monastery.

“Tête de Moine” which can be translated to “Monk’s Head” in English, carries well it’s name as it looks similar to a Cistercian monk’s head with the top hair shaven off! This cheese has a cylindrical shape and, compared to all other cheeses, it should never be simply cut into slices, but instead, it should be scraped. In order to eat it, the top should be cut off and the sides cleaned of all crust. Then, with the help of a tool called “Girolle”, the cheese is scraped in order to make elegant rosettes. The “Girolle” was invented by a mechanic from Lajoux who had the wits to create this very useful tool which comes in very handy when you want to enjoy “Tête de Moine”…
With a colour ranging from ivory white till pale yellow, this spicy cheese has a lot to offer. It is a cheese for gourmets as it’s flowery taste and it’s delicate soft creamy texture are matchless. “Tête de Moine” gets stronger in flavor with age, so it’s spiciness depends on how long it is left to mature.

"Tête de Moine" is one of those Swiss delicacies which I highly recommend you to taste if ever you travel to Switzerland or find it in your own country.

(Tête De Moine & Girolle -Pic by http://chezlatina.com)
(Tête De Moine -Pic by
www.3rdchannel.com)

Saturday, December 10, 2005

L'ESCALADE

On the 12th of December, Geneva commemorates a historical event that has made the pride of it’s inhabitants since this memorable day in 1602 when the town won it’s independence.

The name “Escalade”, meaning “the escalade”, originates from this special evening of December 1602, during the longest and darkest night of the year when the Catholic army from Savoy decided to attack the town and take it by surprise. The army climbed up the fortified walls surrounding Geneva with ladders as there was no other way to reach the town for it was well protected.

According to tradition, their plan to invade the town failed miserably thanks to a woman’s incredible courage. “Mère Royaume” ("Mother Kingdom" such is her mythological name) who was a Huguenot from Lyon, saved Geneva by throwing her hot cauldron of soup on the soldiers who were trying to escalade the ramparts/fortifications. The warning was given and the people who had just been woken up in the middle of their sleep faught with incomparable determination.

Her act of bravery has not been forgotten as it represents an important milestone in the history of Geneva. This observance has since then been memorialised between the 11th and 12 th of December, every year.

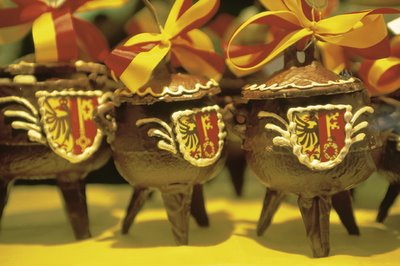
On this day, the people disguise themselves and, like for Halloween, the kids go from door to door to sing the traditional “Cé què lainô” song in order to get a bit of pocket money or sweets (chocalates in general). In the old town, like in 1602, battalions parade with horses and torches dressed up in their historical costumes and carrying the original gear, proclamations are made, old military music is played (fifes and tambourines), a big bonfire is lit in front of the cathedral St.-Pierre and guns are fired. All the closed places and secret passages of the old town (generally inaccessible all year long) are open. All the food stores and conectioneries sell chocolate cauldrons which are filled up with marsipan vegetables in honour of the woman who “saved” the town from the Savoyard invasion. A traditional vegetable soup is eaten and the fragrant “vin chaud” (spiced hot red wine) is drunken in the streets where they are being prepared.

Every family buys a chocolate cauldron and as a rememberance ritual, two people (the youngest and oldest) hold one another’s hands over the “marmite” (cauldron in French) and break it, uniting their forces, while pronouncing the sentence “qu’ainsi périssent les ennemis de la République!” (“that in this way, the enemies of the Republic perish!”)…

The “Escalade” is a kind of carnival which is only celebrated in Geneva and nowhere else in Switzerland. This special time of festivities lasts two days during which the people rejoice and the atmosphere is very joyful and colourful. If you like historical parades and reconstitutions, then the “Escalade” is for you!

(Compagnie 1602 -Pic by www.edwebpreject.com
(Nuit De L'escalade -Pic by www.geneve.ch)
(Armet savoyard -Pic by www.ville-ge.ch)
(Marmites En Chocolat -pic by www.geneve-tourisme.ch)

Saturday, December 3, 2005

CHINESE LEMON CHICKEN

As I am a big fan of Chinese food, This "LEMON CHICKEN“ is always a fulfilling culinary experience for me. It has the merit of being easy to prepare and not too demanding ingredients-wise.

This traditional Cantonese (Southeastern China) dish allies the subtle tangy sourness of lemon juice with the round and nutty taste of the deliciously crispy chicken nuggets. Like all Cantonese dishes, it is not hot nor too spicy, but succulently stir-fried...

You will discover that eating Chinese food at home is not mission impossible, because cooking dishes from this part of the world is not out of your reach! Once you’ve taken up making your own traditional Chinese specialities, you will not miss going to the restaurant as homemade Asian food can prove to be as fine as professionally prepared meals, if not even better!…


I’ve based this recipe on The Australian Women’s Weekly “Chinese Cooking Class” cookbook and adapted it according to my own gustative memories based on what I had eaten at the Chinese restaurant and in diverse “fast-foods”.


Serves 4

Ingredients:
4 Whole chicken breasts
1/2 Cup cornstarch
2 Tbs Water
1 Tbs Light soy sauce or oyster sauce
4 Egg yolks (~50g eggs)
Salt to taste
Pepper to taste
6 Green shallots (spring onions), chopped
Oil for deep-frying
Sauce:
150ml Lemon juice
3 1/2 Tbs Cornstarch
1 1/2 Tbs Sherry
3 Tbs Light runny honey
2 1/2 Tbs Light brown sugar
240ml Water
2 Cube chicken stock, crumbled
1 Tsp Ginger, finely grated
Salt to taste

Method:
1. Cut the chicken breasts in strips. Reserve.
2. For the sauce, combine the lemon juice, cornstarch, sherry, honey, sugar, water, chicken stock and ginger together in a saucepan.
3. Stir over low heat until all the sugar has melted. Then let the sauce boil and thicken. Reserve.
4. Beat the egg yolks, soy sauce and two tablespoons water together. Put the cornstarch into a bowl, gradually add the egg mixture and mix well. Salt and pepper to taste.
5. Heat up the oil.
6. Dip the chicken breast strips into the batter.
7. Put a few pieces of chicken into the hot oil and fry until golden. Drain on absorbent paper.
8. Keep warm in a moderate oven (~160°C/325°F) while frying the remaining chicken strips.
9. Arrange the chicken on a serving plate, spoon hot sauce over and sprinkle with the chopped green shallots.

Remarks:
Don’t overcook the sauce, otherwise it will lose all of it’s thickness.
Deep-fry the meat in batches.
If you wish, you could also use duck fillets or lean pork chops for this recipe.
Add the sauce just before serving, otherwise the crispy batter will soften.

Serving suggestions:
Eat this dish with Thai jasmine rice or long grain rice.

(Lemon Chicken -Pic by www.esampan.com)
(Lemon Chicken -Pic by Rosa www.rosas-yummy-yums.blogspot.com)
(Cantonese Garden -Pic by Lityuer Liao www.trekearth)

BAGELS

Bagels are widely spread in America and eaten on a dayly basis by many people. A bagel is a ring-shaped bread made with high gluten flour. It is poached in boiling water previously to being baked. This particular method gives bagels a chewy, dense and tender interior as well as a nice shiny crust. These are characteristics that differentiate bagels from other breads… The history of bagels is very interesting and on the level of it’s undeniable popularity.

According to lengends, the very first bagel to have been rolled was in 1683, when an unknkown Jewish baker from Vienna wanted to pay tribute to the King of Poland, Jan Sobieski, who had just saved the Austrians from the Turkish invaders. Since the king was a talented horseman, the baker decided to shape his dough into an uneven circle ressembling a riding stirrup (or “Beugel” in German). This bread became soon very successful throughout Eastern Europe and with time, it’s original shape changed (a hole was added in the centre) and it’s name was modified (from the different variations of the word “Beigel”, “Beugel” and “Bugel”, a new name finally got adopted: bagel which surely originates from Yiddish).

In 1880, the thousands of Eastern European Jewish immigrants who arrived in North America brought with them this bread speciality. From this time on, bagels became very popular in the USA and Canada. Cities like New York, Chicago, Montreal and Toronto became closely associated to this tradinional bread because of their large Jewish communities. Over the years, the traditional flavors like pumpernickel, onion, sesame seeds, poppy seeds and plain have been joined by many different sorts of modern creations like cinnamon, raisin, muesli, apple, blueberry, spinach, non-Kosher ham and any other taste that can be imagined. But bagels remain the same in essence; the old bagel-making tradition is still alive and intact. The know-how has evolved, has been perpetuated and passed onto new generations of bakers.


~ Bagels ~
Recipe (only the bread) taken from Eric Treuille & Ursula Ferrigno's "Ultimate Bread" cookbook and adapted by Rosa @ Rosa's Yummy Yums


Makes 8 "Bagels".

Ingredients:
2 Tsp Dried yeast
1 1/2 Tbs Grannulated sugar
300ml Water
500g Strong white flour (plain)
1 1/2 Tsp Salt

Method:
1. Sprinkle the yeast and sugar into 100ml of the water in a bowl. Leave four 5 minutes and then stir to disolve.
2. Mix the flour and salt together in a large bowl, make a well in a centre of the flour and pour in the yeasted water.
3. Pour the remaining water, holding back about half, into the well. Mix in the flour and stir in the reserved water, as needed, to form a firm, moist dough.
4. Turn the dough out onto a well-floured surface and knead until smooth and elastic for about 10 minutes. As you knead the dough, gradually work in as much additional flour as you can comfortably knead.
5. Put the dough in a lightly oiled bowl, turning into coat and cover with a tea towel. Leave to rise until doubled in size, about 1 hour.
6. Knock back the dough, then leave to rest for 10 minutes.
7. Cut the dough into 8 equalized pieces.
8. Shape each piece into a ball and form each bowl into a ring by inserting a floured finger into the centre of each one. Work the finger in a circle to stretch and widen the hole. Then twirl the ring around the index finger of one hand and the thumb of the other hand until the hole is about a third of the bagel’s diameter.
9. Place the bagels on a lightly oiled baking sheet, then cover with a damp tea towl and leave to rest for 10 minutes.
10. Bring a large pan of water to the boil, then reduce the heat to allow the water to simmer. Use a perforated skimmer to carefully lower the bagels into the water in batches of two or three at a time.
11. Transfer the drained to a lightly oiled baking sheet.
12. Bake at 220°C (425°F) for 20 minutes or until golden.

Remarks:
The dough should be very stiff and firm.
When you poach the bagels never cover the pan. It takes about 1 minute until they rise to the surface. Then remove them from the water with a perforated skimmer.

Serving suggestions:
Eat with the sweet or savory spread of your choice.
Bagels are particularly fine with cheese, dry meat or dry sausages.
The are also fine when toasted or served as sandwiches.

(Bagels -Pic by Rosa
www.rosas-yummy-yums.blogspot.com)
(Bagel Sandwich -Pic by
www.funkyfood.dsl.pipex.com)

WEEKEND CAT BLOGGING #26

Here's another weekend of cat blogging which has started, so grap your mouse and share your kitty cat pickies with us!!!

Unfortunately, since I don't have a digital camera at home, the amount of cat pictures that I can offer is very limited... Anyway, I really enjoy the other bloggers' kitties that I discover every week in WCB.

It's funny to see that those who have a close relationship with food also love animals, and in particular cats and dogs. It seems both go hand in hand!....

Mr. Fridolin (Herr Kiki) in his sleepy, yet malicious state of trance...

You will also find this picture as well as others on the great Eat Stuff blog from Sydney, Australia. If you also want to participate to Weekend Cat Blogging, then just leave your blog name, URL and permalink in a comment on Clare and Casey's site.

A list of the pussycats you can admire:

Check out Beowoulf and Domino as they take a relaxed attitude to life at The Countess
Check out
New Cats new look for the winter at Farmgirl Fare
Check out
Edith and Glinda getting ready for another cat show, at anne's food
Check out
rima's bathtub antics, at Les carnets de sbmarie
Check out
Aggie totally killing a fake mouse, at KyakSoup
Check out
Caramel riding around on the shoulder, at Heather's Space
Check out
Gabriel, you don't want to mess with her, trust me; at Middle-Fork
Check out
Boo's Mummy having a nap on the stove top, at masak-masak
Check out
Fridolin, looking very content and relaxed. Photo posted by the lovely Rosa, of Rosa's Yummy Yums
Check out Bella and Tasha enjoying the sunshine and warm weather at A few of my favourite things
Check out
Kittaya, looking handsome as always at Mahanandi
Check out Opium, wow she looks like a goddess! at Cel's Home page
Check out
Max and Noosh dreaming at passionate nonchalance
Check out
Miss Kitty She is starting to look festive already! at Culinary in the Desert
Check out
Stella smelling the beautiful flowers (Happy Birthday Katie!) at The poor Cracklins

(Fridolin -Pic by Rosa www.rosas-yummy-yums.blogspot.com)

Monday, November 28, 2005

MOQUECA DE PEIXE

Brazil, the largest country in South America, is well-known for it’s extraordinary multi-ethnic and multifaceted culinary diversity resulting from a colonial past and a melting pot of influences originating from it’s immigrants who hailed from all over the world.
The base of Brazilian cuisine comes from the Native Indians with foods like cassava, yams, corn, roots, fish and game. When the Portuguese conquerors colonized Brazil in 1533, they brought with them their own cooking traditions (seafood dishes) which were already influenced by the Moorish (North African) occupation of Portugal during the 8th century AC. In 1538, around 5 million African (mostly West Africans) slaves arrived, thus importing their own flavors (foods including pineapple, coconut, palm hearts, etc...) that still remain as being the largest and predominating culinary influence of Brazil. Besides, the immense flow of immigrants (Western and Eastern Europeans, Arabs and Asians) who came between the end of the 19th century and the beginning of the 20th century also participated to widening the range of influences that have been absorbed by Brazil’s richly original cuisine.

It is important to know that, unlike other South American countries, Brazil has highly tasty dishes which are playfully sweet, but rarely wildly hot; they are harmonious and delightfully perfumed. Brazilian food tends more to rafinement rather than to inducing an electrocuting and fiery clash of overwhelming sensations!

Brazil's national cuisine has to be seen like a collection of five main regional styles and methods of cooking. The North is heavily influenced by the Native Indians, the Northeast is pedominated by African cuisine, the Central-West is an agricultural region with lots of ranches, fishes and game, the Southeast has a big European and North African cooking tradition and The South's diet comes from the gaucho (cowboy), German and Italian people.
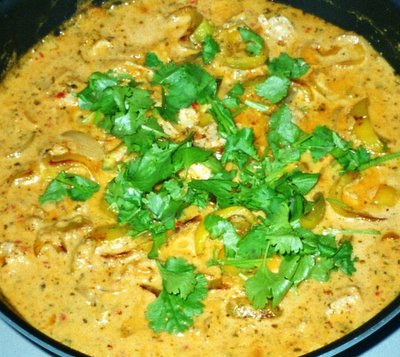
Brazil’s sensual and mystique aura is captured within this typical Afro-Bahian dish named “MOQUECA DE PEIXE”. It is voluptuously spiced and delicately perfumed. “MOQUECA” is a concentration of what Brazil has to offer: beautiful sweet flavors tinted by the exotic savor of tropical islands. This speciality is so heavenly and colourful that it will wonderfully play with your taste buds which will be delightfully tingled!!!

~ Moqueca Da Peixe ~
Recipe by Rosa @ Rosa's Yummy Yums 2005.

Quantity for 3-4 people.


Ingredients:
500g Cod fillets, cut in 2cm cubes
200g Big shrimps (optional)
2 Big white onions, chopped
3 Cloves garlic, crushed
1 Jalapeño chilli, seeded and chopped
4 Tomatoes, coarsly chopped
4Tbs Fish sauce
2 Limes, juiced
2 Green peppers, seeded and cut in strips
1 Big onion, sliced
400ml Coconut milk
1Tbs Olive oil
1Tbs Dende oil
Salt to taste
Pepper to taste

Method:
1. Mix together garlic, pepper, salt and lime juice.
2. Pour over fish and shrimps, and marinade for 1 hour.
3. In a food processor, combine onions, jalapeño chilli, tomatoes, dende oil and fish sauce.
4. Heat a frying pan, add oil and sliced onions. Fry until translucid.
5. Add the green peppers and stir-fry for about about 3 minutes.
6. Add the fish and shrimps, and pour the tomatoe mixture into the pan. Cook for about 5 minutes.
7. Pour the coconut milk into the fish mixture.
8. Salt and pepper to taste.
9. Simmer for 40 minutes to 1 hour until sauce has thickend. Serve.

Remarks:
Dende oil, or palm tree oil, may be difficult to purchase if you don’t have a Carribean market near your house, so you can replace it with olive oil although it’s flavor will be different.
You can either simmer the “MOQUECA” in a normal pan or in a clay pot placed in a moderate oven, thus being careful that the stew doesn’t dry too much or burn.

Serving suggestions:
Eat this dish with farofa (fried manioc flour) or plain white rice (Carolina, parboiled, etc…).

Decorate the "MOQUECA" with chopped coriander and .

(Moqueca -Pic by Rosa www.rosas-yummy-yums.blogspot.com)
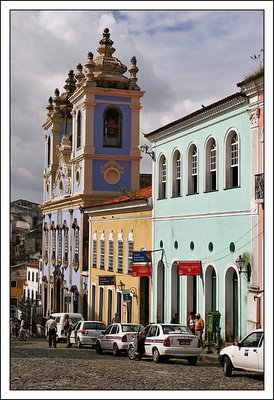
(Salvador De Bahia -Pic by Christian Cooper
www.trekearth.com)
(Southeast Brazil -Pic by Jose Reynaldo Da Fonseca
www.trekearth.com)

Sunday, November 27, 2005

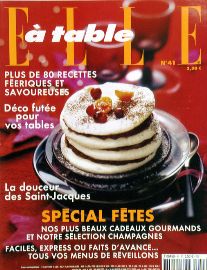
ELLE À TABLE

For the neophytes who don’t know what ELLE À TABLE is, this magazine deals with everything in close relationship to food in a gastronomical sense. It was firstly released in 1995 in Sweden and was very fastly printed for distribution in diverse other countries like France, Germany, Australia, Japan and Italy. ELLE À TABLE is a lifestyle magazine in association with the trademark ELLE.

ELLE À TABLE is directed to people who are in search of a fresh and innovative magazine dedicated to a specific fashionable and socially rich way of life. This bimonthly magazine has a modern and fresh manner of speaking about the table arts.


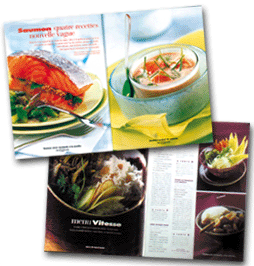
The articles are very witty and humorful, thus adding a unique zesty touch to the magazine's remarkable writing. ELLE À TABLE is packed with tons of interesting and captivating columns, highly aesthetic photography and finger-licking recipes. Inside each issue, you’ll find shopping news, wine and book reviews, articles about interior decoration and food-loving people, suggestions, useful addresses of restaurants and stores, internet tips and so much more. The dishes presented are either simple, traditional or elaborate depending on the event and mood/context chosen. There are recipes by chefs and delicious menu ideas to experience with friends.

ELLE À TABLE compiles a lot within it’s classy magazine; there’s so much to read and cook that you’ll not see the time pass until the next issue comes out! It is a truely beautiful little culinary jewel to recommend to anybody who appreciates the value of good food.

I’ve been an avid ELLE À TABLE reader since a time now and this cookery magazine continues to overwhelm me with it’s magnificent contents! This luxurious gourmet magazine is a very interesting read and a real pleasure for the eyes. It’s joyful and colourful tone is very seducing and the open-mindedness of it's collaborators will enlighten you!!!

(Elle à Table -Pic by www.elle.fr)

Saturday, November 26, 2005

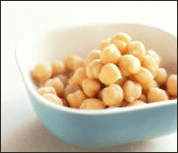
CHICKPEAS (CICER ARIETINUM)

Whilst some people dislike chickpeas, I always loved them for their mild nutty and creamy taste as well as for their crunchy and pleasant floury texture. I also enjoy the wide ranging variety of dishes which can be made with this humble seed…

Chickpeas are generally round in shape and either black, reddish, brown or pale yellow in colour. Also known as chana, garbanzo bean, Bengal gram or ceci bean, this seed is a member of the pulse family and originates from Southern Europe and the Middle East. Chickpeas grow on 20-50cm bushes which have small feathery leaves. Although chickpeas need a subtropical or tropical climate, because the plants need a lot of rain (400mm annual rain), they are also quite resistant to cold temperatures. Chickpeas can be grown in a temperate climate, but the production will then be lower. They are produced from the Mediterranean to Western Asia. Did you know that they were even cultivated in Germany, during WWII, as a substitute to coffee?!!! Interesting, isn’t it?….
Before they can be cooked, chickpeas have to be previously soaked for about 8 good hours in water, but they can also be germinated and then, eaten raw. Because of it’s essential nutrients and undeniable source of protein, this pulse holds a major role and importance within many culinary traditions of many cultures in places like India, Spain, Greece, North Africa, Lebanon, etc… What would a couscous, a hummus, raitas, felafels or a chhole be without this rich and nourishing staple?!? Many appreciated and renowned specialities would simply not exist without chickpeas. Just imagine what we would come to miss!...

Chickpeas are magical as they can be curried, spiced, stewed, mashed, pureed or ground (flour); one can nearly do what she/he wants with them! And apart from their obvious utility, chickpeas taste very fine (yes, yes…) and bring an uncomparably round hazelnutty/chestnutty flavor and a “smoky” note to dishes….


(Chickpeas -Pic by
www.kristinreisinger.com)
(Chickpea Harvest -Pic by www.christianaid.org.uk)

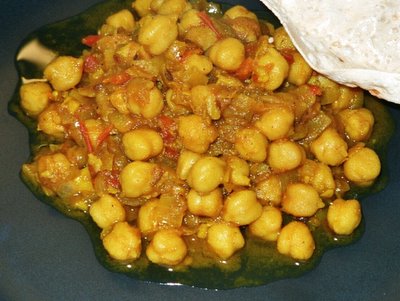
CHHOLE

Pulses (sixty varities) are an important part of India’s diet and chickpeas are well-represented within the culinary tradition of this colourful country.

“CHHOLE” is a delicate and succulent dish from Punjab (Northern India) that is found at all wedding banquets. It is a tasty speciality which’s savor is enrichened by many spices and, in particular, by a very special one called asafoetida* (Ferula Asafoetida aka Devil’s Dung!!!). This spice is commonly used in India and although it smells and tastes rather foul (rotten eggs), it adds more character to dishes when associated to other ingredients.

This recipe was taken from Monisha Bharadwaj’s beautiful cookbook entitled “The Indian Kitchen” and was slightly modified by myself.

Serves 4

Ingredients:
300g Dried white chickpeas
1 Pinch soda
90ml Sunflower oil
1 Tsp Cumin seeds
1/2 Tsp Asa-foetida
3 White onions, chopped
1 Tsp Ginger paste
1 Tsp Garlic paste
10g Green chillies, seeded and sliced
150g Tomatoes, chopped
1 Tsp Ground chilli (optional)
1 Tsp Turmeric powder
1 Tsp Mango powder (or 2Tsp mango chutney)
1 Tsp Garam masala
1 Tsp Ground anardana seeds (pomegranate seeds)
300-400ml Water
Salt to taste
60g Fresh Coriander, chopped
1 Lemon quartered

Method:
1. Soak the chickpeas in water overnight. Sieve and put in a pan with soda and enough fresh water. Cook until tender.
2. In a frying pan, heat the oil and add the cumin seeds and asafoetida. Fry for about 1 minute.
3. Add the onions, the green chillies, the garlic and ginger paste. Fry until the onions are translucid.
4. Add the tomatoes and cook for about 5 minutes while stirring and crushing them in order to obtain a type of paste. Add the chilli powder, turmeric, mango powder, garam masala and pomegranate seeds.
5. Continue stirring until the paste gets brownish in colour, then add the chickpeas. Stir.
6. Pour in the water and salt to taste.
7. Crush a few chickpeas in order to thicken the sauce and let simmer for about 10-15 minutes.
8. Serve sprinkled with coriander and accompanied by one quarter lemon per person.

Remarks:
If you don’t have any garlic or ginger paste underhand, pound the garlic and ginger in a mortar.
Don’t worry if you don’t find pomegranate seeds, they can be optional.The “CHHOLE” has to be thickish and not too watery.

Serving suggestions:
Eat with basmati rice, popadums or naan bread.

* Asafoetida: Powdered resin gum coming from the stem and roots' dried sap of a variety of wild fennel.

(Chhole -Pic By Rosa www.rosas-yummy-yums.blogspot.com)
(Punjab -Pic by Amihay Shraga www.trekearth.com)

Wednesday, November 23, 2005

Tuesday, November 22, 2005

THANKSGIVING PUMPKIN PIE

Firstly, I wish a HAPPY THANKSGIVING to all the American bloggers who live in the US and abroad; may you enjoy this very special day and eat wonderfully well!

I must confess that I had never been a big fan of pumpkin tarts or pies until the day I discovered the American way of baking luscious desserts with this intreguingly remarkable and manifold fruit. Now, I am addicted to it and can’t stop looking around for new recipes which I put to the test in my little kitchen!

On that occasion (Thanksgiving), I’ve decided to share with you my “PUMPKIN PIE” recipe. This typical all-time classic of American cuisine is THE incontrovertible fall desserts served on this national day of feasting. “PUMPKIN PIE” is perfect to celebrate Thanksgiving with it’s comforting autumnal flavors and spices which are mind-blowingly blended together. This pie is full of finesse, yet chock-full of taste and unpretencious, not too sweet nor sickly, but just flawlessly wonderful and well-balanced. It is the best conclusion to a complete and festive traditional Thanksgiving menu!…

This recipe which I have partially adapted was originally released within the pages of R. Danforth, P. Feierabend and G. Chassman’s great “Culinaria USA” book, a gastronomical and cultural bible printed by the defunct Könemann publisher.


Ingredients:
Enough "Shortcrust Pastry" (or shortbread pastry) for one 23cm pie*
Filling:
3 Eggs (~53g)
1 2/3 Cup Pureed pumpkin (butternut squash or pie/sugar pumpkin)
125ml Maple syrup
250ml Double (thick) cream
2 Tbs Unsalted butter, melted
2 Tbs Dark rum
2-3 Tbs Castor sugar
2 Tbs Cornstarch
2 Tsps Ground cinnamon
1 Tsp Ground ginger
1/4 Tsp Ground nutmeg
1/4 Tsp Ground allspice
A pinch Ground cloves
1/3 Tsp Salt

Method:
1. Preheat the oven to 210°C (410°F).
2. In a bowl, beat the eggs with the pureed pumpkin, then add the maple syrup, cream, melted butter, rum, sugar, cornstarch, ground cinnamon, ground ginger, ground nutmeg, ground allspice, ground cloves and salt.
3. Roll out the shortcrust pastry and line the pie dish or flan case. Trim off excess edge.
4. Prick the bottom of the pastry with a fork.
5. Pour the filling into the pastry case and bake for about 35-40 minutes.
6. Eat once it is cool.

Remarks:
While preparing the filling you can taste it in order to see if you want the pumpkin mixture a little sweeter. If it’s the case add some sugar. But, normally, this filling needs no added sugar.
Instead of maple syrup you can use either light runny honey, golden syrup or corn syrup, but be careful, because they all have a different sugar potency.
Do not to let the pie crust get too brown. If it has a tendency to burn, then lower the oven heat to 180° C (350°F) after the pie has baked for about 15-25 minutes at 210°C (410°F).
If you use "Shortbread Pastry", you'll have to bake it blind before you can pour the filling into the pastry case.

Serving suggestions:
Eat with whipped cream.

*See "Shortcrust Pastry" recipe on this blog.

(Pumpkin Pie -Pic by www.rickdeesinthemorning.com)
(Pumpkin Pie -Pic by Rosa www.rosas-yummy-yums.blogspot.com)
(Pumpkins -Pic by
www.pismire.org)
(Leaves -Pic by
www.fishhook.ndsu.edu)