Showing posts with label Loaf. Show all posts

Friday, January 14, 2011

CORNFLAKES TERRINE - TERRINE AUX CORNFLAKES

Terrine Cornflakes Picnik collage 3 bis
If like me you have abused a little to much of goodies during the Christmas holidays, then you might want to calm down and start eating more healthily again as I'm pretty sure that you are not willing to change your whole wardrobe or stop wearing those cute skinny jeans that you cherish so much because they make you look so slim...

I am not ashamed to confess that for the past 3-4 weeks I have been devouring (like crazy and without thinking about the effects such mindless scarfing might have on my waistline) big quantities of sugar-loaded, butter-rich, calorie-laden cookies, breads, chocolates, cakes and desserts of all kind. I carelessly and happily wolfed down quantities of sweet treats, and had much pleasure indulging in such a naughty fashion!

When the God of Gluttony possesses you, there is no way you can escape. You just have to accept it's taking over your soul and bend to it's will. If you resist, it will whisper in your ears words that'll awaken your craving until you give up the fight and sacrifice yourself on the altar of epicurism. It is impossible to struggle against the urge to "sin".

As a result, my size 36-38 (size 6-8 US) trousers are slightly too tight now and I feel not really comfortable in my body anymore. But hey, what the heck? Eventhough I care about my weight, find it important to exercise regularly and control my diet I also have food desires like everybody else and sometimes have to fulfill them. The delight and beatitude conferred by this nosh marathon was so big that the few centimeters I had gained around my waist, hips and thighs were not that dramatic.

Anyway, once you get back to your normal routine you will lose the extra fat you had acquired and get fit again (as a matter of fact I've already lost most of it), so why be afraid of a short break in your regime. If it happens once in a while and it is not a habit, then it can't be bad. You just have to be in control of things and know when to stop. It's only once it becomes an addiction that it develops into something dangerous and negative. Then you have to raise the alarm and consider taking your problems seriously.

All year long (most of the time, festive holidays aside), I try to eat well and to follow my usual dietary pattern which consists of meals that are mostly vegetarian (80% of the time), poor in carbohydrates (sugar, cereals, starchy vegetables & starches), rich in protein (eggs, dairy produces, legumes, nut, seeds & animal products) and vegetables. This way of feeding is what fits me best. Since I've started preparing less carb-loaded dinners I have more energy, feel a lot less hungry all the time and more comfortable in my body. Not forgetting that it is also very budget-friendly as you don't need to buy tons of overpriced meat.

Although I love meat I cannot cook it more than twice a week otherwise it'll affect my well-being. So, in a way I am nearly a full-time vegetarian. I don't mind being a carnivore, but I also love veggies since there are so many ways you can cook them. At my place, eating vegetarian meals isn't synonymous of boring and bland, all the contrary!

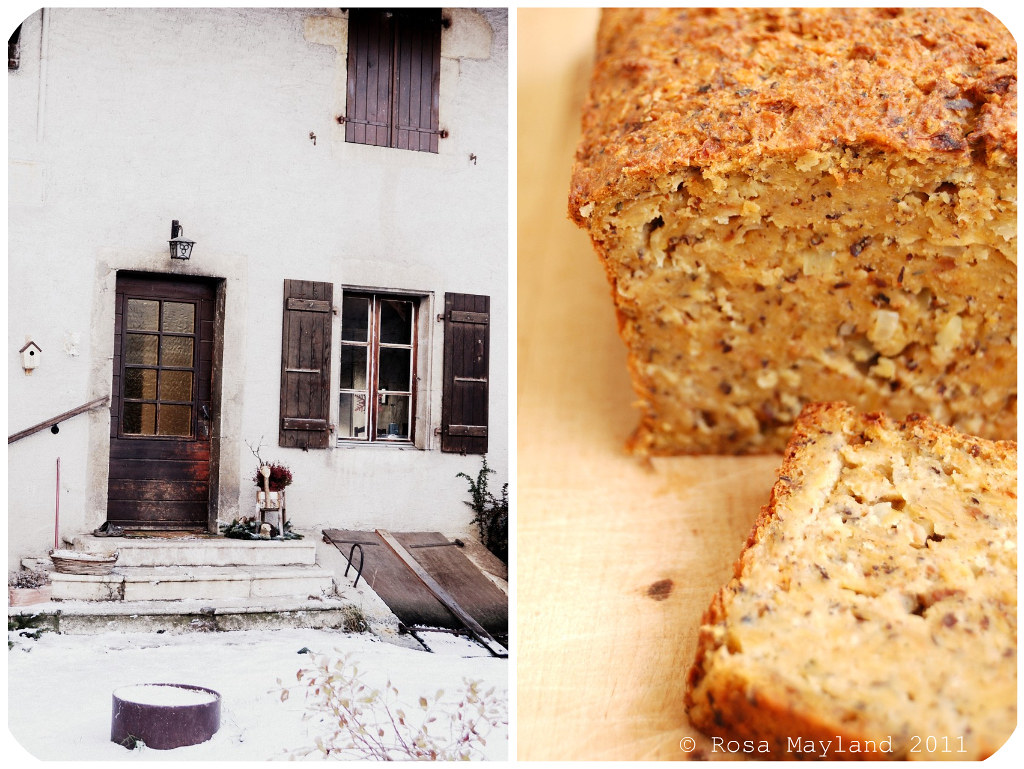
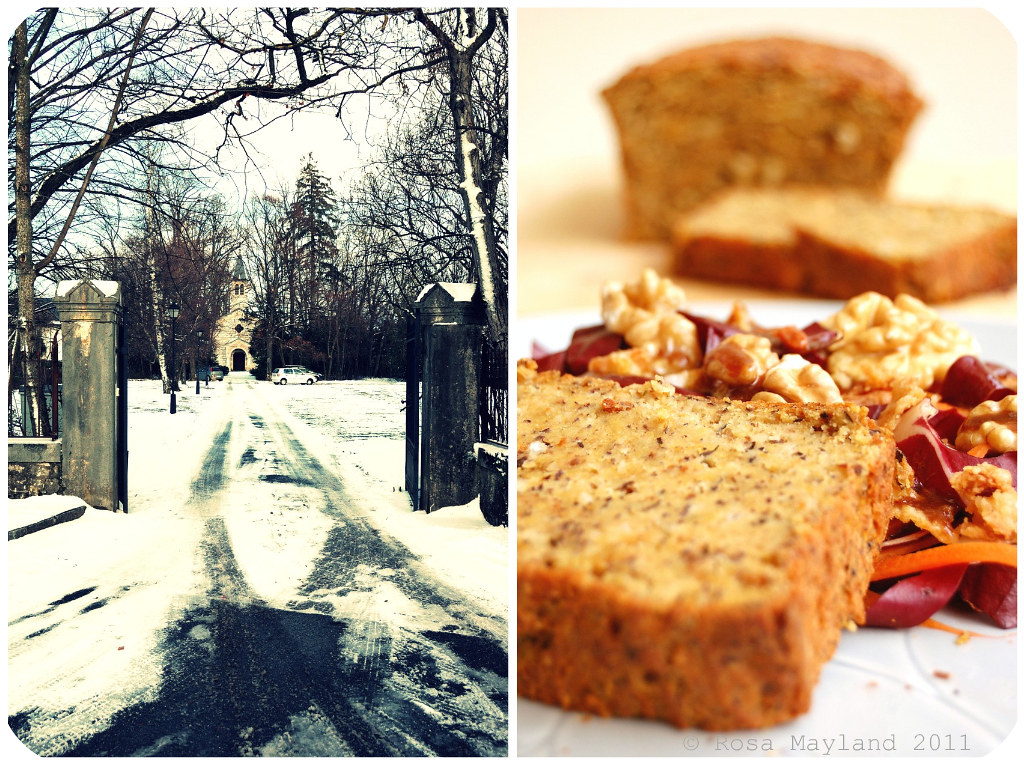
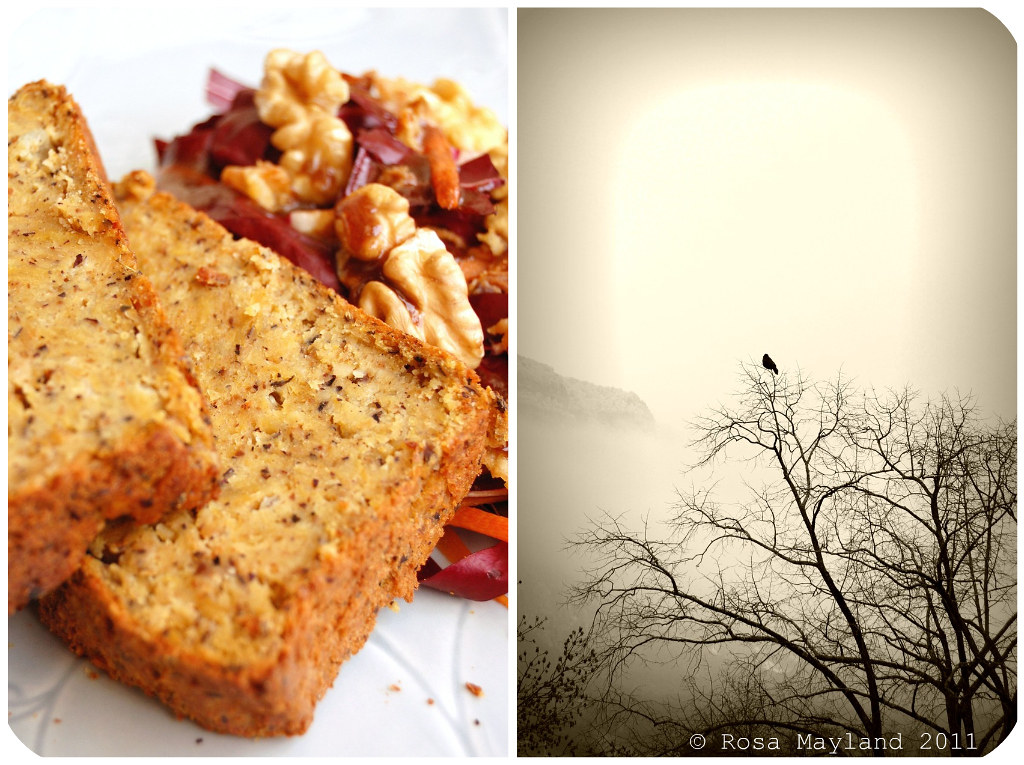
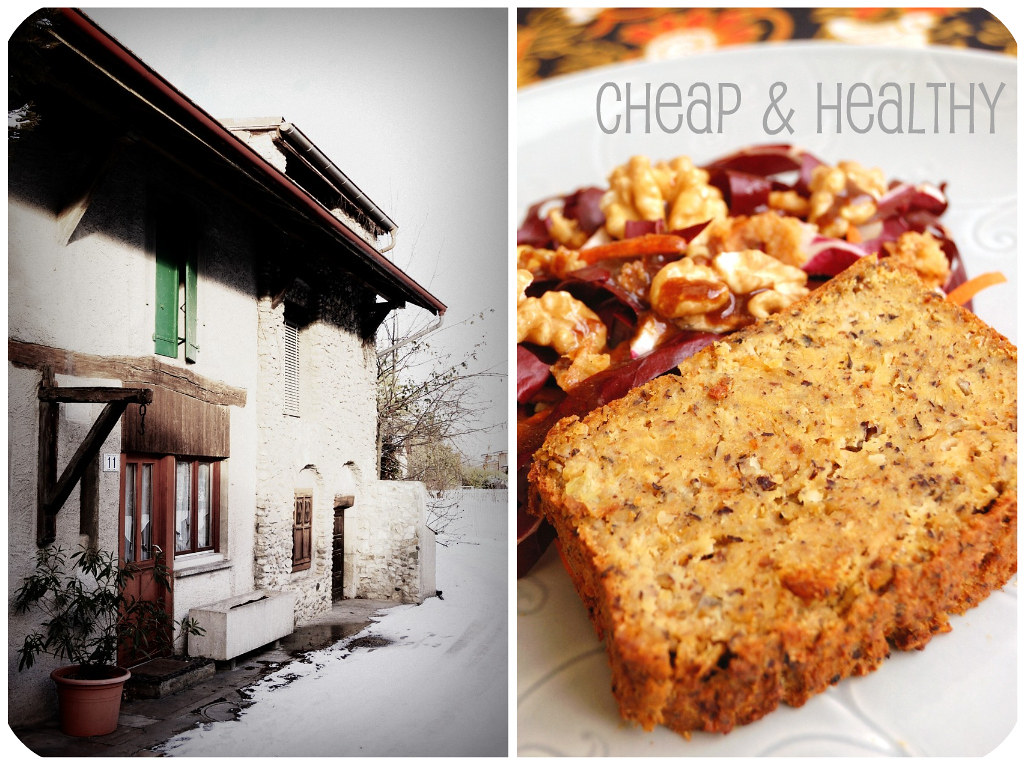
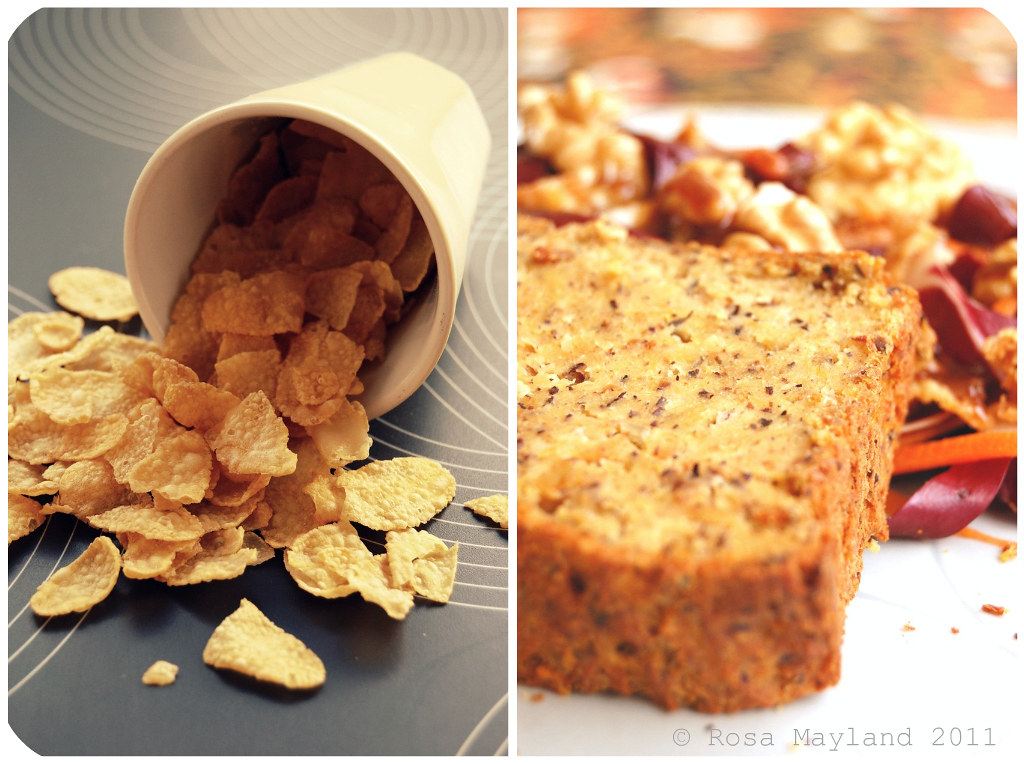
One of my favorite meat-free recipes that I cook at home is a groovy terrine made with cornflakes. This original vegiloaf is very versatile, tasty and nourishing. It has a pleasant herby, corny and nutty flavor, and a soft as well as moist texture. This "Vegetarian Cornflake And Hazelnut Terrine" can be pan-fried, eaten either cold or hot, served for breakfast, brunch, lunch or dinner and accompanied as well as presented in many different manners.

A multi-faceted dish which is easily prepared, good for the health an
d which will not ruin you. Perfect!

Terrine Cornflakes Picnik collage 5 bis
~ Vegetarian Cornflake And Hazelnut Terrine ~
Recipe by Rosa @Rosa's Yummy Yums 2011.

Serves 4.

Ingrédients:
500ml Milk
160g Cornflakes
100g Ground hazelnuts, lightly toasted
2 Big eggs
1 Big Onion, finely chopped
1 Tsp Nutritional yeast
1/2 CC Garlic powder
A pinch Ground paprika
A pinch Curry powder
A few drops of Tabasco (optional)
1 1/4 Tsp Italian herbs
A pinch dried thyme
Sea salt (fine), to taste
Pepper, to taste
A bit of butter to grease the pan

Method:
1. Preheat the oven to 220° C (420° F).
2. In a big bowl, crush (coarsely) the cornflakes.
3. In a medium bowl, beat together the eggs with the milk, garlic, spices, Tabasco, herbs, salt and pepper.
4. Pour this mixture over the cornflakes, add the yeast, hazelnuts and onion and mix well.

Terrine Cornflakes Picnik collage 6 bis
5. Butter generously your rectangular cake pan and cover the bottom with sulfurised/baking paper.
6. Scrape the mixture in the pan and smooth the top.
7. Bake for aboput 30-40 minutes (test with a skewer).
8. Remove the terrine from the oven and let it rest for about 5 minutes before releasing it delicately from the pan.
9. Serve.

Remarks:
you can replace the hazelnuts by any other ground nuts of your choice, but don't forget to roast them a little.
You can also use the herbs (fresh or dried) and spices of your choice.

Serving suggestions:
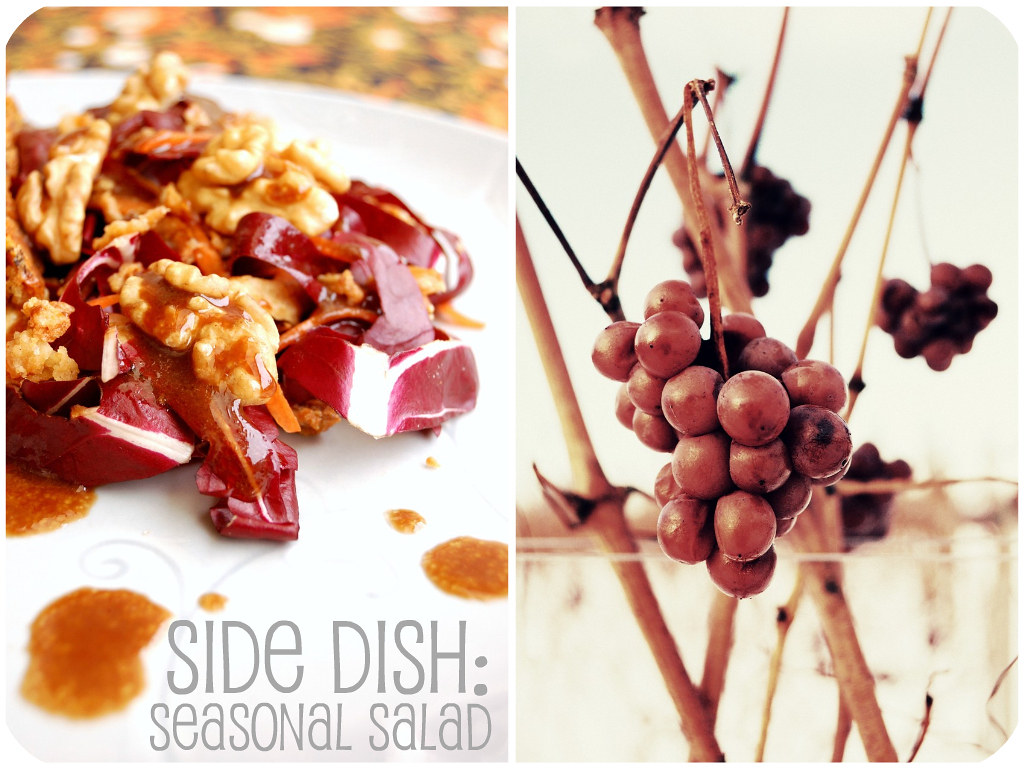
Serve hot or cold, with tomato sauce, steamed or stir-fried vegetables, a seasonal salad or pan-fried mushrooms.

~~~~~~~~~~~~~~~~~~~~~~

Terrine Cornflakes Picnik collage 4 bis
~ Terrine Végétarienne Aux Cornflakes Et Aux Noisttes ~
Recette par Rosa @Rosa's Yummy Yums 2011.

Pour 4 personnes.

Ingrédients:
500ml De lait
160g de Cornflakes
100g de Noisettes moulues, toastées
2 Gros oeufs
1 Gros Oignon, finement haché finement
1 CC de Levure nutritionnelle
1/2 CC d'Ail en poudre
Une pincée de paprika en poudre
Une pincée de poudre de curry
Quelques gouttes de Tabasco (en option)
1 1/4 CC d'Herbes italiennes
1 Pincée de Thym séché
Sel de mer fin, selon goût
Poivre, selon goût
Un peu de beurre pour le moule

Méthode:
1. Préchauffer le four à 220° C.
2. Dans un grand bol, concasser grossièrement les cornflakes.
3. Dan un bol moyen, battre les oeufs avec le lait, l'ail, le Tabasco, les herbes, les épices, le sel et le poivre.
4. Ajouter le mélange liquide au cornflakes et ajouter les noisettes ainsi que l'oignon. Bien mélanger.

Terrine Cornflakes Picnik collage 2 bis
5. Beurrer généreusement un moule à cake rectangulaire et recouvrir le fond de papier sulfurisé.
6. Verser le mélange dans le moule et lisser le dessus.
7. Cuire pendant 30-40 minutes (vérifier la cuisson avec la pointe d'un couteaux).
8. Sortir la terrine du four et la laisser reposer 5 minutes sur une grille, puis la démouler délicatement.
9. Servir.

Remarques:
Vous pouvez remplacer les noisettes moulues pour d'autres noix moulues, mais n'oubliez pas des les torréfier avant.
Vous êtes libres d'ajouter les épices et herbes (fraîches ou séchées) de votre choix.

Idées de présentation:
Servir cette terrine chaude ou froide, avec de la sauce tomate, des légumes vapeurs ou sautés, une salade de saison ou des champignons légèrement poêlés.

Terrine Cornflakes Picnik collage 1 bis

Friday, December 24, 2010

DRESDNER CHRISTSTOLLEN - THE DARING BAKERS

dk-group-1
The end of the month is here again and the moment has come for all of us Daring Bakers devotees to uncover a secret we have kept well-hidden for a few weeks. Of course, contrarily to most of my zealous colleagues and as it is my habit, I made my challenge at the very last moment (a special wink goes to Jamie at "Life's A Feast"!). This time though I executed it without stress despite the fact that Xmas was getting closer every day and I still had a lot to prepare...

The 2010 December Daring Bakers’ challenge was hosted by Penny of "Sweet Sadie’s Baking" who chose to challenge Daring Bakers’ to make a "Dresdner Chris
tstollen". She adapted a friend’s family recipe and combined it with information from friends, techniques from Peter Reinhart’s book and Martha Stewart’s demonstration.

Stollen Picnik-Collage 3 bis
"Dresndner Christstollen" is a bread-like fruitcake made with yeast, water, milk, flour, butter, salt, eggs, rum, vanilla, orange essence, orange and lemon zests, candied orange peel, candied citrus peel, raisins, cinnamon and sometimes also cardamom as well as marzipan. This traditional German speciality which is a little similar to the Italian "Panettone" or the Dutch "Kerststol" can be traced back to 1474. It is usually eaten during the Christmas holidays, hence the religious-oriented name (it is also called "Weihnachtsstollen", meaning "Christmas Stollen" in English). Originally it was called "Dresdner Striezel" - "Striezel" coming from the word "Strüzel" or "Stroczel", meaning "awaken" because it was an early-baked loaf of bread. It's unique shape is meant to represent the baby Jesus wrapped in swaddling clothes.

Germans baked "Stollen" loaves to honor princes and church dignitaries, and to sell at fairs and festivals. The very first of them were confectioned without milk or butter because the Catholic church didn't allow these ingredients during Advent. It was only until the mid 17th century that a papal proclamation allowed bakers to finally add milk and butter.

Nowadays it is still as popular as in the past. Although "Dresdner Christstollen" doesn't have roots in Switzerland we nontheless consume tons of that festive treat during the end of year festivities. It is so widely spread that you can buy it from every store and you'll find it on most tables. At home we always ate "Stollen", so now I cannot imagine celebrating Yuletide without serving that ambrosial goodie. It is so Xmas-like. Therefore, when I heard that we were asked to bake a "Stollen" for the December challenge I was really excited about that project and really looked forward to tasting the homemade version as until now I have never had the opportunity to make my own.

I more or less followed the recipe to the letter. I chose not to use candied cherries, but added a few more raisins. As I thought that almond flakes might totally disappear in the dough and would pass unnoticed if used in that form I decided to add slivered almond instead which I toasted. I also filled one of my loaves with some marzipan. Being a traditionalist, I absolutely wanted to shape my "Dresdner Christstollen" the classic way and didn't have the desire to give it the appearance of a wreath.

The result was highly satisfying. The recipe gave me two mammoth loaves that looked perfect and tasted just out of this world. My "Dresdner Christstollen" had just the right texture too. It was neither too heavy nor too light, the inside was pleasantly moist and melt-in-the-mouth and and the crust was super soft (there was nearly no difference with the inside). Flavor-wise they were exactly the way they should be: intensely fragrant, with delicate boozy, buttery, orangy, lemony, cinnamony and nutty notes, not to forget that thanks to the overnight proofing they also had a slightly sourdoughy aroma that was extremely pleasurable. There is only one negative remark I'll make though. In my opinion, the "Stollen" could have contained more raisins and mixed peel as I found there were a tad not enough fruits...

This homemade "Dresdner Christstollen" is so much better than store-bought ones and a lot cheaper, so I highly recommend you to get off your asses and start baking if you love this European delicacy!

Stollen Picnik-Collage 4 bis
~ Christmas Stollen ~
Recipe adapted from Penny's German friend who bakes Stollen every year, Peter Reinhart's "Bread Baker’s Apprentice" and Martha Stewart.

Makes two traditional shaped Stollen loaves.
Serves 10-12 people


Preparation time:
The following times are approximate. I suggest you gat
her and scale/weigh/measure (mise en place) all your ingredients before you begin mixing.

• Approximately 1 hour first stage – then rest overnight or up to 3 days
• 2 hours to warm up after refrigeration
• 15 minutes shaping

• 2 hours proofing
• 30-45 minutes baking Equipment required:

• Mixer with dough hook or strong arms and hands
• Mixing bowl
• Bowl to soak raisins

• Small saucepan
• Sheet of plastic or plastic wrap to cover when proofing

• Bench or pastry scraper (very handy for cutting dough and also cleaning work surface)
• Rolling pin
• Dough whisk can be handy but not necessary
• Pastry Brush
• A scale is really important to have when making bread so I strongly advise you to get one. You do not have to have on
e though. (would make a good Christmas gift!)
• Sheet Pan or round Pizza pan
• Parchment Paper Stollen Wreath


Ingredients:
1/4 Cup (60ml) Lukewarm water (110º F/43º C)
2 packages (4 1/2 Tsps/14 grams/1/2oz) Active dry yeast
1 Cup (240ml) Milk
10 Tbs (140g) Unsalted butter (can use salted butter)
5½ Cups (27oz/770g) All-purpose flour (Measure
flour first, then sift + extra for dusting)
½ Cup (115g) Castor sugar
¾ Tsp (4.5g) Sea salt (if using salted butter there is no need to alter this salt measurement)
1 Tsp (6g) Gropund cinnamon
3 Large eggs, lightly beaten
Grated zest of 1 lemon and 1 orange

2 Tsps Pure vanilla extract
1 Tsp Lemon extract or orange extract
3/4 Cup (4 ¾oz/135g) Mixed peel
1 Cup (6oz/170g) Firmly packed raisins
3 Tbs (45ml) Dark rum
12 Red glacé cherries, roughly chopped (optional)
1 Cup (3.5oz/100g) Slivered almonds, lightly toasted

Melted unsalted butter for coating the wreath
Confectioners sugar for dusting wreath

Note:
If you don’t want to use alcohol, double the lemon or orange extract or you could use the juice
from the zested orange.

Stollen 3 bis
Method For Making The "Dough":
1. In a small bowl, soak the raisins in the rum (or in the orange juice from the zested orange) and set aside.

2. Pour 1/4 cup (60 ml) warm water into a small bowl, sprinkle with yeast and let stand 5 minutes. Stir to dissolve yeast completely.
3. In a small saucepan, combine 1 cup (240 ml) milk and 10 tablespoons (150 ml) butter over medium - low heat until butter is melted. Let stand until lukewarm, about 5 minutes.
4. Lightly beat eggs in a small bowl and add lemon and vanilla extracts.
5. In a large mixing bowl (4 qt/4 liters or in the bowl of an electric mixer with paddle attachment), stir together the flour, sugar, salt, cinnamon, orange and lemon zes
ts.
6. Then stir in (or mix on low speed with the paddle attachment) the yeast/wate
r mixture, eggs and the lukewarm milk/butter mixture (This should take about 2 minutes. It should be a soft, but not sticky ball).
7. When the dough comes together, cover the bowl with either plastic or a tea cloth and let rest for 10 minutes.
8. Add in the mixed peel, soaked fruit and almonds and mix with your hands o
r on low speed to incorporate. Here is where you can add the cherries if you would like (Be delicate with the cherries or all your dough will turn red!).
9. Sprinkle flour on the counter, transfer the dough to the counter, and begin kneading (or mixing with the dough hook) to distribute the fruit evenly, adding additional flour if needed (The dough should be soft and satiny, tacky but not sticky). Knead for approximately 8 minutes/6 minutes by machine (The full six minutes of kneading is needed to distribute the dried fruit and other ingredients and to make the dough have a reasonable bread-dough consistency. You can tell when the dough is kneaded enough – a few raisins will start to fall off the dough onto the counter because at the beginning of the kneading process the dough is very sticky and the raisins will be held into the dough but when the dough is done it is tacky which isn't enough to bind the outside raisins onto the dough ball.).
10. Lightly oil a large bowl and transfer the dough to the bowl, rolling around to coat it with the oil. Cover the bowl with plastic wrap.

11. Put it in the fridge overnight (The dough becomes very firm in the fridge since the butter goes firm, but it does rise slowly… The raw dough can be kept in the refriger ator up to a week and then baked on the day you want.).

Stollen Picnik-Collage 5 bis
Shaping the Dough and Baking the Wreath:
1. Let the dough rest for 2 hours after taking out of the fridge in order to warm slightly.
2. Line a sheet pan with parchment paper.
3. Punch dough down,
divide it into two pieces.
4. Pat into ovals.
5. For traditional stollen shape (video 1 & video 2),
on a floured working surface roll out the dough to an oblong shape about 3 cm (1 1/5 inch) thick (The long sides should be bulging.). Fold in the long sides of the dough on top of each other. Now push in the dough lengthwise with your hands forming a stollen shape. Place the Stollen on your baking sheet.
6.
Brush the dough with melted butter and cover loosely with plastic wrap.
7. Proof for approximately 2 hours at room temperature, or until about 1 1/2 times its original size.
8. Preheat oven to moderate 180°C (350° F) with the oven rack on the middle shelf.
9. Bake the stollen for 20 minutes, then rotate the pan 180 degrees for even baking and continue to bake for 20 to 30 minutes (The bread will bake to a dark mahogany color, should register 190°F/88°C in the center of the loaf, and should sound hollow when thumped on the bottom.). 10. Transfer to a cooling rack and brush the top with melted butter while still h ot.
11. Immediately tap a layer of powdered sugar over the top through a sieve or sifter.
12. Wait for 1 minute, then tap another layer over the first (The bread should be coated generously with the powdered sugar.
Coat the stollen in butter and icing sugar three times, since this many coatings helps keeps the stollen fresh - especially if you intend on sending it in the mail as Christmas presents! The more rum and the more coatings of butter and sugar you use the longer it will store. The following is for the recipe as written and uses the 45 mls of rum and two coatings of butter and icing sugar.).
13. Let cool at least an hour before serving.

Storing:
When completely cool, store in a plastic bag or leave it out uncovered overnight to dry out slightly, German style.
The stollen tastes even better in a couple of days.


Serving suggestions:
Stollen is delicious with butter and a cup of tea.

It toasts superbly and can be used to make bread pudding.

Stollen Picnik-Collage 1 bis

~~~~~~~~~~~~~~~~~~~~~~


Etant donné que la recette est un peu longue, je n'ai malheureusement pas pu faire une traduction française de ce billet et je m'en excuse auprès de tous mes amis lecteurs et blogueurs francophones!

C'est pourquoi je vous suggère de vous rendre sur le blog mentionné ci-desso us. Vous y trouverez cette recette en version française.

Recette pour le "Dresdner Christstollen" sur les deux blogs canadiens suivants:
Chez Isa de "Les Gourmandises d'Isa" (Canada)
Chez Vibi de "La Casserole Carrée" (Canada)


Stollen Picnik-Collage 2 bis

Friday, November 12, 2010

NORWEGIAN MOUNTAIN BREAD - PAIN RUSTIQUE NORVÉGIEN

Norwegian Bread Picnik collage 5 bis
I like to think of myself as an adventurous and daring cook/baker. Of course, there are times when life is chaotic and I just simply don't feel like staying in the kitchen for hours. It is when one feels lazy and tired that certain simple and unpretentious recipes come in handy...

Last Saturday I really had no desire to spend more than 2 hours baking bread. It was a sunny and warm day, and there was no way I was going to stay in the apartment considering the fact that the weather prognoses for Sunday were dreadfully awful.


So, as I am in a very Scandinavian- (music, culture & films) and healthy-oriented period at the moment it is not surprising that my attention was captured by Nigella Lawson's "Norwegian Mountain Bread" recipe while I was surfing on expat Siri's blog ("The Transplanted Baker").

I dare you to find a more uncomplicated and rapid bread recipe! There is absolutely no kneading, rising or shaping involved (the loaf rises in the oven). The only thing you have to do is weigh and mix all the ingredients together, pour the dough into the baking pan, put it in the oven and then keep an eye on the clock and the thermostat knob. Magic, no?

For such an inelaborate and rustic bread the result was remarkable. It was very flavorful, aromatic, pleasantly moist, wonderfully seedy, interestingly dense/compact, slightly sweet and so enjoyable. It somehow reminded me of Valais Rye Bread (Walliser Roggenbrot), German Pumpernickel, Swedish Rägbröd or Danish Ruggbrød, only without the sourness (since it is not made with sourdough).

This excellent "Norwegian Mountain Bread" is perfect when served with cheese, smoked salmon, Gravlax or cured meats such as Pastrami or corned beef. I'm sure you'll be delighted by this bread's unique aroma and texture.

This bread is getting yeastspotted by Susan’s Yeastspotting!

Norwegian Bread Picnik collage 4 bis
~ Norwegian Mountain Bread ~
Recipe adapted from Nigella Lawson's "How To Be a Domestic Goddess".

Makes one medium-sized loaf.

Ingredients:
1 Cup plus 2 Tbs (250ml) Milk or buttermilk, lukewarm
1 Cup plus 2 Tbs (250ml) Water, lukewarm
2 Cups (255g) Whole-wheat flour
1/2 Cup (64g) Rye flour
2 1/4 Tsp (1/4 oz./7 g) Active dry yeast
1/4 Cup (50g) Rolled oats (not instant)
1 1/2 Tsp Fine sea salt
1 Tbs Light brown sugar
8 Tbs Blend of any of the following (preferably all)
- Wheat germ
- Sunflower seeds
- Flaxseeds (linseeds)
- Pumpkin seeds
- Wheatbran

Method:
1. Mix the milk, water and yeast together in a measuring jug and let rest for about 10 minutes. Combine all the other ingredients in a large bowl.
2. Pour the liquid into the dry ingredients, stirring all the while to make a sticky mixture. Then beat for about 2-3 minutes.
3. Butter your loaf pan well, pour the dough into the pan, sprinkle a few extra seeds and oats over the surface of the bread, and place in a cold oven (middle).

Norwegian Bread Picnik collage 2 bis
4. Turn the on oven to 100° C (225° F). After 30 minutes, turn it up to 175° C (325° F) for one hour (see remarks).
5. When the loaf begins to get nice and brown, take it out of the oven, run a butter knife along the sides of your pan and let rest for 5 minutes, then carefully remove the bread from the pan.
6. Allow the bread to cool thoroughly on a rack in order to prevent the insides from g
etting gummy.

Remarks:
As I had no wheatbran or wheat germ, I used 3 tbs sunflower seeds, 3 tbs flaxseeds and et 2 tbs pumpkin seeds.
Nigella recommends poking the bread with a cake tester or fine skewer to make sure it's done, ie: the skewer will come out clean. You may wish to return the loaf to the oven for an extra 10-15 minutes if you judge that it hasn't baked enough (that's what I did).

Serving suggestions:

Slice thinly and serve with cheese, dry, cured or cold cooked meat, smoked salmon, Gravlax or smoked herring/mackerel.

~~~~~~~~~~~~~~~~~~~~~~

Norwegian Bread Picnik collage 1 bis
~ Pain Rustique Norvégien ~
Recette adaptée de "How To Be a Domestic Goddess" par Nigella Lawson.

Pour un pain moyen.

Ingrédients:
250ml de Lait ou de babeurre, tiède
250ml d'Eau, tiède
255g de Farine complète
64g de Farine de seigle
2 1/4 CC (7g) de Levure sèche
50g de Flocons d'avoine
1 1/2 CC de Sel de mer fin
1 CS de Sucre brun clair
8 CS d'un mélange des ingrédients suivants (tous)
- Germes de blé
- Graines de tournesol
- Graines de lin
- Graines de courge
- Son de blé

Méthode:
1. Dans un récipient, mélanger ensemble le lait, l'eau et la levure et laisser de côté pendant 10 minutes. Dans un grand bol, mélanger ensemble tous les ingrédients restants.
2. Verser le liquide dans les ingrédients secs tout en mélangeant bien afin d'obtenir une pâte collante, puis la battre pendant 2-3 minutes.
3. Beurrer un moule rectangulaire de taille moyenne et verser la pâte dedans. Saupoudrer avec des flocons d'avoine et des graines et placer dans le four froid (milieu).

Norwegian Bread Picnik collage 6 bis
4. Régler le four à 100° C. Après 30 minutes, augmenter la température à 175° C et continuer à cuire le pain pendant 1 heure (voir remarques).
5. Quand le pain commence à devenir brun et qu'il a une belle croûte, le sortir du four et le dégager des bords du moule avec un couteau. Puis, après 5 minutes le sortir du moule et le poser sur une grille.
6. Faire refroidir le pain complètement avant de le consommer (afin d'éviter que l'intérieur soit "gommeux").


Remarques:
J'ai utilisé 3 CS de graines de tournesol, 3 CS de graines de lin et 2 CS de graines de courge car je n'avait pas de son de blé ou de germes de blé.
Nigella recommande de tester le pain avec la pointe d'un couteau afin d'être bien sûr que le pain soit cuit (dans ce cas la lame en ressort propre). Il vous faudra alors peut-être remettre le pain dans le fourra pendant 10-15 minutes (si vous jugez que le pain est pas assez cuit - ce que j'ai fait).

Idées de présentation:
Couper en tranches très fines et servir avec du fromage, de la viande séchée, de la charcuterie ou du roastbeef froid, du saumon fumé, du Gravlax ou du maquereau/harreng fumé.

Norwegian Bread Picnik collage 3 bis