Showing posts with label Brioche. Show all posts

Friday, July 27, 2012

CARDAMOM & ORANGE BRIOCHE BREAD (TANG ZHONG METHOD) - BRIOCHE A LA CARDAMOME ET A L'ORANGE (MÉTHODE TANG ZHONG) ♥ A GUEST POST FOR ANURADHA AT "BAKER STREET"

At the moment, I regularly receive e-mails from bloggers who ask me to write posts for them. It is certainly a pleasant sensation to know that you are”notorious”, but the downside of it is that, as a consequence, the  requests have been piling up lately and I have the impression that I’m slowly drowning in them. Dealing with them is hard, because Rosa’s Yummy Yums is currently keeping me busy and to make things worse, coping with the way weeks pass (too fastly) is already challenging enough. Anyway, although it usually takes me quite a while before I am able to grant my consorts’ demands, I nonetheless always try to please my foodie buddies by offering them the best of myself as a token of respect and appreciation.

So, when Anuradha at Baker Street proposed me to show her how straightforward it is to toil with yeast and help her get rid of her uneasiness when it comes to handling this seemingly treacherous leavening agent, I could not refuse her proposition. As a fellow gastronome and kitchen dweller, it is my duty to encourage my Indian friend to take the bull by the horns and turn her into a confident dough puncher.

If you have never heard of Anuradha before, then you have missed out a lot as not only is she a talented and self-taught baker, but also the kind soul behind the highly popular Muffin Monday event. Her brilliant site is chock-a-block full with cool recipes for cakes, cookies, bars, cupcakes, cheesecakes, etc... It is impossible to browse through Baker Street without feeling the urge to replicate one of her mouthwatering treats. I am a big fan of hers!

This Friday, I am extremely thrilled to present you with my most recent edible “coup de coeur” and I wish to warmly thank Anuradha for opening the doors of her lovely platform to me. It is a true honor to be your guest today and to have my work hosted by such a fabulous individual like her! Hopefully, my step-by-step ""Cardamom & Orange Brioche Bread (Tang Zhong Method)" recipe will be as much of a revelation for you as it was for me...

Asians can't live without rice and the majority of white people could not envisage an existence devoid of bread. For most Westerners, it is an important staple which’s consumption can be traced back to the prehistoric era and which has been eaten on a daily basis since the emergence of agriculture. It belongs to those edible goods that form the basis of all civilizations’ diets due to its significant nutritional properties - poor in fat, but rich in complex carbohydrates, plant protein, fibers, vitamins and essential minerals -, cheapness and simplicity.

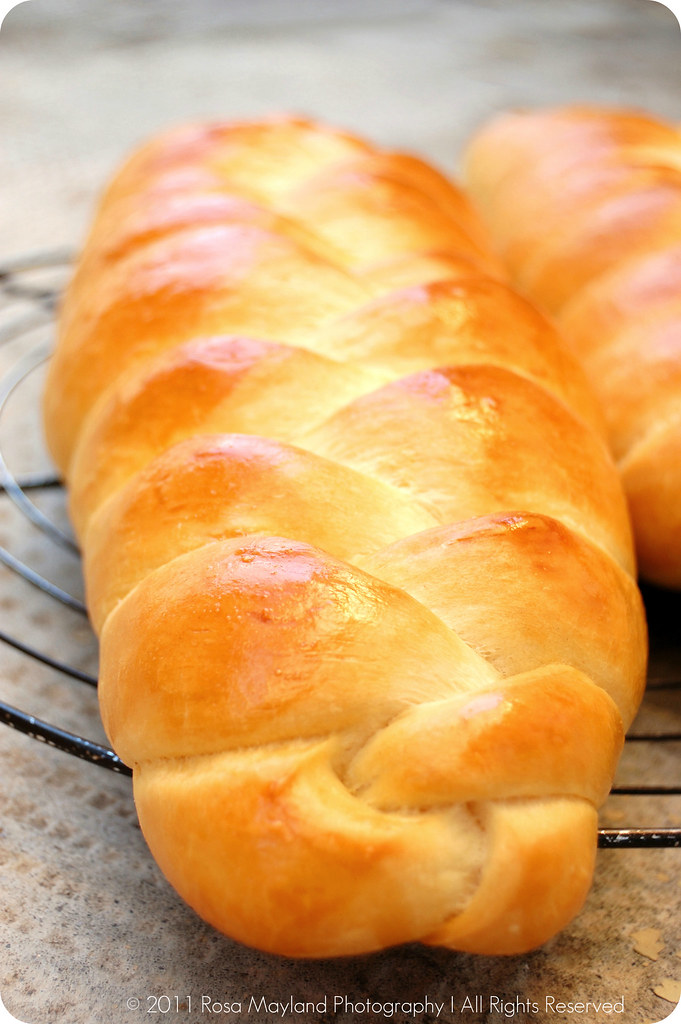
As an Anglo-Swiss person, it is one of the foods that is part of my European heritage, thus it has forged my identity and it characterizes me. An age-old tradition here. For instance, Switzerland is supposed to have more varieties of breads than any other country on the planet - between 200 and 300 different kinds - and our nation have been tackling dough for over 6000 years. Every canton has its own specialities and each celebration its particular loaf to which a multitude of stories as well as customs are linked. We are definitely no novices in that department. Great Britain is also very fond of that doughy aliment and there too, the art of breadmaking has seen the light of day during the Stone Age. As a matter of fact, it is one of UK's favorite eats - 99% of the households buy bread and 12 million loaves are sold each day. You'll find many bakeries across the kingdom and thanks to the vast range of British flour available, the Queen's subjects have no reason of being jealous of the Helvetic folks as over 200 types of breads are said to be produced nationwide.

At home, we rarely bought bread from the bakery or the supermarket because our weekly supply was baked by my mother, a devoted housewife who cooked our meals from scratch and shunned industrial grub. ]...[

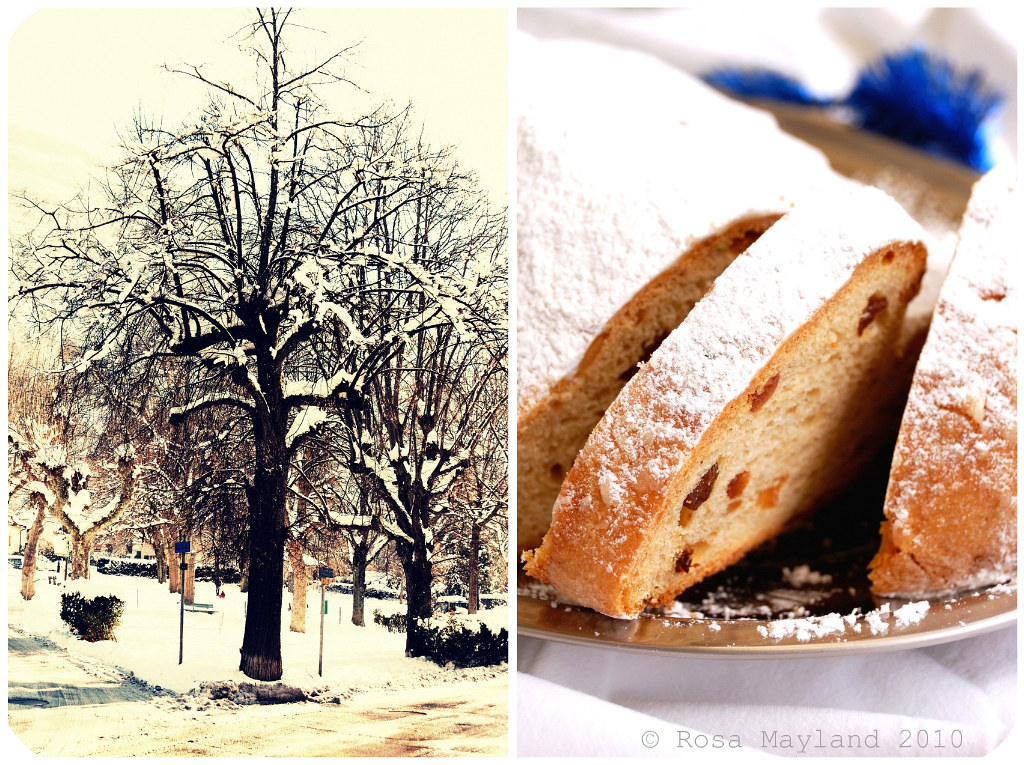
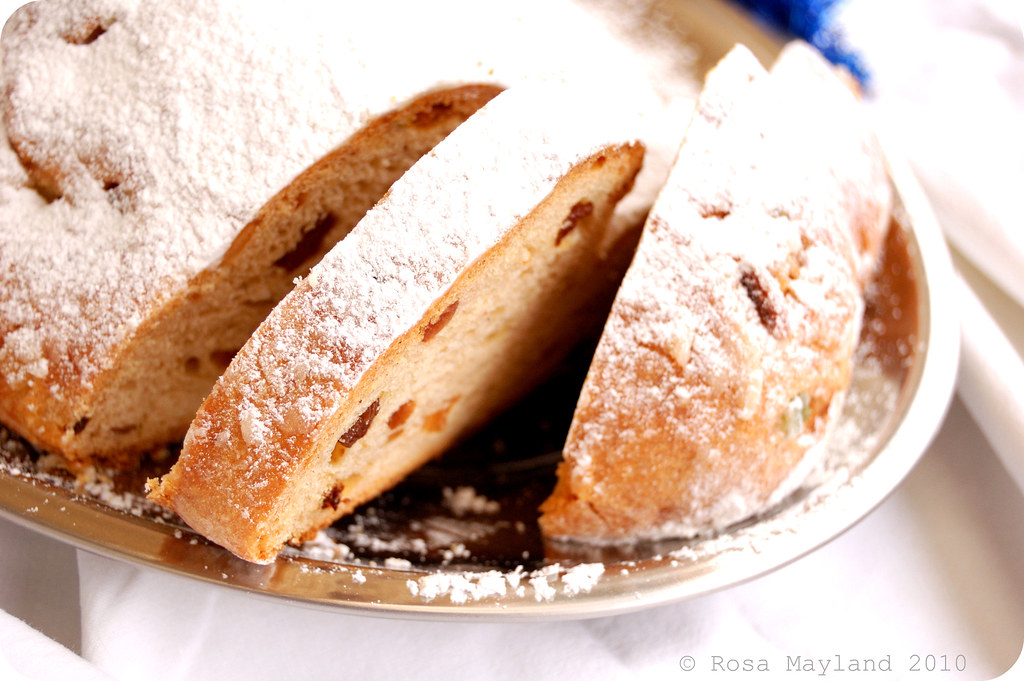
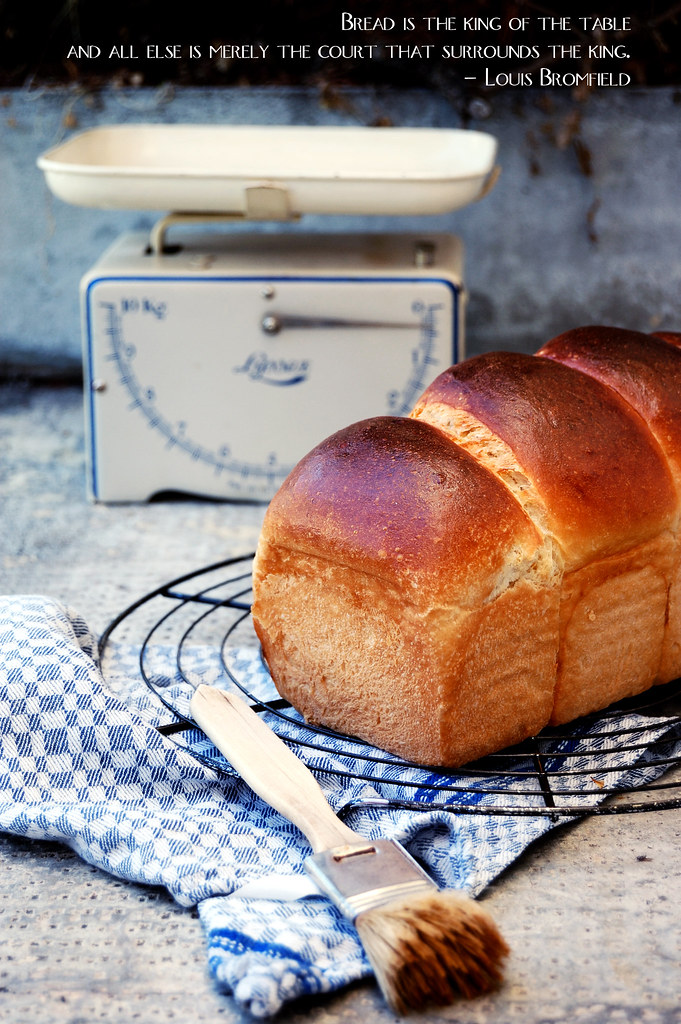
So, if that short introduction made your mouth water and your tastebuds tingle, tickled your curiosity and gave you the urge to read my article, then please hop on over to Baker Street in order to learn more about this "Cardamom & Orange Brioche Bread (Tang Zhong Method)", get a glimpse of my pictures, discover my recipe and pay a visit to the lovely Anuradha.

This bread is getting yeastspotted by Susan’s Yeastspotting!

Tang Zhong Brioche 5 3 bis
Etant donné que beaucoup de mes lecteurs francophones ne comprennent pas forcément l'anglais et que malheureusement peu d'entre-eux auront la chance de lire mon billet invité et dernier article en date sur le merveilleux blog Baker Street qui appartient à la tentueuse blogeuse Anuradha, je me suis permise de traduire la recette qui y figure afin que vous puissiez aussi en profiter car je pense qu'elle pourra vous intéresser (vous pouvez tout de même y jeter un coup d'oeil car ses recettes sont vraiment passionnantes et mon article contient d'autres images que celles exposées ici).
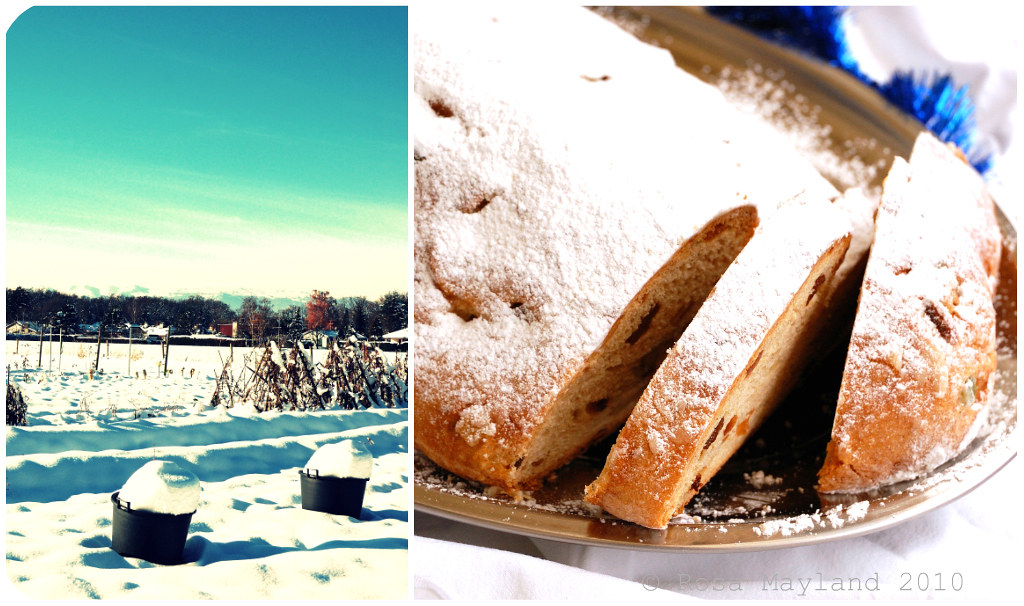
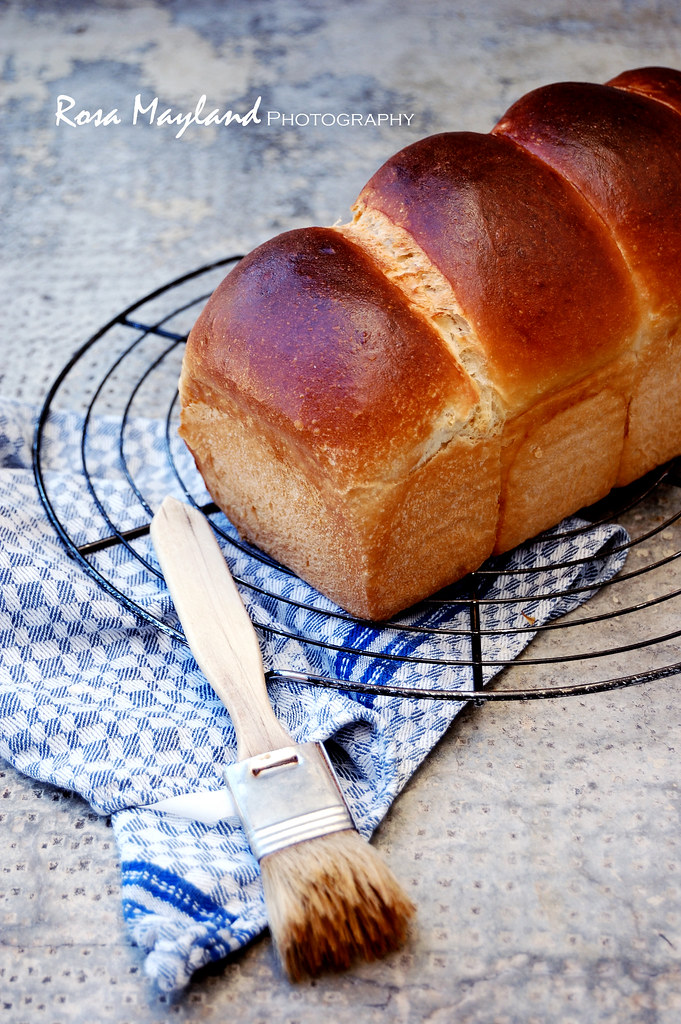
J'espère que ma "
Brioche A La Cardamome Et A L'Orange" vous plaira car c'est un pain divinement moelleux et parfumé dont la méthode de fabrication (Tang Zhong) nous vient tout droit du Japon (les autres pays d'Asie en sont aussi friands) et dont je me suis enamourée dernièrement après l'avoir découvert sur le blog de la merveilleuse Gracianne. Un pur délice!

Brioche A La Cardamome Et A L'orange (Méthode Tang Zhong)
Recette adaptée de "Un Dimanche A La Campagne" et de "Kirbie's Cravings".

Pour un pain.


Ingrédients Pour Le "Tang Zhong":

25g de Farine
125g d’Eau (filtrée de préférence)
Ingrédients Pour La "Pâte":

125g (125ml) de Lait
120g de Tang zhong
1 Oeuf (63g)
350g de Farine T55
50g de Sucre cristallisé
1 CS de Lait en poudre
1 1/4 CC de Cardamome en poudre

Le zeste d'une demi orange (ou 1 sachet de zestes d'orange Dr. Oetker)
1 1/2 CC de Levure en poudre (ou 15g de levure fraîche)

1 CC de Sel de mer fin
30g de Beurre non-salé, coupé en petits cubes, à température ambiante
1 CS d'Huile d'arachide, pour huiler le bol
1 Oeuf + 1 CS de Lait, pour le glaçage


Méthode Pour Le "Tang Zhong":
1. La veille, mélanger dans une casserole, au fouet, 25g de farine et 125g d’eau. Laisser chauffer à feu moyen en fouettant constamment jusqu’à obtention d'un mélange ayant la consistance d’un roux. En principe, il faut le faire chauffer jusqu’à 65ºC pendant 2-3 minutes (dès que le mélange épaissit, devient homogène et que le fouet y laisse un sillage, il est prêt).
2. Verser le Tang Zhong dans un bol, le laisser refroidir, filmer au contact et réfrigérer pendant au moins 6 heures.

Méthode Pour La "Pâte":
3. Le lendemain, remettre le Tang Zhong au moins une demi-heure à température ambiante avant de l’utiliser.
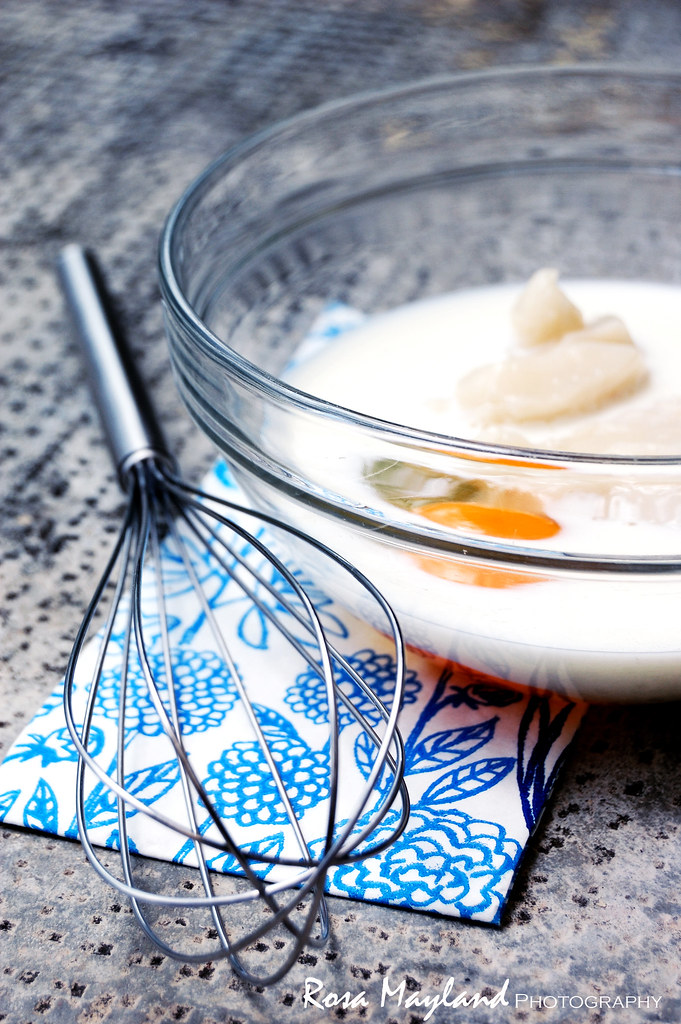
4. Dans un bol moyen, fouetter ensemble le lait, le Tang Zhong et l’œuf.
5. Dans le bol de votre robot, mélanger ensemble la farine, le sucre et le lait en poudre.

6. Faire un puits, ajouter le mélange liquide, la cardamome, le zeste et la levure sèche (ou la levure fraîche émiettée), puis commencer à pétrir.
7. Au bout de quelques minutes, ajouter le sel puis pétrir pendant encore 5-10 minutes, jusqu’à ce que la pâte soit bien élastique et homogène.
8. Ajouter ensuite le beurre mou et pétrir de nouveau pendant 10 minutes, jusqu’à ce que la pâte prenne du corps et se détache des parois du bol.
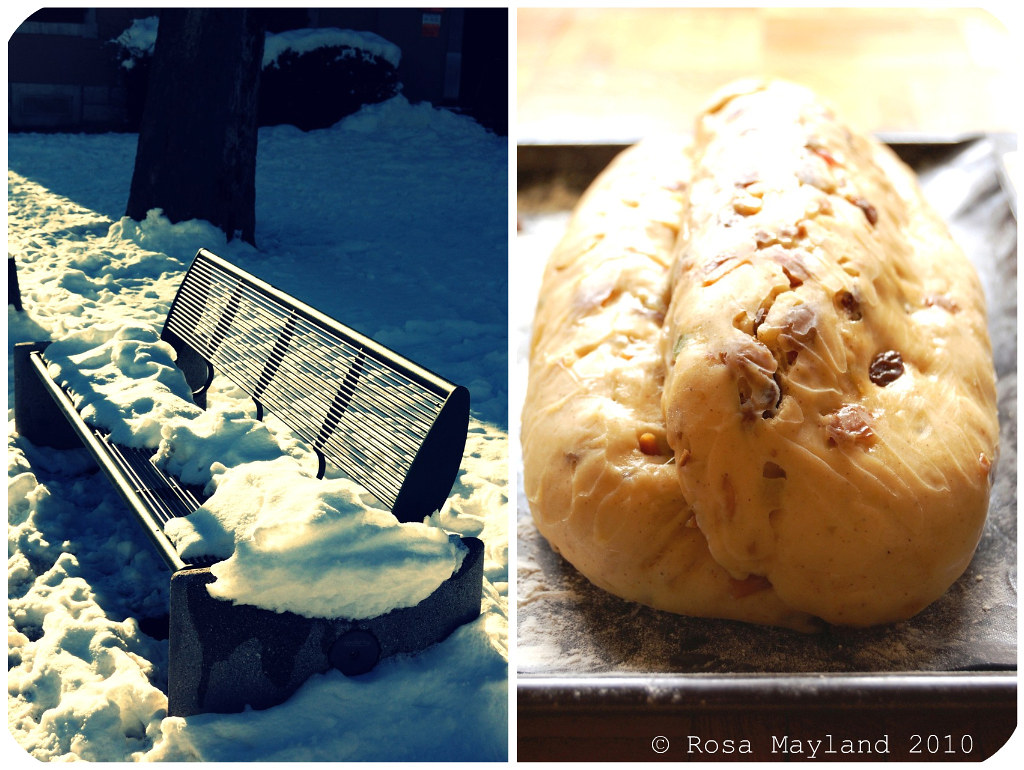
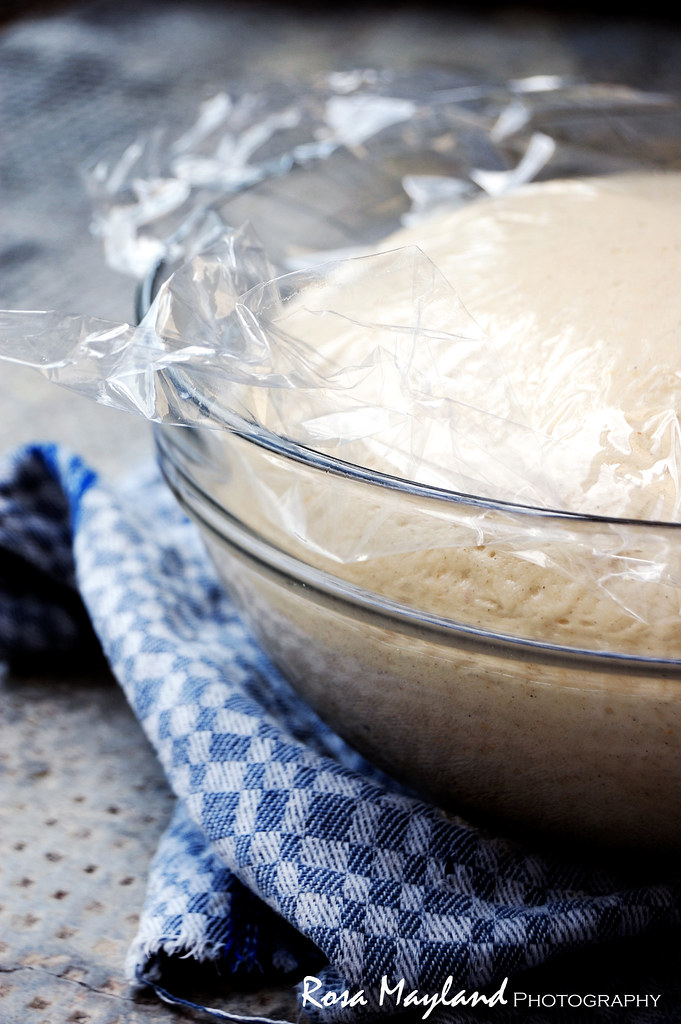
9. 
Façonner la pâte en une boule et la placer dans un grand bol que vous aurez préalablement huilé. Couvrir la pâte avec un film plastique et recouvrir le bol d'un linge humide. La laissez lever dans un lieu chaud et à l'abri des courants d'airs, jusqu'à ce qu'elle ait doublé de volume, environ 40 minutes à 1 heure.
10. Dégonfler la pâte, la transférer sur une surface propre et légèrement farinée, puis la façonner en un pain rectangulaire (voire méthode - vidéo en anglais) ou la diviser en 3 parts égales, applatir chaque portion avec vos mains pour en chasser l'air, les bouler (voire méthode - vidéo en anglais) et les déposer côte à côte dans le moule.
11. Couvrir d'un film plastique et laisser lever pendant environ 40 à 60 minutes ou jusqu'à ce que la pâte ait doublé de volume.
12. Préchauffer le four à
180 ° C (350 ° F), puis battre un oeuf avec 1 cuillère à soupe de lait et badigeonner le dessus du pain avec ce mélange (la croûte deviendra dorée et brillante).
13.
Verser 1/4 - 1/2 tasse d’eau dans le fond du four chaud et cuire pendant environ 30 minutes, ou jusqu'à ce que le pain sonne creux lorsque vous tapez sur sa base avec un doigt.
14. Laisser refroidir sur une grille.

Remarques:
Au départ la pâte sera extrêmement collante. C'est tout à fait normal. Continuer à la pétrir jusqu'à ce qu'elle soit élastique et lisse, pendant environ 15-20 minutes avec un batteur sur socle et à 30 minutes à la main.
Quand la pâte est prête, vous devriez être capable de l'étirer qu'elle se déchire trop rapidement.

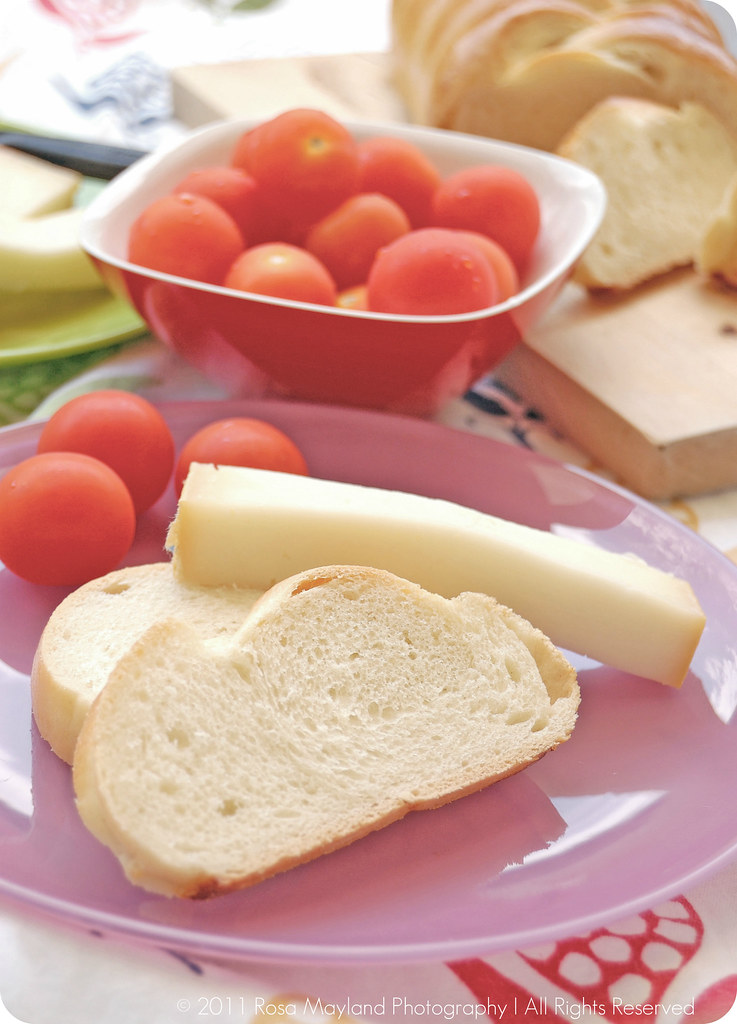
Suggestions d'accompagnement:
Servir pour le déjeuner ou le brunch avec du fromage, de la confiture, du Nutella ou la tartinade de votre choix.
Cette brioche est parfaite pour faire un pouding au pain ou du pain perdu.


Friday, July 22, 2011

BUTTERZOPF - TRESSE AU BEURRE

Zopf 2 bis
I have just realized that although I totally love Swiss food and eat it on a regular basis, I strangely tend to forget to blog about it and share my latest experiments with you. Considering that there is no particular reason for that, I have decided to start writing again about the unique specialities one can find in my beautiful and multifaceted country...

Switzerland (also known as "
Confoederatio Helvetica" or "die Schweiz", "la Suisse", "Svizzera", "Svizra") is a federal republic composed of 26 distinct cantons as well as 4 linguistic and cultural areas (German, French, Italian and Rumantsch). Consequently, it is not suprising if its cuisine is a reflection of the rich heritage and impressive inherant multiculturality that can be found in our island-like tiny kingdom. Each region and district has its very own traditional gastronomy and produces which they fiercely protect (at least in the countryside and amongs cooks or farmers).

Even if this tiny piece of land stuck between Germany, Austria, France, Italy has a very rich culinary identity, one cannot refute that each part of the Swiss Confederation has to a certain extent been influenced by its neighbors, and vice versa. For example, a Geneva delicatessen such as "Longeole" can also be found in Chablais (Haute-Savoie), a similar cheese to Valais "Raclette" is made in Savoie too, the Swiss German "Spätzli" seem to be of Swabian (Germany) origin, then "Polenta" or "Risotto" which evoke the Apennine Penninsula are far from being dishes rare to find in Ticino, and the list goes on. As it is the case with every place that is not in total isolation, the borders are quite permeable, so it is pretty understandable that ideas, information, arts and science transit across them.

This Friday, I am presenting a butter, milk and kirsch enriched braided bread that we generally eat on Sunday mornings (not only, though). "Butterzopf" is very similar to the Jewish "Challah" or to its German and Austrian cousin "Hefekranz/Hefezopf", minus the eggs and sugar. It is halfway between a Vienese pastry and a brioche. The name "Zopf" or "Züpfe" is derived from its shape and literally means "braid" or "plait" (hence "Butterzopf" meaning "butterbraid"). This treat is enjoyed throughout our land, but as we like to make things complicated, its appearance can vary slightly depending on the localities. In Eastern Switzerland it'll be long and pointed, in canton Bern bakers will make it look very large and round ended and in Central Switzerland it will be given a large and flat form.

The origins of it are fairly unclear and surrounded by many legends, some gloomy others cheerful. Apparently, in ancient times, women used to accompany their deceased husbands into the tomb and the spirit world in order for the married couple to be reunited in death. Thankfully that dark tradition was abanded and replaced by a new, less barbarian one. Instead of being forced to perish with her man, the widow only had to cut off her hair (usually a plait) and lay it in the grave, alongside the body of her late companion. Then, the practice of offering one's hair as sacrifice was abolished and a braided loaf was used in place of the tresses. But as there is no real evidence of that custom, it is more likely that "Butterzopf" saw the light of day in a less morbid way. In 1256, the first baker's corporation was created in Basel and not long after, a few more were formed around the Helvetic territory. During the 15th century this delicacy became very popular as people used to gift it on special occasions such as Christmas and New Year. It was even offered as a token of love or to seal a promise of marriage.
Since its existence is attested since 1430, it is most probable that it is a Swiss invention. Nowadays, Swiss people still have the habit of bringing a "Zopf" to their hosts to mark special events (public holidays and feast days).

Zopf Path Arve 1 4 bis
As the the 1st of August, our National Day is soon here I found that it would be very convenient to write a post coinciding with that celebration. When this date is approaching, there is not one supermarket newspaper, food magazine or leaflet that doesn't star this delightful goodie which is a part of our identity as much as the cliché-esque chocolate, cheese or watches are.

Unfortunately, I possess no family recipe for making this brioche, so the one I use faithfully and always with much success hails from the very first bread book I bought 13 years ago (wow, I'm feeling "old" suddenly LOL), "Ultimate Bread" by Eric Treuille & Ursula Ferrigno (see review here).
The formula for it is quite straightforward and accessible, nothing tricky here. There is no need to stress or plan your baking session too much ahead as it'll take you only a few little hours to prepare (1/4 of an afternoon).

Their "Butterzopf" is perfect. It tastes and looks exactly as it should. Texture-wise, the crust is marvelously glossy, golden-colored as well as delicately crisp and its inside is exquistely tender, spongy, full of finesse in addition to being beautifully areated. Furthermore, its subtle flavor is just out of this world and incredibly gratifying. It is elegantly buttery and has fabulous heady hints of Kirsch that pleasantly mingle with the round, enthralling and ambrosial aromas of yeast. You should be there when my "Butterzopf" is in the oven. The smell that spreads through the apartment is dreamlike and instantly puts you in a good mood

This bread is utterly delicious that you don't need to dress up your slice with any fancy spread or accompany it with anything. Its taste alone is self-sufficient. Nonetheless, it pairs really well with butter, cheese, jams, curds, Nutella, Cenovis (the Swiss equivalent of Marmite and Vegemite), honey, dried meat, smoked fish or pate.

Come, try it. I promise you that you'll not be deceived!

Submitted to Yeastspotting!

Zopf 7 bis 1 1 bis
~ Swiss Butterzopf ~
Recipe adapted from Eric Treuille & Ursula Ferrigno's cookbook "Ultimate Bread".

Makes 1 big loaf (or two medium loaves).

Ingredients
2 Tsp (7g) Dried yeast
1 Tsp Castor sugar
1 1/4 Cups (300ml) Full-fat milk, lukewarm (not over 50° C /122° F)
3 3/4 Cups (500g) Flour (high in gluten)
1 1/2 Tsp Fine sea salt
4 Tbs (60g) Unsalted butter, softened and creamed
2 Tbs Kirsch
1 Egg yolk + 1 Tbs Milk, mixed together (for glazing the bread)

Method:
1. Sprinkle the yeast and the sugar into 1/2 cup (120ml) of the milk. Let stand for 5 minutes and then stir to dissolve.
2. Put the flour in the bowl of your standmixer. Make a well in the center and pour in the yeasted mixture.
3. Using a wooden spoon, draw enough of the flour into the liquid in order to form a soft paste which's texture is similar to pancake batter.
4. Cover the bowl with a dish towel or plastic film and let “sponge” until frothy and risen, about 20 minutes.
5. Pour the remaining milk into the well, add the salt, butter and kirsch. Mix until you obtain a moist, but not tacky dough (if the dough is too wet addd a little flour our if it's too dry, add some milk).
6. Knead until the dough is smooth, shiny, elastic and passes the window pane test, about 4-6 minutes (10 minutes when kneaded by hand).
7. Oil a bowl and place the dough in it
, turning to coat evenly with butter. Cover with some plastic film and then a dish towel. Let rise at room temperature, until doubled in size, about 1 1 ⁄2 to 2 hours.
8. Punch down, then let rest for 10 minutes.

Zopf Kirsch bis 1 3 bis
9. Divide the dough into three pieces (or 6 if you are making two medium loaves), then roll out each of them into a 40cm (16-inch) long rope and make a (or 2) braided loaf (loaves) with them (see example here).
10. Place on a baking sheet covered with baking paper and cover with a dish towel.
11. Let prove until doubled in size, about 35–45 minutes.
12. Twenty minutes before the end of the proofing time, preheat the oven to 180° C (350° F).
13. Once the bread is ready to get baked, brush the top of the loaf with the egg glaze.
14. Bake in the preheated oven for 40 minutes, until golden brown and hollow sounding when tapped underneath.
15. Let cool on a wire rack.

Remarks:
If you don't have any Kirsch, then use brandy or plum spirit/brandy.
You can freeze your bread without problem. In that case, you just have to bake it as instructed above and then to remove it from the oven
10 minutes before the end of its baking time, wrap it in a dish towel and let it cool completely before freezing. On the day you choose to eat your zopf, defreeze it for 15 to 30 minutes (in its freezer bag), then bake it for 10 minutes at 200° C (400° F) and let it cool on a wire rack.

Serving suggestions:
Serve for breakfast or brunch with cheese, jam or the spreads of your choice (perfect with cream cheese, lemon curd and Nutella).
You can also make wonderful French Toasts with the leftover bread.

~~~~~~~~~~~~~~~~~~~~~~

Zopf 5 bis
~ Tresse Au Beurre Suisse ~
Recette adaptée du livre "Le Pain" par Eric Treuille et Ursula Ferrigno .

Pour 1 grosse tresse (ou 2 moyennes tresses).

Ingrédients:
2 CC (7g) de Levure sèche
1 CC de Sucre cristallisé
300ml de Lait entier, tiède (en dessous de 50° C)
500g de Farine blanche pour pain
1 1/2 CC de Sel de mer fin
60g de Beurre non-salé, battu en pommade
2 CS de Kirsch
1 Jaune d'oeuf + 1 CS de Lait, mélangés ensemble (pour la dorure)

Méthode:
1.
Verser 120ml de lait dans un petit bol, puis saupoudrer avec la levure et le sucre. Bien mélanger et laisser reposer pendant 10 minutes, jusqu'à ce que le mélange soit mousseux.
2.
Dans un grand bol (ou dans le bol d'un robot électrique avec le crochet à pain), ajouter la farine et faire un puits. Y verser le mélange lait/sucre/levure.
3. A l'aide d'une cuillère en bois, incorporer assez de farine afin d'obtenir un mélange visqueux ressemblant à de la pâte à pancake.
4. Couvrir avec un linge ou du film plastique/alimentaire et laisser "lever/mousser" pendant environ 20 minutes.
5. Ajouter le lait restant, le sel, le beurre et le kirsch. Bien mélanger afin d'obtenir une pâte humide, mais pas collante (si elle colle, ajouter un peu de farine et si elle est trop sèche, ajouter un peu de lait).
6. La pétrir pendant 4-6 minutes (ou 10minutes à la main), jusqu'à ce qu'elle soit lisse, brillante, élastique et passe le test du vitrail.
7.
Mettre la pâte dans un grand bol légèrement huilé/beurré et faites tourner la pâte dans le bol afin de bien l'enduire d'huile/de beurre. Couvrir avec du film plastique/alimentaire, puis avec un linge de cuisine. Faire lever à température ambiante jusqu'à ce que la pâte ait doublé de volume, pendant environ 1 1 ⁄2 à 2 heures.
8.
Dégonfler la pâte et la laisser reposer pendant 10 minutes.

Zopf Bug Flower bis
9. Diviser la pâte en 3 (ou 6 si vous faites deux pains) parts égales, former des longs "saucissons" de 40cm de longueur et les tresser ensemble (voir example ici).
10. Mettre la tresse (ou les tresses) sur une plaque de cuisson recouverte de papier sulfurisé et recouvrir avec un linge de cuisine.
11. Laisser lever pendant environ 35–45 minutes, ou jusqu'à ce que le pain ait doublé de volume.
12. Vingt minutes avant la fin de la période de levage, préchauffer le four à 180° C.
13. Une fois que le(s) pain(s) est(sont) prêt(s) à être enfourné(s), le(s)
badigeonner avec le glaçage à l'oeuf.
14. Cuire pendant 40 minutes, jusqu'à ce qu'il(s) soi(en)t dorés et sonne(nt) creux.
15.
Sortir le(s) pain(s) du four et le(s) faire reffroidir sur une grille avant de le(s) déguster.

Remarques:
Si vous n'avez pas de kirsch, vous pouvez aussi utiliser du brandy ou de l'eau-de-vie de prunes.
Vous pouvez très bien congeler votre tresse. Il vous suffit de la préparer comme indiqué dans la recette, puis de sortir votre pain 10 minutes avant la fin de la cuisson, de l'envelopper encore chaude dans un linge, puis de le laisser refroidir complètement avant de le mettre au congélateur. Après, vous n'aurez qu'à laisser votre tresse dégeler partiellement pendant 15 à 30 minutes dans son sachet de congélation et enfin de l'enfourner pour 10 minutes dans le four préchauffé à 200° C et de le laisser refroidir sur une grille.

Idées de présentation:
Servir à l'heure du déjeuner ou pour le brunch, avec du fromage, de la confiture, du cream cheese, du lemon curd ou du Nutella.
Avec le reste de pain, faites du pain perdu. Vous verrez, c'est merveilleux.

Zopf 1 bis

Friday, December 24, 2010

DRESDNER CHRISTSTOLLEN - THE DARING BAKERS

dk-group-1
The end of the month is here again and the moment has come for all of us Daring Bakers devotees to uncover a secret we have kept well-hidden for a few weeks. Of course, contrarily to most of my zealous colleagues and as it is my habit, I made my challenge at the very last moment (a special wink goes to Jamie at "Life's A Feast"!). This time though I executed it without stress despite the fact that Xmas was getting closer every day and I still had a lot to prepare...

The 2010 December Daring Bakers’ challenge was hosted by Penny of "Sweet Sadie’s Baking" who chose to challenge Daring Bakers’ to make a "Dresdner Chris
tstollen". She adapted a friend’s family recipe and combined it with information from friends, techniques from Peter Reinhart’s book and Martha Stewart’s demonstration.

Stollen Picnik-Collage 3 bis
"Dresndner Christstollen" is a bread-like fruitcake made with yeast, water, milk, flour, butter, salt, eggs, rum, vanilla, orange essence, orange and lemon zests, candied orange peel, candied citrus peel, raisins, cinnamon and sometimes also cardamom as well as marzipan. This traditional German speciality which is a little similar to the Italian "Panettone" or the Dutch "Kerststol" can be traced back to 1474. It is usually eaten during the Christmas holidays, hence the religious-oriented name (it is also called "Weihnachtsstollen", meaning "Christmas Stollen" in English). Originally it was called "Dresdner Striezel" - "Striezel" coming from the word "Strüzel" or "Stroczel", meaning "awaken" because it was an early-baked loaf of bread. It's unique shape is meant to represent the baby Jesus wrapped in swaddling clothes.

Germans baked "Stollen" loaves to honor princes and church dignitaries, and to sell at fairs and festivals. The very first of them were confectioned without milk or butter because the Catholic church didn't allow these ingredients during Advent. It was only until the mid 17th century that a papal proclamation allowed bakers to finally add milk and butter.

Nowadays it is still as popular as in the past. Although "Dresdner Christstollen" doesn't have roots in Switzerland we nontheless consume tons of that festive treat during the end of year festivities. It is so widely spread that you can buy it from every store and you'll find it on most tables. At home we always ate "Stollen", so now I cannot imagine celebrating Yuletide without serving that ambrosial goodie. It is so Xmas-like. Therefore, when I heard that we were asked to bake a "Stollen" for the December challenge I was really excited about that project and really looked forward to tasting the homemade version as until now I have never had the opportunity to make my own.

I more or less followed the recipe to the letter. I chose not to use candied cherries, but added a few more raisins. As I thought that almond flakes might totally disappear in the dough and would pass unnoticed if used in that form I decided to add slivered almond instead which I toasted. I also filled one of my loaves with some marzipan. Being a traditionalist, I absolutely wanted to shape my "Dresdner Christstollen" the classic way and didn't have the desire to give it the appearance of a wreath.

The result was highly satisfying. The recipe gave me two mammoth loaves that looked perfect and tasted just out of this world. My "Dresdner Christstollen" had just the right texture too. It was neither too heavy nor too light, the inside was pleasantly moist and melt-in-the-mouth and and the crust was super soft (there was nearly no difference with the inside). Flavor-wise they were exactly the way they should be: intensely fragrant, with delicate boozy, buttery, orangy, lemony, cinnamony and nutty notes, not to forget that thanks to the overnight proofing they also had a slightly sourdoughy aroma that was extremely pleasurable. There is only one negative remark I'll make though. In my opinion, the "Stollen" could have contained more raisins and mixed peel as I found there were a tad not enough fruits...

This homemade "Dresdner Christstollen" is so much better than store-bought ones and a lot cheaper, so I highly recommend you to get off your asses and start baking if you love this European delicacy!

Stollen Picnik-Collage 4 bis
~ Christmas Stollen ~
Recipe adapted from Penny's German friend who bakes Stollen every year, Peter Reinhart's "Bread Baker’s Apprentice" and Martha Stewart.

Makes two traditional shaped Stollen loaves.
Serves 10-12 people


Preparation time:
The following times are approximate. I suggest you gat
her and scale/weigh/measure (mise en place) all your ingredients before you begin mixing.

• Approximately 1 hour first stage – then rest overnight or up to 3 days
• 2 hours to warm up after refrigeration
• 15 minutes shaping

• 2 hours proofing
• 30-45 minutes baking Equipment required:

• Mixer with dough hook or strong arms and hands
• Mixing bowl
• Bowl to soak raisins

• Small saucepan
• Sheet of plastic or plastic wrap to cover when proofing

• Bench or pastry scraper (very handy for cutting dough and also cleaning work surface)
• Rolling pin
• Dough whisk can be handy but not necessary
• Pastry Brush
• A scale is really important to have when making bread so I strongly advise you to get one. You do not have to have on
e though. (would make a good Christmas gift!)
• Sheet Pan or round Pizza pan
• Parchment Paper Stollen Wreath


Ingredients:
1/4 Cup (60ml) Lukewarm water (110º F/43º C)
2 packages (4 1/2 Tsps/14 grams/1/2oz) Active dry yeast
1 Cup (240ml) Milk
10 Tbs (140g) Unsalted butter (can use salted butter)
5½ Cups (27oz/770g) All-purpose flour (Measure
flour first, then sift + extra for dusting)
½ Cup (115g) Castor sugar
¾ Tsp (4.5g) Sea salt (if using salted butter there is no need to alter this salt measurement)
1 Tsp (6g) Gropund cinnamon
3 Large eggs, lightly beaten
Grated zest of 1 lemon and 1 orange

2 Tsps Pure vanilla extract
1 Tsp Lemon extract or orange extract
3/4 Cup (4 ¾oz/135g) Mixed peel
1 Cup (6oz/170g) Firmly packed raisins
3 Tbs (45ml) Dark rum
12 Red glacé cherries, roughly chopped (optional)
1 Cup (3.5oz/100g) Slivered almonds, lightly toasted

Melted unsalted butter for coating the wreath
Confectioners sugar for dusting wreath

Note:
If you don’t want to use alcohol, double the lemon or orange extract or you could use the juice
from the zested orange.

Stollen 3 bis
Method For Making The "Dough":
1. In a small bowl, soak the raisins in the rum (or in the orange juice from the zested orange) and set aside.

2. Pour 1/4 cup (60 ml) warm water into a small bowl, sprinkle with yeast and let stand 5 minutes. Stir to dissolve yeast completely.
3. In a small saucepan, combine 1 cup (240 ml) milk and 10 tablespoons (150 ml) butter over medium - low heat until butter is melted. Let stand until lukewarm, about 5 minutes.
4. Lightly beat eggs in a small bowl and add lemon and vanilla extracts.
5. In a large mixing bowl (4 qt/4 liters or in the bowl of an electric mixer with paddle attachment), stir together the flour, sugar, salt, cinnamon, orange and lemon zes
ts.
6. Then stir in (or mix on low speed with the paddle attachment) the yeast/wate
r mixture, eggs and the lukewarm milk/butter mixture (This should take about 2 minutes. It should be a soft, but not sticky ball).
7. When the dough comes together, cover the bowl with either plastic or a tea cloth and let rest for 10 minutes.
8. Add in the mixed peel, soaked fruit and almonds and mix with your hands o
r on low speed to incorporate. Here is where you can add the cherries if you would like (Be delicate with the cherries or all your dough will turn red!).
9. Sprinkle flour on the counter, transfer the dough to the counter, and begin kneading (or mixing with the dough hook) to distribute the fruit evenly, adding additional flour if needed (The dough should be soft and satiny, tacky but not sticky). Knead for approximately 8 minutes/6 minutes by machine (The full six minutes of kneading is needed to distribute the dried fruit and other ingredients and to make the dough have a reasonable bread-dough consistency. You can tell when the dough is kneaded enough – a few raisins will start to fall off the dough onto the counter because at the beginning of the kneading process the dough is very sticky and the raisins will be held into the dough but when the dough is done it is tacky which isn't enough to bind the outside raisins onto the dough ball.).
10. Lightly oil a large bowl and transfer the dough to the bowl, rolling around to coat it with the oil. Cover the bowl with plastic wrap.

11. Put it in the fridge overnight (The dough becomes very firm in the fridge since the butter goes firm, but it does rise slowly… The raw dough can be kept in the refriger ator up to a week and then baked on the day you want.).

Stollen Picnik-Collage 5 bis
Shaping the Dough and Baking the Wreath:
1. Let the dough rest for 2 hours after taking out of the fridge in order to warm slightly.
2. Line a sheet pan with parchment paper.
3. Punch dough down,
divide it into two pieces.
4. Pat into ovals.
5. For traditional stollen shape (video 1 & video 2),
on a floured working surface roll out the dough to an oblong shape about 3 cm (1 1/5 inch) thick (The long sides should be bulging.). Fold in the long sides of the dough on top of each other. Now push in the dough lengthwise with your hands forming a stollen shape. Place the Stollen on your baking sheet.
6.
Brush the dough with melted butter and cover loosely with plastic wrap.
7. Proof for approximately 2 hours at room temperature, or until about 1 1/2 times its original size.
8. Preheat oven to moderate 180°C (350° F) with the oven rack on the middle shelf.
9. Bake the stollen for 20 minutes, then rotate the pan 180 degrees for even baking and continue to bake for 20 to 30 minutes (The bread will bake to a dark mahogany color, should register 190°F/88°C in the center of the loaf, and should sound hollow when thumped on the bottom.). 10. Transfer to a cooling rack and brush the top with melted butter while still h ot.
11. Immediately tap a layer of powdered sugar over the top through a sieve or sifter.
12. Wait for 1 minute, then tap another layer over the first (The bread should be coated generously with the powdered sugar.
Coat the stollen in butter and icing sugar three times, since this many coatings helps keeps the stollen fresh - especially if you intend on sending it in the mail as Christmas presents! The more rum and the more coatings of butter and sugar you use the longer it will store. The following is for the recipe as written and uses the 45 mls of rum and two coatings of butter and icing sugar.).
13. Let cool at least an hour before serving.

Storing:
When completely cool, store in a plastic bag or leave it out uncovered overnight to dry out slightly, German style.
The stollen tastes even better in a couple of days.


Serving suggestions:
Stollen is delicious with butter and a cup of tea.

It toasts superbly and can be used to make bread pudding.

Stollen Picnik-Collage 1 bis

~~~~~~~~~~~~~~~~~~~~~~


Etant donné que la recette est un peu longue, je n'ai malheureusement pas pu faire une traduction française de ce billet et je m'en excuse auprès de tous mes amis lecteurs et blogueurs francophones!

C'est pourquoi je vous suggère de vous rendre sur le blog mentionné ci-desso us. Vous y trouverez cette recette en version française.

Recette pour le "Dresdner Christstollen" sur les deux blogs canadiens suivants:
Chez Isa de "Les Gourmandises d'Isa" (Canada)
Chez Vibi de "La Casserole Carrée" (Canada)


Stollen Picnik-Collage 2 bis

Friday, February 19, 2010

MARDI GRAS KING CAKE - GÂTEAU DU ROI

I first got introduced to New Orleans when I started reading Anne Rice's novels on the Mayfair Witches. I remember how much I loved the context in which the story was told and how much magnificent NOLA was so poetically depicted...

The scent of the place, it's incomparable atmosphere entwined with a long as well as tragic history of slavery and Fr
ench bourgeoisie, it's fascinating old houses as well as it's musical background and vibrantly exotic exhuberance are all so well described in the writings of Anne Rice. For all those reasons, for me, New Orleans is synonymous with mystery, eery religious practices, good food, romantism as well as cheerfulness. It is a destination that makes me fanticize.

"The doctor had never been inside an antebellum mansion until that spring in New Orleans. And the old house really did have white fluted columns on the front...Greek Revival style they call it -- a long violet-gray town house on a dark shady corner in the Garden District, it's front gate guarded it seemed by two enormous oaks.

The iron lace railings were made in a rose pattern and much festooned with vines; purple wisteria, the yellow Virginia creeper and bougainvillea of a dark, incandescent pink....Always he paused at the largest tree that had lifted the iron fence with its bulbous roots. He could not have gotten his arms around the trunk of it. It reached all the way from the pavement to the house itself, twisted limbs clawing at the shuttered windows beyond the banisters, leaves enmeshed with the flowering vines."

- Excerpt from "The Witching Hour" by Anne Rice (p. 5) -

I also remember that, while reading the Mayfair Witches chronicles, her tales about Mardi Gras transported me entirely . It is no wonder if, when flipping through my Culinaria "The United Staes: a Culinary Discovery" cookbook, my attention was drawn towards that buoyantly colored brioche bread that is only made during the period which follows Three Kings Day or the Epiphany (6th of January) and ends with Mardi Gras Day or Fat Tuesday (around the middle of February).

This treat comes in various styles (simple ring, three-braided ring, four-braided ring, etc...) and with many different fillings (cream cheese, praline, apple, raspberry & cream cheese, chocolate, pecan, etc...). While the common "King Cake" is baked in an oven, the Cajun version is deep-fried just like a doughnut would be. "King Cakes" are always topped with sugar granules in the official Carnival colors of purple (passion of Christ), green (hope) and gold (rewards of leading a Christian life). A small plastic baby is hidden inside and it has become customary in the New Orleans culture that whoever finds the trinket must provide the next "King Cake".

After never really getting round to making a "King Cake", this year, I finally decided to overcome my ungrounded fears and baked that Louisiana-style delicacy with much success. Needless to say that although it took me two days to make, it disappeared in an even shorter lapse of time!

This New Orleans sinfully sweet carnival treat is so marvelous and festive that you can't get your hands off it! There is nothing better than a fresh slice of fragrantly yeasty brioche bread which's ooey gooey heart releases the most delightful flavors of cinnamon, roasted pecans, whiskey and is is covered with a crispy, yet melty layer of icing. Irresistible!

For those who are interested in learning a little more about the history and traditions of Mardi Gras "King Cake", I invite you to check out the following links: King Cake - A Rich Tradition, History Of the King Cake & Mardi Gras King Cakes.

In Switzerland, the Catholic cantons also celebrate the carnival. The following videos and article might give you an insight: Saveur Magazine - Basel Carnival, The Morgenstreich - Basel Carnival, The Lights Go Out - Basel Carnival & The Tschäggättä - In Lötschental, Wallis (see my article on the subject).

This post is also for YeastSpotting.

~ Mardi Gras King Cake ~
Recipe taken from Food Network and slightly adapted by Rosa @ Rosa's Yummy Yums 2010.

Makes 1 King Cake.

Ingredients for the "Cake":
1/3 Cup Milk
1 Package active dry yeast
2 1/2 Cups Bread flour, plus more for dusting
2 Large egg yolks
2 Large eggs
3 Tbs Granulated sugar Finely grated zest of
1 organic lemon
1 Tsp Sea salt
1/2 Tsp Freshly grated nutmeg
1 1/2 Sticks (180g) Unsalted butter, softened, plus more for greasing the bowl
Ingredients for the "Filling":
1/2 Cup Golden raisins
1/4 Cup Bourbon
3/4 Cup Packed light brown sugar
2/3 Cup Toasted pecans, chopped
1 Tsp Pure vanilla extract
1 Tsp Ground cinnamon
2 Tsp Grated orange zest (organic)
1/4 Tsp Sea salt
1 Dry bean or plastic King Cake baby
Ingredients for the "Glaze":
1 Cup Confectioners' sugar
Purple, green and gold sanding sugar, for decorating

Method for the "Cake":
1. Heat the milk in a saucepan until scalding; transfer to a food processor, add the yeast and pulse to combine.
2. Add 1/2 cup flour and the egg yolks; process to combine. Pour the remaining 2 cups flour evenly over the yeast mixture; do not process. Put the lid on; set aside for 90 minutes.
3. Add the 2 whole eggs, granulated sugar, lemon zest, salt and nutmeg to the food processor; process to make a slightly textured dough, about 1 minute.
4. With the machine running, slowly add the butter to make a smooth, sticky dough. once the butter has been incorporate, stop mixing.
5. Transfer the dough to a lightly buttered bowl and cover tightly with plastic wrap; let rise in a warm place for 3 hours.
6. Turn the dough out onto a clean surface and knead briefly; form into a ball and return to the bowl. Cover tightly with plastic wrap and refrigerate for 8 hours or overnight.
Method for the "Filling":
1. Plump the raisins in the bourbon in a small saucepan over medium heat. Remove from the heat and add the brown sugar, pecans, vanilla, cinnamon, orange zest, salt and the bean or plastic baby; mix until combined and set aside.
2. On a floured surface, roll the dough into a 20-by-7-inch rectangle, with the long edge facing you. Spoon the filling in an even layer over the dough, leaving a 1-inch border along the top and bottom. Fold the bottom and then the top edge over the filling to make a tight roll; pinch to seal.
3. Transfer the roll seam-side down to a parchment-lined baking sheet; tuck one end into the other to form a ring
4. Cover loosely with plastic wrap and set aside in a warm place until the roll doubles in size, about 2 hours.
5. Preheat the oven to 350 degrees. Bake the cake until firm and golden brown, about 40 minutes. Cool on a rack.

Method for the "Glaze":
1. Mix 6 tablespoons water with the confectioners' sugar; brush 2/3 of the glaze over the cake.
2. Sprinkle with bands of colored sugar; drizzle with more glaze.

Remarks:
Instead of preparing a cake that is made with a single roll, I made three little rolls and braided them before my cake into a crown (see video).

Serving suggestions:
This cake is to be enjoyed without moderation, at any time of the day or night.
It is better to eat your "King Cake" quite rapidly (I guess that'll not be a problem as it might very well not make it to the next day LOL), otherwise it might dry u
p and loose it's moisture.

~~~~~~~~~~~~~~~~~~~~~~

~ Gâteau Du Roi ~
Recette prise sur le site Food Network et adaptée par Rosa @ Rosa's Yummy Yums 2010.

Pour 1 brioche.

Ingrédients pour la "Brioche":
80ml de Lait
1 Paquet (7g) de levure en poudre
350g de Farine à pain et plus pour saupoudrer le plan de travail
2 Gros jaunes d'oeufs
2 Gros oeufs entiers

3 CS de Sucre cristallisé
Le zeste d'un citron bio
1 CC de Sel de mer
1/2 CC de Noix de muscade fraîchement râpée
180g de Beurre non-salé, battu en pommade et plus pour beurrer le bol
Ingrédients pour la "Garniture":
80g de Raisins blonds
60ml de Whisky
180g de Sucre brun (bien tassée)
80g de Noix de pécan torréfiées et hachées grossièrement
1 CC d'Extrait de vanille pure
1 CC de Cannelle en poudre
2 CC de Zeste d'orange bio
1/4 de CC de Sel de mer
1 Fève (en forme de bébé si possible)
Ingrédients pour le "Glaçage":
120g de Sucre en poudre
Des paillettes en sucre de couleur violette, verte et jaune

Méthode pour la "Brioche":
1. Chauffer le lait dans une casserole afin qu'il soit à température du corps (pas plus). Le mettre dans le bol du mixer et ajouter la levure, puis bien mélanger.
2. Ajouter 70g de farine et les jaunes d'oeufs. Mélanger à l'aide de la spatule mélangeuse du mixer. Bien répartir sur le dessus le reste de la farine. Ne pas mélanger. Couvrir et laisser reposer pendant 90 minutes.

3. Ajouter les 2 oeufs entiers, le sucre cristallisé, le zeste de citron, le sel et la muscade. Mixer avec le crochet à pain pendant 1 minute.
4. Tout en continuant de pétrir la pâte, ajouter le beurre afin d'obtenir une pâte collante et lisse. Pétrir juste assez afin que le beurre soit incorporé.
5. Mettre la pâte dans un grand bol beurré et recouvrir avec du film plastique. Laisser lever dans un endroit chaud pendant 3 heures.
6. Sortir la pâte du bol, la pétrir légèrement . Former une boule et la remettre dans le bol. Couvrir avec un film plastique et entreposer au frigo pendant 8 heures ou tout une nuit. Méthod pour la "Garniture":
1. Mettre les raisins et le whisky dans une petite casserole, à feu moyen, afin de les réhydrater. Enlever la casserole du feu et ajouter le sucre brun, les noix, la vanille, la cannelle, le zeste d'orange, le sel et la fève. Bien mélanger et mettre de côté.
2. Sur une surface enfarinée, rouler la pâte afin d'obtenir un rectangle de 50 x 18cm (la pâte doit être face à vous en longueur). Disposer la garniture en laissant un bord de 2cm de chaque côté. Plier le partie inférieur en la rabattant vers le milieu et replier la partie supérieure dessus afin d'obtenir un beau boudin serré. Pincer afin de sceller.
3. Mettre le boudin (avec la commissure dessous) sur une plaque recouverte de papier sulfurisé et superposer les deux bouts afin d'obtenir une couronne.
4. Couvrir avec une feuille de plastique alimentaire et mettre de côté, pendant 2 heures ou jusqu'à ce que la couronne ait doublé de volume.
5. Préchauffer le four à 180° C. Cuire la brioche jusqu'à ce qu'elle sonne creux et soit dorée, environ 40 minutes. Laisser refroidir sur une grille.

Méthode pour le "Glaçage":
1. Mélanger 6 cuillères à soupe d'eau avec le sucre en poudre. Glacer la brioche à l'aide d'un pinceau et garder une petite quantité pour la finition.
2. Saupoudrer avec le sucre coloré (faire des bandes distinctes). Faire couler le reste du glaçage sur le dessus du gâteau.

Remarques:
J'ai formé trois boudins que j'ai tressé avant de former la couronne (voir vidéo).

Idées de présentation:
A manger sans modération, à n'importe quelle heure de la nuit et du jour.
Il est préférable de consommer ce gâteau assez rapidemment (je ne pens
e pas que ça sera un problème) afin qu'il ne déssèche pas.