Showing posts with label Whole Wheat. Show all posts

Thursday, October 11, 2012

WHOLE WHEAT SPINACH AND FETA PIE - PIE AUX ÉPINARDS, À LA FÉTA ET À LA FARINE COMPLÈTE

I like to think that we've got a plan, so let's stick to it. That said, once we've stuck to it, we're allowed as much improvisation as anyone cares to indulge themselves in.
- Guy Ritchie
Cooking and improvising go hand in hand. The preparation of meals is far from being a stress-free activity, thus in order to carry out that task properly and be in control of the situation during moments of pure adrenaline rush, one needs to be highly resourceful, endlessly witty and extremely flexible. In the kitchen, many things can go awfully wrong or turn out contrarily to what you've expected. Consequently, last-minute decision taking, fast thinking and inventiveness are a necessity at all times, or else you'll panic and everything will go terribly pear-shaped. Besides, it is more fun not to systematically depend on derectives, rely on written formulas and follow them to the letter as fierce self-reliance unleashes your aptitude for brilliancy.

Of course, in pursuance of versatility, fluidity and creative emancipation, a cook must possess a basic knowledge of culinary techniques (master principles and practices, acquire essential skills and know how recipes work by understanding their structure), learn about ingredients and their roles as well as properties (how they taste, with what they can be or can't be paired, etc...), be open-minded as well as adventurous and love to experiment. The key to liberty, virtuousity and dexterity lies within exercise, perseverance and courage. So before you throw the towel and declare that it is impossible to reach this level of adroitness, remember that nothing comes without effort and that great art requires suffering. In life, nothing is free.

Stovetop geniuses have the capacity to quickly and easily assemble amazing dishes even when all hell lets loose in their headquarters and disaster is about to strike. Problems don't appear to affect them and they seem to invariably find a solution to each of them. Similarly to a surfer, a cuisinier confronts the tallest waves of tension with confidence and he/she rarely fails to overcome them by virtue of his/her composure and cool attitude...

Some of us were fortunate to be raised in homes where family members craftily prepared food simply by using their imagination. We consider it a blessing as thanks to those extraordinary individuals, we were introduced to the joys of cooking instinctively and had the possibility to gain a solid erudition just by observing them at work or by playing the apprentice chef or the helpful commis.

As a child and teenager, I used to hover a lot around my grandmothers' and mother's kitchens. These welcoming and soothingly warm rooms were the nevralgic center of their homes and it felt good to hang out there,  because they smelled wonderful and that's where company was to be found. As far as I can remember, I was always attracted to this area of the house/apartment like a moth to a flame. I could not resist sitting at the table and looking at what was happening around the range oven or stirring the pans' contents as well as having a quick taste of the yummy fare surrounding me whenever my granny and mum turned their backs. Over the years, I have swallowed an immense amount of precious information which cannot be found in books and which I constantly put to use on a daily basis.

Spinach Pie 9 2 bis
In the abstract art of cooking,
ingredients trump appliances,
passion supersedes expertise,
creativity triumphs over technique,
spontaneity inspires invention,
and wine makes even the worst culinary disaster taste delicious.
- Bob Blumer
Cooking requires confident guesswork and improvisation-- experimentation and substitution, dealing with failure and uncertainty in a creative way.
- Paul Theroux
My gastronomic experience has helped me become a dautnless foodie who can face catastrophes and flops without flipping out excessively or being paralized by confusion and the terror of failure. I have solid nerves and more than one trick in my hat. Well, that's maybe not 100% accurate (I'm embellishing things a little here). Nobody's perfect and I'm not a saint, therefore I cannot solemnly promise/gurantee that I won't throw a fit every now and then, fling things across the kitchen, swear like a sailor or behave like a tantrummy diva if difficulties arise (I get easily hot and bothered - LOL). Anaway, despite my occasional loss of temper and moody behaviour, whatever may happen, I'll always find a way out of the painfuland uncomfortable position I am in.

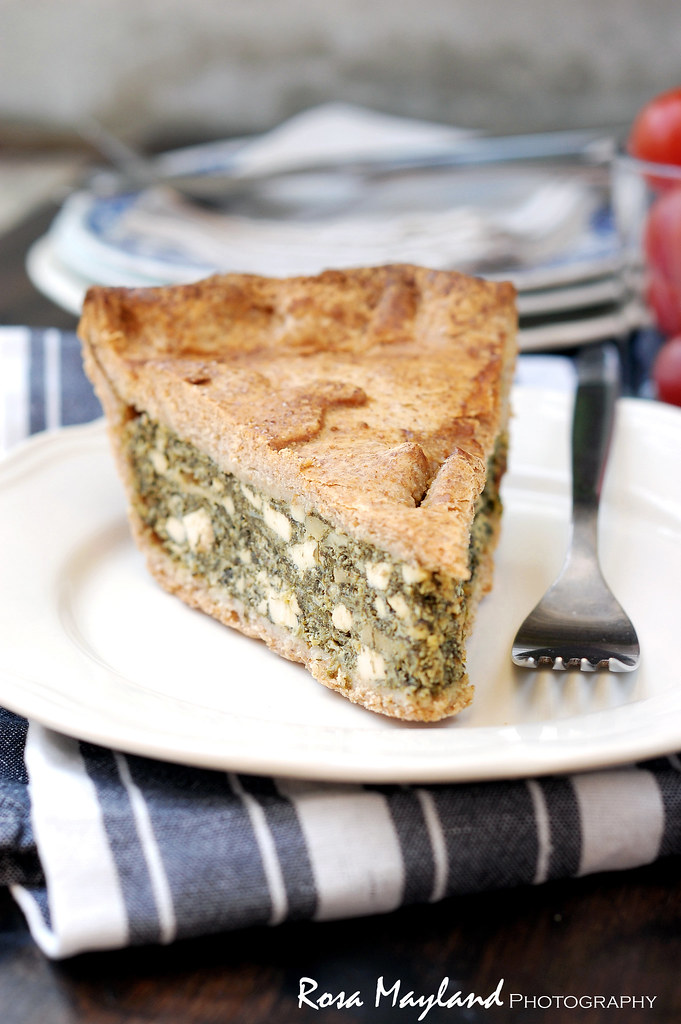
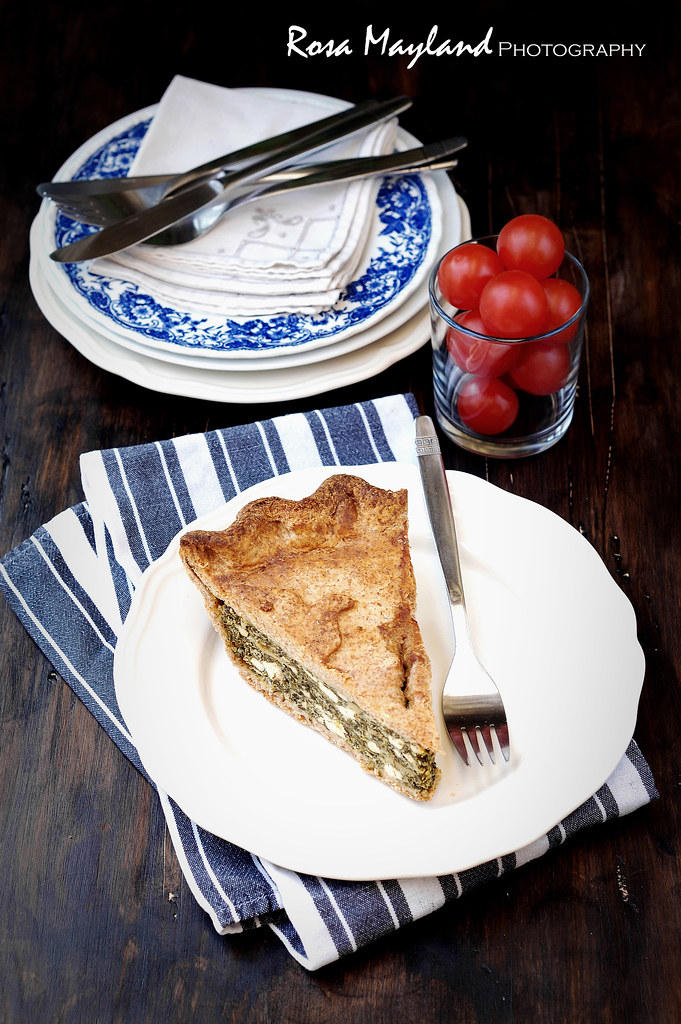
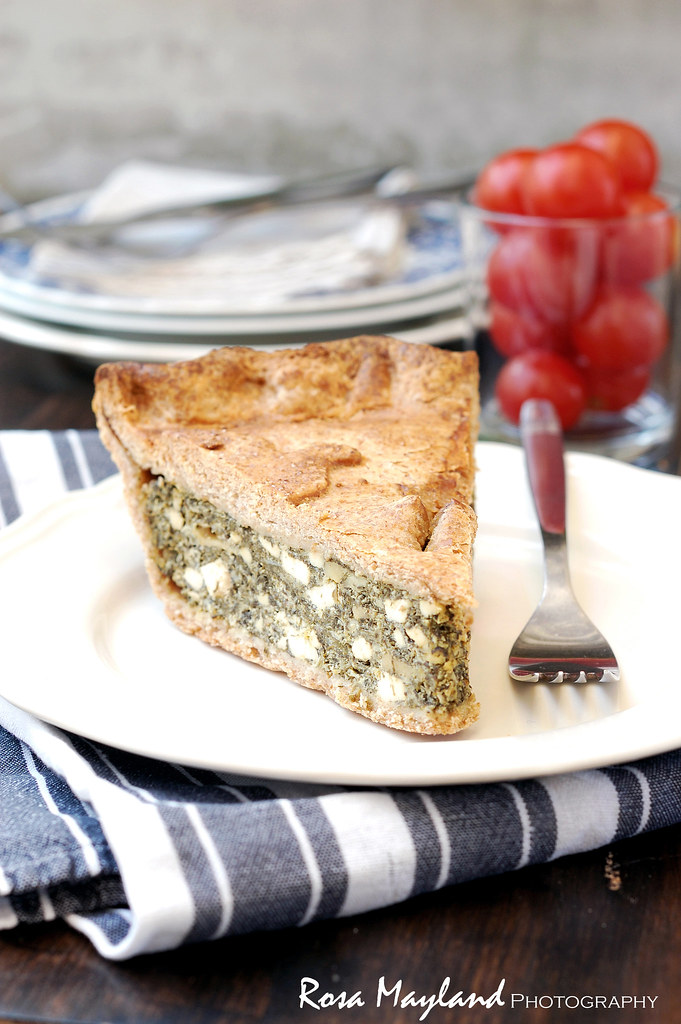
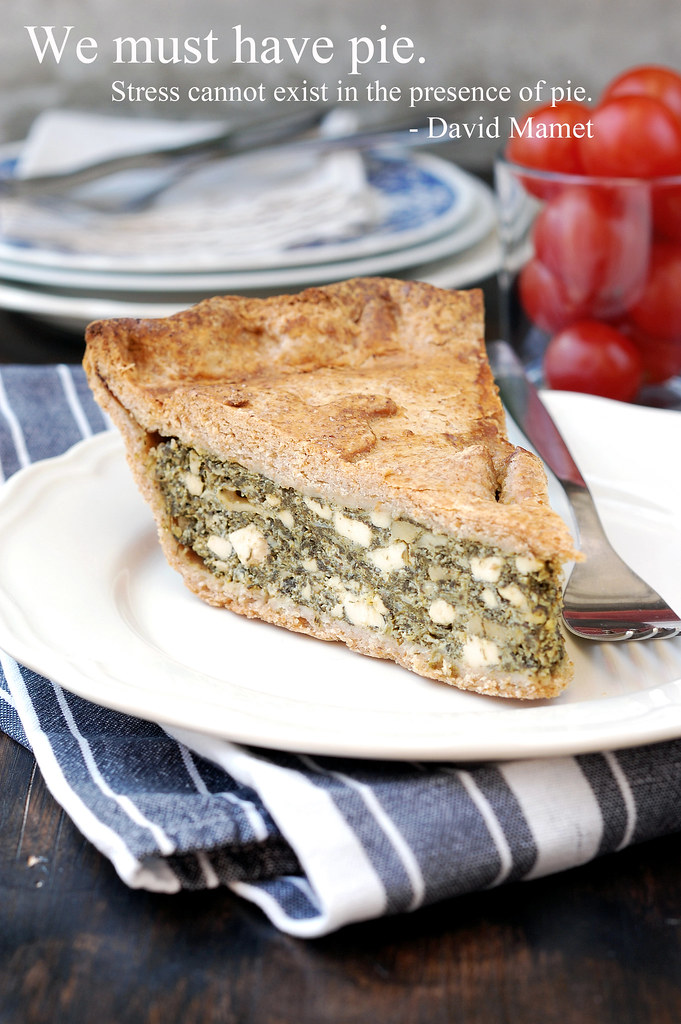
No later than two weeks prior to writing this article, while I was concocting "Spanakopita", a last-minute complication forced me to drastically change my plans. Unfortunately, my store-bought yufka (I make my own when I have enough time on my hands) had an unpleasantly and suspiscious sourdoughyy odor which alarmed me. After some serious pondering, it is with a heavy heart that I decided chuck it in the dustbin (I hate spoiling food and nearly never get rid of anything). Once that was done, I had to come up with an alternative dish. In less than 60 seconds I found the perfect replacement for the inedible phyllo dough and concocted a wholemeal shortcrust pastry in a jiffy. So, for supper that Friday night, instead of Greek börek, "Whole Wheat Spinach And Feta Pie" landed on the menu. Luckily, my sagacity saved the evening, and P. greeted my creation with a beaming smile and sparkling eyes (how rewarding!).

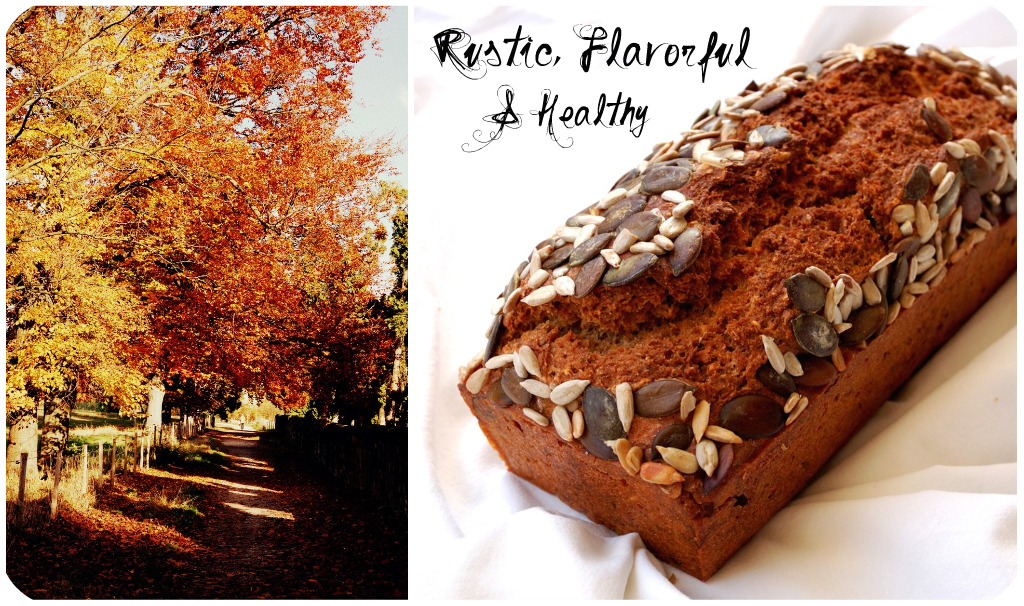
This remarkably luscious, refined tasting, comforting and healthy (rich in fiber, calcium, iron, vitamin A, folic acid, omega-3 fatty acids, protein, zinc, magnesium, etc...) savory treat can be eaten warm or cold, depending on the season, and the leftovers can be stored in the refrigerator (up to a week) as well as frozen (up to a month) and turned into a much welcomed easy/lazy dinner for knackered workers. Superfood with gusto!

P.S. Next week and for a few days only, I'll be absent from the net (blog & social media), so don't worry if I don't visit your blog, leave a comment on your last post or show any sign of life on either Facebook or Twitter...


Whole Wheat Spinach and Feta Pie
Recipe by Rosa Mayland, October 2012.

Serves 4-6/makes a 24cm pie.

Ingredients For The "Whole Wheat Shortcrust Pastry":
380g Whole wheat flour
1 2/3 Tsps Fine sea salt
100g Lard, cold & cut into small cubes
90g Unsalted butter, cold & cut into small cubes
Enough water to blend (~90-100ml)
1 Beaten egg, for glazing the top of the pie
Ingredients For The "Filling":
1 Tbs Olive oil
3 Medium onions, chopped finely
4 Cloves garlic, chopped finely
1 1/2 Tsp Dried dill
600g Frozen spinach, thawed, squeezed dry and chopped finely
3 Eggs (~63g)
250g Ricotta
250g Feta, finely chopped
50g Mature Gruyère,  cut into small cubes
Pepper, to taste
Salt, to taste

Spinach Pie 1 1 bis bis
Method For The "Shortcrust Pastry":
1. Sift the flour and salt into a bowl/bassin.
2. Add the lard and butter. Rub between the fingers until the mixture is flaky.
3. Pour in the water, gradually, while continuously cutting and stirring with a knife (stop adding water when the dough is stiff - it should not be sticky or wet). Gather up into a soft ball and place it in the fridge while you prepare the filling.

Method For The "Filling":
4. In a hot frying pan/skillet, add the oil and chopped onion. Fry until translucid.
5. Add the garlic and dill. Cook for another minute.
6. Add the spinach and stir-fry for about 5 minutes.
7. Put the mixture in a big bowl and let cool completely.
8. Incorporate the eggs, ricotta, feta and Gruyère to the spinach mixture.
9. Salt and pepper to taste.
Method For "Assembling The Pie":
10. Heat the oven to 200°C (400° F).
11. Roll out 2/3 of the pastry and line the base of a 24cm (9 1/2 inches) pie plate.
12. Fill with the spinach mixture and brush the edges of the pastry with water.
13. Roll out the remaining dough (1/3) and cover the pie.
14. Press the edges of the pastry to seal and trim off the excess.
15. With the remaining pastry, decorate the pie top as desired (leaves, flowers, et...).
16. Prick the top of the pastry case to allow steam to escape and glaze the top with the beaten egg
17. Bake for about 40 minutes, until the pastry is crisp and golden.
18. Serve.

Remarks:
You can also make your pastry with plain flour or your filling with fresh spinach and replace the feta as well as the Gruyère by any other cheese of your choice.

Serving suggestions:
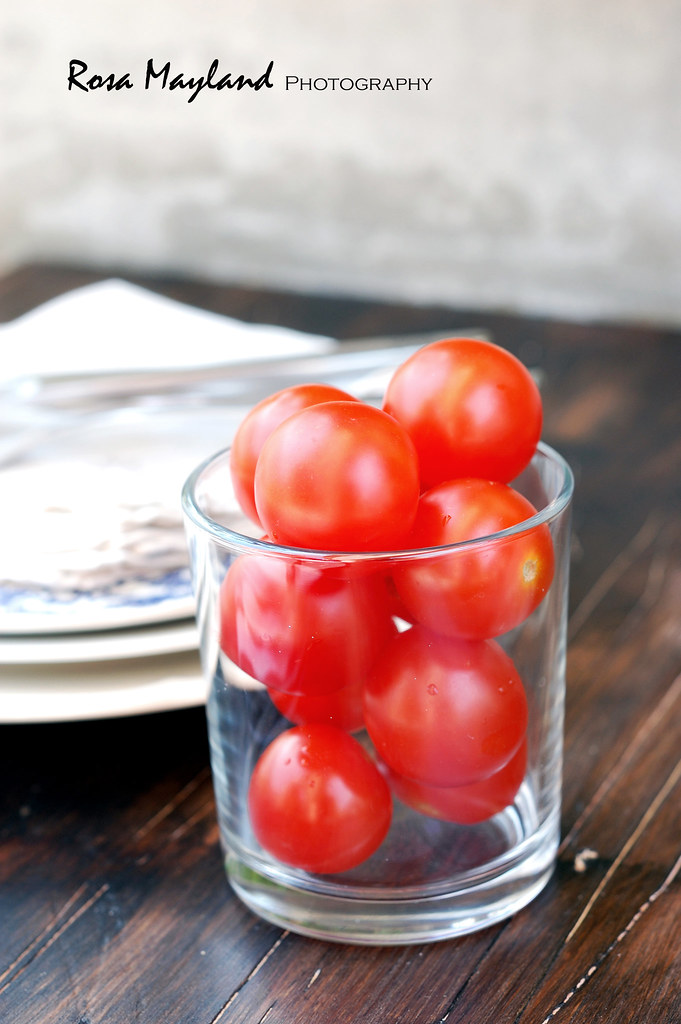
Cut into wedges and serve hot or cold with a crisp green salad or a tomato salad.
This pie is perfect for taking on picnics or to potlucks.

Spinach pie 4 2 bis
Pie Aux Epinards, A La Féta Et A La Farine Complète
Recette par Rosa Mayland, octobre 2012.

Pour 4-6 personnes/1 pie de 24cm.

Ingrédients Pour La "Pâte Brisée A La Farine Complète":
380g de Farine complète

1 2/3 CC de Sel de mer fin
100g de Saindoux, froid et coupé en petits dés
90g de Beurre non-salé, froid et coupé en petits dés
Suffisamment d'eau froide afin que la pâte forme une boule (~90-100ml)

1 Oeuf battu, pour glacer le dessus du pie

Ingredients Pour La Garniture":
1 CS d'Huile d'olive
3 oignons moyens, hachés finement
4 Gousses d'ail, hachées finement
1 1/2 CC d'Aneth séchée
600g d'Epinards congelés, décongelés, essorés et hachés finement
3 Oeufs (~63g)
250g de Ricotta
250g de Feta, hachée finement
50g de Gruyère salé, coupé en petits cubes
Poivre noir moulu, selon goût
Sel de mer fin, selon goût

Spinach Pie 8 1 bis
Méthode Pour la "Pâte Brisée A La Farine Complète": 
1. Tamiser la farine et le sel dans un bol.
2. Ajouter le beurre, puis frotter
la farine et le beurre entre les doigts afin d'obtenir un mélange qui ait une texture sabloneuse.
3. Verser l'eau, graduellement, tout en mélangeant bien (ne plus ajouter d'eau quand la pâte atteint la bonne consistance -ni trop mouillée, ni trop collante). Former une boule puis la mettre au frigo pendant que vous préparez la garniture.
Méthode pour la "Garniture":
4. Dans une poêle chaude, ajouter l'huile et l'oignon haché. Faire revenir en remuant constamment jusqu'à ce qu'il soit translucide.
5. Ajouter l'ail et l'aneth. Faire revenir pendant une minute.
6. Ajouter les épinards et faire cuire pendant environ 5 minutes, tout en remuant régulièrement.

7. Mettre le mélange dans un grand bol et laisser refroidir complètement.
8. Incorporer les oeufs, la ricotta, la feta et le gruyère.
9. Saler et poivrer selon goût.
Méthode Pour "Assembler Le Pie":
10. Chauffer le four à 200 ° C.
11. Etaler 2/3 de la pâte et foncer la base d'un plat à pie de 24cm de diamètre.
12. Remplir avec la garniture et mouiller les bords de la pâte avec de l'eau.
13. Etaler la pâte restante (1/3) et couvrir le pie.
14. Appuyez sur les bords de la pâte pour les sceller et couper l'excédent de pâte.
15. Avec la pâte restante, décorer le dessus du pie comme vous le souhaitez (feuilles, fleurs, et ...).
16. Piquer le couvercle de pâte afin de permettre à la vapeur de s'échapper et glacer le dessus avec l'œuf battu.
17. Cuire au four pendant environ 40 minutes, jusqu'à ce que la pâte soit dorée et croustillante.
18. Servir.

Remarques:

Vous pouvez également fabriquer votre pâte avec de la farine ordinaire et faire votre garniture avec des épinards frais ansi que remplacer la feta et le Gruyère par un autre fromage de votre choix.

Suggestions d'accompagnement:

Couper en tranches et servir chaud ou froid avec une salade verte ou une salade de tomates.
Cette tarte est parfaite pour prendre en pique-nique ou pour offrir lors de soupers canadiens.


Spinach Pie 6 2 bis

Friday, November 12, 2010

NORWEGIAN MOUNTAIN BREAD - PAIN RUSTIQUE NORVÉGIEN

Norwegian Bread Picnik collage 5 bis
I like to think of myself as an adventurous and daring cook/baker. Of course, there are times when life is chaotic and I just simply don't feel like staying in the kitchen for hours. It is when one feels lazy and tired that certain simple and unpretentious recipes come in handy...

Last Saturday I really had no desire to spend more than 2 hours baking bread. It was a sunny and warm day, and there was no way I was going to stay in the apartment considering the fact that the weather prognoses for Sunday were dreadfully awful.


So, as I am in a very Scandinavian- (music, culture & films) and healthy-oriented period at the moment it is not surprising that my attention was captured by Nigella Lawson's "Norwegian Mountain Bread" recipe while I was surfing on expat Siri's blog ("The Transplanted Baker").

I dare you to find a more uncomplicated and rapid bread recipe! There is absolutely no kneading, rising or shaping involved (the loaf rises in the oven). The only thing you have to do is weigh and mix all the ingredients together, pour the dough into the baking pan, put it in the oven and then keep an eye on the clock and the thermostat knob. Magic, no?

For such an inelaborate and rustic bread the result was remarkable. It was very flavorful, aromatic, pleasantly moist, wonderfully seedy, interestingly dense/compact, slightly sweet and so enjoyable. It somehow reminded me of Valais Rye Bread (Walliser Roggenbrot), German Pumpernickel, Swedish Rägbröd or Danish Ruggbrød, only without the sourness (since it is not made with sourdough).

This excellent "Norwegian Mountain Bread" is perfect when served with cheese, smoked salmon, Gravlax or cured meats such as Pastrami or corned beef. I'm sure you'll be delighted by this bread's unique aroma and texture.

This bread is getting yeastspotted by Susan’s Yeastspotting!

Norwegian Bread Picnik collage 4 bis
~ Norwegian Mountain Bread ~
Recipe adapted from Nigella Lawson's "How To Be a Domestic Goddess".

Makes one medium-sized loaf.

Ingredients:
1 Cup plus 2 Tbs (250ml) Milk or buttermilk, lukewarm
1 Cup plus 2 Tbs (250ml) Water, lukewarm
2 Cups (255g) Whole-wheat flour
1/2 Cup (64g) Rye flour
2 1/4 Tsp (1/4 oz./7 g) Active dry yeast
1/4 Cup (50g) Rolled oats (not instant)
1 1/2 Tsp Fine sea salt
1 Tbs Light brown sugar
8 Tbs Blend of any of the following (preferably all)
- Wheat germ
- Sunflower seeds
- Flaxseeds (linseeds)
- Pumpkin seeds
- Wheatbran

Method:
1. Mix the milk, water and yeast together in a measuring jug and let rest for about 10 minutes. Combine all the other ingredients in a large bowl.
2. Pour the liquid into the dry ingredients, stirring all the while to make a sticky mixture. Then beat for about 2-3 minutes.
3. Butter your loaf pan well, pour the dough into the pan, sprinkle a few extra seeds and oats over the surface of the bread, and place in a cold oven (middle).

Norwegian Bread Picnik collage 2 bis
4. Turn the on oven to 100° C (225° F). After 30 minutes, turn it up to 175° C (325° F) for one hour (see remarks).
5. When the loaf begins to get nice and brown, take it out of the oven, run a butter knife along the sides of your pan and let rest for 5 minutes, then carefully remove the bread from the pan.
6. Allow the bread to cool thoroughly on a rack in order to prevent the insides from g
etting gummy.

Remarks:
As I had no wheatbran or wheat germ, I used 3 tbs sunflower seeds, 3 tbs flaxseeds and et 2 tbs pumpkin seeds.
Nigella recommends poking the bread with a cake tester or fine skewer to make sure it's done, ie: the skewer will come out clean. You may wish to return the loaf to the oven for an extra 10-15 minutes if you judge that it hasn't baked enough (that's what I did).

Serving suggestions:

Slice thinly and serve with cheese, dry, cured or cold cooked meat, smoked salmon, Gravlax or smoked herring/mackerel.

~~~~~~~~~~~~~~~~~~~~~~

Norwegian Bread Picnik collage 1 bis
~ Pain Rustique Norvégien ~
Recette adaptée de "How To Be a Domestic Goddess" par Nigella Lawson.

Pour un pain moyen.

Ingrédients:
250ml de Lait ou de babeurre, tiède
250ml d'Eau, tiède
255g de Farine complète
64g de Farine de seigle
2 1/4 CC (7g) de Levure sèche
50g de Flocons d'avoine
1 1/2 CC de Sel de mer fin
1 CS de Sucre brun clair
8 CS d'un mélange des ingrédients suivants (tous)
- Germes de blé
- Graines de tournesol
- Graines de lin
- Graines de courge
- Son de blé

Méthode:
1. Dans un récipient, mélanger ensemble le lait, l'eau et la levure et laisser de côté pendant 10 minutes. Dans un grand bol, mélanger ensemble tous les ingrédients restants.
2. Verser le liquide dans les ingrédients secs tout en mélangeant bien afin d'obtenir une pâte collante, puis la battre pendant 2-3 minutes.
3. Beurrer un moule rectangulaire de taille moyenne et verser la pâte dedans. Saupoudrer avec des flocons d'avoine et des graines et placer dans le four froid (milieu).

Norwegian Bread Picnik collage 6 bis
4. Régler le four à 100° C. Après 30 minutes, augmenter la température à 175° C et continuer à cuire le pain pendant 1 heure (voir remarques).
5. Quand le pain commence à devenir brun et qu'il a une belle croûte, le sortir du four et le dégager des bords du moule avec un couteau. Puis, après 5 minutes le sortir du moule et le poser sur une grille.
6. Faire refroidir le pain complètement avant de le consommer (afin d'éviter que l'intérieur soit "gommeux").


Remarques:
J'ai utilisé 3 CS de graines de tournesol, 3 CS de graines de lin et 2 CS de graines de courge car je n'avait pas de son de blé ou de germes de blé.
Nigella recommande de tester le pain avec la pointe d'un couteau afin d'être bien sûr que le pain soit cuit (dans ce cas la lame en ressort propre). Il vous faudra alors peut-être remettre le pain dans le fourra pendant 10-15 minutes (si vous jugez que le pain est pas assez cuit - ce que j'ai fait).

Idées de présentation:
Couper en tranches très fines et servir avec du fromage, de la viande séchée, de la charcuterie ou du roastbeef froid, du saumon fumé, du Gravlax ou du maquereau/harreng fumé.

Norwegian Bread Picnik collage 3 bis

Friday, October 8, 2010

HEALTHY BREAD ROLLS - PAINS COMPLETS

Bread Rolls Picnik collage 1 bis
The other Friday I could not find one bread recipe I wanted to make. Although there internet, my files and books offer plenty of them, there was not one which inspired me at that very moment (don't get me wrong, those mediums offer great recipes, but on this day I found nothing to my taste). After going through Tastespotting, Yeastspotting, Foodgawker, my books, magazines and files for the 100th time I was starting to feel highly irritable, extremely frustrated and particularly pissed (I hate not getting what I want LOL - some of you might know that feeling)...

So, after losing a lot of precious time looking for the bread Grail, I decided that I was going to create my own recipe in order to satisfy my craving for rustic and healthy bread. I went throug
h my cupboards and started collecting what interested me (different flours, seeds and dandelion petals). Then, while keeping the correct measurements that are required for making bread, I started improvising like a madwomen (Remember, I'm a freejazzer in the kitchen. I love my little jam sessions!). That's how I ended up making lovely "Chestnut And Whole Wheat Flour, Dandelion Flower, Sesame and Flaxseed Bread Rolls" that ended up being perfect and exactly what I was looking for.

Those bread rolls are not only healthy, but they are also packed with taste. With their crunchy crust, soft as well as chewy inside, nutty aroma, smoky notes and round grainy flavor it is impossible not to fall in love with them.

My
"Chestnut And Whole Wheat Flour, Dandelion Flower, Sesame and Flaxseed Bread Rolls" pair perfectly well with all kinds of cheeses (Cantal, Brie de Meaux, Cheddar, Gruyère, Cancaillotte, Chavroux, Fourme d'Ambert, Reblochon, Appenzeller, Mutschli, etc...), Bündner dried meat, dried sausages and pate. They also make the most wonderful sandwiches (ham, roastbeef, cheese, pastrami, Chicken, hummus, fish, etc...). Lipsmackingly good!

This post is submitted to Yeastspotting.

Bread Rolls Picnik collage 4 bis
~ Chestnut And Whole Wheat Flour, Dandelion Petals, Sesame & Flax Seed Bread Rolls ~
Recipe by Rosa @Rosa's Yummy Yums 2010.


Makes 8 rolls.

Ingredients
:
300ml Warm water (105°-115° F/40.5°-46° C)
2 Tsps (1 envelope/7g) Active dry yeast
1 Tsp Light brown sugar
300g (10.5oz) Unbleached all-purpose flour
100g (3.5oz) Whole wheat flour
100g (4oz) Chestnut flour
6 Tsps Sesame seeds
2 Tbs Flax seeds (linseeds)
1 1/2 Tbs Dandelion petals
2 Tsps Sea salt
1 1/2 Tsps Malt powder
A little milk for brushing the rolls
Kosher salt for sprinkling

Method:
1. Pour warm water into a small bowl.

2. Sprinkle yeast and sugar over the surface of the water.
3. Stir to combine and let stand until foamy, about 10
minutes.
4. In a large bowl (or in the work bowl of a standing mixer fitted with a dough hook), mix together the flours, seeds, malt, dandelion petals and salt.
5. Add the yeasted water and mix well until a shaggy dough is formed.

6. Turn dough out onto a lightly floured work surface and knead about 10 minutes, until dough is smooth and springy and passes the windowpane test (you can also knead the dough in your stand mixer).
7. Place dough in a greased bowl. Turn dough once to grease the top and cover with plastic wrap or kitchen towel.
8. Let rise at room temperature until double in size, about 1 1/2
hours.
9. Gently deflate dough with your fist. Turn dough out on a lightly floured work surface.
10. Divide the dough into 8 equal pieces.
11. Shape into Kaiser rolls (method by the King Arthur Flour)
12. Place the rolls on a baking tray and cover with a humid towe
l, let rise for about 40 minutes or until double in size.
13. Twenty minutes before baking thge rolls, preheat the oven to 190° C (375° F).
14. Brush top of loaves with milk and sprinkle with salt.

15. Put the baking tray in the center of the oven and bake about 20-25 minutes, or until rolls loaves are golden brown and sound hollow when tapped with your finger.
16. Remove the rolls from the oven and place them on a coolin
g rack. Cool completely before eating.

Bread Rolls Picnik collage 2 bis
Remarks:
While kneading the bread, don't forget to dust your work surface with flour (only 1 Tbs at a
time) if the dough tends to by sticky.
Once you have brushed the loaves with the milk glaze, you can sprinkle them with the gourmet salt of your choice (I used Hawaiian red salt).

Serving suggestions:

This bread is delicious with almost anything (cheese, jam, pate, etc…) and can be enjoyed at any time of the day.

~~~~~~~~~~~~~~~~~~~~~~

Bread Rolls Picnik collage 6 bis
~ Petits Pains A La Farine Complète, Farine De Châtaignes, Pétales De Pissenlit Et Aux Graines ~
Recette par Rosa @Rosa's Yummy Yums 2010.

Pour 8 petits pains.

Ingrédients:
300ml d'Eau tiède (à pas plus de 46° C)
2 CC (ou un sachet de 7g) de Levure sèche
1 CC de Sucre brun clair
300g de Farine blanche/fleur
100g de Farine complète
100g de Farine de châtaignes
6 CC de Graines de sésame
2 CS de Graines de lin
1 1/2 CS de Pétales de fleurs de pissenlit
2 CC de Sel de mer
1 1/2 CC de Poudre de malt

Du lait pour badigeonner les petits pains
Du sel en gros grains pour saupoudrer

Méthode:
1. Verser l'eau dans un petit bol.
2. Saupoudrer avec la levure et le sucre.

3. Bien mélanger et laisser reposer pendant 10 minutes, jusqu'à ce que le mélange soit mousseux.
4. Dans un grand bol (ou dans le bol d'un robot électrique avec le crochet pétrisseur), mélanger ensemble les farines, les graines, le sel, le pissenlit et le malt.

5. Ajouter le mélange levure/eau/sucre et mélanger jusqu'à ce qu'une boule de pâte se forme.
6. Mettre la pâte sur un plan de travail légèrement fariné et pétrir pendant 10 minutes, jusqu'à ce qu'elle soit douce et élastique (vous pouvez aussi pétrir la pâte dans un robot).
7. Mettre la pâte dans un grand bol légèrement huilé/beurré et faites tourner la pâte dans le bol afin de bien l'enduire d'huile/de beurre. Couvrir avec du film alimentaire, puis avec un linge.
8. Faire lever, à température ambiante, jusqu'à ce que la pâte ait doub
lé de volume, pendant 1 1/2 heures.

Bread Rolls Picnik collage 5 bis
9. Dégonfler la pâte et la mettre sur un plan de travail fariné.
10. Diviser la pâte en 8 morceaux égaux.
11.
Façonner chaque pâton en petits pains de l'empereur (méthode).
12. Placer les petits pains au fur et à mesure sur la plaque de cuisson en les retournant (face nouée dessous) et couvrir avec un linge humide et laisser lever pendant 40 minutes, jusqu'à ce que les petits pains aient doublé de volume.
13. Vingt minutes avant d'enfourner les petits pains dans le four, préchauffer le fo
ur à 190° C (375° F).
14. Au dernier moment, badigeonner les petits pains avec du lait et les saupoudrer avec le sel.
15. Cuire les petits pains pendant 20-25 minutes, jusqu'à ce qu'ils soient dorés et sonnent creux.
16. Sortir les petits pains du four et les faire refroidir sur une grille avant de les déguster.

Remarques:
Lors du pétrissage, si votre pâte colle, saupoudrer la d'un peu de farine (1 CS à la fois) sur votre plan de travail.
Après avoir badigeonné vos pains, vous pouvez aussi les saupoudrer avec du gros sel (j'ai utilisé du sel rouge de Hawaii).

Idées de présentation:

Ce pain est délicieux avec presque n'importe quoi (fromages, pâtés, confitures...) et peut être mangé à toute heure de la journée.

Bread Rolls Picnik collage 3 bis

Friday, July 9, 2010

CURRY & ONION CHAPATIS

Chapatis Picnik collage 1 Bis
During the summertime we all want to eat lighter dishes and we can't get bothered to steam up the kitchen by cooking for hours without end. Generally, we prefer refreshing foods that are fuss free. It is for that reason that most people particularly enjoy wraps which are not only delicious, but also very practical whether we are having a relaxed meal at home, a party, a picnic, organizing a happy hour or watching our favorite series/sports show on TV...

As I had made a ras-el-hanout ratatouille (home recipe) with all the lovely seasonal and regional vegetables (fresh garlic, onions, eggplants, zucchinis, red bell pepper and tomatoes) I had bought, I thought that it would be a great idea to use it as a filling in some kind of flatbread.

Although I love Mexican flour tortillas I wanted to make something else so I decided upon preparing "Chapatis" which we had not eaten for quite a while. I had made that Indian speciality a lot in the past, but had somehow forgotten about it. Time to go back to an old classic.

"Chapatis" are pan-fried, unleavened flatbreads which are also known under the name "Roti" and which hail from the Indian subcontinent. Similar versions of this fingerfoood can also be found in Africa (Kenya, Uganda, Ghana and Tanzania) and Turkestan. They are made with whole wheat flour, water (or milk), salt and a little ghee, and can be flavored as wished (onions, chilli, bell pepper, garlic, coconut milk, grated coconut, garam massala, etc...). Traditionally, "Chapatis" are used along with fingers to scoop up Indian foods such as vegetables, chutneys, raitas, stews and curries.

This time instead of following a recipe to the letter I prefered to invent mine on the basis of what I saw, tested in the past and read. I love "Onion Chapatis" and came to the conclusion that it would be great if I added some curry powder and a little garlic powder to them. The result was fantastic.

These "Curry & Onion Chapatis" were so fragrant, addictive and delicious. The flavor was exhalirating and the texture was heavenly. Pure Indian bliss!

Chapatis 3 ALONE bis
~ Curry & Onion Chapatis ~
Recipe by Rosa @ Rosa's Yummy Yums 2010.


Makes 10 chapatis.


Ingredients:
250g Whole wheat flour (+ more for rolling)
1 Tsp Sea Salt
1 1/2 Tsp Mild or hot curry powder
1/2 Tsp Garlic powder
1/3 tsp Chilli powder (optional)

A pinch Freshly ground black pepper
2 Tsp Ghee or melted butter
200ml Milk (see remarks)
1 Medium White onion, finely chopped
1/2 Tsp Sea salt
Ghee or melted butter to fry the chapatis


Method:
1. Put the Flour, salt, curry, garlic, chilli powder (if used) and ground pepper in a bowl. Whisk.
2. Add the milk and 2 tsp ghee.
3. Mix thouroughly in order to get a ball of dough.
4. Knead for about 10 minutes until you g
et a smooth dough.
5. Let the dough rest in a fresh place for about 30 minutes.
6. Meanwhile, mix the salt and onions together and let rest.

7. Knead again the dough thouroughly, then divide it into 10 pieces.
8. Squeeze out the liquid out of the onions.
9. Flatten the piece of dough into a 2.3 inches (6cm) round, add 3/4 tsp onions, fold the dough over and shape into a ball.

10. Roll out carefully into a 6.2 inches (16cm) round.
11. Grease a heavy-based frying pan
with ghee or melted butter and place over medium high heat.
12. Add one chapati at a time and cook until blisters appear, then turn and cook on t
he other side until golden brown.
13. Brush the chapati with a little ghee or melted butter and serve hot.

Chapatis Picnik collage 2 bis
Remarks:
Instead of using milk, you can use water or a mixture of milk and water. Keep in mind that milk makes the chapatis softer.
If the dough is too sticky, then add a little flour.
The more you knead the dough, the smoother the it becomes and the smoother the dough is, the softer the chapatis

Serving suggestions:
Serve those Chapatis with Indian vegetables (raw or strir-fried), chutney, raita, stew and curry. You can also fill them with whatever you like (ratatouille, grated cheese like cheddar, Philadelphia, fish, salad, colslaw, hummus, chilli con carne, etc...).

~~~~~~~~~~~~~~~~~~~~~~

~ Chapatis Curry et Aux Onions ~
Recette par Rosa @ Rosa's Yummy Yums 2010.

Pour 10 chapatis.

Ingrédients:
250g de Farine complète (+ pour abaisser la pâte)
1 CC de Sel de mer

1 1/2 CC de Poudre de curry doux ou fort
1/2 CC d'Ail en poudre
1/3 CC de Poudre de piment
1 pincée de Poivre noir moulu
2 CC de Ghee ou de beurre fondu

200ml de Lait (voir remarques)
1 Oignon blanc (moyen), haché finement

1/2 CC de Sel de mer
Ghee ou du beurre fondu pour cuire les chapatis

Chapatis Picnik collage 3 bis
Méthode:
1. Mettre la farine, le sel, le curry, l'ail, la poudre de piment (
si utilisée) et le poivre dans un bol, puis mélanger.
2. Ajouter le lait et 2 CC ghee.
3. Bien mélanger afin d'obtenir une boule de pâte.
4. Pétrir
la pâte pendant 10 minutes, jusqu'à ce qu'elle soit moelleuse.
5. Laisser reposer la pâte au frais pendant 30 minutes.

6. Pendant ce temps, mélanger le sel avec les oignons. Laisser mariner.
7. Pétrir la pâte quelques minutes encore et la diviser en 10 pâtons.
8. Presser les oignons afin que d
u liquide en sorte.
9. Applatir les pâtons afin d'obtenir un rond de pâte de 6cm de diamètre, ajouter 3/4 CC d'oignons et replier la pâte afin d'obtenir une boule.
10. Abaisser la pâte en une galette ronde de 16cm de diamètre.
11. Graisser la poêle à frire avec le ghee ou le beurre fondu et mettre à chauff
er à température moyenne (6 sur 10).
12. Ajouter un chapati et faire frire jusqu'à ce que des "cloques" se forment. Retourner le chapati et cuire jusqu'à ce que la galette soit dorée.
13. Peindre avec un peu de ghee ou beurre fondu et servir chaud.

Remarques:
Au lieu d'utiliser du lait, vous pouvez utiliser de l'eau ou un mélange des deux. N'oubliez pas que le lait rend les galettes encore plus souples et moelleuse.
Si la pâte est trop collante, alors ajoutez un peu de farine.
Plus vous pétrissez la pâte, plus les chapatis seront moelleux

Chapatis Picnik collage 5 bis
Idées de présentation:
Servir ces galettes avec des légumes (cuits ou crus), du chutney, de la raïta, du ragoût et du curry. Vous pouvez aussi les remplir avec ce qui vous plaît (ratatouille, fromage rapé/cheddar, Philadelphia, poisson, salade, coleslaw, Houmous, etc...).