Showing posts with label Jewish. Show all posts

Saturday, October 16, 2010

HARVEST APPLE CHALLAH - WORLD BREAD DAY 2010

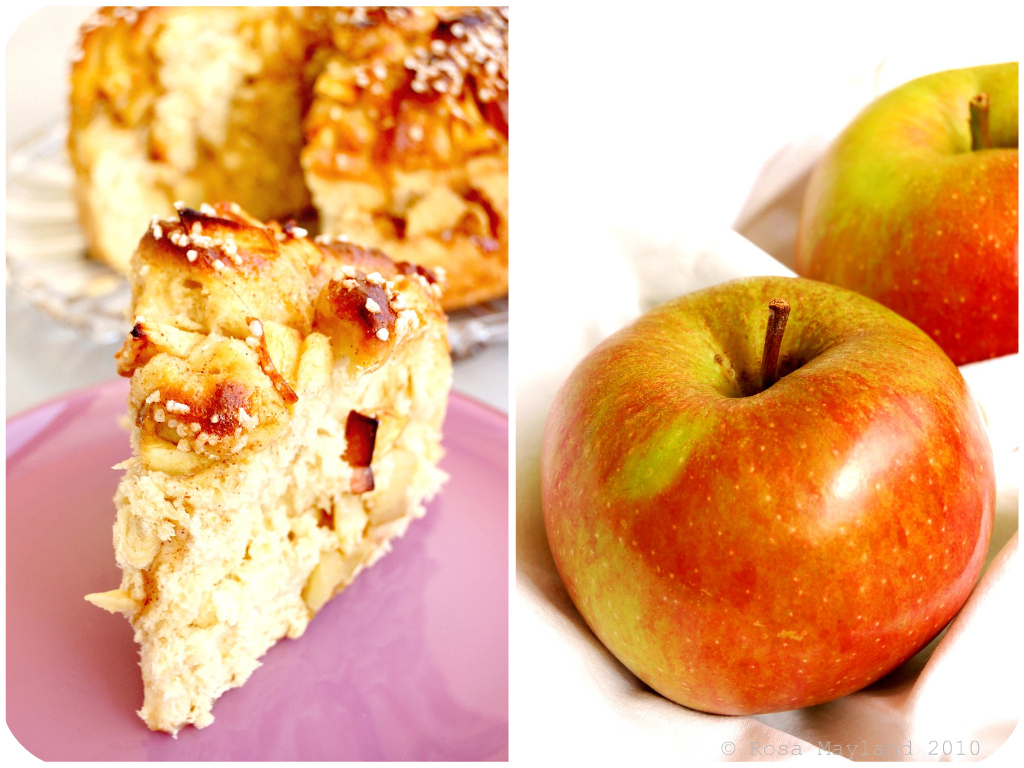
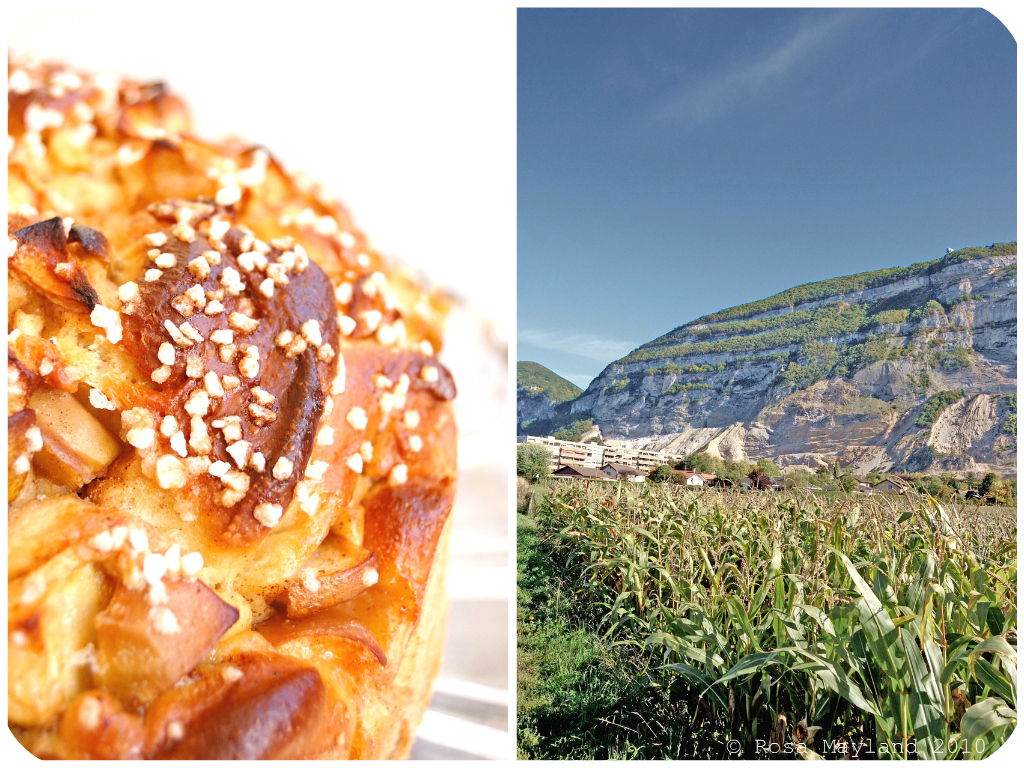
Apple Challah Picnik-Collage 5 bis
This week I was once again facing another of my famous recipe crisises. I felt inspired, but could not find the bread I wanted to make for Zorra's "World Bread Day" annual event and roundup....

I knew that I wanted to bake something sweet, with apples and with some originality. I didn't want to propose a bread I had already blogged about so that limited my choice. You have to know that, as strange as it might seem, there aren't that many different recipes that combine brioche-type dough and apples. Apart from "Apple Cinnamon Rolls" (not enough apple in them), "Apple Danish Braids" (I had already made that speciality once - with apricots), "Apple Buns" (delicious, but not delicate enough and too rustic, in my opinion) and "Apple Pizzas/Focaccias" (I've already written a lot about fruit-based pizzas or focaccias) there isn't much choice when it comes to associating that fall fruit with bread dough (yes, I know, I am a terribly finicky person).
World Bread Day 2010 (submission date October 16)
It is only after a good hour of roaming through the net and getting slighty overheated (My anger was boiling. I felt like a pressure cooker ready to explode!) by my unsuccessful quest that I finally stumbled upon what I was looking for. I was going to bake a "Harvest Apple Challah". A not overly rich brioche bread that contains enough apples to satisfy my fruit cravings and which has a load of personaliy.

What is ironic about that recipe is that I found it nowhere else than on one of my fav
orite and most regularly visited pages on the net: the King Arthur Flour website. I had to google and surf crazily like a spastic (no harm meant to people suffering fom cerebral palsy) in a frenzy in order to end up finding my recipe on a site I know more than well. I could have saved a lot of time if I knew that at the end I was going to choose a recipe from them!!!

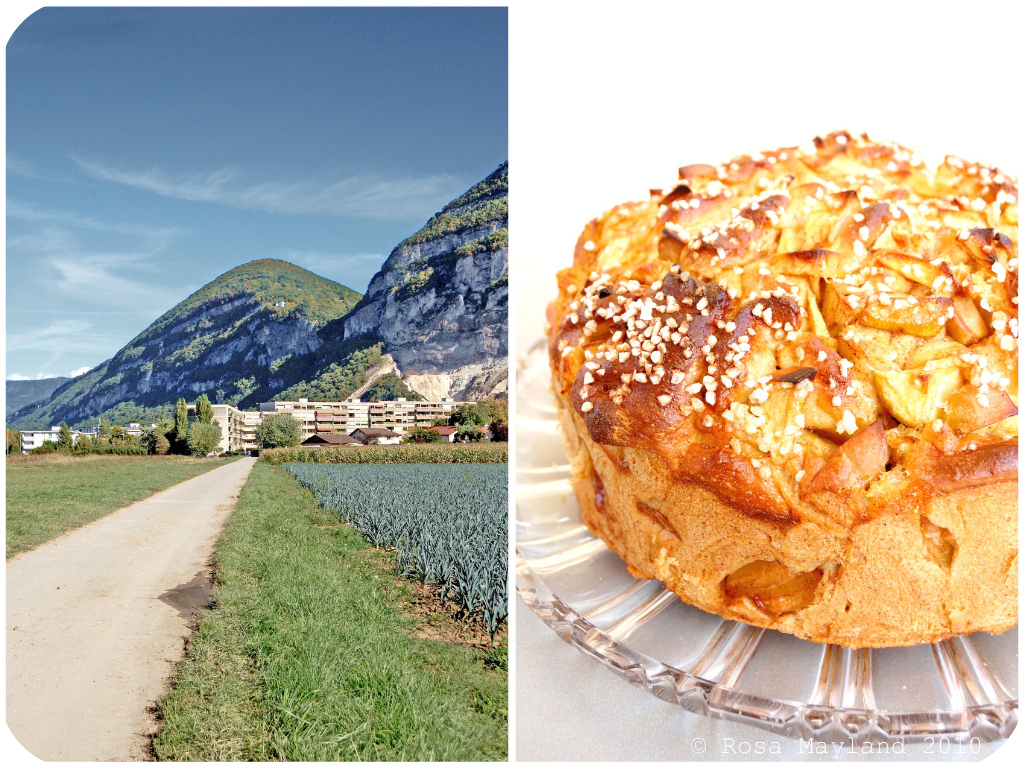
This "Harvest Apple Challah" is very different from the traditional Challahs we all know (plain, braided or coiled and with sesame or poppy seeds). This non-orthodox Challah is prepared like "Monkey Bread", spiced with cardamom, vanilla as well as orange peel puree and stuffed with sweetened cinnamon and rum scented apple chunks. In fact, it is called Challah just because the dough is made exactly like that of this wonderful festive Jewish bread.

The dough is rather painless and straightforward to prepare; nothing very difficult here (Unless you've never made bread that is...). The filling is also easy peasy. The only messy part in this recipe is when you have to cut the big apple-filled dough pillow in 16 pieces and place each of them in the round cake pan. Then, it gets kind of dirty, chaotic and extremely untidy. You'll have apples falling out, slippery wet dough refusing to get tamed, syrup juice oozing out of every opening and you'll think that it all went terribly wrong. But don't stick to that impression. You are actually doing the right thing. Don't panic, breathe deep and forget about the disastrous appearance of your unbaked Challah and your post-atomic bomb looks of your work surface. It will indeed look picture perfect once it comes out of the oven!

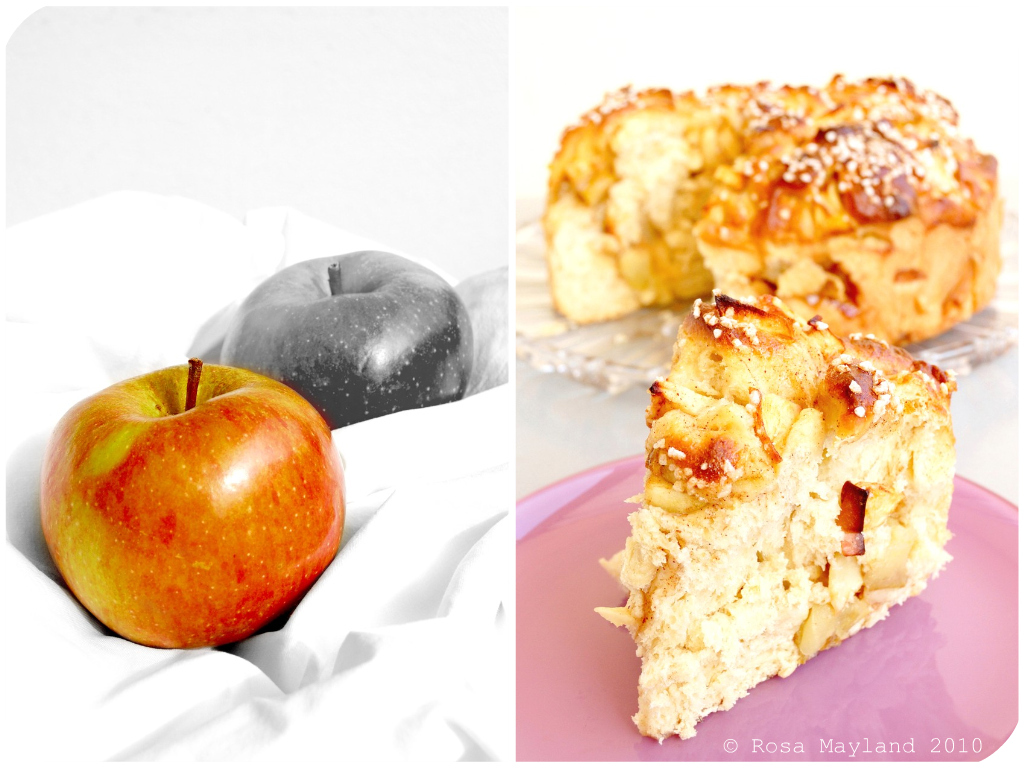
The smooth Challah dough contains fragrant honey, spices (my addition), some eggs and sunflower oil (no butter is ever used in this briochy treat). This particular combination confers an incredibly tender, fluffy and delicate texture as well as a divinely aromatic flavor to this bread. For the apple filling (to which I added a little rum), I chose not to use apples that are commonly employed when making desserts or cooking (Golden, Granny Smith, Gala, Jonagold, etc...) as in my opinion they either lack oomph, sharpness or fragrance. I decided upon choosing one of my favorite apples, the Dutch Belle de Boskoop. This large, lumpy, dull reddish green-brown apple might not be as pretty as it's other apple counterparts (I find it beautiful, though) and might look a little rustic as well as not prone to be presented on stalls, but believe me it has one of the most mouthwatering aromas I have ever come upon. And is the best ally when baking as it stands up well to cooking (As you have gathered now, I am a BIG fan of this apple!). Needless to say that the sharp filling was just perfect and contrasted wonderfully with the light sweetness of the bread.

This KAF "Harvest Apple Challah" is just simply to die for so do yourself a favor and BAKE IT without delay!!!!

This bread is getting yeastspotted by Susan’s Yeastspotting!
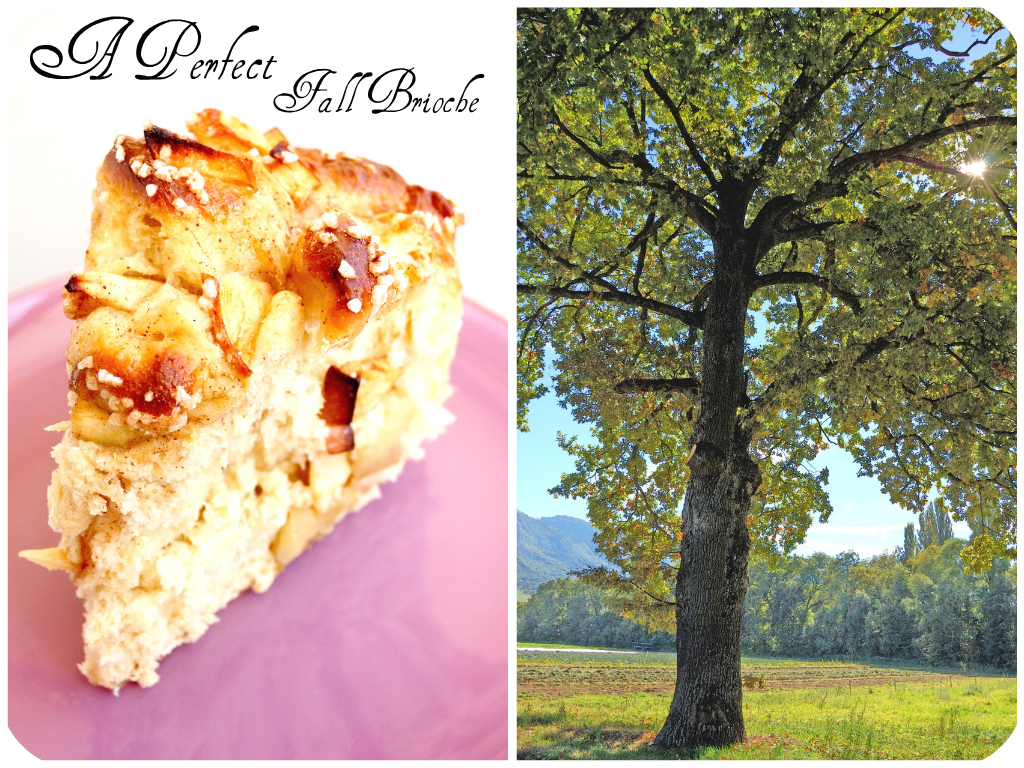
Apple Challah Picnik-Collage 3 bis
~Harvest Apple Challah ~
Recipe adapted from King Arthur Flour.


Ingredients for the "Dough":

1/2 Cup (4oz) Water, lukewarm

6 Tbs Vegetable oil (sunflower or peanut oil preferred)
1/4 Cup Runny honey

2 Large eggs
4 Cups (17oz) Unbleached all-purpose flour
1 1/2 Tsp Sea salt
1/2 Tsp Ground cardamom
1 1/2 Tsp Pure vanilla extract
1 Tsp Orange peel puree zest
1 Tbs (7g) Dried/instant yeast

Ingredients for the "Apple Filling":
2 Medium-to-large Apples (not peeled), cored and diced in 3/4" chunks
1 Tsp Ground cinnamon

1/4 Cup (2oz) Light brown sugar
1 Tbs Dark rum (optional)
Ingredients for the "Glaze":
1 Large egg
1 Tbs Water

Pearl sugar (optional)

Method for the "Dough":
1. Combine all of the dough ingredients. Mix and then knead them, using a mixer or by hand (or bread machine), until you have a soft, smooth and elastic dough (about 8-10 minutes).
2. Put the dough in a oiled/buttered bowl and let it rise, covered, for 2 hours or until it's puffy and nearly doubled in size (If you've made the dough in a bread machine, allow it to rise in the machine for an extra hour after the dough cycle is completed.).
3. Lightly grease/butter a 9inch round cake pan that's at least 2inch deep (or grease a 9inch or 10inch springform pan).
Method for the "Apple Filling":
4. Toss the apple chunks with the sugar, cinnamon and rum.

5. Gently deflate the dough, transfer it to a lightly greased work surface, and flatte n it into a rough rectangle, about 8 x 10 inches.
6. Spread half the apple chunks in the center of the dough (see remarks for details).

7. Fold a short edge of the dough over the apple in order to cover it, patting firmly to seal the apples and spread the dough a bit.
8. Spread the remaining apple atop the folded-over dough.
9. Cover the apples with the other side of the dough, again patting firmly (Basically, you've folded the dough like a letter, enclosing the apples inside.).
10. Take a long knife and cut the apple-filled dough into 16 pieces. Cut in half, then each half in halves, etc ... (This will be very, VERY messy; the dough is slippery, apples will fall out, sugar syrup will ooze... it's not pretty. Don't worry, and don't stress about making all the pieces the same size).
11. Lay the dough chunks into the pan (Crowd them so that they all fit in a single tight layer - barely. Lots of apple chunks will fall out during this process; just tuck them in among the dough pieces, or simply spread them on top.).
12. Cover the challah gently with lightly greased plastic wrap or a humid towel and let it rise for about 1 hour, until it's a generous 2inches high (It should just crest the rim of a 9inch round cake pan). Twenty minutes before the end of the rising time, preheat the oven to 325° F (170° C).
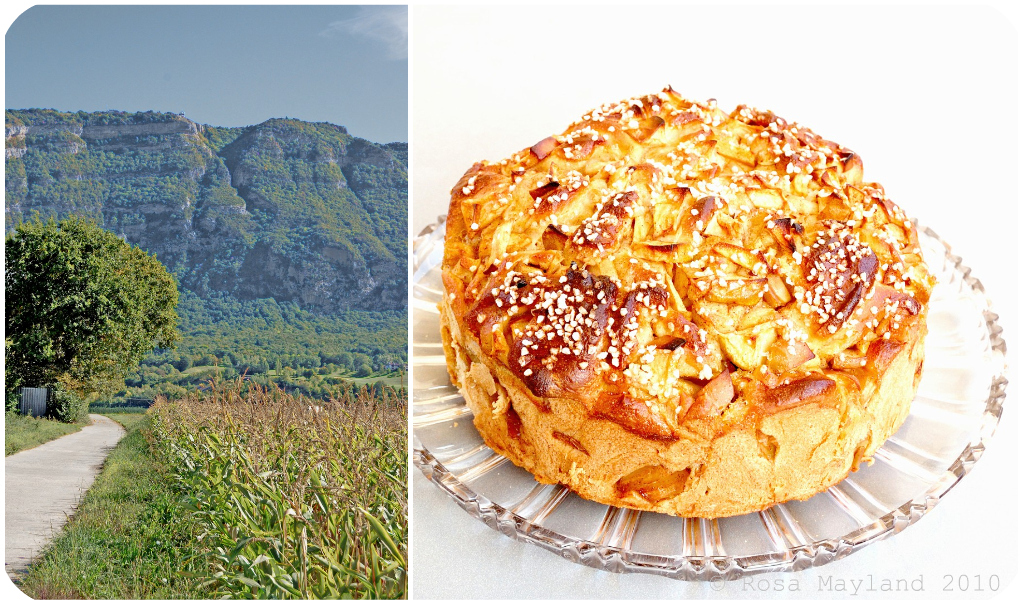
Apple Challah Picnik-Collage 4 bis
Method for the "Glaze":
13. Whisk together the egg and 1 tablespoon water. Brush the dough with the egg mixture, and sprinkle heavily with the pearl sugar, if desired.
14. Place the bread in the lower third of the oven. Bake it for 55 minutes, or until the top is at least light golden brown all over and has no white spots (Some of the higher-rising pieces will actually char; that's OK.).
15. Remove the challah from the oven, and after 5 minutes loosen the edges and carefully transfer it to a rack.
16. Let cool or serve warm.

Remarks:
I made my challah with Boskoop apples.

Be sure to use good-quality honey and oil in this recipe. Since they play such a major part, they have to taste good.
Use neutral-flavored oil. Canola oil can produce off flavors in baking, so best not to use it here.
If you want to see a picture tutorial of that recipe go over to the KAF site.

Serving suggestions:
Serve the bread warm or at room temperature.
Drizzle with honey just before serving, if desired or serve with honey for dipping.


~~~~~~~~~~~~~~~~~~~~~~
Apple Challah Picnik-Collage 6 bis
~ Challah Aux Pommes ~
Recette adaptée de King Arthur Flour.


Ingrédients pour la "Pâte":
120ml d'Eau à température ambiante
6 CS (90ml/g) d'Huile végétale (tournesol ou arachide)
90ml/g de Miel liquide
2 Gros oeufs (63g)
510g de Farine blanche/fleur

1 1/2 CC de Sel de mer
1/2 CC de Cardamome en poudre
1 1/2 CC d'Extrait de vanille pure
1 CC de Zeste d'orange en purrée

1 CS (7g/1 sachet) de Levure sèche (en granulés)
Ingrédients pour la garniture aux "Pommes":
2 Moyennes à larges pommes (non pelées), nettoyées et coupées en morceaux de 1cm

1 CC de Cannelle en poudre
60g de Sucre brun clair
1 CS de Rhum foncé (en option)
Ingrédients pour le "Glaçage":

1 Gros oeuf
1 CS d'eau
Sucre perlé (en option)

Méthode pour la "Pâte"
1. Mettre tous les ingrédients pour la pâte dans un bol. Mélanger et pétrir (pendant environ 8-10 minutes) à la main ou avec un robot (ou bien avec votre MAP), jusqu'à obtention d'une pâte douce et élastique.
2. Mettre la pâte dans un bol huilé, la couvrir avec un linge ou du film plastique et laisser lever pendant 2 heures ou jusqu'à ce qu'elle ait presque doublé de volume (Si vous avez préparé cette pâte dans votre MAP, alors laissez-la lever une heure supplémentaire après que le cycle se soit terminé.).
3. Légèrement beurrer/huiler un moule à cake de 23cm et de 6cm de haut (ou un moule à charnière de 23cm).
Méthode pour la garniture aux "Pommes":
4. Mélanger les pommes avec le sucre, la cannelle et le rhum.
5. Faire dégonfler la pâte, la transférer sur un plan de travail légèrement huilé et l'applatir afin d'obtenir un rectangle approximatif de 20 x 25cm.
6. Mettre la moitié des pommes au centre de la pâte (sur la largeur - voir remarques pour la méthode illustrée).
7. Replier le côté plus étroit sur le pommes pour les recouvrir et bien applatir afin de bien répartir les pommes.
8. Répartir les pommes sur le partie repliée.
9. Couvrir les pommes avec l'autre bord et applatir à nouveau (En fait, vous aurez replié la pâte telle une lettre, en renfermant les pommes à l'intérieur).
10. A l'aide d'un couteau, couper ce "chausson" en 16 morceaux. Cou
per en deux, puis encore en deux, etc... (Cette étape est très salissante; la pâte est glissante, les pommes s'échappent de leur enveloppe et du jus coule... C'est pas beau, mais pas de panique, c'est normal. Il n'y a pas besoin non plus que les morceaux soient égaux.).
11. Placer les morceaux dans le moule (Faire une seule couche et bien les coller ensemble/serrer. Certains morceaux de pomme tomberont durant cette étape; il suffira juste de les coller/presser sur le dessous du pain.).
12. Couvrir votre challah avec du film plastique huilé ou un linge humide et la faire lever pendant environ 1 heure, jusqu'à ce qu'elle ait atteint une hauteur de 5-6cm (La pâte devrait juste dépasser le bord du moule.). Vingt minutes avant la fin du temps de levée, préchauffer le four à 170° C.
Apple Challah Picnik-Collage 1 bis
Méthode pour le "Glaçage":
13. Battre ensemble l'oeuf et la cuillère à soupe d'eau. Badigeonner la pâte avec ce mélange et saupoudrer généreusement avec le sucre perlé.
14. Mettre le pain dans le tiers inférieur du four et le cuire pendant 55 minutes, ou jusqu'à ce que le dessus soit doré (Certaines parties plus élevées seront peut être caramélisées; c'est OK.).
15. Sortir la Challah du four. Après 5 minutes dégager les bords et la sortir du moule afin qu'elle refroidisse sur une grille.
6. Laisser la Challah refroidir complètement ou la manger encore chaude.

Remarques:
J'ai utilisé des pommes boskoop.

Choisir un miel et de l'huile de bonne qualité pour cette recette car la saveur en dépend grandement.
Utiliser de l'huile au goût neutre. L'huile de colza peut donner un mauvais petit arrière-goût à votre Challah, alors c'est préférable de ne pas en utiliser pour cette recette.

Sur le site KAF vous trouverez la recette en photos. Cela vous aidera à comprendre comment replier la pâte afin de créer un "chausson" (étapes 6 à 9).

Idées de présentation:
Servir ce pain chaud ou à température ambiante.
Arroser avec du miel liquide ou tremper votre tranche de brioche dans du miel.
Apple Challah Picnik-Collage 2 bis

Tuesday, September 22, 2009

WALNUT MA'AMOUL - MA'AMOULS AUX NOIX

As this year, both the Eid Ul-Fitr festival (marking the end of the Ramadan) and Rosh Hashanah (Jewish New Year) coincide (20th and 19th of September), I thought that it'd be a good idea if I offered a recipe that brings us back to the time when both Muslim and Jewish people cohabited in harmony and were close...

So after a lot of thinking and some researching, I came to the conclusion that the cookie which would be the best symbol of peace, friendship, respect and tolerance is the Middle Eastern shortbread pastry known under the name of "Ma'amoul" (meaning "filled cookie" in Arabic).

Not only is it adored in Lebanon, Syria, Palestine and other Levantine countries, but it also very popular amid Arab Christians as well as amid the Lebanese and Egyptian (Sepharadic) Jewish communities.

***************
I am organizing an event called "Pastries For Peace" (thanks Kiriel for the idea). Anybody can participate. The roundup will take place on the 7th of December 2009 and the deadline is the 1st of December 2009. Just send your links to grandchampatgmxdotch.

J'organise un jeu qui s'appel "Pastries For Peace (Pâtisseries Pour La Paix)" et qui est ouvert à tous. Toutes vos participations seront visible dès le 7 décembre 2009 et le délai de participation est fixé au 1er décembre 2009. Envoyez tous vos lien à grandchampatgmxdotch.

***************
Choosing this recipe also meant that the baker I am was going to get challenged as I had never made "Ma'amouls" before and had always been intimidated by Middle Eastern pastries, although I had been dying to experiment with those delicacies since a very long time. I always chickened out because they seemed so complicated to produce. I know, stupid me, as usual...

Anyway, with my pristine tabi (woo
den mould) desperately waiting to get used, I could not skip the opportunity to finally jump in the cold water and test my baking skills on a sweet treat which is so different from what we know in the Western world!

Fortunately for me, this incursion into the art of making pastries the Arabic way turned out extremely well. My creations looked not too bad and were mouthwateringly good!

Those "Ma'amouls" are very unusual, refined and unique in aesthetics, flavor and composition. Not only are they very pretty, but they also taste like heaven. With their crisp flaky pastry and soft filling, those nutty, not overly sweet and delightfully fragrant cookies will conquer you instantly.

Eid Moubarak!
&
Shana Tova!

~ Walnut Ma'amoul ~
Recipe by Camille at "Cakes In The City" (France) and adapted by Rosa @ Rosa's Yummy Yums.

Makes about 50 small ma'amouls.

Ingredients for the "Pastry":

500g Fine semolina (or 400g fine semolina and 100g flour)
30g Powder sugar
1 Pinch Salt
1 Tsp Baking powder
250g Unsalted butter, at room temperature
60
ml Milk
60ml Orange blossom water
Ingredients for the "Filling":
150g Walnuts
The zest of one organic orange
2-3 Tbs Powder sugar
2-3 Tbs Water
Powder sugar for dusting

Method for the "Pastry":
1. In a big bowl, mix together the semolina (and flour if you use any), sugar, salt and baking powder.
2. Add the butter and
rub between the fingers until the mixture is flaky.
3. Add the milk and orange blossom water and lightly k
nead the dough for 1 minute.
4. Shape the pastry into a ball, wrap in plastic foil and p
ut in the fridge for about 1 hour.
Method for the "Filling":
5. Meanwhile, prepare the filling: put all the ingredients in a mixer and blend until it ressembles a paste.
6. Preheat the oven to 160°C (° F).
7. Take a small portion of dough and shape it into a ball. Make a hole with your thumb.
8. Fill the hole with the walnut paste and close the ball. Process in t
he same way with the remaining pastry and filling.
9. With the help of a floured tabi (decorative mould) shape the balls into ma'amoul cookies by packing each ball into the mould and then tapping the cookies out onto the work area with a sharp firm hit to the top of the mold.
10.
Transfer cookies to baking sheet with a spatula and bake for about 12 to 15 minutes (stop baking as soon as the sides are starting to get golden brown).
11. Let cool on a rack.
12. Cover the cookies with powdered sugar.


Remarks:
I found two videos for you (video 1 & video 2) that might help you. Check them out if in doubt when it comes to shaping those ma'amoul!

Maamoul are very delicate cookies which you have to manipulate wih care. Let them cool completely before manipulating them.
If you don't have a tabi, then just shape the balls as indicated, put them on the baking sheet and flatten them slightly and decorate the cookies with tweezers.

Serving suggestions:
Eat those cookies with mint tea or Arabic coffee.

***************

~ Ma'amouls Aux Noix ~
Recette par Camille de "Cakes In The City" (France) et adaptée par Rosa @ Rosa's Yummy Yums.

Pour environ 50 petits ma'amouls.

Ingrédients pour la "Pâte":

500g de Semoule fine (ou 400g de semoule fine et 100g de farine)
30g de Sucre en poudre
1 Pincée de sel
1 CC de Levure chimique
250g de Beurre, à température ambiante
60ml de Lait
60ml d'Eau de fleur d'oranger
Ingrédients pour la "Farce":
150g de noix de Grenoble
Le zeste râpé d'une orange bio
2-3 CS de Sucre en poudre
2-3 CS d'Eau
Sucre glace, pour la finition

Méthode pour la "Pâte":
1. Dans un grand saladier mélanger la semoule (et la farine si vous en utilisez), le sucre, le sel et la levure.
2. Ajouter le beurre ramolli et travailler du bout des doigts pour obtenir un mélange sablé.
3. Ajouter enfin le lait et l'eau de fleur d'oranger, puis pétrir la pâte pendant une minute.
4. Former une boule de pâte que vous laisserez re
poser pendant 1 heure au frigo, emballée dans un film plastique.
Méthode pour la "Farce":
5. Pendant ce temps, préparer la garniture: mettre tous les ingrédients de la garniture dans un mixer afin d'obtenir une masse collante et homogène.
6. Préchauffer le four à 160°C.
7. Prendre une petite portion de pâte, la rouler en boule et y creuser un trou en y enfonçant le pouce.
8. Remplir la cavité de
farce et refermer la boule. Poursuivre jusqu'à épuisement des ingrédients.
9. Façonner chaque petite boule à l'aide d'un tabi (moule à ma'amouls/voir 3ième image depuis le haut) en l'enfonçant dans le creux du moule, puis en le tapant ensuite très énergiquement sur une planche à découper pour démouler le ma'amoul.
10. Disposer les biscuits sur une plaque à pâtisserie
recouverte de papier sulfurisé et faire cuire pendant 12 à 15 minutes (arrêter la cuisson quand les bords commencent à dorer).
11. Laisser refroidir sur une grille.
12. Saupoudrer de sucre glace avant de les servir.

Remarques:
J'ai trouvé 2 vidéos qui pourraient vous intéresser (video 1 & video 2). Jettez-y un coup d'oeil car elles sont très utiles afin de comprendre comment former un ma'amoul!
Les Maamouls sont des petites choses très friables, il faut donc les laisser refroidir complètement avant de les manipuler.
Si vous n'avez pas de Tabi, disposer simplement les boules de pâte sur une plaque de cuisson recouverte de papier sulfurisé. Les aplatir légèrement avec la paume de la main et les décorer à l'aide d'une pince de décoration.

Idée de présentation:
Servez ces biscuits avec un thé à la menthe ou un café arabe.


Wednesday, September 10, 2008

MOROCCAN CHAROSET TRUFFLES

As I had a bag of nearly out of date dates (lol) and I had been eying Joan Nathan's mouthwatering "Charoset" recipes since a while (too long), I decided that it was about time for me to test this intriguing, interesting and highly symbolic speciality...

"Haroset", "Charoset" or "Charoses" is a jewish paste which is lumpy, sweet, dark-colored and is made with fruits as well as nuts. It is generally served during the Passover Seder (Pesach). Because of it's color and texture, it symbolizes the mortar with which the Israelites bonded bricks when they were slaves and built cities in Ancient Egypt. "Charoset" derives from the Hebrew word "Cheres" meaning "clay".

Today, the date, raisin and nut "Charoset" recipe I am presenting before you
comes from Morocco. Depending on where the "Charoset" originates, it is made with different ingredients. But, there are two main categories, two distinctive types of "Charoset": the Ashkenazi "Charoset" which is not cooked and is made with nuts, apples, cinnamon and wine (sometimes also honey and sugar in order to bind the "paste") and the Sepharadi "Charoset" which is usually cooked (not always, though) and contains raisins as well as ingredients native to the Middle East (dates, figs, sesame seeds, etc...).

Those little truffles are not only healthy, but also surprisingly scrumptious. The flavors of the dried fruits, nut, wine and cinnamon blend so well together in order to create luscious little balls that are quite addictive and refined both in look and taste. A sweet treat that is ideal to take on walks as they are energetic (a little similar to those fruit bars you can buy in health stores) or to eat when in need od something comforting, yet wholesome and nutritious at the same time. They also make the perfect gift (instead of offering chocolates) for Christmas, Passover, birthdays, Ramadan, etc... Those "Charoset Truffles" are really worth trying, believe me!

~ Moroccan Charoset Truffles ~
Recipe taken from "Jewish Cooking In America" by Joan Nathan and slightly ada
pted by Rosa @ Rosa's Yummy Yums.

Makes about 60 truffles.

Ingredients:
2 Cups Pitted dates
1/2 Cup Golden raisins

1/2 Cup Dark raisins
1/2 Cup Walnuts
1 Tsp Ground cinnamon (optional)
1-2 Tbs Sweet red Passover wine (see remarks)

Castor sugar, for coating (optional, see remarks)

Method:
1. Process the dates, raisins, and walnuts in a food processor until the mixture is finely chopped and begins to stick together.
2. Add the cinnamon and enough wine to make a sticky mass.
3. Line a baking sheet with waxed paper.
4. Drop slightly rounded measuring teaspoonfuls of the mi
xture onto the lined sheet.
5. Roll each mound with moistened palms into hazelnut-size balls.
6. Refrigerate for at least 3 hours or until firm.

7. Roll them in the sugar.
8. Serve.


Remarks:
You can use any other nut of your choice.

For extra flavor, try adding orange rind.
I had no sweet red Passover wine at home, so I used Porto instead. You can also moisten the "Charoset" with orange juice or any alcohol or liquor of your choice (Sherry, Whisky, orange liquor, etc...).
You can also coat those truffles with chopped roasted
walnuts or even melted chocolate (like with chocolate truffles).

Serving suggestions:
Those "Charoset Truffles" can be eaten at any time of the day with a cup of tea or coffee.
Just remember that they are made with highly dangerous (purgative/laxative) ingredients, so don't eat too many of them (lol)...

****************

~ Charoset Marocain ~
Recette tirée du livre "Jewish Cooking In America" de Joan Nathan et adaptée par Rosa @ Rosa's Yummy Yums.

Pour environ 60 petites truffes.

Ingrédients:

2 Tasses de Dattes dénoyeautées
1/2 Tasse de Raisins secs blonds
1/2 Tasse de Raisins secs foncés
1/2 Tasse de Noix de Grenoble
1 CC de Cannelle en poudre (en option)
1-2 CS de Vin sucré pour Pessa'h (voir remarques)
Sucre cristallisé, pour recouvrir les truffes (voir remarques)

Méthode:
1. Mixer les dattes, raisins et les noix dans un blender jusqu'à ce que le mélange soit homogène (purée fine) et commence à former une boule.
2. Ajouter la cannelle et assez de vin afin que ça forme une masse collante.
3. Recouvrir une plaque de papier sulfurisé.
4. Y placer des petits tas (1 CC) avec la masse.
5. Former des petites boules de la taille d'une noisette avec
vos mains, au préalable humidifiées.
6. Mettre au réfrigérateur pendant 3 heures ou jusqu'à ce qu'elles soient fermes.
7. Les rouler dans le sucre cristallisé.
8. Servir.

Remarques:
Vous pouvez utiliser d'autres noix (noisettes, pécan, cajou, etc...).

Pour plus de saveur, rajoutez un peu de zeste d'orange.
Comme je n'avais pas de vin sucré pour Pessa'h, j'ai utilisé du Porto. Vous pouvez aussi mouiller votre "Charoset" avec du jus d'orange ou avec la liqueur de votre choix (Sherry, Whisky, liqueur d'orange, etc..).
Au lieu d'utiliser du sucre cristallisé pour recouvrir vos truffes, utilisez des noix de Grenoble torréifiées et hachées ou même du chocolat fondu (comme pour les truffes au chocolat).

Idées de présentation:
Ces truffes peuvent être mangées à toute heure de la journée, accompagnées de thé ou de café.
Attention: N'oubliez pas que ce mélange de fruits secs est hautement dangeureux (laxatif et purgatif), alors allez-y mollo avec les quantités (lol)...