Showing posts with label Bars. Show all posts

Wednesday, March 19, 2014

BLACK AND WHITE WEDNESDAY #121 - A SWEET SWEET SWISS TREAT

Läckerli
- Läckerli, A Taste Of Childhood -

If you are interested in getting the recipe for those delicious Swiss cookie bars, then head over there!

This picture was submitted to "Black & White Wednesday", an event created by Susan at "The Well-Seasoned Cook". This week it is hosted by Deepali Jain at "Lemon in Ginger" (click here in order to see who is hosting the next roundup).

Friday, February 18, 2011

PEANUT BUTTER, CHOCOLATE & COFFEE COOKIES BARS

pB Cookie Picnik collage 2 bis
Some people adore peanut butter, others are not too enthusiastic about it and another category of people dislike it totally. If you know me well it is no mystery to you that I am one of those foodies who is gaga about this devilishly luscious, creamy, slightly sweet and rich condiment. As a matter of fact I am bananas about peanuts in general...

One can make so many yummy things and be very creative with peanut butter. From desserts, pastries, sauces to savory dishes you have the choice. There are no
limits when it comes to baking or cooking with it. Just have a look on the net and you'll see that there is an incredible quantity of peanut butter-based recipes on offer. It is impossible not to find one that suits you.

As a child I did my first experiments with peanut butter in England while on holidays at my grandparents. They always had a jar of that gloppy stuff in their pantry. We ate it generally in the morning with "plastic bread" toasts. My grandmother who loves overripe bananas (eeewww, nasty and so sickly!) made sandwiches with peanut butter and slices of that disgustingly blackened fruit. Apart from salted butter it was the only spread I liked to use as ultra-bitter store bought marmalade (no matter it's quality) was never my thing - the homemade version is much better and more refined as well as flavorful.

At home peanut butter was something we bought very seldom and once again it was solely used to accompany bread or crackers. We never ate baked goods made with it, what a pity! Anyway, in opposition to the vast majority of American kids who are fed on PB & Jam sandwiches and adore this snack I have to say that this combination was never my favorite. As a matter of fact I find it really icky. It repulses me quite violently and gives me the shivers, brrrr! On the contrary, I personally find that the association between peanut butter and honey (especially white honey) or peanut butter and Nutella is heavenly and so harmonious as if they were meant to mingle together (that implies only me, of course)!

Peanut butter far from being a contemporary staple. Although we might think that Americ
ans are at the origin of it considering the fact that they consume tons of this goody and since it is impossible to imagine this nation without it, they are just the ones who started commercialising this precious ingredient before anybody else.

Already in 950 B.C. the ancient Incas used peanuts (which originate from South America) to make a paste-like mixture. Early explorers brought plants to Africa, peanuts to Spain (trade) and finally imported them into the American Colonies where they were exchanged against other merchandise. As you can see the USA was not the first country to benefit from that fabulous legume (yes, it's not a nut!). The first commercial peanut crop was grown in North carolina around 1818 and in the early 1840's in Virginia.

It is only in 1890 that an unknown doctor "invented" peanut butter for health benefits and in 1903 that Dr. Ambrose Staub of Saint-Louis (Missouri) patented a peanut butter making machine. By 1914, many companies were producing that speciality, but it became a far more refined produce when in 1928, Joseph L. Rosenfield (the father of Skippy PB) created a churning process that made peanut butter even smoother.

The only time I am thankful for the "discovery" (very debatable though) of the Americas is in a foodie-oriented way. Had the "white bearded men" not set their foot on North or South American soil we might never have been able to develop so many wonderful desserts or dishes made with chocolate (xocolātl), peanuts (cacahuatl) in our treats, potatoes, beans, tomatoes, pumpkins, corn, passionfruits, avocados, pecans, cashews, mango, etc. I can't imagine a life without all these glorious and healthy fruits and vegetables.

Coming back to our much venerated peanut butter I have to admit that I am so obssessed by it and addicted to it's smoothiness as well as gorgeously nutty flavor that I had to eradicate it from my cupboards in order to come clean with my dependence. I ate far too much peanut butter and even gobbled it out of the pot. Now, although my passion for it has not died I can have an open jar next to me and not even reach for it or be tempted by it's contents...

So when I bought my first pot of this delightful substance after a few months of abstinence I knew that I was going to celebrate this event by baking something decadent with it. After flipping through my newly received "The King Arthur Flour's Cookie Companion" cookbook I found what I was looking for: "Peanut Butter Smoothies". As the original recipe was not immoral enough for me I decided to top each slice with additional coffee frosting.

Needless to point out that those infamous blondie-like cookie bars were incredibly soft, visciously gooey and dangerously calorific (the sweetness alone could kill a horse or make an elephant sleep/weak). My "Peanut Butter Chocolate Chips Cookie Bars With Coffee Frosting" are down-right delectable and guaranteed to send you to the heaven's above with a sugar coma and an overdose of pleasure!

PB Cookie Picnik collage 3 bis
~ Peanut Butter Chocolate Chips Cookie Bars With Coffee Frosting ~
Recipe adapted from "The King Arthur Flour's Cookie Companion" cookbook.

Makes 12 slices.

Ingredients For The "Bars":
6 Tbs (90g) Unsalted butter, at room temperature
1/2 Cup (143g) Natural smooth peanut butter
1 Cup (210g) Crystallized sugar

1/4 Cup (60g) Light brown sugar, packed
2 Big eggs

1 Tsp Natural vanilla extract
1 Cup (128g) Unbleached white flour
1/3 Tsp Sea salt
1 Tsp Baking powder
1 Cup (180g) Chocolate chips (bittersweet)

Ingredients For The "Coffee Frosting":
1 Tbs Instant coffee powder
1 Tbs Hot water
3/4 Cup (90g) Powder sugar, sieved
2-4 Tbs Double cream (35% fat)


Method For The "Bars":
1. Preheat the oven to 180° C (350° F).
2. Butter a 20 x 20cm (8 x 8 inches) brownie pan.
3. Mix together the flour, salt and baking powder. Set aside.
4. In a medium bowl, cream the butter and peanut butter together until smooth and
homogenous.

PB Cookie 3 bis
5. Whisk in the sugars until the mixture is light and smooth.
6. Add the eggs, one at a time, whisk well and scrape down the bowl after each addition.
7. Stir in the vanilla.
8. Add the the flour mixture and stir well until combined.
9. Incorporate the chocolate chips.
10. Spread the batter into the prepared pan.
11. Bake for about 30-32 minutes until the edges pull away slightly from the pan.
12. Cool completely before cutting and frosting.

Method
For The "Coffee Frosting":
13. Meanwhile, in a small bowl dissolve the coffee in the hot water.
14. Add the powder sugar and enough cream (in order to get a spreadable mixture). Mix well.

Remarks:
You can replace the bitterwseet chocolate chips by dark, semi-sweet chocolate chips or peanut butter chips.
You can ommit the frosting if you find that those bars are rich enough without it.

Serving suggestions:
Serve for afternoon tea or as an in-between sweet treat with some whipped cream or a scoop of vanilla ice cream and a cup of tea or coffee.

~~~~~~~~~~~~~~~~~~~~~~

PB Cookie Picnik collage 5 bis
~ Barres Au Beurre De Cacahuète, Chocolat Et Glaçage Au Café ~
Recette adaptée du livre "The King Arthur Flour's Cookie Companion".

Pour 12 tranches.

Ingrédients Pour Les "Barres":
90g de Beurre non-salé, à température ambiante
143g de Beurre de cacahuète (sans morceaux)
210g de Sucre cristallisé
60g de Sucre brun clair
2 Gros Oeufs

1 CC d'Extrait de vanille pure
128g de Farine blanche
1/3 CC de Sel de mer fin
1 CC de Poudre à lever
180g de Pépites de chocolat (à 60% de cacao)
Ingrédients Pour le "Glaçage Au Café":
1 CS de Café instantané
1 CS d'Eau chaude

90g de Sucre en poudre, tamisé
2-4 CS de Crème double (35% de mat. grasses)

Méthode Pour Les "Barres":
1. Préchauffer le four à 180° C.
2. Beurrer un moule à brownie de 20 x 20cm.
3. Mélanger ensemble la farine, le sel et la poudre à lever. Mettre de côté.

PB Cookie Picnik collage 4 bis
4. Dans un bol moyen, battre le beurre et le beurre de cacahuète en pommade (le mélange doit être homogène).
5. Ajouter les sucres et battre jusqu'à ce que le mélange soit léger.
6. Ajouter les oeufs, un à un et bien mélanger (nettoyer les bords à l'aide d'une langue de chat après chaque ajout).
7. Incorporer la vanille.
8. Puis incorporer le mélange farine/sel/poudre afin d'obtenir une pâte homogène.
9. Ajouter les pépites de chocolat et bien mélanger.
10. Etaler la pâte dans le moule.
11. Cuire pendant 30-32 minutes, jusqu'à ce que les bords se détachent légèrement du moule.
12. Laisser refroidir complètement avant d'étaler le glaçage.

Méthode Pour le "Glaçage Au Café":
13. Pendant ce temps, dans un petit bol, dissoudre le café instantané dans l'eau chaude.
14. Ajouter le sucre, assez de crème (afin d'obtenir un glaçage étalable) et mélanger.


Remarques:
Vous pouvez remplacer les pépites de chocolat à 60% par des pépites au chocolat au lait ou des pépites de beurre de cacahuète.
Si vous pensez que ces barres sont assez assez riches comme ça, alors il vous est possible d'omettre le glaçage.

Idées de présentation:
Servir pour votre quatre heures ou comme snack et accompagner avec de la crème fouettée, une boule de glace vanille ainsi qu'avec du thé ou du café.

PB Cookie Picnik collage 1 bis

Friday, May 7, 2010

DATE BARS - BARRES AUX DATTES


I have a very special relationship with food. You see, I tend to act like a squirrel and keep perishable products for far too long. Because of that bad mania, I generally end up creating menus or making treats in order to rescue from the dustbin the food that I have amassed greedily and stocked as if I were preparing for war...

So, as I had a leftover packet of Christmas dates that was about to expire, I thought that it would be great to not let it rot any further and to use it for making a sweet something that'll uplift our spirits which have been shattered by the awful weather outside. Some of the best treats to bring back a smile on your face are certainly cookie bars, so that's what I decided to bake.

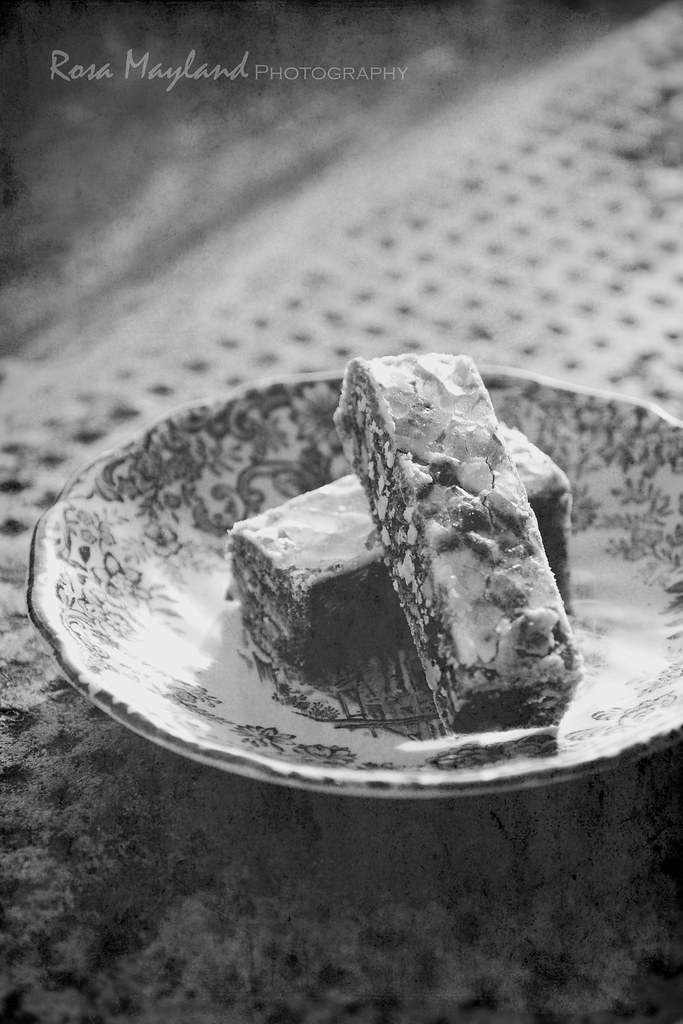
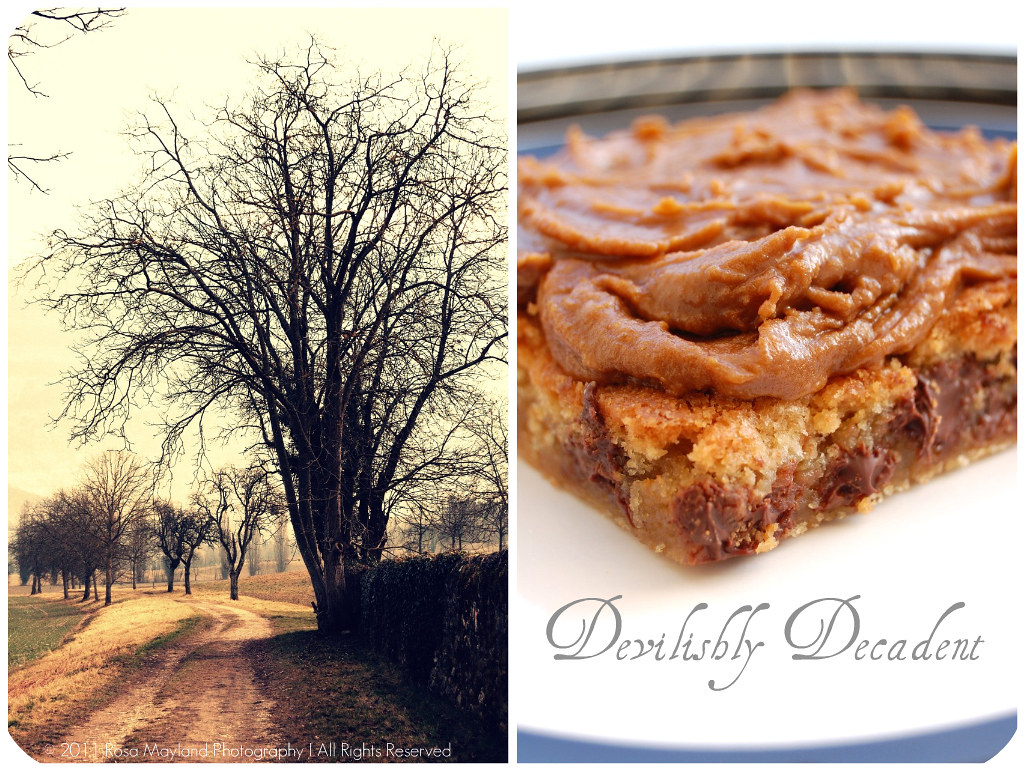
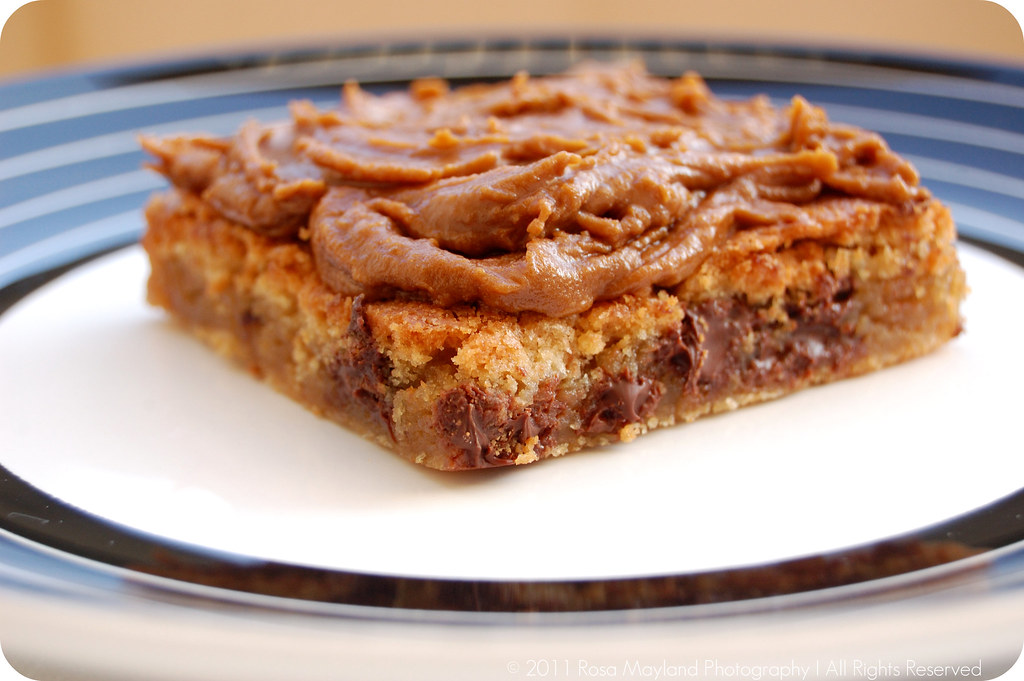
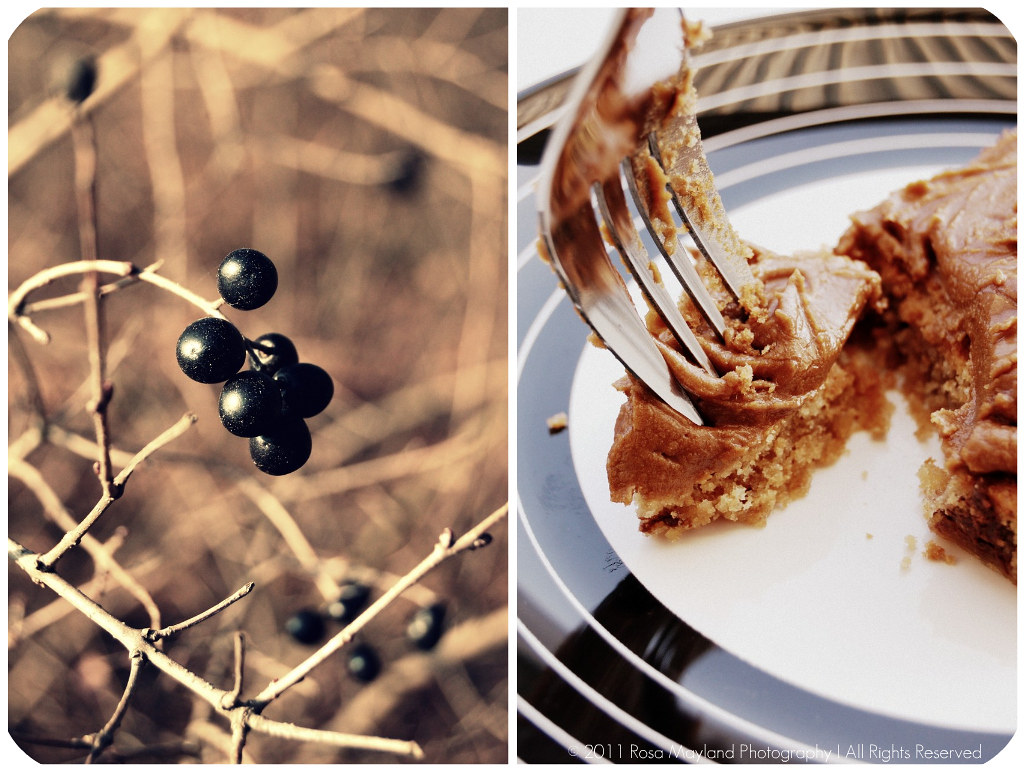
After a little research, I found the perfect bar in Tish Boyle's "The Good Cookie". If you can't find anything interesting to bake in this "bible",
then you must be a cookie hater! There is not one recipe in this book that you would want to make and most importantly, all of the recipes I tested until now have been very successful.

The "Date Bars" are wonderful on all levels. They have a delightful spicy, nutty, buttery and fruitty flavor and a very pleasant flaky, crunchy as well as chewy (not too much, though) texture. Those bars are excellent and extremely addictive. Perfect for picnics, brunches or tea time!

~ Date Bars ~
Recipe taken from Tish Boyle's "The Good Cookie" and slightly adapted by Rosa @ Rosa's Yummy Yums 2010.

Makes 16 bars.

Ingredients for the "Sweet Pastry Crust":
1 1/3 Cups All-purpose flour
1/3 Cup Granulated sugar
1/2 Tsp Sea salt
1/2 Cup (1 stick) Cold unsalted butter, cut into
1/2-inch cubes

1 Large egg yolk
2 Tsp Cold water
1 Tsp Vanilla extract
Ingredients for the "Date Filling":
2 Cups pitted dates, cut in half
1/3 Cup Granulated sugar
1 1/2 Cups Water
1 Tsp Finely grated organic orange zest

1/4 Tsp Sea salt
1 Cinnamon stick

Ingredients for the "Topping":
2/3 Cup All-pupose flour
1/4 Cup Firmly packed dark brown sugar
1 Tsp Ground cinnamon
1/8 Tsp Sea salt
1/2 Cup Walnuts, coarsely chopped
60g Unsalted butter, melted Confectioner's sugar for dusting (optional)


Method for the "Sweet Pastry Crust":
1. Position a rack in the centre of the oven and preheat the oven to 180° C (350° F).
2. Grease the bottom and sides of a 22cm (9-inch) square baking pan
.
3. Place the flour, sugar and salt in the bowl of a food processor and process until blended.
4. Scatter the butter pieces over the flour mixture a
nd process until the mixture resembles coarse meal, about 6 seconds.
5. In a small bowl or cup, whisk together the egg yolk, water and vanilla extract.
6. With the food processor running, add the yolk mixture through the feed tube and process just until the dough begins to come together in large clumps, 15
to 20 seconds.
7. Scrape the dough into prepared pan and, using your fingers, pat it evenly into the bottom of the pan.

8. Bake the crust until golden, 20 to 25 minutes.
9. Transfer the pan to a wire rack to cool while you prepare the date filling a
nd topping.
Method for the "Date Filling":
1. In a medium saucepan, combine dates, sugar, water, orange zest, salt and cinnamon.
2. Bring to a boil and reduce the heat. Simmer for about 15 to 20 minutes until the dates are tender.
3. Let the mixture cool for about 10 minutes, then remove the cinnamon stick and transfer to the bowl of a food processor.
4. Process the mixture until smooth.
5. scrape the filling onto the cooled crust and spread evenly, covering the crust completely.
Method For the "Topping":
1. In a medium bowl, mix together the flour, sugars, cinnamon and salt until blended.
2. Stir in the nuts and then the melted butter, until the mixture comes together.
3. Sprinkle the topping evenly over the date filling, covering it.
Method for the "Baking":
1. Bake at 180° C (350° F) for about 25 to 30 minutes, until the top is lightly browned. 2. Cool completely on a wire rack.
3. Cut into 16 bars and sprinkle with the confectioner's sugar.

Remarks:

You can replace the dark brown sugar by light brown sugar and the walnuts by pecans.
Store those bars in an airtight container (I keep them in the fridge) at room temperature for up to 5 days.

Serving suggestions:
Eat those squares with some ice cream (vanilla, pecan, walnut, caramel, etc...) or alone.

~~~~~~~~~~~~~~~~~~~~~~


~Barres Aux Dattes ~
Recette tirée du livre "The Good Cookie" par Tish Boyle et adaptée par Rosa @ Rosa's Yummy Yums 2010.

Donne 16 barres.

Ingrédients pour la "Pâte Sucrée":
170g de Farine fleur/blanche
70g de Sucre cristallisé
1/2 CC de Sel
120g de Beurre non-salé froid et coupé en petits cubes
1 Gros jaune d'oeuf
2 CC d'Eau glacée
1 CC d'Extrait de vanille
Ingrédients pour la "Garniture Aux Dattes":
~315g de Dattes dénoyautées et coupées en deux
70g de Sucre crystallisé
360ml/g d'Eau
1 CC de Zeste d'orange bio
1/4 CC de Sel de mer

1 Bâtonnet de cannelle
Ingrédients pour le "Streusel":
85g de Farine blanche
60g de Sucre brun foncé
1 CC de Cannelle en poudre
1/8 de CC de Sel de mer
60g de Noix de Grenoble, hachées grosssièrement
60g de Beurre non-salé, fondu Sucre en poudre pour saupoudrer (en option)

Méthode
pour la "Pâte Sucrée":
1. Positionner une grille de cuisson au milieu du four et préchauffer à 180° C (350° F).
2. Beurrer/graisser le fond et les bord
s d'un moule carré de 22cm (9-inch).
3. Mettre la farine, le sucre et le sel dans le bol du mixer et mixer jusqu'à ce que ça soit bien homogène.

4. Disperser les cubes de beurre sur le mélange farine/sucre/sel et mixer 6 secondes afin d'obtenir un mélange grossier ressemblant à un appareil à crumble.
5. Dans un petit bol ou une tasse, battre ensemble le jaune d'oeuf, l'eau et l'extrait de vanille.
6. Ajouter ce mélange au "crumble" dans le mixer et pulser pendant 15-20 secondes jusqu'à obtention d'une pâte.

7. Racler cette pâte et la mettre dans le moule, puis, en utilisant vos doigts, bien la presser de manière afin de couvrir le fond du moule de manière égale.
8. Cuire pendant 20 à 25 minutes, jusqu'à ce que la pâte soit dorée.
9. Sortir le moule du four et le mettre sur une grille afin que la pâte refroidisse pendant que vous préparez l'appareil aux dattes et le streusel.

Méthode pour la "Garniture Aux Dattes":
1. Dans une casserole moyenne, mélanger ensemble les dattes, le sucre, l'eau, le zeste, le sel et le bâtonnet de cannelle.
2. Porter à ébullition et réduire la température. Faire mijoter pendant 15 à 20 minutes, jusqu'à ce que les dattes soient tendres.
3. Faire refroidir le mélange pendant 10 minutes puis enlever le bâtonnet de cannelle et mettre le mélange dans un blender.
4. Mixer jusqu'à obtention d'une purrée fine.
5. Verser le mélange sur la croûte et répartir de manière homogène en recouvrant entièrement la croûte.
Méthode pour le "Streusel":
1. Dans un bol moyen, mélanger la farine, les sucres, la cannelle et le sel.
2. Ajouter les noix concassées et le beurre fondu. Bien mélanger afin que la préparation soit légèrement colmatée.
3. Répartir le streusel sur la purrée de dattes afin de la recouvrir entièrement.
Méthode pour la "Cuisson":
1. Cuire à 180° C (350° F) pendant 25 à 30 minutes jusqu'à ce que le dessus soit légèrement doré.
2. Laisser refoidir sur une grille.
3. Couper en 16 parts égales et saupoudrer avec le sucre en poudre.


Remarques:
Vous pouvez remplacer le sucre brun foncé par du sucre brun clair et les noix de Grenoble par des noix de pécan.
Ces barres se conservent 5 jours (à température ambiante - je les mets au frigo) dans une boîte.

Idées de présentation:
Vous pouvez servir ces carrés avec une boule de glace (vanille, café, noix de pécan, noix de Grenoble, caramel, etc...) ou servis tel quel.

Friday, January 29, 2010

NANAIMO BARS - THE DARING BAKERS

This month has been quite hectic for me and being able to complete my Daring Bakers' Challenge has been more than testing. Anyway, no matter how things have been for me lately, I was not going to miss the opportunity of letting the healing powers of baking soothe my body and soul...

The January 2010 Daring Bakers' challenge was hosted by Lauren of Celiac Teen who chose Gluten-Free Graham Wafers and "Nanaimo Bars" as the challenge for the month. The sources she based her recipe on are 101 Cookbooks and www.nanaimo.ca.

"Nanaimo Bars" originate from Canada. This no-bake confection is named after the West-Coast city of Nanaimo in British Columbia. This wonderfully rich dessert item consists of a wafer crumb-based layer, topped by a layer of light vanilla or custard flavoured butter icing, which is covered in chocolate made from melted chocolate squares.

Just like any bar, "Nanaimo Bars" are not for the faint of heart when it comes to calories. This easy to make chocolaty, nutty, coconutty, vanilla goodness is irresistibly decadent. They are so bad for your cholesterol, but oh so good for your spiritual health!

Many thanks to Lauren for introducing me to the gluten-free world and for making me realise that baked goods which contain no gluten are as delicious as the gluten-ladden ones.

~ Nanaimo Bars ~

Preparation time:

• Graham Wafers:
30 to 45 minutes total active prep, 2 ½ hours to overnight and 45 minutes inactive prep.

• Nanaimo Bars:
30 minutes.


Equipment required:
• Food Processor
• Bowls
• Parchment paper or silpats
• Cookie sheets
• Double boiler or pot and heatproof bowl
• 8 by 8 inch square pan
• Hand mixer or stand mixer (You may use a wooden spoon, but this makes it much easier!)
• Saucepan For Gluten-Free Graham Wafers

****************

GRAHAM CRACKERS

Ingredients:
1 Cup (138g/4.9 ounces) Sweet rice flour (also known as glutinous rice flour)
3/4 Cup (100g/3.5 ounces) Tapioca Starch/Flour
1/2 Cup (65 g/2.3 ounces) Sorghum Flour
1 Cup (200g/7.1 ounces) Dark Brown Sugar, Lightly packed
1 Tsp (5ml) Baking soda
3/4 Tsp (4ml ) Kosher Salt
7 Tbs (100g/(3 ½ ounces) Unsalted Butter (Cut into 1-inch cubes and frozen)
1/3 Cup (80ml) Honey, Mild-flavoured such as clover
5 Tbs (75ml) Whole Milk
2 Tbs (30ml) Pure Vanilla

Method:
1. In the bowl of a food processor fitted with a steel blade, combine the flours, brown sugar, baking soda, and salt. Pulse on low to incorporate. Add the butter and pulse on and off, until the mixture is the consistency of a coarse meal. If making by hand, combine aforementioned dry ingredients with a whisk, then cut in butter until you have a coarse meal. No chunks of butter should be visible.
2. In a small bowl or liquid measuring cup, whisk together the honey, milk and vanilla. Add to the flour mixture until the dough barely comes together. It will be very soft and sticky.
3. Turn the dough onto a surface well-floured with sweet rice flour and pat the dough into a rectangle about 1 inch thick. Wrap in plastic and chill until firm, about 2 hours, or overnight. 4. Divide the dough in half and return one half to the refrigerator. Sift an even layer of sweet rice flour onto the work surface and roll the dough into a long rectangle, about 1/8 inch thick. The dough will be quite sticky, so flour as necessary. Cut into 4 by 4 inch squares. Gather the scraps together and set aside. Place wafers on one or two parchment-lined baking sheets. Chill until firm, about 30 to 45 minutes. Repeat with the second batch of dough.

5. Adjust the rack to the upper and lower positions and preheat oven to 350 degrees Fahrenheit (180 degrees Celsius).
6. Gather the scraps together into a ball, chill until firm, and reroll. Dust the surface with more sweet rice flour and roll out the dough to get a couple more wafers.
7. Prick the wafers with toothpick or fork, not all the way through, in two or more rows.
8. Bake for 25 minutes, until browned and slightly firm to the touch, rotating sheets halfway through to ensure even baking. Might take less, and the starting location of each sheet may determine its required time. The ones that started on the bottom browned faster.
9. When cooled completely, place enough wafers in food processor to make 1 ¼ cups (300 mL) of crumbs. Another way to do this is to place in a large ziplock bag, force all air out and smash with a rolling pin until wafers are crumbs.

***************

NANAIMO BARS

Ingredients for the "Bottom Layer":
1/2 Cup (115g/4 ounces) Unsalted Butter
1/4 Cup (50g/1.8 ounces) Granulated Sugar
5 Tbs (75ml) Unsweetened Cocoa
1 Large Egg, Beaten
1 1/4 Cups (300ml/160 g/5.6 ounces) Gluten Free Graham Wafer Crumbs (See previous recipe) 1/2 Cup (55g/1.9 ounces) Almonds (Any type, Finely chopped)
1 Cup (130g/4.5 ounces) Coconut (Shredded, sweetened or unsweetened)

Method for the "Bottom Layer":
1. Melt unsalted butter, sugar and cocoa in top of a double boiler.
2. Add egg and stir to cook and thicken. Remove
from heat.
3. Stir in crumbs, nuts and coconut.
4. Press firmly into an ungreased 20x20cm (8 by 8 inch) pan.

Ingredients for the "Middle Layer":
1/2 Cup (115g/4 ounces) Unsalted Butter
2 Tbs and 2 Tsps (40ml) Heavy Cream
2 Tbs (30ml) Vanilla Custard Powder (Such as Bird’s. Vanilla pudding mix may be substituted.)
2 cups (254g/8.9 ounces) Icing Sugar

Method for the "Middle Layer":
1. Cream butter, cream, custard powder, and icing sugar together well.
2. Beat until light in colour.
3. Spread over bottom layer.


Ingredients for the "Top Layer":
115g (4 ounces) Semi-sweet chocolate
2 Tbs (28g/1 ounce) Unsalted Butter

Method for the "Top Layer":
1. Melt chocolate and unsalted butter over low heat.
2. Cool.
3. Pour over middle layer and chill.

***************

REMARKS

These bars freeze very well, so don’t be afraid to pop some into the freezer.
The graham wafers may be kept in an airtight contai
ner for up to 2 weeks.
If making the graham crackers with wheat, replace the gluten-free f
lours (tapioca starch, sweet rice flour, and sorghum flour) with 2 ½ cups plus 2 tbsp of all-purpose wheat flour, or wheat pastry flour. Watch the wheat-based graham wafers very closely in the oven, as they bake faster than the gluten-free ones, sometimes only 12 minutes.
For the Nanaimo Bars, if making with wheat, replace the gluten-free graham wafer crumbs with equal parts wheat graham wafer crumbs.

***************

Etant donné la longueur du texte original, je n'ai malheureusement pas pu faire une traduction française de ce billet et je m'en excuse auprès de tous mes amis lecteurs et blogueurs francophones!

C'est pourquoi je vous suggère de vous rendre sur le blog mentionné ci-dessous. Vous y trouverez cette recette en version française.

Chez Isa de "Les Gourmandises d'Isa" (Canada)

Wednesday, September 2, 2009

LEMON & ROSE CHEESECAKE BARS

Barbara at the great "Winos And Foodies" blog is a very kind, courageous and strong woman from Australia who has kicked cancer in it's butt and celebrated it with other bloggers in July. And man, we are all so relieved that she finished her chemo treatment!

Every year, Barbara is organi
ses an event called "A Taste Of Yellow" in order to support LiveSTRONG Day . This time it will occur on the 2nd of October 2009 in order to coincide with the date Lance Armstrong was diagnosed with cancer 10 years ago..

She is asking all (food)bloggers to take part in the round-up by making a dish that should contain some yellow (banana, cheese, saffron, etc...). Closing day is September the 13th 2009, but I guess that if you ask her politely, she will accept your recipe even if you send it two or three days later (Email your entries to her at atasteofyellowATgmailDOTcom)...

Although you might find the subject a little redundant, today I will be presenting yet another "Cookie Bar" recipe...

I'm awfully sorry for always blogging about this Anglo-Saxon and for sounding like a scratched CD, but "Slices" are like the Holy Grail to me. I can't help baking them on a regular basis as
as they are so scrumptious, easy to make and versatile. I just cannot go through a month without testing a new "Square" recipe.

As I had quite a few cartons cream cheese in my fridge (bought on sale) and since I had been craving cheesecake lately, I thought that I could make "Cheesecake Bars". So, I went on the net looking for recipes and I came across Martha Stewart's delicious "Lemon Cheesecake Squares".

This basic recipe is great as it can be played around wi
th to suit individual cravings of the moment and one can customize it to his'/her's liking. That's exactly what I wanted to do.

I didn't have any Graham Crackers at home, so I used Lotus Caramelised Biscuits from Belgium. I ommited the lemon juice as well as the lemon zest. Instea
d, I flavored my cream cheese filling with lemon extract, vanilla and ground dried rosebuds. Luckily, that combination worked fine and my "Lemon & Rose Cheesecake Bars" were delightful.

The cookie base is deliciously caramell
y, slightly salty and crunchy, and the cream cheese filling is delicately fragrant and creamy-textured. Those bars are fabulous, especially if served with a not-too-sweet seasonal "Cinnamon Prune Compote".

A dessert item that is extremely irresistible and so tooths
ome!

~ Lemon & Rose Cheesecake Bars ~
Recipe by
Martha Stewart and adpted by Rosa @ Rosa's Yummy Yums.

Makes 16 squares.

Ingredients for the "Crust":
1 1/4 Cups (145g) Lotus caramel cookies (or Graham Crackers), finely powdered
2 Tbs (30g) Castor sugar
3 Tbs (45g) Unsalted butter, melted
1 Pinch Sea salt
Ingredients for the "Filling":
480g (2x 8 oz) Cream cheese, at room temperature
3/4 Cup (158g) Castor sugar
1/2 Tbs Flour
1 Pinch Sea salt
2 Large eggs, at room temperature
2 Dried rosebuds, powdered in a mortar
1/2 Tsp Pure vanilla extract
2-3 Drops Lemon extract


Method for the "Crust":
1. Preheat oven to 170° C (325° F).
2. Butter a 22 X 22cm (8-inch) square baking pan and line the bottom with parchment paper.
3. In a food processor, blend cookies/crackers w
ith sugar and salt until finely ground. Add the melted butter and pulse until moistened.
4. Transfer crumb mixture to prepared pan, and pat in gently.
5. Bake until beginning to brown, 10 to 12 minutes
.
6. Let cool on a rack.
Method for the "Filling":
7. Place cream cheese in food processor and blend until smooth and creamy.
8. Add sugar, flour, salt, eggs, rosebud powder, vanilla, lemon e
xtract and blend until smooth.
9. Pour mixture onto hot crust in pan and smooth the top.
10. Bake until set (filling should jiggle only slightly when pan is gently shake
n), 30 to 35 minutes.
11. Cool completely in pan.
12. Cover very loosely with plastic wrap and chill until firm, at least 12 hours.

Remarks:
The longer the cheesecake squares are chilled, the bet
ter, so don't be hasty.
Keep them in the fridge for up to 5 days.


Serving suggestions:

Serve with a cinnamon prune/plum compote.


****************

~ Carrés De Cheesecake Au Citron Et A La Rose ~
Recette de
Martha Stewart, adaptée par Rosa @ Rosa's Yummy Yums.

Pour 16 carrés.

Ingrédients pour la "Croute":
1 1/4 Cups (145g) de Biscuits Lotus au caramel (ou de Graham Crackers), réduits en poudre
2 CS (30g) de Sucre cristallisé
3 CS (45g) de Beurre non-salé, fondu
1 Pincée de Sel de mer
Ingrédients pour la "Garniture":
480g de Cream cheese, à température ambiante
158g de Sucre cristallisé
1/2 CS (7.5g) de Farine
1 Pincée de Sel de mer
2 Gros oeufs, à température ambiante
2 Boutons de rose, réduits en poudre (dans un mortier)
1/2 CC d'Extrait de vanille pure
2-3 Gouttes d'extrait de citron

Méthode pour la "Croûte":
1. Préchauffer le four à 170° C (325° F).

2. Beurrer un moule de 22 X 22 cm et recouvrir le fond de papier sulfurisé.
3. Passer les biscuits/crackers avec le le sucre et le sel au mixer, puis ajouter le beurre et pulser jusqu'à ce que le tout soit bien humide.

4. Mettre ce mélange dans le moule et applatir avec les doigts.
5. Cuire pendant 10 à 12 minutes.
6. Laisser refroidir sur une grille.

Méthode pour la "Garniture":
7. Mettre le cream cheese dans un batteur électrique et mixer afin qu'il devienne crémeux.
8. Ajouter le sucre, la farine, le sel, les oeufs, la poudre de boutons de rose, la vanille et l'extrait de citron, puis mixer jusqu'à ce que le tout soit homogène.

9. Verser ce méalnge sur la croûte et lisser.
10. Cuire
30 à 35 minutes, jusqu'à ce que la garniture soit figée (la garniture devrait légèrement trembloter quand le moule est secoué).
11. Faire refroidir (dans le moule).

12. Couvrir avec un film alimentaire et mettre au frigo au moins 12 heures.

Remarques:
Plus vous laisser ces carrés au frigo, plus ils seront meilleurs, alors ne soyez pas trop pressés.
Ils se gardent jusqu'à 5 jours au frigo.

Idées de présentation:
Servez ces carrés avec une compote de questches aromatisée à la cannelle et à la vanille.