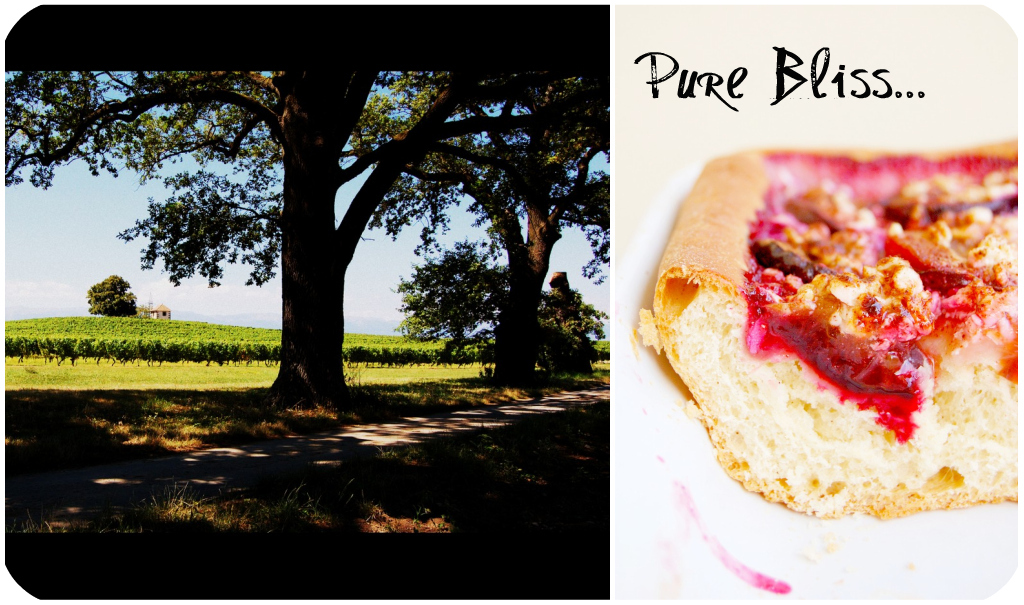
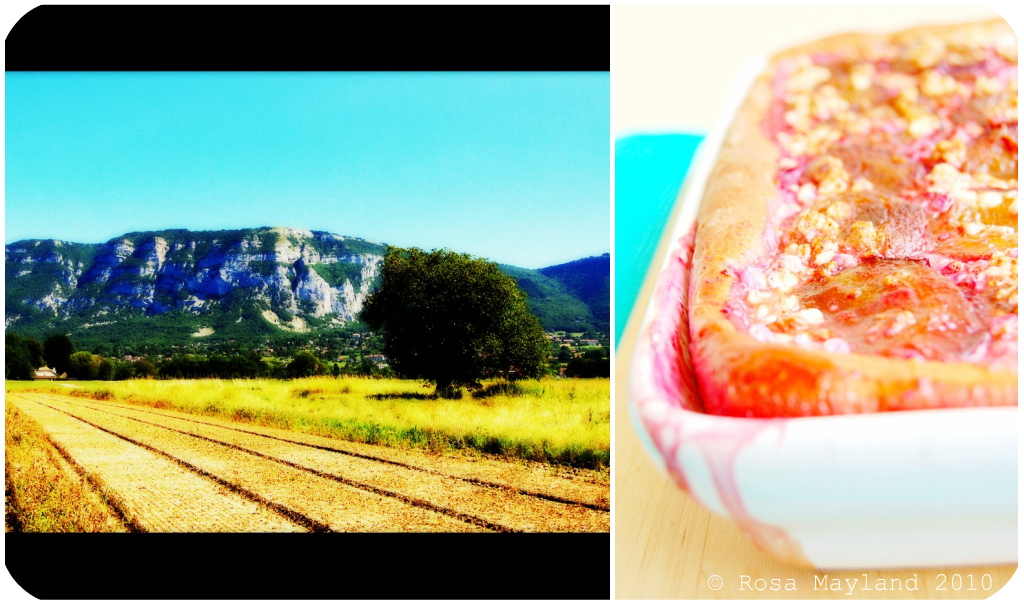
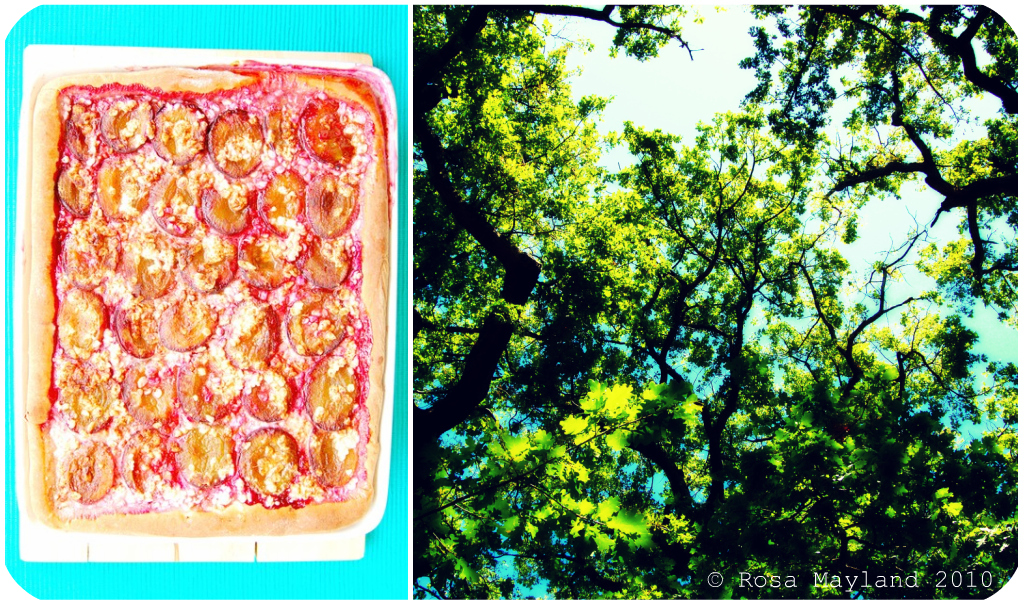
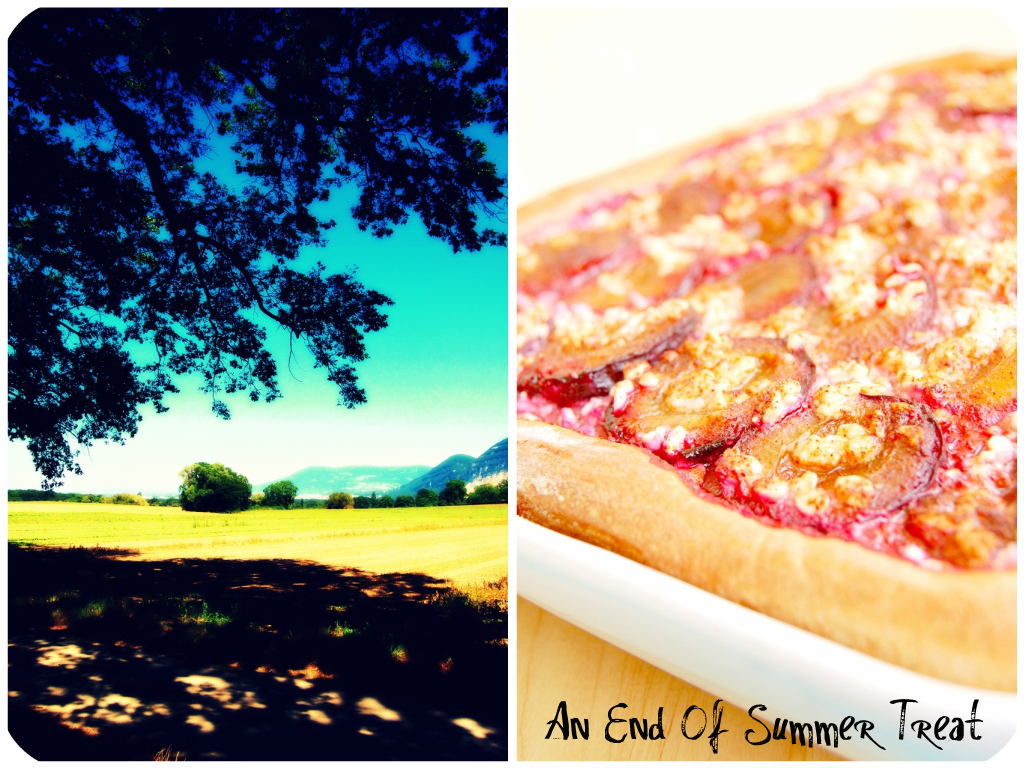
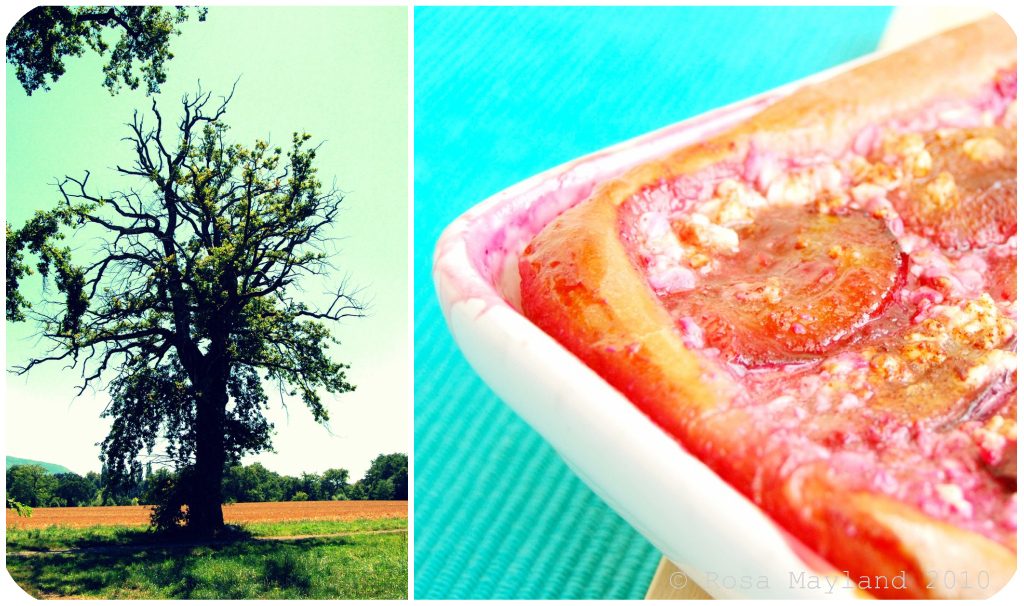
I can never get enough of yeasty treats, tarts and Italian plums. I find such grub irresistible and totally addicting. Those are some of my favorite things, hence the quasi-obsession I have with them. If you put such kinds of food in front of me I'll very likely stuff my face with them. Yes, I am a little "pig" and I am not ashamed of telling you that. Call me little Miss Piggy if you want (LOL Nonetheless, I know when to stop and how to control my diet)...Well, now has come the Italian plum season and, although it announces the end of summer I am incapable of not rejoicing at the idea of preparing divine pastries with those delightful stone fruits. In my opinion, they are far better than peaches and nectarines (only apricots come close to plums) as they are more exhalirating, flavorful and have a more gorgeous deep purple color.Italian plums are my most beloved variety of plums. With their slightly tart and almost lemony as well as smoky flavor they are quite different from the common plums that are widely spread and lot less complex as well as delicate taste-wise (not as multilayered in flavor).Also known as questches or pruneaux in Switzerland (or France), they make me travel back in the past and bring back cherished memories. My Swiss grandparents had many fruit trees around their house and always picked tons of Italian plums. They used them for making "Gâteau Aux Pruneaux" (plum tart) and the rest which could not be eaten straight away was put in the freezer. I can still remember biting into those frozen whole plums and being blown away by their lusciousness. When I visited "Pépé et Mémé" (Nan & Pop in French) during the summer that's what we ate to cool down. That icy treat was fantastic and was even more fulfilling than ice cream.A while ago, I was leafing through one of my Swiss cookery magazine and saw a recipe for a "Plum Tart" made with brioche dough. Of course, it caught my attention and made me salivate. I absolutely had to make something like that.
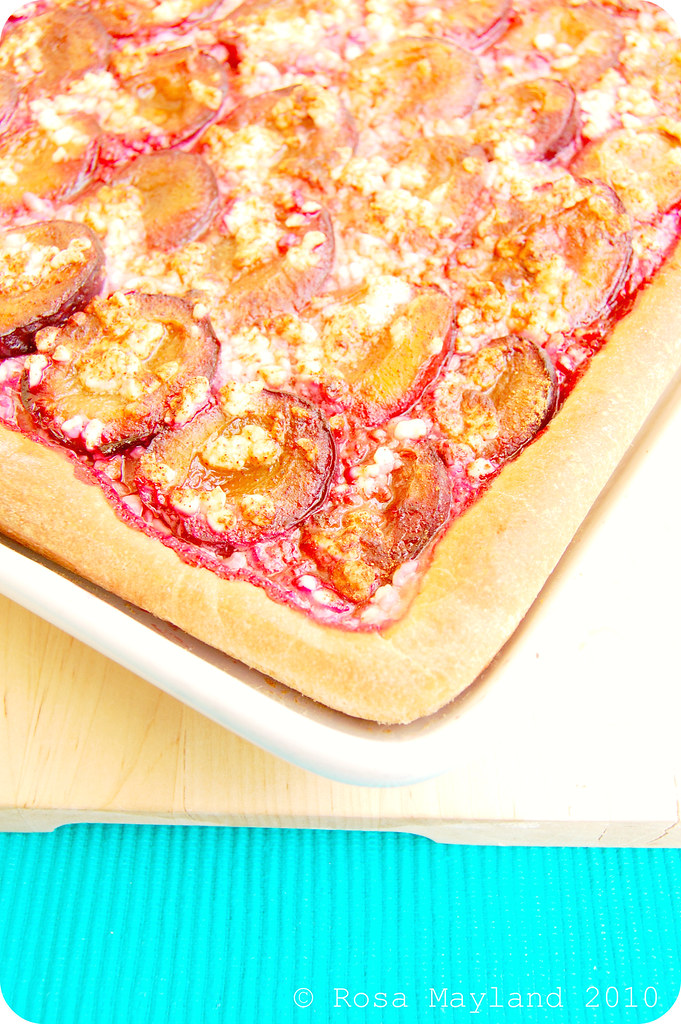
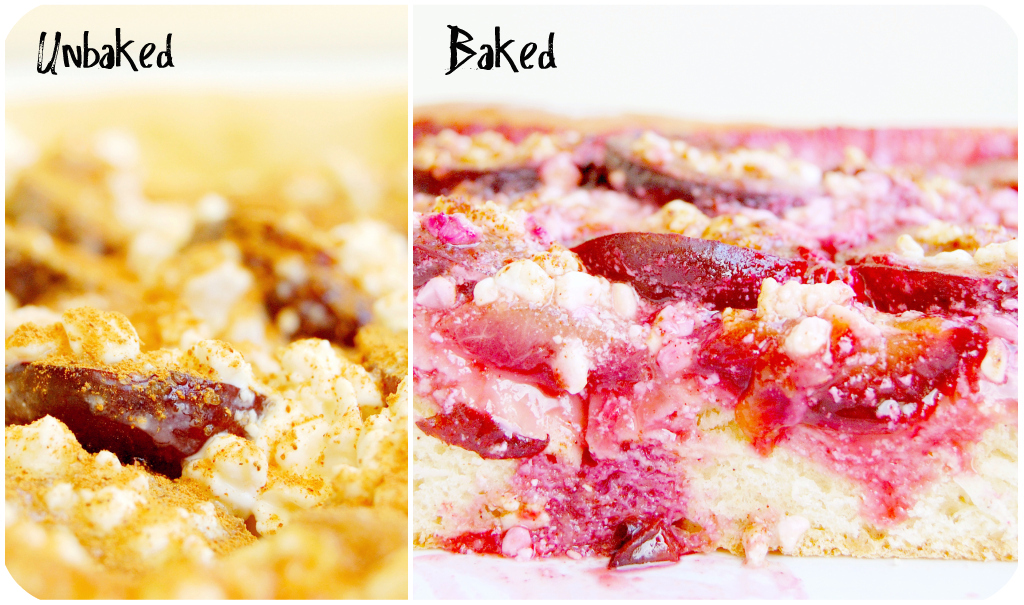
The "Italian Plum Focaccia With Cottage Cheese" I created was very much inspired by the one of "Cuisine De Saison". I used a very similar dough base, but instead of topping the plums with crumble I thought that it would be a great idea to use cottage cheese instead. The result was just incredibly scrumptious!The bread was soothingly sweet, rich and pillowy soft. The combination of cinnamon, plums and cottage cheese was perfect and tasted divine. The focaccia was a really success and did not last long.This post is submitted to Yeastspotting.
~ Italian Plum & Cottage Cheese Focaccia ~Recipe by Rosa @ Rosa's Yummy Yums 2010
Makes 1 focaccia/for about 4-6 people.
Ingredients For The "Dough":280g All-purpose flour25g de Light brown sugar1 1/2 Tsp Vanilla sugar1 Tsp Sea salt100ml Lukewarm milk1 Tsp Dry yeast or 10 g Fresh yeast25g Browned butter, at room temperature1 Egg (63g)Flour for rolling the dough
Ingredients For The "Filling":600-700g de Italian plums/quetsches150g Cottage cheese50-60g Light brown sugar1 Tsp Ground cinnamon2 Tbs Amaretto
Methode:1. In a bowl mix together the flour, the light brown sugar, the vanilla sugar and the salt. Make a well in the centre of the flour.2. Add the yeast to the lukewarm milk and let rest for 5 minutes.
3. Pour the yeasted milk in the well. Incorporate enough flour in order to obtain a thick paste. Let rest for about 20 minutes or until the mixture is bubbly.4. Add the butter and the egg. Mix well in order to get a ball of dough.5. Knead the dough for 10 minutes, until it is soft and passes the window pane test.6. Place the dough in a well-oiled bowl and cover with a humid towel. Let rise for 1 hour or until doubled in size.7. Roll the pastry in a 1 cm/0.4 inches thick rectangle and place it on a baking pan covered with baking paper.8. Cut the plums in half and remove the stone. Place the plums in neat and tigh t rows with the cut part facing up. Sprinkle the cottage cheese over the fruits and then the sugar as well as the cinnamon.9. Let the dough rise for about 30 minutes and preheat the oven to 200° C (400° F).
10. Sprinkle the Amaretto over the fruits and bake for about 25-30 minutes in the bottom part of the oven.11. Remove from the oven and let cool on a baking rack.
Remarks:Depending on how your plums are juicy you might have to bake the focaccia a little while longer so that your bread dough doesn't end up all soggy.
You can also flavor the dough with lemon zest or extract.
Serving suggestions:
Serve as a meal, dessert or teatime treat.
You can eat the focaccia with whipped cream or lemon pastry cream.
~~~~~~~~~~~~~~~~~~~~~~
~ Prune & Cottage Cheese Focaccia ~
Recette par Rosa @ Rosa's Yummy Yums 2010
Donne 1 focaccia/pour 4-6 people.
Ingrédients Pour La "Pâte":280g de Farine blanche25g de Sucre brun clair1 Sachet de Sucre v
anillé1 CC de Sel de mer100ml de Lait tiède1 CC de Levure sèche ou 10 g de levure fraîche25g de Beurre (non-salé) noisette, à température ambiante1 Oeuf (63g)Farine pour abaisser la pâteIngrédients Pour La "Garniture":600-700g de Pruneaux/quetsch
es150g de Cottage cheese50-60g de Sucre brun clair1 CC de Cannelle2 CS Amaretto1. Dans un bol, mélanger ensemble la farine, le sucre brun, le sucre vanillé et le sel. Former une fontaine au centre.
2. Délayer la levure dans le lait tiède et laisser reposer pendant 5 minutes.
3. Verser le mélange dans la fontaine et incorporer assez de farine afin d'obtenir une pâte visqueuse. Laisser reposer environ 20 minutes jusqu’à ce que le mélange commence à mousser.
4. Ajouter le beurre et l’oeuf, puis mélanger le tout afin de former une boule de pâte.5. Pétrir pendant environ 10 minutes afin d'obtenir une pâte lisse et élastique.6. Mettre la pâte dans un bol huilé, couvrir avec un film plastique et laisser lever pendant 1 heure ou jusqu'à ce que la pâte ait doublé de volume.
7. Abaisser la pâte sur un peu de farine en un rectangle d’env. 1 cm d’épaisseur et la déposer sur une plaque recouverte de papier sulfurisé.8. Couper les pruneaux en deux, les dénoyauter, puis les répartir bien serrés sur la pâte, face coupée vers le haut. Répartir le cottage cheese sur les quetsches puis saupoudrer le sucre et la cannelle.9. Laisser lever pendant 30 minutes et préchauffer le four à 200 °C.
10. Saupoudrer les fruits avec l'Amaretto et faire cuire la focaccia pendant environ 25 à 30 minutes dans le bas du four.
11. Retirer et laisser refroidir.
Remarques:
Si vos fruits sont juteux vous devrez sûrement cuire la focaccia un peu plus longtemps afin que la pâte ne soit pas trop détrompée et molle.
Vous pouvez aussi utiliser du zeste ou de l'extrait de citron pour parfumer votre pâte.
Idées de présentation:
Servir cette focaccia comme repas, dessert ou comme gourmandise entre les repas.
Cette focaccia peut être mangée avec de la crème Chantilly ou de la crème patissière au citron.

Damn, time passes so/too fast! In case you are like me, you might not have realized that September is coming to an end and that The Daring Bakers have once again geared up in order to flood the internet with their latest creations...
The September 2009 Daring Bakers' challenge is hosted by Steph of "a Whisk And A Spoon" (USA) who chose the French treat, "Vols-Au-Vent" based on the "Puff Pastry" recipe by Michel Richard from the cookbook "Baking With Julia" By Dorie Greenspan.
Although the idea of making "Puff Pastry" in my kitchen and rolling it on my oven totally freaked me out, I greeted this new baking joust with much excitement and great anticipation. I had always wanted to make my own "Pâte Feuilletée", yet never managed to make any until now. I guess that the reason why I never got to baking that delicacy has more to do with my subconscious cowardness (which was the real blocker) than with not my lack of space (a lame excuse).As I was not going to let myself get destabilized by my chicken ways , so I made the promise to honor the saying "When there's a will, there's a w ay " and gathered all my courage as well as inner strength to face the time-consuming task that lay ahead.
To my biggest surprise, it all went very smoothely and at the end, my sanity remained. Nobody was murdered, no pastry was thrown across t he kitchen and no profanities were uttered! Once my "Vols-Au-Vent" came out of the oven looking all golden and perfect, I was really relieved. I had another reason to be proud of myself. My ego an d confidence got magnificently boosted...Since we are only two at home, I divided the dough in half. I used one half to create sweet "Vols-Au-Vent" and froze the other half in order to make savory "Vols-Au-Vent" later on.
I wanted a fresh and fruity dessert that would not be too sugary, so I opted for a simple yet divine "Pastry Cream" filling (Dorie Greenspan's recipe) and decided to decorate my pastries with slices of Italian prune that I glazed runny jelly. I served my "Vols-au-vent" with cinnamon and red wine poaches figs. All that resulted in a tantalizingly delicate and ambrosial treat that delighted us to the highest point.
The pastry was incredibly flaky, light, crispy and had well-defined layers. It tasted of butter and was far from being bland or vinegary like most industrial "Puff Pastries" tend to be. It was perfect texture- and flavor-wise; worthy of any good bakery. Together with the lusciously creamy, vanillaed "Pastry Cream" and, the crunchy and extremely fragrant prunes, each bite brought you a step closer to heaven!!!I really wish to thank Steph for having choosen that fantastic recipe and for having helped me surpass myself and my fears.
~ Michel Richard's Puff Pastry Dough ~
Recipe taken fron "Baking With Julia" by Dorie Greenspan.
Yields 1.2 kg (2 1/2 pounds) dough.Equipment:Food processor (will make mixing easy, but this can be done by hand as well)Rolling pinPastry brushMetal bench scraper (optional, but recommended)Plastic wrap
Baking sheetParchment paperSilicone baking mat (optional, but recommended)Set of round cutters (optional, but recommended)Sharp knife
Fork
Oven
Cooling rack
Preparation Times:
. About 4-5 hours to prepare the puff pastry dough (much of this time is inactive, while you wait for the dough to chill between turns…it can be stretched out over an even longer period of time if that better suits your schedule).
. About 1 1/2 hours to shape, chill and bake the vols-au-vent after your puff pastry dough is complete.Note:This recipe makes more than you will need for the quantity o f vols-au-vent stated above. While I encourage you to make the full recipe of puff pastry, as extra dough freezes well, you can halve it successfully if you’d rather not have much leftover.***************

MAKING THE DOUGH
Ingredients:
2-1/2 Cups (354g) Unbleached all-purpose flour + extra for dusting the work surface
1-1/4 Cups (142g) Cake flour
1 Tbs Sea salt (you can cut this by half for a l ess salty dough or f or sweet preparations)
1-1/4 Cups (300ml) Ice water
1 Pound (454g) Very cold unsalted butterMixing The Dough:
1. Check the capacity of your food processor before you start. If it canno t hold the full quantity of ingredients, make the dough into two batches and combine them.
2. Put the all-purpose flour, cake flour, and salt in the work bowl of a food processor fitted with a metal blade and pulse a couple of times just to mix. Add the water all at o nce, pulsing until the dough forms a ball on the blade. The dough wi ll b e ve ry moist and pliable and will hold together when squeezed between your fingers (Actually, it will feel like Play-Doh.).3. Remove the dough from the machine, form it into a ball, with a small sharp knife, slash the top in a tic-tac-toe pattern. Wrap the dough in a damp towel and re frigerate for about 5 minutes.4. Meanwhile, place the butter between 2 sheets of plasti c wrap an d beat it with a rolling pin until it flattens into a square that's about 2.54cm (1 inch) thick. Take care that the butter remains cool and firm (If it has softened or become oily, chill it before co ntinuing.).
Incorporating The Butter:
5. Unwrap the dough and place it on a work surface dusted with all-purpose flour (A cool piece of marble is the ideal surface for puff pastry.) with your rolling pin (Preferably a French rolling pin without handles.), press on the dough to flatten it and then roll it into a 25cm (10 inches) square. Keep the top and bottom of the dough well floure d to prevent sticking and lift the dough and move it around frequently. Starting from the cen ter of the square, r oll out over each corner to create a thick center pad with "ears," or fl aps.
6. Place the cold butter in the middle of the dough and fold th e e ars ov er the butter, stretching them as needed so that they overlap slightly and encase the butter completely (If you have to stretch the dough, stretch it from all over; don't j ust pull the ends.). You should now have a package that is 20cm (8 inches) square.
Making The Turns:
7. Gently but firmly press the rolling pin against the top and bottom edges of the square (this will help keep it square). Then, keeping the work surface an d the top of the d ough well floured to prevent sticking, roll the dough into a recta ngle that is three times as long as the square you started with, about 61cm/24 inches (don't worry about the width of the rectangle: if you get the 61cm/24 inches, everything else will work itself out.) With this first roll, it is particularly important that the butter be rolled evenly along the len gth and width of the rectangle; check when you start rolling that the butter is moving along w ell, and roll a bit harder or more evenly, if necessary, to get a smooth, even dough-butter sandwich (use your arm-strength!).8. With a pastry brush, brush off the excess flour from the top of the d ough, and fold the rectangle up from the bottom and down from the top in t hirds, like a business letter, brushing off the excess flour. You have completed one turn.9. Rotate the dough so that the closed fold is to your left, lik e the spine of a book. Repeat the rolling and folding process, rolling the dough to a length of 61cm (24 inches) and then folding it in thirds. This is the second turn.
Notes On Chilling the Dough:
If the dough is still cool and no butter is oozing out, you can give the dough another two turns now.
If the condition of the dough is iffy, wrap it in plastic wrap and re frigerate it for at least 30 minutes. Each time you refrigerate the dough, mark the number of tu rns you've completed by indenting the dough with your fingertips. It is best to refrigerate the d ough for 30 to 60 minutes between each set of two turns. Notes On The Turns:
The total number of turns needed is six.If you prefer, you can give the dough just four turns now, chill it overnight, and do the last two turns the next day.
Puff pastry is extremely flexible in this regard. However, no matter how you arrange your schedule, you should plan to chill the dough for at least an hour bef or e cutting or shaping it.
Extra tips:. While this is not included in the original recipe we are using (and I did not do this in my own trials), many puff pastry recipes use a teaspoon or two of white vinegar or lemon juice, added to the ice water, in the détrempe dough. This a dds acidity, which relaxes the gluten in the dough by breaking down the proteins, making rolling easier. You ar e welcome to try this if you wish.. Keep things cool by using the refrigerator as your friend! If you see any b utte r starting to leak through the dough during the turning process, rub a little flour on the exposed dough and chill straight away. Although you should certainly chill the doug h for 30 to 60 minutes between each set of two turns, if you feel the dough getting to soft or hard to work with at any point, pop in the fridge for a rest.
. Not to sound contradictory, but if you chill your paton longer than the recommended time between turns, the butter can firm up too much. If this seems to be the case, I advise letting it sit at room temperature for 5-10 minutes to give it a chance to soften before proceeding to roll. You don't want the hard butter to separate into chuncks or break t hrough the dough...you want it to roll evenly, in a continuous layer.. Roll the puff pastry gently but firmly, and don’t roll your pin o ver the edges, which will prevent them from rising properly. Don't roll your puff thinner t han about about 1/8 to 1/4-inch (3-6 mm) thick, or you will not get the rise you are looking for. Try to keep “neat” edges and corners during the rolling and turning process, so the lay ers are properly aligned. Give the edges of the paton a scooch with your rolling pin or a bench scraper to keep straight edges and 90-degree corners.. Brush off excess flour before turning dough and after rolling. . Make clean cuts. Don’t drag your knife through the puff or twist your cutters too much, which can inhibit rise.. When egg washing puff pastry, try not to let extra e gg wash d rip down the cut edges, which can also inhibit rise.. Extra puff pastry dough freezes beautifully. It’s best to ro ll it into a sheet about 1/8 to 1/4-inch thick (similar to store-bought puff) and freeze firm on a lined b aking sheet. Then you can easily wrap the sheet in plastic, then foil (and if you have a se alable plastic bag big enough, place the wrapped dough inside) and return to th e freezer for up to a few months.
. Defrost in the refrigerator when ready to use.. You can also freeze well-wrapped, unbaked cut and shaped pu ff pastry (i.e., unbaked vols-au-vent shells). Bake from frozen, without thawing first.. Homemade puff pastry is precious stuff, so save any clean scraps. Stack or overlap them, rather than balling them up, to help keep the integrity of the layers. T hen give them a singe “turn” and gently re-roll. Scrap puff can be used for applications where a super-high rise is not necessary (such as palmiers, cheese straws, napoleons , or even the bottom bases for your vols-au-vent).
***************

FORMING & BAKING THE VOLS-AU-VENT
Yields 1/3 of the puff pastry recipe above will make about 8x-10 x 3.8cm (1.5 inches/diameter) vols-au-vent or 4x 10.2cm (4 inches/diameter) vols-au-vent.
In addition to the equipment listed above, you will need:Well-chilled puff pastry dough (recipe above)Egg wash (1 egg or yolk beaten with a small amount of water)
Your filling of choice
Method:1. Line a baking sheet with parchment and set aside.
2. Using a knife or metal bench scraper, divided your chilled puff pastry dough into three equal pieces. Work with one piece of the d ou gh, and leave th e rest wrapped and chilled. (If you are looking to make more vols-au-vent than the yield stated above, you can roll and cut the remaining two pieces of dough as well…if not, then leave refrigerated for the time being or prepare it for longer-term freezer storage. See the “Tips” section below for more storage info.
3. On a lightly floured surface, roll the piece of dough into a rectangle about 1/8 to 1/4-inch (3-6 mm) thick. Transfer it to t he baking sheet and refrigerate for about 10 minutes before proceeding with the cutting (This assumes you will be using round cutters, but if you do not have them, it is possible to cut squa re vols-au-ven ts usin g a sharp chef’s knife.).
4. For smaller, hors d'oeuvre sized vols-au-vent, use a 3.8cm (1.5 inch) round cutter to cut out 8-10 circles. For larger sized vols-au-vent, fit for a main course or dessert, use a 10cm (4 inches) cutter to cut out about 4 circles. Make clean, sharp cuts and try not to t wist your cutters back and forth or drag your knife through the dough. Half of these rounds will be for the bases, and the other half will be for the sides. (Save any scrap by stacking—not wa dding up—the pieces…they can be re-rolled and used if you need extra dough. If you do need to re-roll scrap to get enough disks, be sure to use any rounds cut from it for the bases, not the ring-shape d sides.)
5. Using a 1.9cm (3/4-inch) cutter for small vols-au-vent, or a 5-6.4cm (2 to 2.5-inch) round cutter for large, cut centers from half of the rounds to make rings. These rings will become the sides of the vols-au-vent, while the solid disks will be the bottoms. You can either save the center cut-outs to bake off as little “caps” for you vols-au-vent, or put them in the scrap pile.

6. Dock the solid bottom rounds with a fork (prick them l ightly, making sure not to go all the way through the pastry) and lightly brush them with egg wash. Place the rin gs directly on top of the bottom rounds and very lightly press them to a dhere. Brush the top rings lightly with egg wash, trying not to d rip any down the sides (which may inhibit rise). If you are using the little “caps,” dock and egg wash them as well.7. Refrigerate the assembled vols-au-vent on the lined baking sheet while you pre-heat the oven to 200º C/400 º F (You cou ld also cover and refrigerate them for a few hours at this point.)8. Once the oven is heated, remove the sheet from the refrigerator and place a silicon baking mat (Preferred b ecause of its weight.) or another sheet of parchment over top of the shells. This will help them rise evenly. Bake the shells until t hey have risen and begin to brown, about 10-15 minutes depending on their size. Reduce the oven temperature to 180º C (350º F), and remove the silicon mat or parchment sheet from the top of the vols-au-vent. If the centers have risen up inside the vols-au-vent, you can gently press them down. Continue baking (with no sheet on top) until the layers are golden, about 15-20 minut es more (If you are baking the cen ter “caps” they will likely be finished well ahead of the shells, so keep an eye on them and remove them from the oven when browned.).
9. Remove to a ra ck to cool. Cool to room temperature for cold fillings or to warm for hot fillings.
10. Fill and serve.
Notes:
For additional rise on the larger-sized vols-au-vents, you can stack one or two additional ring layers on top of each other (using egg wash to "glue"). Thi s will give higher sides to larger vols-au-vents, but is not advisable for the smaller ones, whose bases may not be large enough to support the extra weight. Although they are at their best filled and eaten soon after baking, baked vols-au-vent shells can be stored airtight for a day. Shaped, unbaked vols-au-vent can be wrapped and frozen for up to a month (bake from frozen, egg-washing them first). There is a wonderful on-line video from the PBS show “Baking with Julia” that accompanies the bo ok. In it, Michel Richard and Julia Child demonstrate making puff pastry doug: http://video.pbs.org/video/1174110297/search/Pastry.
***************
Etant donné la longueur du texte original, je n'ai malheureusement pas pu faire une traduction française de ce billet et je m'en excuse auprès de tous mes amis lecteur s et blogueurs francophones!
C'est pourquoi je vous suggère de vous rendre sur les blogs mentionnés ci-dessous. Vous y trouverez cette recette en version française.
Chez Jasmine de "Jasmine Cuisine" (Canada)
Chez Isa de "Les Gourmandises d'Isa" (Canada)
 As I mentioned a few weeks ago, one of my favorite harvest time fruits has to be "Italian Plums" (or as we call it here "Zwetschge", "Quetsche" or "Prune"). I can never get enough of this wonderfully fragrant stonefruit...
Every week, since the day that this Swiss fruit was made available on market stalls, I buy kilos of prunes and eat them in all the possible ways. I've baked tarts, crumbles, cobblers, clafoutis, bars, cakes and made compotes as well as jams, you name it!
This marvelous fruits has such a pretty color as well as delicate aromas and is so delightful for the palate that it is impossible not to fall in love with it at first sight and taste!
So, the other day when I was contemplating baking something autumn-like with my fresh little violet gems, I came up with a great idea. I thought it would be great to pair those fruits with chestnut spread from Ardèche and cinnamon. I was sure that combo would be quite original and totally divine. I wasn't wrong.
My creation proved to be totally blissful, ambrosial and terribly enjoyable. The tart disappeared very fast and each forkful was followed by "mmmmhhhs" and "aaahhhs" of pleasure!
Try it, you'll adopt it!
 ~ Chestnut & Cinnamon Prune Tart ~
Recipe by Rosa @ Rosa's Yummy Yums 2009.Makes one 22cm tart.Ingredients for the "Shortcrust Pastry":250g Plain white flour110g Unsalted butter, very cold and cut into small cubes15g Lard (see remarks), cut into small cubes1 1/3 Tsp salt1 Tsp SugarAbout 60-100ml icy water or enough to bind the mixtureIngredients for the "Chestnut Filling":250g Chestnut spread (Crème de marrons de l'Ardèche)2 Tsps Cornstarch2 Tsps Kirsch or Prune brandyIngredients for the "Prune Filling":15 Fresh prunes, pitted, halved and slit halfway through the middle3-4 Tbs Light brown sugar3/4 Tsp Ground cinnamon Method for the "Shortcrust Pastry":1. Sift the flour, sugar and salt into a medium-sized bowl/bassin.2. Add butter and the lard. Rub between the fingers until the mixture is flaky.
3. Pour in water, gradually, while continuously cutting and stirring with a knife (stop adding water when the dough is stiff/it should not be sticky or wet). Gather up into a soft ball.
4. Dust your working area and rolling pin with flour and shape the pastry by rolling away from you and always turning the pastry around in order to achieve a round shape.5. Place it in the tart pan and trim the edges.6. Prick the bottom with a fork.Method for the "Chestnut Filling":7. Preheat the oven to 210° C (410° F).8. Mix together the chestnut spread, cornstarch and alcohol.
9. Spread evenly the pastry bottom.10. Place the prunes in a neat way.
11. Sprinkle with the light brown sugar and cinnamon.12. Bake in preheated oven for 50-60 minutes, or until the sides of the pastry are pale golden and the fruits are cooked through.
13. Remove from the oven and let cool on a wire rack.
 Remarks:Lard is solid pork fat. You can replace it by the oil of your choice or margarine which also make the crust nice and crispy/flaky.Always lift the flour out of the bowl while rubbing; it makes the butter/flour mixture airy.
Be careful not to add too much water as the pastry should not be stick to the touch.
While mixing the water to the flour/butter mixture never work the pastry like a bread dough, otherwise you would end up with a stiff, hard and elastic pastry, because you would have liberated the gluten in the flour.You will have a little bit of pastry leftover. Use it as you wish.
Serving suggestions:
This tart is delicious when eaten with either a scoop of homemade ice cream (vanilla, pistachio, caramel, walnut, etc..) or a dollop whipped cream.You can also sprinkle some almond praline over it.
***************
 ~ Tarte A La Crème De Marron, Cannelle Et Prunes ~
Recette par Rosa @ Rosa's Yummy Yums 2009.Pour une tarte de 22 cm.Ingrédients pour la "Pâte Brisée":250g de Farine blanche/fleur110g de Beurre non-salé, coupé en petit dés15g de Saindoux (voir remarques), coupé en petits dés1 1/3 CC de Sel1 CC de Sucre cristalliséEnviron 60-100ml d'eau très froide ou assez afin que la pâte forme une bouleIngrédients pour la "Garniture A La Crème De Marron":
250g de Crème de marron d'Ardèche2 CC de Maizena
2 CC de Kirsch ou eau de vie de prunes
Ingrédients pour la "Garniture Aux Prunes":15 Prunes, coupées en deux, puis fondues par le milieu3-4 CS de Sucre brun clair
1 CC de Cannelle en poudre
 Méthode pour la "Pâte Brisée":1. Tamiser la farine, le sucre et le sel dans un bol moyen.
2. Ajouter le beurre et le saindoux. Frotter la farine et le beurre/saindoux entre les doigts afin d'obtenir un mélange qui ait la texture sabloneuse.
3. Verser l'eau, graduellement, tout en mélangeant bien (n'ajoutez plus d'eau quand la pâte aura atteint la bonne consistance/ni trop mouillée, ni trop collante). Former une boule.
4. Fariner votre rouleau à pâtisserie et votre plan de travail. Etalez la pâte avec un rouleau à pâtisserie (du milieu jusqu'à l'extérieur) afin d'obtenir une forme ronde.5. Posez la pâte sur votre moule et découpez l'excédent de pâte. 6. Piquez la pâte avec une fourchette.
Méthode pour la "Garniture A La Crème De Marron":7. Préchauffer le four à 210° C (410° F).
8. Mélanger ensemble la crème de marron, la maïzena et l'eau de vie.
9. Etaler ce mélange sur le fond.
10. Placer les prunes sur la garniture à la crème de marron.
11. Saupoudrer avec le sucre brun clair et la cannelle.12. Cuire dans le four préchauffé pendant environ 50-60 minutes, ou jusqu'à ce que les rebords de la pâte soient légèrement dorés et que les prunes soient cuites à point.
13. Laisser reffroidir sur une grille.
 Remarques:
Le saindoux est de la graisse de porc (solidifiée). Vous pouvez le remplacer par de l'huile ou de la margarine qui rendent aussi la pâte croustillante.
Soulevez toujours la farine lorsque vous la frottez avec le beurre/saindoux: ça apporte de l'air au mélange.
Faites bien attention de ne pas ajouter trop d'eau à votre pâte. Elle ne doit pas être collante.
Pendant que vous mélangez l'eau au mélange farine/beurre/saindoux, ne la travaillez pas telle une pâte à pain, autrement votre pâte sera dure, élastique et pas manipulable du tout car vous aurez libéré le gluten contenu dans la farine.
Vous obtiendrez un reste/surplus de pâte. A vous de l'utiliser à votre guise.
Idées de présentation:
Cette tarte est délicieuse lorsque qu'elle est accompagnée d'une boule de glace maison (vanille, pistache, caramel, noix de Grenoble, etc..) ou de crème chantilly.
Vous pouvez aussi la saupoudrer de pralin aux amandes.