Showing posts with label Peanuts. Show all posts

Saturday, August 20, 2011

CHICKEN SATAY WITH PEANUT SAUCE & A GUEST POST

twin-towers-kl
Today, I am about to turn a fresh page in the history of my blog as this Saturday marks the beginning of a new era for me. After having been cordially invited by the charming Leemei of the London-based "My Cooking Hut" to write a guest post for her, my time has finally come to host one of her articles.

You see, I am a recent convert to guest posting and I am quite a virgin when it comes to it. Rich of two wonderful experiences as an invitee, but being a total neophyte when it comes to welcoming somebody else's work on my site, I thought that I'd really enjoy to slip into the skin of a moderator and editor for a while and make my readers discover the work of a fellow blogger they might not already have knowledge of...

So, I am absolutely delighted, happy and so thrilled to have the immense honor as well as great opportunity to introduce you to this talented young woman who is a native Malaysia, the most multifaceted land in Southeast Asia.

Just like her country, Leemei's blog is colorful, exotic, pluri-ethnic and sense-awakening. It is impossible not to get seduced by her mouthwatering recipes that hail from the whole wide world, fabulously refreshing photography and lovely stories.

Thanks for sharing your world with us!

~~~~~~~~~~~~~~~~~~~~~~

KL_Mosque
I have been reading Rosa’s blog for quite a while now. Not only do I undeniably love her for the food she presents, but I also enjoy looking at those breathtaking photos that she takes. Not too long ago, she wrote a wonderful guest post and shared a delicious recipe – "Swiss Sausage Salad" on my blog –"My Cooking Hut".

I was delighted that Rosa invited me to guest post on her wonderful blog. Thank you, Rosa! At first, I wasn’t too sure what I was going to cook, but I knew for sure that I wanted to make something Malaysian.

When it comes to Malaysian food, not many people know it as much as Thai food, for example. Malaysian food is the original fusion food. It results from a melting-pot society, thus it cannot be classified as a type of cuisine since is composed of an array of food hailing from different ethnic backgrounds – Malay, Chinese, Indian, Nyonya, Eurasian and the indigenous people of Borneo. Malaysians love their food and they eat at least 5 meals a day - in small portions.

The passion for food is already naturally instilled at an early stage in life, while still in one's mother’s womb. People talk about food all the time and it never seems to bore them. This portrays how much their lives evolve around food. Their love for it is so strong that it binds Malaysia's diverse ethnic group together.

Although I grew up in an exclusively Chinese family, living in a multi-cultural society means that I have been exposed to different cultures, lifestyle and food since a very tender age. In the kitchen, not only do we stock up some essential Chinese cooking ingredients as well as condiments, but we also have all the important dried spices, fresh aromatic herbs and roots which are generally ground together so as to obtain spice pastes called "Rempah" in Malay and are used in many typical Malaysian dishes.

satay ingredients 1
A traditional mortar and pestle is essential Malaysian kitchen item that is employed when preparing fresh "Rempahs". However, it is getting very common nowadays to grind things ina food processor as it allows one to whizz up spice paste in just a matter of seconds.

Many would think that making spice paste is tricky because there are so many ingredients involved. I have to stress that it is not as daunting as you might think. Once you have gathered the basic ingredients needed, then you are pretty much there. As with many dishes, you can then use it as a base and create your own variations. Cooking is a form of art I have to say.

"Satay" or "Sate" is very popular in Malaysia. It is skewered meat that is marinated with spices, grilled and then served with a delicious peanut sauce. It originates from Indonesia and is also a favorite in other Southeast Asian countries such as such as Singapore, Brunei, Thailand and the Philippines. The types of meats that are used in the preparation of this speciality are chicken, beef or mutton. Chicken and beef "Satay" are the most spread variations and can be found throughout Malaysia.

satay ingredients 2
I remember the best place to scout for really good "Satay" is, without a doubt, the "PasarMalam" or night market. Every Saturday evening, in my hometown back in Malaysia, numerous farmers, fishermen and food vendors gather at a designated place and set up their mobile stalls to sell their produces and food. This always gets me really excited as I cannot wait to check out all the stalls, in particular the food stalls as I could literally buy my dinner from different the food vendors there! Of course, my all time favourite stall has to be the one that selling "Satay".

As you can see the major ingredients used in the "Satay" marinade are also similar to the ones that are incorporated into the peanut sauce. They are very aromatic and play an important role when making a flavoursome base for curry too.

If you've never tried Malaysian food, I definitely recommend you to give this "Satay" recipe a go as it'll be the medium to introduce you to the gastronomy of Malaysia. I am sure that you will fall in love with it as its great for an outdoor summer BBQ and makes a mean party food!

chicken satay peanut sauce
~ Chicken Satay With Peanut Sauce ~

Ingredients For The "Satay":
1 Tsp Dried shrimp paste/belacan, toasted
1.5cm piece Fresh turmeric or 1 Tsp Turmeric powder
10 Shallots, peeled and chopped
2cm piece Galangal, peeled and chopped
6 Cloves garlic, peeled and chopped
1 Fresh chilli, deseeded and chopped
1 Lemongrass, white part only and chopped
3 Tbsp Sugar
1 Tsp Coriander powder
1 Tsp Cumin powder
A pinch of Salt
900g Chicken thighs, skinned, deboned and cut into chunky strips
Bamboo skewers
Ingredients For The "Peanut Sauce":
6 Shallots, peeled and chopped
1 Red onion, peeled and chopped
1 Fresh red chilli, deseeded and chopped
6 Dried red chillies, deseeded, softened and chopped
2 Lemongrass, white part only and chopped
2 Tbs Sunflower oil
1 Tbs Tamarind pulp
200ml Warm water
2 Tbs Sugar
1 Tbs Soya sauce
100g Roasted unsalted peanuts, chunkily ground

Method:
1. Wrap the shrimp paste in a foil and put in a preheated oven at 180°C (350° F) to toast, for about 4-5 minutes, until aromatic. Set aside to cool.
2. Meanwhile, put the fresh turmeric, shallots, galangal, garlic, chili and lemongrass in a food processor, grind until they form a smooth paste. Add the sugar, coriander powder and cumin powder and salt mix until combine.
3. Add the spice paste to the chicken, mix thoroughly, making sure each piece is coated with the spice paste. Cover with cling film, refrigerate for at least 4 hours or overnight.
4. To make the sauce, put the shallots, onion, red chilli, dried red chillies and lemongrass in a food processor. Grind until smooth and set aside. Meanwhile, put 80ml of the warm water into a bowl and add the tamarind pulp. Let soak for 15 minutes or until it becomes soft. Use a spoon to break the pulp into a pliable form. Strain through a fine sieve set over a bowl, discard the solid.
5. In a saucepan over medium high heat, put the sunflower oil and add the spice paste. Cook and stir constantly for about 8-10 minutes or until the paste gets darker in color and very fragrant. Add the tamarind water and stir. Add the rest of the water and bring to the boil for a few seconds. Add the sugar and soya sauce, stir and let it simmer for 1 minute or so. Add the ground roasted peanuts, stir and set aside.
6. Thread 4 strips of chicken onto each skewer, in order to obtain a loose S shape. Then pop them under the grill for about 7.5 cm from the heat source, giving them about 3-4 minutes on each side. Alternatively, grill the skewered meat over the BBQ. Place the skewers on warm plates and serve with the peanut sauce handed separately.

KL_central market

Friday, February 18, 2011

PEANUT BUTTER, CHOCOLATE & COFFEE COOKIES BARS

pB Cookie Picnik collage 2 bis
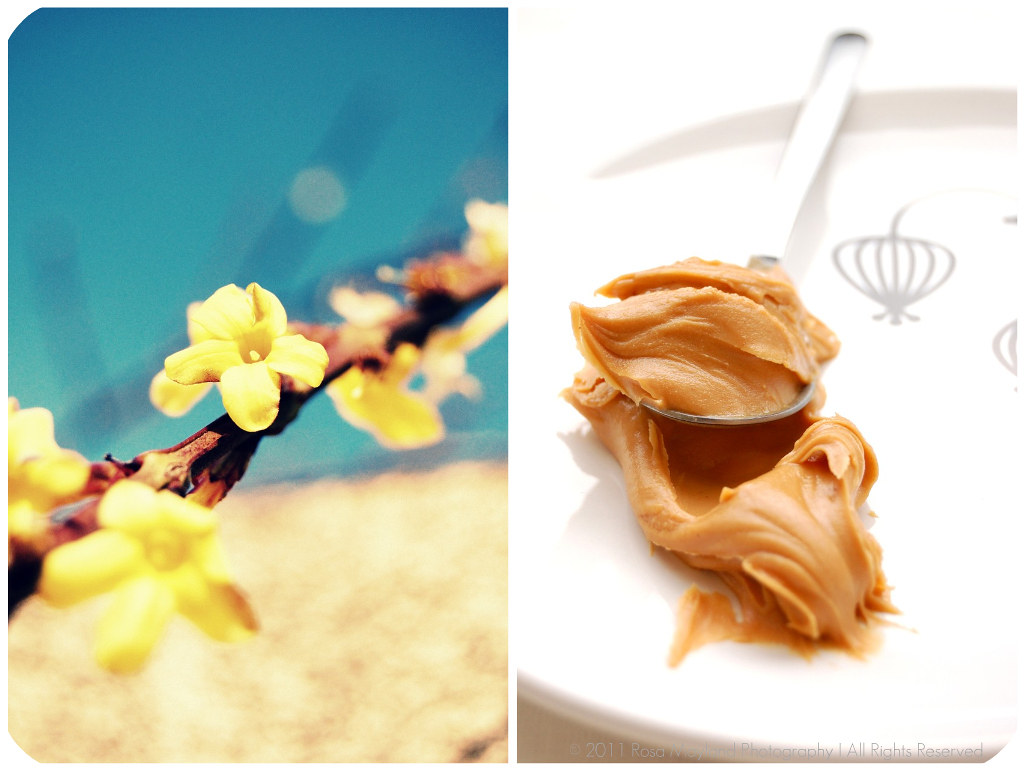
Some people adore peanut butter, others are not too enthusiastic about it and another category of people dislike it totally. If you know me well it is no mystery to you that I am one of those foodies who is gaga about this devilishly luscious, creamy, slightly sweet and rich condiment. As a matter of fact I am bananas about peanuts in general...

One can make so many yummy things and be very creative with peanut butter. From desserts, pastries, sauces to savory dishes you have the choice. There are no
limits when it comes to baking or cooking with it. Just have a look on the net and you'll see that there is an incredible quantity of peanut butter-based recipes on offer. It is impossible not to find one that suits you.

As a child I did my first experiments with peanut butter in England while on holidays at my grandparents. They always had a jar of that gloppy stuff in their pantry. We ate it generally in the morning with "plastic bread" toasts. My grandmother who loves overripe bananas (eeewww, nasty and so sickly!) made sandwiches with peanut butter and slices of that disgustingly blackened fruit. Apart from salted butter it was the only spread I liked to use as ultra-bitter store bought marmalade (no matter it's quality) was never my thing - the homemade version is much better and more refined as well as flavorful.

At home peanut butter was something we bought very seldom and once again it was solely used to accompany bread or crackers. We never ate baked goods made with it, what a pity! Anyway, in opposition to the vast majority of American kids who are fed on PB & Jam sandwiches and adore this snack I have to say that this combination was never my favorite. As a matter of fact I find it really icky. It repulses me quite violently and gives me the shivers, brrrr! On the contrary, I personally find that the association between peanut butter and honey (especially white honey) or peanut butter and Nutella is heavenly and so harmonious as if they were meant to mingle together (that implies only me, of course)!

Peanut butter far from being a contemporary staple. Although we might think that Americ
ans are at the origin of it considering the fact that they consume tons of this goody and since it is impossible to imagine this nation without it, they are just the ones who started commercialising this precious ingredient before anybody else.

Already in 950 B.C. the ancient Incas used peanuts (which originate from South America) to make a paste-like mixture. Early explorers brought plants to Africa, peanuts to Spain (trade) and finally imported them into the American Colonies where they were exchanged against other merchandise. As you can see the USA was not the first country to benefit from that fabulous legume (yes, it's not a nut!). The first commercial peanut crop was grown in North carolina around 1818 and in the early 1840's in Virginia.

It is only in 1890 that an unknown doctor "invented" peanut butter for health benefits and in 1903 that Dr. Ambrose Staub of Saint-Louis (Missouri) patented a peanut butter making machine. By 1914, many companies were producing that speciality, but it became a far more refined produce when in 1928, Joseph L. Rosenfield (the father of Skippy PB) created a churning process that made peanut butter even smoother.

The only time I am thankful for the "discovery" (very debatable though) of the Americas is in a foodie-oriented way. Had the "white bearded men" not set their foot on North or South American soil we might never have been able to develop so many wonderful desserts or dishes made with chocolate (xocolātl), peanuts (cacahuatl) in our treats, potatoes, beans, tomatoes, pumpkins, corn, passionfruits, avocados, pecans, cashews, mango, etc. I can't imagine a life without all these glorious and healthy fruits and vegetables.

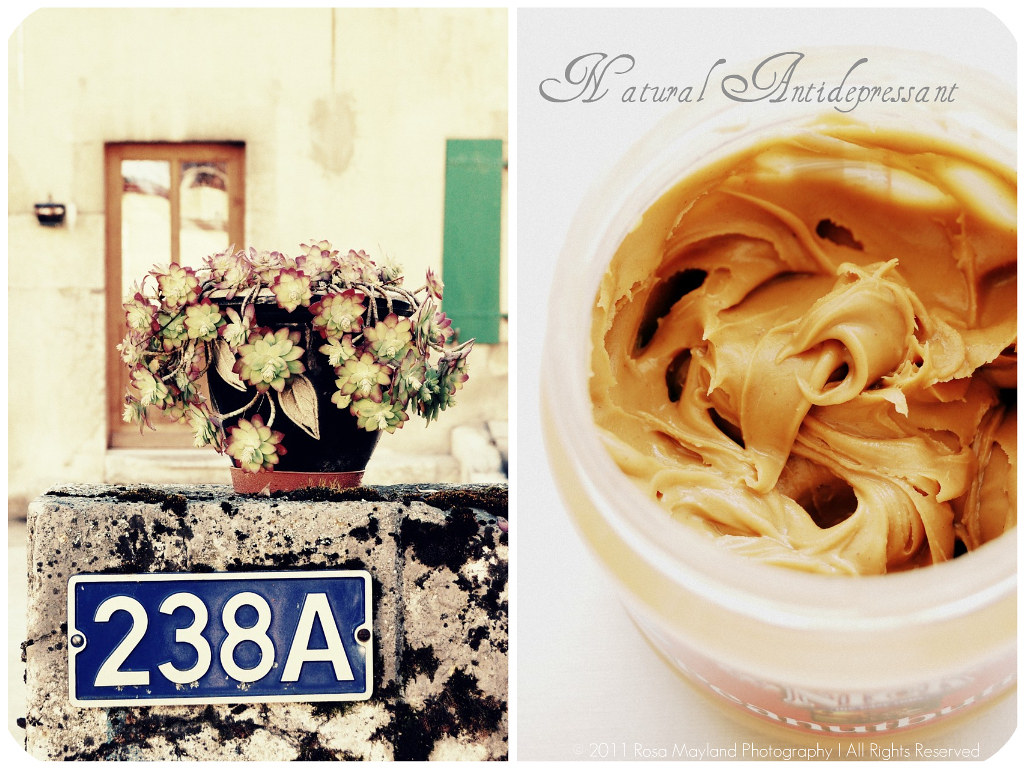
Coming back to our much venerated peanut butter I have to admit that I am so obssessed by it and addicted to it's smoothiness as well as gorgeously nutty flavor that I had to eradicate it from my cupboards in order to come clean with my dependence. I ate far too much peanut butter and even gobbled it out of the pot. Now, although my passion for it has not died I can have an open jar next to me and not even reach for it or be tempted by it's contents...

So when I bought my first pot of this delightful substance after a few months of abstinence I knew that I was going to celebrate this event by baking something decadent with it. After flipping through my newly received "The King Arthur Flour's Cookie Companion" cookbook I found what I was looking for: "Peanut Butter Smoothies". As the original recipe was not immoral enough for me I decided to top each slice with additional coffee frosting.

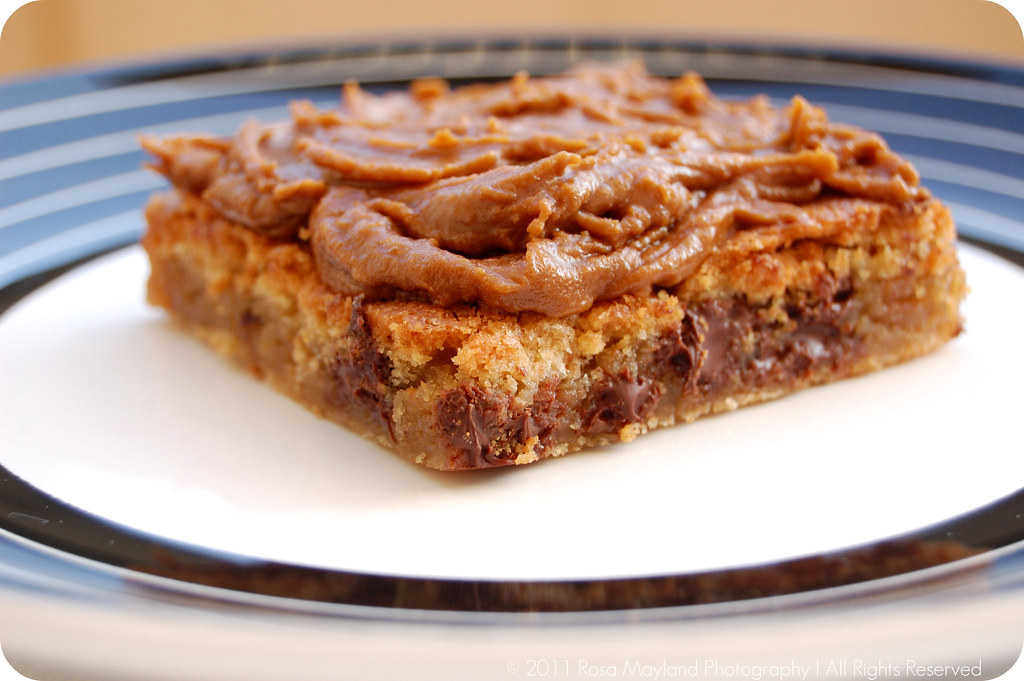
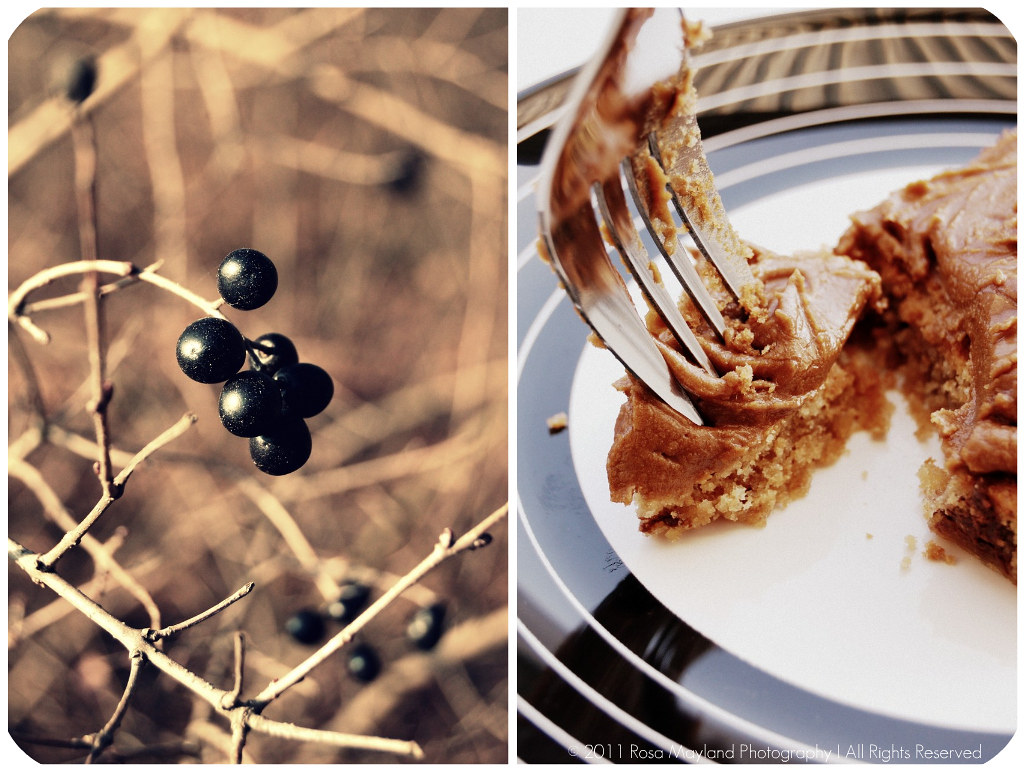
Needless to point out that those infamous blondie-like cookie bars were incredibly soft, visciously gooey and dangerously calorific (the sweetness alone could kill a horse or make an elephant sleep/weak). My "Peanut Butter Chocolate Chips Cookie Bars With Coffee Frosting" are down-right delectable and guaranteed to send you to the heaven's above with a sugar coma and an overdose of pleasure!

PB Cookie Picnik collage 3 bis
~ Peanut Butter Chocolate Chips Cookie Bars With Coffee Frosting ~
Recipe adapted from "The King Arthur Flour's Cookie Companion" cookbook.

Makes 12 slices.

Ingredients For The "Bars":
6 Tbs (90g) Unsalted butter, at room temperature
1/2 Cup (143g) Natural smooth peanut butter
1 Cup (210g) Crystallized sugar

1/4 Cup (60g) Light brown sugar, packed
2 Big eggs

1 Tsp Natural vanilla extract
1 Cup (128g) Unbleached white flour
1/3 Tsp Sea salt
1 Tsp Baking powder
1 Cup (180g) Chocolate chips (bittersweet)

Ingredients For The "Coffee Frosting":
1 Tbs Instant coffee powder
1 Tbs Hot water
3/4 Cup (90g) Powder sugar, sieved
2-4 Tbs Double cream (35% fat)


Method For The "Bars":
1. Preheat the oven to 180° C (350° F).
2. Butter a 20 x 20cm (8 x 8 inches) brownie pan.
3. Mix together the flour, salt and baking powder. Set aside.
4. In a medium bowl, cream the butter and peanut butter together until smooth and
homogenous.

PB Cookie 3 bis
5. Whisk in the sugars until the mixture is light and smooth.
6. Add the eggs, one at a time, whisk well and scrape down the bowl after each addition.
7. Stir in the vanilla.
8. Add the the flour mixture and stir well until combined.
9. Incorporate the chocolate chips.
10. Spread the batter into the prepared pan.
11. Bake for about 30-32 minutes until the edges pull away slightly from the pan.
12. Cool completely before cutting and frosting.

Method
For The "Coffee Frosting":
13. Meanwhile, in a small bowl dissolve the coffee in the hot water.
14. Add the powder sugar and enough cream (in order to get a spreadable mixture). Mix well.

Remarks:
You can replace the bitterwseet chocolate chips by dark, semi-sweet chocolate chips or peanut butter chips.
You can ommit the frosting if you find that those bars are rich enough without it.

Serving suggestions:
Serve for afternoon tea or as an in-between sweet treat with some whipped cream or a scoop of vanilla ice cream and a cup of tea or coffee.

~~~~~~~~~~~~~~~~~~~~~~

PB Cookie Picnik collage 5 bis
~ Barres Au Beurre De Cacahuète, Chocolat Et Glaçage Au Café ~
Recette adaptée du livre "The King Arthur Flour's Cookie Companion".

Pour 12 tranches.

Ingrédients Pour Les "Barres":
90g de Beurre non-salé, à température ambiante
143g de Beurre de cacahuète (sans morceaux)
210g de Sucre cristallisé
60g de Sucre brun clair
2 Gros Oeufs

1 CC d'Extrait de vanille pure
128g de Farine blanche
1/3 CC de Sel de mer fin
1 CC de Poudre à lever
180g de Pépites de chocolat (à 60% de cacao)
Ingrédients Pour le "Glaçage Au Café":
1 CS de Café instantané
1 CS d'Eau chaude

90g de Sucre en poudre, tamisé
2-4 CS de Crème double (35% de mat. grasses)

Méthode Pour Les "Barres":
1. Préchauffer le four à 180° C.
2. Beurrer un moule à brownie de 20 x 20cm.
3. Mélanger ensemble la farine, le sel et la poudre à lever. Mettre de côté.

PB Cookie Picnik collage 4 bis
4. Dans un bol moyen, battre le beurre et le beurre de cacahuète en pommade (le mélange doit être homogène).
5. Ajouter les sucres et battre jusqu'à ce que le mélange soit léger.
6. Ajouter les oeufs, un à un et bien mélanger (nettoyer les bords à l'aide d'une langue de chat après chaque ajout).
7. Incorporer la vanille.
8. Puis incorporer le mélange farine/sel/poudre afin d'obtenir une pâte homogène.
9. Ajouter les pépites de chocolat et bien mélanger.
10. Etaler la pâte dans le moule.
11. Cuire pendant 30-32 minutes, jusqu'à ce que les bords se détachent légèrement du moule.
12. Laisser refroidir complètement avant d'étaler le glaçage.

Méthode Pour le "Glaçage Au Café":
13. Pendant ce temps, dans un petit bol, dissoudre le café instantané dans l'eau chaude.
14. Ajouter le sucre, assez de crème (afin d'obtenir un glaçage étalable) et mélanger.


Remarques:
Vous pouvez remplacer les pépites de chocolat à 60% par des pépites au chocolat au lait ou des pépites de beurre de cacahuète.
Si vous pensez que ces barres sont assez assez riches comme ça, alors il vous est possible d'omettre le glaçage.

Idées de présentation:
Servir pour votre quatre heures ou comme snack et accompagner avec de la crème fouettée, une boule de glace vanille ainsi qu'avec du thé ou du café.

PB Cookie Picnik collage 1 bis

Wednesday, June 3, 2009

SALSA DE MANI - PEANUT SAUCE

Apart from being a total and hopeless peanut addict (or should I say freak?!), I am very fond of South American food and of anything exotic that'll spice up my daily life. That's why I decided to broaden my horizon to the amazing joys of latino cooking and test a new recipe which I had been drooling over since a few months...

I'm a big fan of Brazil's tantilizing cuisine and Mexico's mouthwatering cuisine, but I have never ventured into the realm of Ecuadorian cusine before, although, many times, I have been tempted to do so while surfing on Laylita's (USA) wonderful foodblog (see link).

While trying to find
a different way of serving chicken legs and a dish that would contain achiote/annatto, I stumbled upon a recipe for "Salsa De Mani" (from Ecuador, but also Peru), a hearty peanut sauce that is quite versatile and can be served in various manners.

"Salsa de Mani" is easy to make and really delicious. The pungently fresh flavor of coriander, the roundness of peanut butter, the shrapness of onions as well as the warm spiciness of cumin blend perfectly well with the slightly bitter, earthy, musky and flowery taste of ground achiote/annatto seeds which also contributes to the sauce's flashy color.

"Salsa De Mani" is far from being bland and boring!
It is a mellow and gorgeous vegetarian sauce that will delight you tastebuds without shocking them!

~ Salsa De Mani ~
Recipe Laylita at "
Laylita's Blog" (USA) and adpated by Rosa @ Rosa's Yummy Yums 2009.

Ingredients:

3/4 Cup (214g) Peanut butter (unsweetened)
1/2 Cup White onion, finely diced
1 1/2 Tsps Ground cumin
1/2 Tsp Garlic powder (optional)
1 tsp Ground achiote (annatto)
1 Cup (240g/ml) Milk
2 Tbs Peanut oil, vegetable oil or butter
1 Hard-boiled egg, finely chopped
2 Tbs Cilantro, finely chopped
4 Tbs White onion, finely minced or sliced
Salt, to taste

Method:
1. Mix the peanut butter with 1/2 cup of milk to help dissolve the peanut butter.
2. Heat the butter or oil to prepare a refrito, add the onion (1/2 cup), achiote (annatto), cumin, garlic powder and salt. Cook until the onions are soft.
3. Add the peanut butter and peanut butter/milk mixture, as well the remaining 1/2 cup of milk.
4. Stir well and let simmer for about 10 minutes, over low heat.

5. Add the chopped hard-boiled egg, cilantro, and onions. Salt to taste.
6. Serve warm.


Remarks:
This sauce is traditionally made with fresh roasted peanuts instead of store-bought peanut butter, but this is a quick and easy way to prepare "Salse De Mani". However, if you wish to make your own peanut butter, then use salted roasted peanuts that you'll blend into a smooth paste.

Serving suggestion:
This delicious peanut sauce is best served together with Ecuadorian llapingachos (potato cakes/patties), fried or boiled potatoes, boiled yucca, hard-boiled eggs, pasta (spaghetti, noodles, penne, etc...), vegetables of all kinds as well as with meats (pork, chicken, turkey, ostrich and beef).

***************

~ Sauce Au Cacahuètes ~
Recette par Laylita de "Laylita's Blog" (USA) et adaptée par Rosa @ Rosa's Yummy Yums 2009.

Ingrédients:
3/4 de Tasse (214g) Beurre d'arachide (non-sucré)
1/2 de Tasse d'Oignons blancs, finement hachés
1 1/2 CC de Cumin en poudre
1/2 CC d'Ail en poudre (en option)
1 CC de Roucou (annatto) moulu
1 Tasse (240g/ml) de Lait
2 CS d'Huile d'arachide, végétale ou de beurre
1 Oeuf cuit dur, finement haché
2 CS de Coriandre fraîche, finament hachée
4 CS d'oignons blancs, finement hachés ou coupés
Sel, à volonté

Méthode:
1. Bien incorporer 1/2 tasse de lait à la pâte d'arachide afin de détendre cette dernière.
2. Chauffer l'huile ou le beurre et ajouter l'onion (1/2 tasse), le roucou (annatto), le cumin, l'ail en poudre et le sel, puis cuire jusqu'à ce que les oignons soient translucides.
3. Ajouter le mélange
lait/pâte d'arachide ainsi que le reste du lait.
4. Bien mélanger et laisser mijoter 10 minutes, à feu doux.
5. Ajouter l'oeuf cuit dur haché, la coriandre et les 4CS d'oignons hachés.
6. Servir chaud.

Remarques:
Traditionnellement, cette sauce est faite avec des cacahuètes grillés et non avec du beurre d'arachide. Cette version est rapide est facile, mais si vous le désirez, vous pouvez faire vore propre purrée avec des cacahuètes grillées (salées) que vous passerez au mixer afin d'obtenir une pâte onctueuse.

Idées de présentation:
Cette délicieuse sauce peut être servie avec des llapingachos écuadoriens (galettes de pommes de terre), des pommes de terres rôties ou cuites à l'eau, avec du manioc cuit à l'eau, des oeufs cuits durs, des pâtes (spaghetti, nouilles, penne, etc...), ainsi qu'avec toutes sortes de légumes et/ou avec de la viande (porc, poulet, dinde, autruche et boeuf).

Saturday, February 28, 2009

CHOCOLATE VALENTINO - DARING BAKERS

The end of the month is getting close and, once again, all The Daring Bakers around the world are getting excited because the time has come to blog about their challenge and see what the other participants are presenting...

The February 2009 challenge is hosted by Wendy of "WMPE's" blog and Dharm of "Dad ~ Baker & Chef" who have chosen a "Chocolate Valentino Cake" by Chef Wan; a "Vanilla Ice Cream" recipe from Dharm and a "Vanilla Ice Cream" recipe from Wendy as the challenge.

At home we both are very fond of flourless chocolate cakes and ice creams, so I was really looking fowards to making this very promising dessert!

Both recipes offered much freedom of interpretation and everybody had the choice to pick the kind of chocolate they wanted (be it giandujia, white, black, milk, etc...) and flavor the cake (or not) as they wished. We also could use the ice cream recip which we fancied. So, I decided to take a darker variety of chocolate (60% cocoa) and to adapt Dharm's "Vanilla Ice Cream". And, as I'm very keen on the irresistible association between chocolate, tonka and peanut, I chose to create my own "Peanut & Tonka Ice Cream" in order to accompany the "Chocolate Valentino Cake". To add a little touch of originality, tanginess and craziness, I decorated my plates with reduced dark balsamic vinegar...

Needless to say that I was extremely pleased by the great looks and awesome taste of this delectable dessert. The flavoring were just perfect and it presented really well too.

As no sugar nor flour are added to the batter, this subtle "Chocolate Valentino Cake" isn't too sweet or even sickly as it is the case with many rich chocolate cakes. It has a strong cocoa aroma and is fluffy, very moist and almost fudgy. The "Peanut & Tonka Ice Cream" adds a layer of scrumptiousness to this luscious treat as the delicate peanutty taste as well as the heady, haunting and unusual, yet lush and pleasant tonka flavor pairs wonderfully with that of the cake. Not to forget that the texture contrast between the creamy, crunchy ice cream and the smooth chocolate cake is just heavenly!

This challenge was highly enjoyable as it was straight-forward and not too messy, nevertheless the result was fantastic on the gustatory level as much as on the visual level. A recipe I will make again and adapt according to my cravings!

I really want to thank Wendy at "WMPE's" (USA) and Dharm at "Dad ~ Baker & Chef" (Malaysia) for having chosen that gorgeous recipe and for bringing the spirit of Valentine's Day into our plates!

~ Chocolate Valentino ~
Recipe from "Sweet Treats" by Chef Wan.

Makes one cake, using a 20x20cm (8x8 inches) brownie pan.

Ingredients:
16 Oz (1 pound/454g) Semisweet chocolate (60% cocoa), roughly chopped
1/2 Cup (1 stick) plus

2 Tbs (146 grams total) Unsalted butter
5 Large eggs (~63g), separated

Method:
1. Put chocolate and butter in a heatproof bowl and set over a pan of simmering water (the bottom of the bowl should not touch the water) and melt, stirring often.
2. While your chocolate butter mixture is cooling. Butter your pan and line with a parchment circle then butter the parchment.
3. Separate the egg yolks from the egg whites and put into two medium/large bowls.
4. Whip the egg whites in a medium/large grease free bowl until stiff peaks are formed.
5. With the same beater beat the egg yolks together.
6. Add the egg yolks to the cooled chocolate.
7. Fold in 1/3 of the egg whites into the chocolate mixture and follow with remaining 2/3rds. Fold until no white remains without deflating the batter.
8. Pour batter into prepared pan, the batter should fill the pan 3/4 of the way full, and bake at 190° C (375° F).
9. Bake for 25 minutes until an instant read thermometer reads 60°C (140° F).
10. Cool cake on a rack for 10 minutes then unmold.

Remarks:
Do not over-whip the cake or it will be dry.
If you do not have an instant read thermometer, the top of the cake will look similar to a brownie and a cake tester will appear wet.

Serving suggestions:
Serve this cake with whipped cream or ice cream (see recipe below).

***************

~ Peanut And Tonka Ice Cream ~
Recipe based on a recipe from the "Ice Cream Book" by Joanna Farrow and Sara Lewis, and freely adapted by Rosa @ Rosa's Yummy Yums 2009.

Ingredients:
1 Tsp Pure vanilla paste
300ml (1 1/4 Cups) Whole milk
300ml (1 1/4 Cups) Heavy Cream (35% fat)
1/4 Tsp Ground tonka bean
4 Large egg yolks
75g (6 Tbs) castor sugar
2 Tsps Cornsarch
4 Tbs Smooth peanut butter

3 Tbs Cream
1 Tbs Caramel sauce
(see recipe)
3/4 Cup Salted peanuts, coarsely chopped

Method:
1. Pour the milk and the cream into a heavy based saucepan, add the vanilla paste and ground tonka, and bring to the boil.
2. Whisk the egg yolks, sugar and cornstarch in a bowl until the mixture is thick and foamy.
3. Gradually pour in the hot milk/cream mixture, whisking const
antly. Return the mixture to the pan and cook over a gentle hear, stirring all the time
4. When the custard is thicke and smooth, pour it back into the bowl and let cool 10 minutes.
5. Mix together the peanut butter and the 3 tbs cream. Add the peanut butter mixture and the caramel sauce to the warm custard and whisk
well.
6. Cool the peanut butter custard and, then ch
ill.
7. Put into an ice cream machine and churn the mixture until thick, about 30 minutes (see instructions on your ice cream maker).
8. Mix in the chopped peanuts and freeze for 6 hours or until firm enough to scoop.

Remarks:
Don't add the peanut butter mixture if the custard is too hot.


Serving suggestions:
Top the "Chocolate Valentino Cake" with a generous scoop of "Peanut
& Tonka Ice Cream".

To see my other Daring Bakers' challenges, please click here.


****************
Etant donné la longueur du texte original, je n'ai malheureusement pas pu faire une traduction française de ce billet et je m'en excuse auprès de tous mes amis lecteurs et blogueurs francophones!

C'est pourquoi je vous suggère de vous rendre sur les blogs mentionnés ci-dessous. Vous y trouverez cette recette en version française.

Chez Vibi de "La Casserole Carrée" (Canada)
Chez Isa de "Les Gourmandises d'Isa" (Canada)

Monday, May 5, 2008

PEANUT BREAD - PAIN AUX CACAHUÈTES

Finally, after having eyed the very popular "The Soul Of A New Cuisine: A Discovery Of The Foods And Flavors Of Africa" by chef Marcus Samuelsson (read article here) for several months, I finally got to buy that much awaited and longed-for cookbook...

Like a little kid, I opened my parcel feverishly and discovered a magnificent book that was on the level of my expectations and fulfilled my need for broadening my culinary horizons and crossing new borders.

With it's 204 mouth-watering recipes and 258 stunning color photos, this book is really beautiful and interesting. It contains many gorgeous recipes from all over Africa and is divided into differents sections: Ingredients, Spice Blends & Rubs, Condiments, Sauces & Dips, Salads & Sides, Breads & Sandwiches, Vegetables, Fish & Seafood, Poultry & Meat, Desserts & Drinks.

Although it's title is a bit misguiding,
because Samuelsson's work speaks only about a restricted quantity of dishes and is not meant to be a detailed encyclopedia (as it's title could lead you to think), this cookbook is really rich, accessible and entertaining. In fact, it's purpose is to make you discover the flavors of Africa and to make you understand what the cuisine of this immense continent is all about.

Marcus Samuelsson's aim is not to present a pretentious compilation of all the recipes that are to be found in Africa as it would be close to impossible and not needed. He only wants us to get a basic idea of this unique cuisine in order to expand that idea to something bigger and to sense the soul of that place's culinary specialities, to appreciate their true value and to no more be ignorant regarding that subject as he believes fusion food, in the near future, will dwelve more into the African cuisine and will be more influenced by it's unique savors...

I've already tested a few recipes (Berbere, Toasted Peanut
Bread, Honey Bread and Bobotie) from this wonderful cookbook and I was extremely pleased with all of them! Thanks to his book, I have learnt to see Africa's cuisine in a entirely different way and to take away some of my aprioris and reticences...

If you are looking for new tastes and challenging new meals to cook, if you love spicy, exotic and tasty food, that you enjoy simple, humble yet delicious and refined dishes, and that you want to broaden your culinary horizons as ell as learn new things, then this book is for you as it is a great way to travel while staying at home.

~~~~~~~~~~

Marcus Samuelsson
was born in Ethiopia. After his mother died of tub
erculosis, the little Kassashun Tsegie and his older sister, Fantaye (adoptive name: Linda), were adopted by Ann Marie and Lennart Samuelsson, a homemaker and a geologist, who lived in Göteborg, Sweden. After becoming interested in cooking because of his Swedish maternal grandmother, Samuelsson studied at the Culinary Institute in Göteborg. He then apprenticed in Switzerland and Austria, and came to the USA in 1991 as an apprentice at "Aquavit", a restaurant in Manhattan, New York.

At the early age of 24, Marcus became the executive chef of "Aquavit" restaurant, and soon aft
er that also the youngest ever cook to receive a three-star restaurant review from Ruth Reichl of The New York Times in 1995. In 2003, he was named "Best Chef: New York City" by the James Beard Foundation. The same year he started a second New York restaurant, "Riingo" which serves Japanese-influenced American food and he released his first cookbook "Aquavit: And The New Scandinavian Cuisine". Now, at age 37, the chef is furthering his vision via "Merkato 55" (see interview), an African-inspired restaurant he's opened in Manhattan's Meatpacking District in September 2007.

In his 20s, he returned to Africa, reconnected with his extended birth family and became fascinated by the "very elegant cuisine'' of the African continent and appalled by the fact that the West had such a scant knowledge of it. Samuelsson worked for eight years on his book and delivered a little jewel of exotism called "The Soul of a New Cuisine: A Discovery of the Foods and Flavors of Africa''...

~~~~~~~~~~

The bread I am presenting today is a very fascinating specimen of the West African cuisine. While it might seem to contain a special and unorthodox mix of ingredients, you'll very soon discover that it is not difficult for our tastebuds to get accustomed to it's matchless, yet easily enjoyable flavor.

This Sub-Saharan bread is made with peanuts. Although those legumes originated in South America, groundnuts (another name for peanuts in Africa) are commonly used in various dishes (stews, soups, salads, baked goods, etc...) across Africa. They were introduced by the Portuguese traders from Brazil in the 16th century, They now hold an important place in the African cuisine as this ingredients is very much used in that vast continent...

Samuelsson's dense, yet smooth "Toasted Peanut Bread" is gorgeous. It somehow has a special and spicy flavor, but in reality, it's taste is delicate and is wonderfully fragrant. In a way, it's aroma reminds me a lot to satay as this rich bread contains similar spices such as ground peanuts, coconut milk, ground chilli powder and ground cumin... It is pleasantly nutty, without the groundnuts being overpowering and it also has a delicious wholewheat flavor that blends perfectly well with the ingredients used, thus transforming the tasting of this loaf into an incomparable gustatory experience.

You'll get transported by the uniqueness of this bread. So, why not make that bread roght now and let the the savors of Africa enter your kitchen!


~ African Toasted Peanut Bread ~
Recipe taken from "The Soul Of A New Cuisine" written by Marcus Samuelsson and slightly adapted by Rosa @ Rosa's Yummy Yums.

Makes 1 loaf.

Ingredients:

1 Cup (~240g + more) Coconut milk (see remarks)
3 Tbs Runny honey
1 Package (2 1/4 Tsps) Active dry yeast
1 1/2 Cup Peanuts
1 1/2 Teaspoons Chili powder
1/2 Tsp Ground cumin
2 1/2 Cups (319g) Plain white flour
2 1/2 Cups (394g) Whole-wheat flour
1 Tsp Salt
4 Tbs (60g) Unsalted butter, melted
Method:
1. Bring the coconut milk to a boil in a small saucepan.
2. Add the honey and stir continuously until the honey dissolves.
3. Remove from the heat and let cool until just warm (lukewarm, see rem
arks), then whisk in the yeast.
4. Let stand for 5 to 10 minutes until frothy.
5. Toast the peanuts in a large saute pan over medium heat for 1 to 2 minutes, until golden and fragrant.
6. Add the chili powder and cumin and toas
t for 20 seconds.

7. Let cool slightly, then transfer to a blender or food processor and puree until a smooth paste forms.
8. Mix together the flours and salt in a large bowl and make a well in the center.
9. Add the butter, coconut milk, and peanut paste to the well and slowly combine with the flour, using your hands to work the flour into the well until all the liquid has been absorbed (see remarks).

10. Transfer the dough to a lightly floured work surface and knead until a ball forms, about 5 to 10 minutes.
11. Place the dough in a greased bowl and turn to coat. Cover with a damp cloth/towel or oiled plastic wrap and let rise in a warm, draft-free place for 1 1/2 hours or until doubled in size.

12. Butter a 23 x 13cm (9 x 5-inch) loaf pan.
13. Punch down the dough and place in the pan.
14. Cover with a damp cloth/towel and let rise in a warm, draft-free spot for 40 minutes.
15. Preheat the oven to 180° C (350° F).

16. Bake the bread for 35 minutes, until the top is
golden brown and the bread sounds hollow when tapped underneath.
17. Place the pan on a cooling rack and let sit for 5 minutes, then remove the
pan and let cool completely.

Remarks:
When I made this bread, there wasn't enough liquid. So, I recommend yo
u to use a can (400ml) coconut milk for this bread or enough additional liquid/water in order to form a ball of dough.
The coconut milk should not be too hot (under 50° C
/122° F, at body temperature), otherwise it would kill the yeast and your dough would never rise!

Serving suggestions:

Serve this bread with either a comforting soup, beef stew or fish stew.

It is also delicious with honey, cheese or jam and smothered with chocolate spread.

***************

~ Pain Africain Au Cacahuètes Grillées ~
Recette tirée du livre "The Soul Of A New Cuisine" écrit par Marcus Samuelsson et adaptée par Rosa @ Rosa's Yummy Yums.

Pour 1 pain.


Ingrédients:
1 Tasse (~240g et plus) de Lait de coco (voir remarques)
3 CS de Miel liquide
1 Sachet (2 1/4 CC) de Levure sèche
1 1/2 Tasses de Cacahuètes
1 1/2 CC de Poudre de piment
1/2 CC de Cumin en poudre
2 1/2 Tasses (319g) de Farine fleur/blanche
2 1/2 Tasses (394g) de Farine complète
1 CC de Sel
4 CS (60g) de Beurre non-salé, fondu
Méthode:
1. Dans une petite casserole, porter le lait de coco à ébullition.
2. Ajouter le miel et remuer jusqu'à ce qu'il soit entièrement dissout.
3. Retirer la casserole du feu et laisser refroidir le liquide afin qu'il soit tiède (voir remarques), puis ajouter la levure et bien touiller/mélanger.
4. Laisser reposer pendant 5 à 10 minutes, ju
squ'à ce que le mélange soit mousseux.
5. Faire griller les cacahuètes dans une poêle, à feu moyen pendant 1 à
2 minutes, jusqu'à ce qu'elles soient dorées et embaument.
6. Ajouter la poudre de piment et le cumin, et griller encore pendant 2
0 secondes.

7. Faire légèrement refroidir, puis transférer dans le mixer afin d'obtenir une purée/pâte homogène.
8. Dans un grand bol, mélanger les farines et le sel ensemble. Faire un puit au centre.
9. Au centre du puit, ajouter le beurre, le lait de coco ainsi que la pâte de cacahuètes et bien mélanger à la farine en utilisant vos mains, jusqu'à ce que tout le liquide ait été absorbé (voir remarques).

10. Transférer la pâte sur un plan de travail légèrement fariné et la pétrir pendant 5 à 10 minutes.

11. Mettre la pâte dans un bol huilé/beurré et bien l'enduire de cette huile/ce beurre. Couvrir avec un linge humide ou une feuille de plastique alimentaire huilée et laisser lever dans un endroit chaud, sans courants d'air pendant 1 heure 1/2 ou jusqu'à ce que la pâte ait doublé de volume.
12. Beurrer un moule à pain rectangulaire de 23 x 13cm.
13. Dégonfler la pâte et la mettre dans le moule.
14. Couvrir avec un linge humide et laisser lever dans un lieu chaud et sans courants d'air pendant 40 minutes.
15. Préchauffer le four à 180° C (350° F).

16. Cuire le pain pendant 35 minutes, jusqu'à ce que le dessus soit bien doré et que le pain sonne creux.
17. Poser sur une grille pendant 5 minutes, puis retirer le moule et laisser refroidir complètement.

Remarques:
Quand j'ai fait ce pain, il m'a fallu utiliser beaucoup plus de liquide que mentionné dans la recette. De ce fait, je vous recommande d'utiliser une boîte de lait de coco (400ml) pour ce pain ou de rajouter sufisamment d'eau/de liquide afin de former une boule de pâte.
Le lait de coco ne devrait pas être trop chaud (plutôt à la température du corps, en dessous de 50° C) autrement votre levure sera tuée et votre pain ne lèvera ja
mais.

Idées de présentation:
Servez ce pain avec un soupe réconfortante, un râgout de boeuf ou de poisson.
Vous pouvez aussi manger ce pain avec du miel, du fromage ou de la confiture et pourquoi pas du chocolat à tartiner.