Oh, the summer nightSummer is made for fun, not for labor. It is a time of the year that obliges us to slow down, loosen up and embrace life to the fullest. Hence during the hotter days, when our solar star is illuminating the Northern hemisphere with its blazingly fiery, yet soothingly warm and rejuvenating rays, exhausting chores should be banned as it is a blasphemy to be emprisonned in a steaming hot box while slaving at work or on a school bench.
Has a smile of light
And she sits on a sapphire throne.
- Barry Cornwal
After going through a particularly rough and gloomy winter and spring, we merely have one desire: to limitlesly enjoy the season and feed on as much sunlight as humanly possible, because autumn comes always faster than expected and our beloved Sol's luminescence has the power to heal our soul like no other medicine does/can.
Birds singing joyfully. Lush green pastures. Travelling near and far. Camps, bonfires and sausages on a stick. Late nights with friends. Parties, picnics and barbecues in the wild, at the beach, by the lakeside or pool. Music festivals and midnight concerts. Bonding. Delightful romances. Bikinis, sunglasses, tank tops, flip flops and shorts. Water fun. Basking. Sun kissed hair and tan lines. Ice creams, slushies, refreshing drinks and cafe terraces. Bodies caressed by the balmy breeze. Feeling invicible and forever youthful. Sitting under the shade of a parasol or of a tree. Canicular temperatures. Moist and humid air. Blissfully blue skies, puffy cumulus clouds and rumbling storms. The smell of wet concrete after the rain. Memories by the thousand.Summer breeze makes me feel fineBlowin' through the jasmine in my mind- "Summer Breeze" Type O Negative (originally written by Seals And Crofts)Fell into a sea of grass- "Summertime Rolls" by Jane's Addiction
And disappeared among the shady blades
Children all ran over me
Screaming "Tag... you are the one."
Heavenly, isn't it? Yes? So don't forget to make it all count! Indulgence and joy are vital for our well-being and extremely precious, thus we should not waste our earthly existence never putting ourselves first and forgetting how to be merry.
Rest is not idleness, and to lie sometimes on the grass on a summer day listening to the murmur of water or watching the clouds float across the sky, is hardly a waste of time."It is for this reason I have decided to take it easy with my blog (posting less recipes and focusing on publishing more wordless photography essays) and relax a little throughout the holiday season. Unfortunately, I'm financially unable to go on a vacation or visit places (nothing new, though LOL), so that's the only way for me to relish this magnificent period of frivolousness by frolicking around, cultivating idleness, getting in touch with my inner child and looking after myself...
- John Lubbock
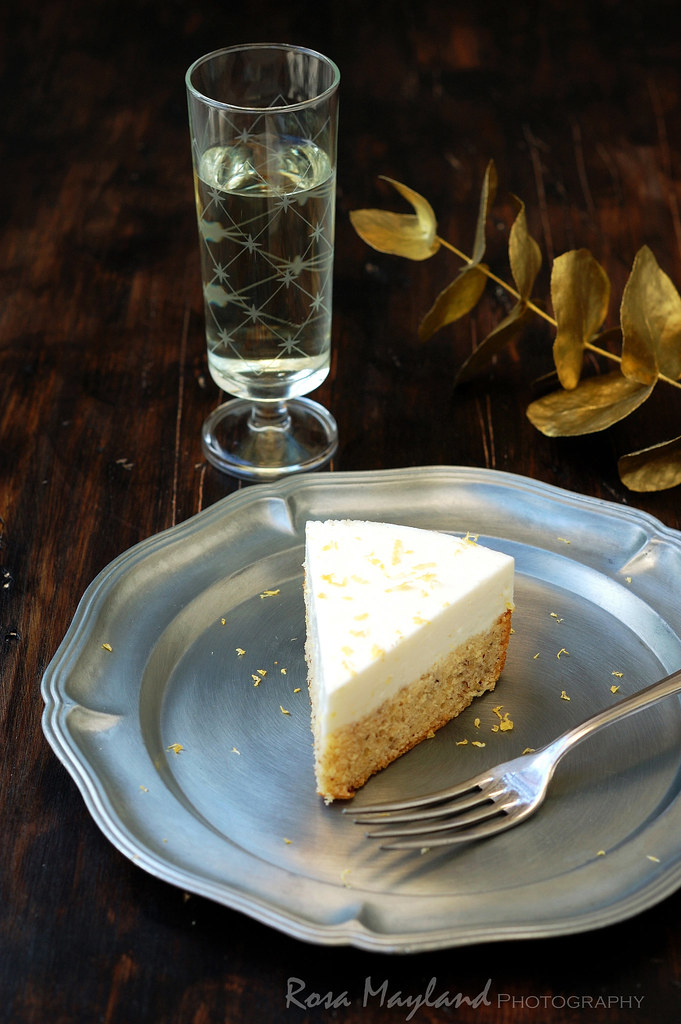
So, without further ado, I would like to introduce you to an estival entremet I am particularly fond of serving to P., but also to my friends and guests. It is a dessert treat which I have been baking for quite a while (at least 10 years) now and which I have (yet) not grown tired of eating on a regular basis.
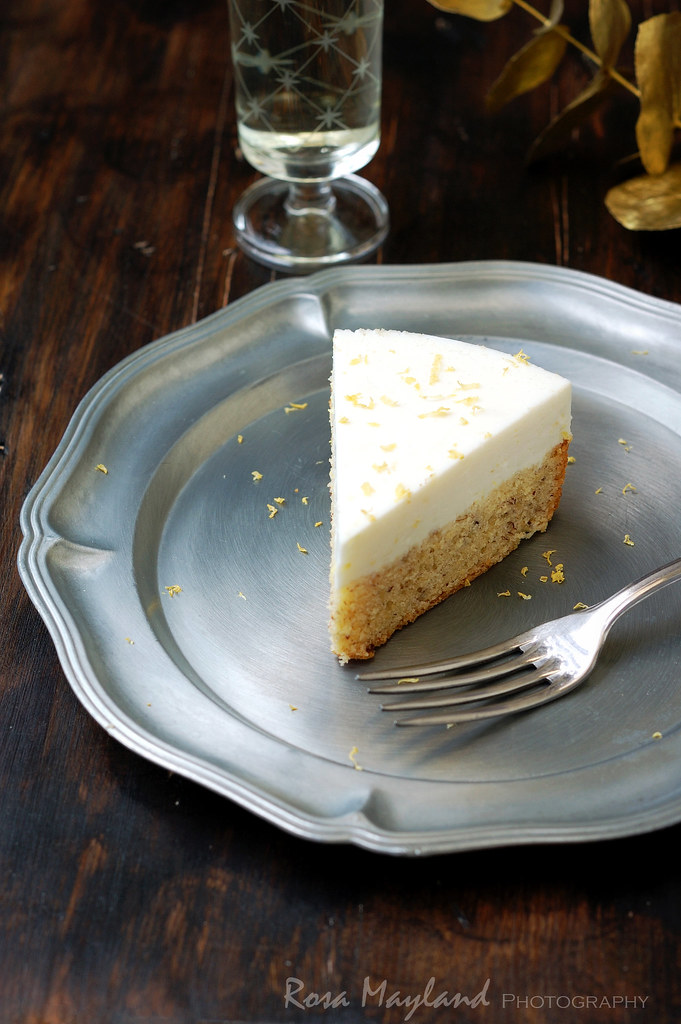
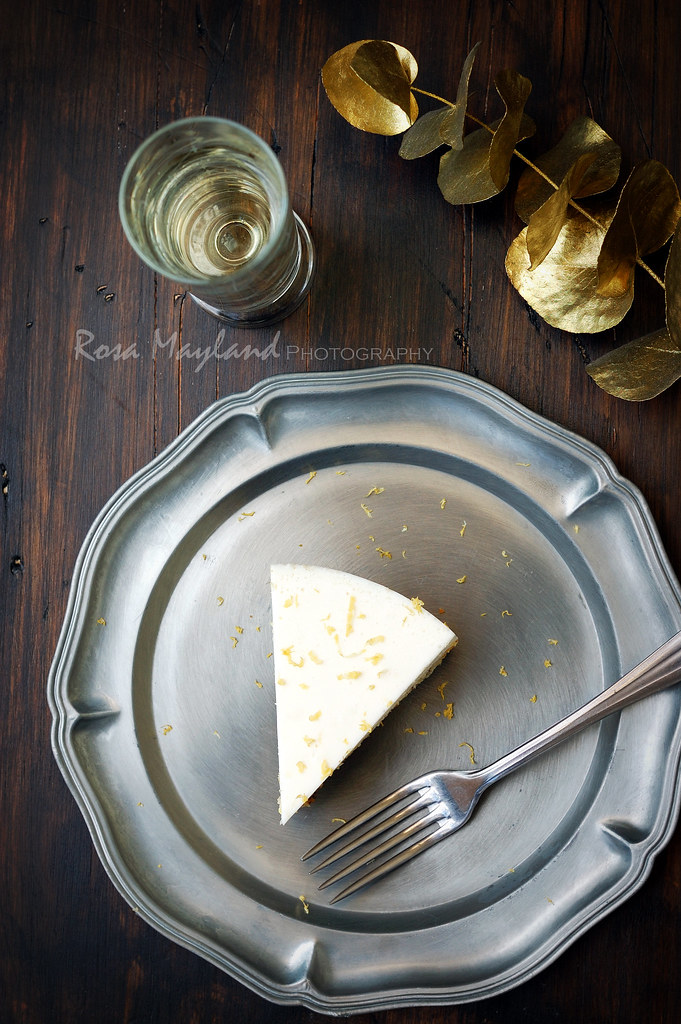
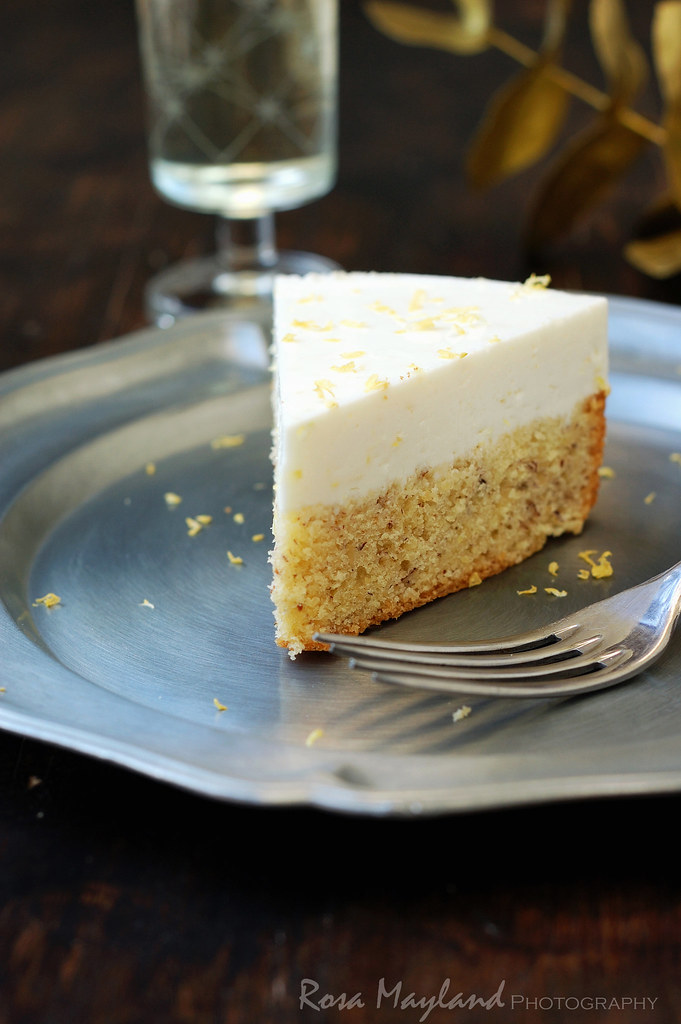
This simple and somewhat old-fashioned "Lemon And Ricotta Delight" is ambrosially citrusy, exhaliratingly nutty and pleasantly refreshing. The moist and slightly crumbly cake layer pairs wonderfully well with the lusciously smooth cheesecake topping. Without doubt, a gloriously indulgent and irresistible delicacy!
Recipe freely adapated from Coopération magazine.
Serves 2-3.
Ingredients For The Cake:
2 Eggs
120g Unsalted butter
80g Castor sugar
70g Ground hazelnuts
170g All-purpose flour
A pinch of fine sea salt
1 Tsp Baking powder
Ingredients For The Ricotta Topping:
250g Ricotta
The zest and juice (7 Tbs) of 1 organic lemon
40g Castor sugar
3.5 Gelatin sheets
Method For The Cake:
1. Line an 18cm springform pan with parchment paper and lightly butter the edges.
2. Preheat the oven to 180 ° C (350° F).
3. Beat the butter together with the sugar until the mixture is light and fluffy.
4. Incorporate the eggs, one at a time, mixing well after each addition.
5. Fold in the hazelnuts, flour, salt and baking powder just until your get a smooth mixture.
6. Pour the batter into the pan and smooth the top.
7. Bake for 30-35 minutes or until a knife inserted in the center of the cake comes out clean.
8. Remove the cake from the oven and let it cool in the pan, on a wire rack.
9. Once at room temperature, level the cake.
10. Soak the gelatin in cold water for about 5 minutes to soften.
11. Whisk the ricotta together with lemon zest, lemon juice and the sugar.
12. Squeeze the gelatin, place it in a pan and let it melt over low temperature, while stirring.
13. Pour the ricotta mixture over the gelatin (not the contrary), mix well and then pour the filling over the cake.
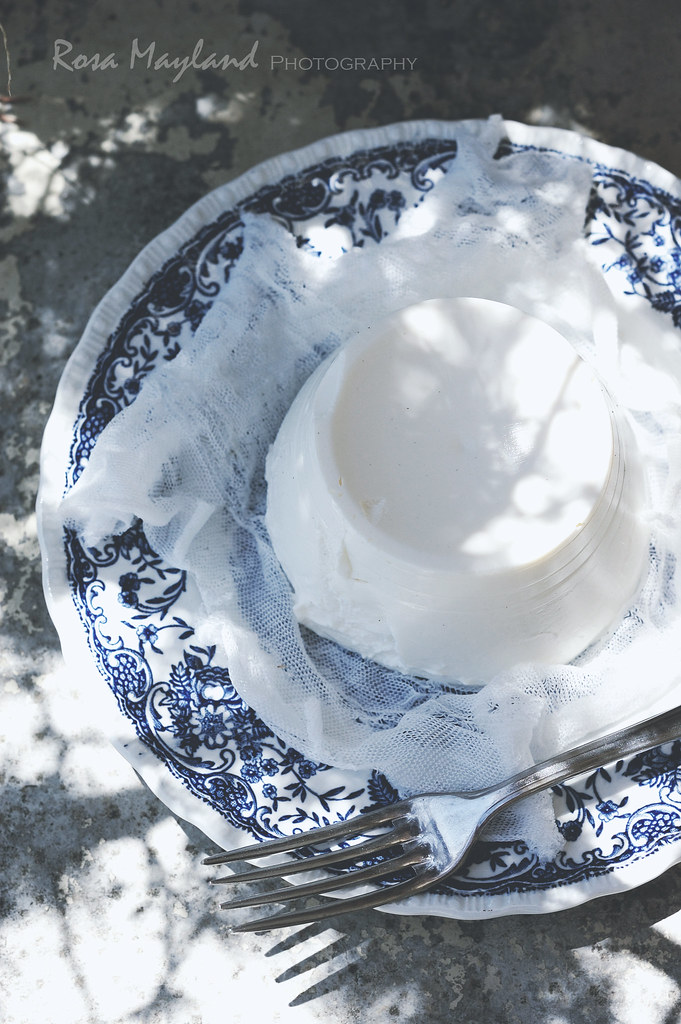
14. Refrigerate until firm, about 2-3 hours.
15. Unclasp the sides of pan, remove the cheesecake and serve.
Remarks:
You can replace the ground hazelnuts with almonds and the lemon zest and juice with lime or orange zest and juice.
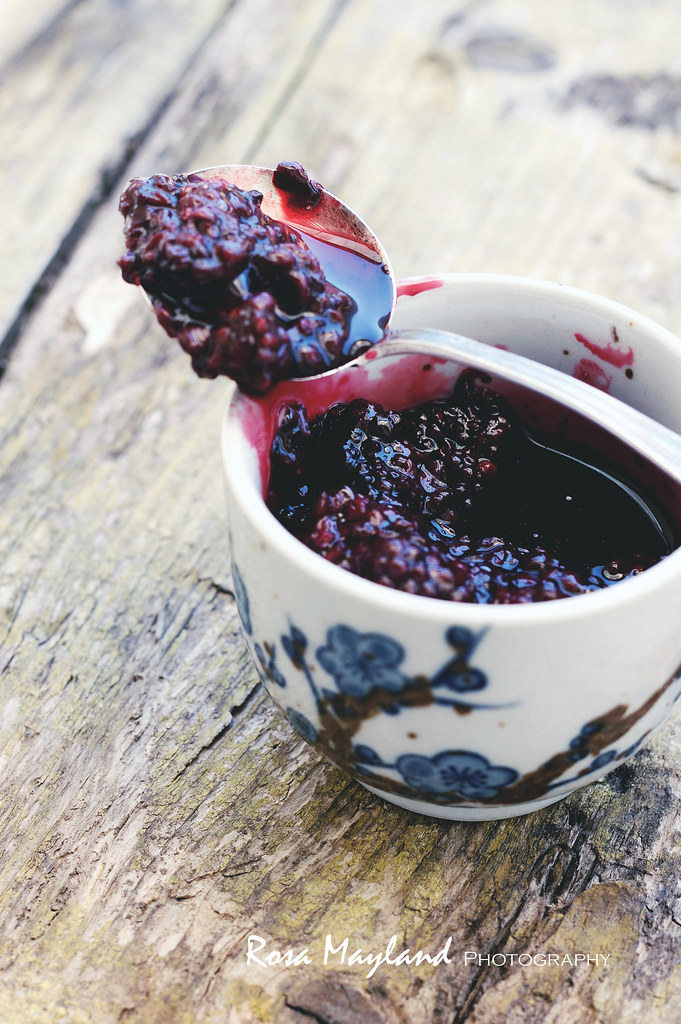
Serving suggestions:
Serve with a berry coulis or compote (for ex. blackberry).
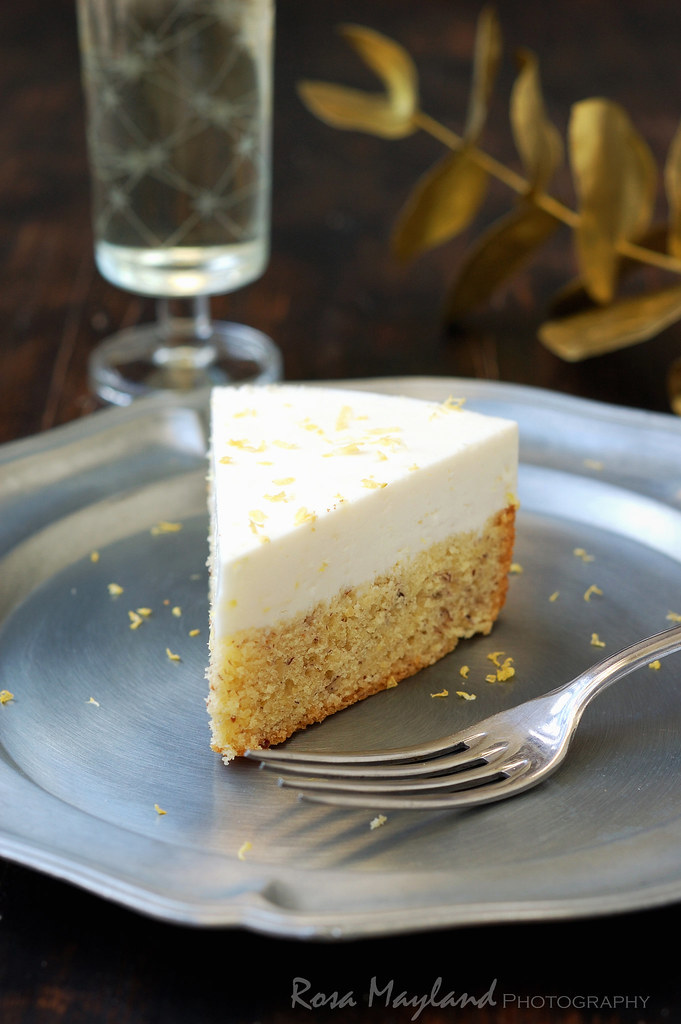
Entremet Au Citron Et À La Ricotta
Recette adaptée du journal Coopération.
Ingrédients Pour Le Cake:
2 Oeufs
120g de Beurre non-salé
80g de Sucre semoule
70g de Noisettes moulues
170g de Farine blanche
1 pincée de sel de mer fin
1 CC de Levure chimique
Ingrédients Pour La Garniture À La Ricotta:
250 g de ricotta
Le zeste et le jus (7 CS) d'un citron bio
40 g de Sucre semoule
3.5 Feuilles de gelatine
Méthode Pour Le Cake:
1. Chemiser un moule à charnière de 18cm avec du papier sulfurisé et beurrer légèrement
les bords.
2. Préchauffer le four à 180° C.
3. Battre le beurre en pommade avec le sucre.
4. Incorporer les oeufs un à un.
5. Incorporer les noisettes, la farine, le sel et la levure chimique afin d'obtenir une pâte fluide.
6. Verser cette pâte dans le moule à charnière et lisser la surface.
7. Faire cuire pendant 30-35 minutes, jusqu'à ce que la pointe d'un couteau insérée au centre du gâteau en ressorte propre et sèche.
8. Sortir le gâteau du four et le laisser refroidir le dans le moule.
9. Une fois refroidit, égaliser le dessus du cake.
10. Faire tremper la gélatine dans de l'eau froide pendant 5 minutes.
11. Bien mélanger au fouet la ricotta avec le zeste et le jus de citron ainsi que le sucre.
12. Presser la gélatine, la mettre dans une casserole et la laisser fondre à feu doux, tout en remuant.
13. Verser le mélange à la ricotta sur la gélatine (et pas le contraire!), puis en napper le gâteau froid dans son moule.
14. Laisser prendre au réfrigérateur pendant au moins 2-3 heures.
15. Démouler et servir.
Remarques:
Les noisettes moulues peuvent être remplacées par des amandes moulues et le zeste ansi que le jus de citron par le zeste et le jus d'une orange (respecter les quantités).
Idées de présentation:
Servir aved un coulis ou une compote de baies (je recommande le coulis de mûres).