 Five months have passed since I first joined the "Daring Bakers" ranks and there was not one single challenge which hasn't made me learn something about baking and it's secrets. All recipes were very different (Lemon Meringue Pie, Yule Log, Potato Bread & Bostoni Cream Pie - see recipes). While some were quite easy and botherless to make, others were highly stressful, complex and difficult, but never were they boring, uninteresting nor a total loss of time...Every time a new challenge is about to be revealed, I get all excited as well as a little worried, because I always wonder what kind of surprises our hosts have in store for us! One thing I'm sure of is that it will once again be the occasion for me to learn new tricks and push my borders a little further each time.
It is for those reasons that the February recipe particularly attracted me. I knew that this month's trial was going to be fun as I love bread and enjoy testing all kinds of new and unknown (to me) baking techniques. Well, I was not going to be disappointed! The word "Bread" rings very poetically in my ears. It evokes wonderful yeasty fragrances, the smooth and elastic inside of a loaf, the thrilling pleasure one gets while watching his/her bread bake, a delightfully crunchy crust that snaps when you bite into it, an incomparable gustatory adventure, the incredible vastness of breadland, the amazing possibilities that baking offers and so much more... So many things that make our daily life all the more enjoyable.
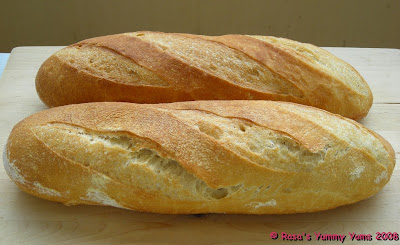
Although I have a minuscule kitchen, an itsy-bitsy working space (the sides of my sink) and no special equipment on hand (everything is done by hand and I have a limited amount of kitchen gadgets/ustensiles), this bread turned out smashingly well and looked pretty much like the ones you can find at a bakery. A great fulfillment for a perfectionist like me!
I must say that it was time-consuming as it took me a whole day from 11h00 am till around 18h00 pm to finish those three loaves. Yet, at the same time, it wasn't extremely difficult technically speaking. Of course, there were a few tricky moments/parts to go through like the shaping and the transferring from the towel to the baking sheet. Certain stages were a little critical, but otherwise, it was quite a straight-forward and flawless process which demanded a lot of patience and concentration.
For me, things went smoothly and I met no problem at all, apart from the post-baking disaster I had to face once the breads were cooling on the rack. I mean, hell! My kitchen looked like a disaster area and the whole place was covered with a layer of flour. A real mess!
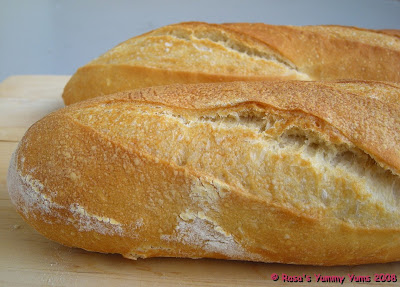
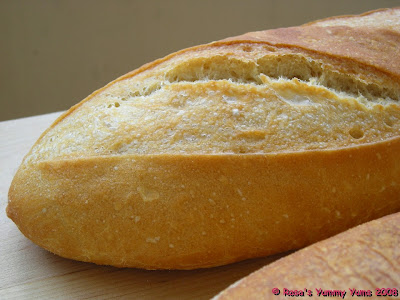
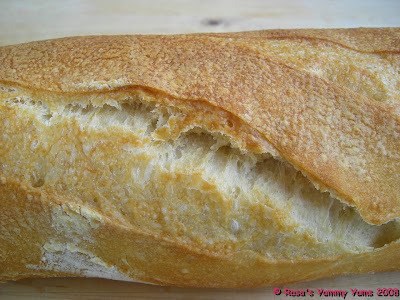
That "French Bread" was really gorgeous. It looked just perfect, had a shiny and crispy crust and the most beautiful and smooth inside I had ever come across. Taste-wise, it was heavenly. Just with a little butter, this bread tasted awesomely good and was magnificently fragrant! Yummy!
Another brilliantly amazing recipe that I will keep preciously!
Thanks to both our hosts Breadchick Mary from "The Sour Dough" (USA) and Sara from "I Like To Cook" (USA) for the diverting day I had!!! You made a damn good choice here!!!
 ~ Pain Français (French Bread) ~
Recipe taken from "Mastering the Art of French Cooking: Volume Two" by Julia Child and Simone Beck.
Recipe Quantity:
3 x Baguettes (24” x 2”) or batards (16” x 3”) or
6 x Short loaves, ficelles, 12 – 16” x 2” or
3 x Round loaves, boules, 7 – 8” in diameter or
12 x Round or oval rolls, petits pains or
1 x Large round or oval loaf, pain de menage or miche; pain boulot
Recipe Time:
7 – 9 hours.
Equipment Needed:
Unless you plan to go into the more elaborate simulation of a baker’s oven, you need no unusual equipment for the following recipe. Here are the requirements, some of which may sound odd but will explain themselves when you read the recipe.
4 to 5 quart mixing bowl with fairly vertical rather than outward slanting sides.
A kneading surface of some sort, 1 1/2 to 2 square feet.
A rubber spatula or either a metal scraper or a stiff wide metal spatula.
1 to 2 unwrinkled canvas pastry cloths or stiff linen towels upon which the dough may rise.
A stiff piece of cardboard or plywood 18 – 20 inches long and 6 – 8 inches wide, for unmolding dough from canvas to baking sheet.
Finely ground cornmeal or pasta pulverized in an electric blender to sprinkle on unmolding. Board so as to prevent dough from sticking.
the largest baking sheet that will fit in your oven.
A razor blade or extremely sharp knife for slashing the top of the dough.
A soft pastry brush or fine spray atomizer for moistening dough before and during baking.
A room thermometer to verify rising temperature.
 Ingredients:
20g Fresh yeast (or 1 package dry active yeast)
1/3 Cup (75ml) Warm water (not over 100° F/38° C)
3 1/2 Cups (about 1 lb/490g) All purpose flour
2 1/4 Tsps (12g) Salt1 1/4 Cups (280 - 300ml) Tepid water (at 70°–74 F/21°- 23° C)
Method:
1. Stir the yeast in the 1/3 cup warm water and let liquefy completely while measuring flour into mixing bowl.2. When yeast has liquefied, pour it into the flour along with the salt and the rest of the water.
3. Stir and cut the liquids into the flour with a rubber spatula, pressing firmly to form a dough and making sure that all the bits of flour and unmassed pieces are gathered in.
(Depending on the humidity and temperature of your kitchen and the type of plain (AP) flour you use, you may need to add additional flour or water to the dough. To decide if this is necessary, we recommend stopping during the mixing process and poking your dough ball. If the dough is super sticky, add additional flour one handful at a time until the dough is slightly sticky and tacky, but not dry. If the dough is dry and feels hard, add 1 tablespoon of water at a time, until the dough is soft and slightly sticky.)
4. Turn the dough out onto kneading surface, scraping bowl clean.
(The dough will be soft and sticky.)
5. Let the dough rest for 2 – 3 minutes while you wash and dry the bowl.6. (The flour will have absorbed the liquid during this short rest, and the dough will have a little more cohesion for the kneading that is about to begin. Use one hand only for kneading and keep the other clean to hold a pastry scrapper, to dip out extra flour, etc.. Your object in kneading is to render the dough perfectly smooth and to work it sufficiently so that all the gluten molecules are moistened and joined together into an interlocking web. You cannot see this happen, of course, but you can feel it because the dough will become elastic and will retract into shape when you push it out.)
Start kneading by lifting the near edge of the dough, using a pastry scraper or stiff wide spatula to help you if necessary, and flipping the dough over onto itself. Scrape dough off the surface and slap it down; lift edge and flip it over again, repeating the movement rapidly.
 7. (In 2 -3 minutes the dough should have enough body so that you can give it a quick forward push with the heel of your hand as you flip it over.) Continue to knead rapidly and vigorously in this way. (If the dough remains too sticky, knead in a sprinkling of flour. The whole kneading process will take 5 – 10 minutes, depending on how expert you become).
8. (Shortly after this point, the dough should have developed enough elasticity so it draws back into shape when pushed, indicating the gluten molecules have united and are under tension like a thin web of rubber; the dough should also begin to clean itself off the kneading surface, although it will stick to your fingers if you hold a pinch of dough for more than a second or two.)
Let dough rest for 3 – 4 minutes. Knead by hand for a minute. (The surface should now look smooth; the dough will be less sticky but will still remain soft.) It is now ready for its first rise.
9. (You now have approximately 3 cups of dough that is to rise to 3 1/2 times its original volume, or to about 10 1/2 cups.)
Wash and fill the mixing bowl with 10 1/2 cups of tepid water (70 – 80 degrees) and make a mark to indicate that level on the outside of the bowl.(Note, that the bowl should have fairly upright sides; if they are too outward slanting, the dough will have difficulty in rising.)
10. Pour out the water, dry the bowl, grease it and place the dough in it.
11. Cover with a greased plastic wrap, and top with a folded towel. Set on a wooden surface, marble or stone are too cold. Or on a folded towel or pillow, and let rise free from drafts anyplace where the temperature is around 70 degrees.(If the room is too hot, set bowl in water and keep renewing water to maintain around 70 degrees. Dough should take at least 3 – 4 hours to rise to 10 1/2 cups. If temperature is lower than 70 degrees, it will simply take longer.)
12. (When fully risen, the dough will be humped into a slight dome, showing that the yeast is still active; it will be light and spongy when pressed. There will usually be some big bubbly blisters on the surface, and if you are using a glass bowl you will see bubbles through the glass. The dough is now ready to be deflated, which will release the yeast engendered gases and redistribute the yeast cells so that the dough will rise again and continue the fermentation process.)
 With a rubber spatula, dislodge dough from inside of bowl and turn out onto a lightly floured surface, scraping bowl clean. If dough seems damp and sweaty, sprinkle with a tablespoon of flour.
13. Lightly flour the palms of your hands and flatten the dough firmly but not too roughly into a circle, deflating any gas bubbles by pinching them.14. Lift a corner of the near side and flip it down on the far side. Do the same with the left side, then the right side. Finally, lift the near side and tuck it just under the edge of the far side.
(The mass of dough will look like a rounded cushion.)
15. Slip the sides of your hands under the dough and return it to the bowl. Cover and let rise again, this time to not quite triple, but again until it is dome shaped and light and spongy when touched.16. Loosen dough all around inside of bowl and turn out onto a lightly floured surface.
(Because of its two long rises, the dough will have much more body. If it seems damp and sweaty, sprinkle lightly with flour.)17. Making clean, sure cuts with a large knife or a bench scraper, divide the dough into:
- 3 equal pieces for long loaves (baguettes or batards) or small round loaves (boules only)
- 5 – 6 equal pieces for long thin loaves (ficelles)
- 10 – 12 equal pieces for small oval rolls (petits pains, tire-bouchons) or small round rolls (petits pains, champignons)
- 2 equal pieces for medium round loaves (pain de menage or miche only)
- If you making one large round loaf (pain de menage, miche, or pain boulot), you will not cut the dough at all and just need to follow the directions below.
18. After you have cut each piece, lift one end and flip it over onto the opposite end to fold the dough into two; place dough at far side of kneading surface.
19. Cover loosely with a sheet of plastic and let rest for 5 minutes before forming.
(This relaxes the gluten enough for shaping but not long enough for dough to begin rising again.)
 20. While the dough is resting, prepare the rising surface; smooth the canvas or linen towel on a large tray or baking sheet, and rub flour thoroughly into the entire surface of the cloth to prevent the dough from sticking.
21. (Because French bread stands free in the oven and is not baked in a pan, it has to be formed in such a way that the tension of the coagulated gluten cloak on the surface will hold the dough in shape.)
For the "Long Loaves - The Batard":
Baguettes are typically much too long for home ovens but the shaping method is the same.
I. After the 3 pieces of dough have rested 5 minutes, form one piece at a time, keeping the remaining ones covered.
II. Working rapidly, turn the dough upside down on a lightly floured kneading surface and pat it firmly but not too roughly into an 8 to 10 inch oval with the lightly floured palms of your hands. Deflate any gas bubbles in the dough by pinching them.
III. Fold the dough in half lengthwise by bringing the far edge down over the near edge.
IV. Being sure that the working surface is always lightly floured so the dough will not stick and tear, which would break the lightly coagulated gluten cloak that is being formed, seal the edges of the dough together, your hands extended, thumbs out at right angles and touching.
V. Roll the dough a quarter turn forward so the seal is on top.
VII. Flatten the dough again into an oval with the palms of your hands.
VIII. Press a trench along the central length of the oval with the side of one hand.
IX. Fold in half again lengthwise.
X. This time seal the edges together with the heel of one hand, and roll the dough a quarter of a turn toward you so the seal is on the bottom.
 XI. Now, by rolling the dough back and forth with the palms of your hands, you will lengthen it into a sausage shape. Start in the middle, placing your right palm on the dough, and your left palm on top of your right hand.
XII. Roll the dough forward and backward rapidly, gradually sliding your hands towards the two ends as the dough lengthens.
XIII. Deflate any gas blisters on the surface by pinching them. Repeat the rolling movement rapidly several times until the dough is 16 inches long, or whatever length will fit on your baking sheet. During the extension rolls, keep circumference of dough as even as possible and try to start each roll with the sealed side of the dough down, twisting the rope of dough to straighten the line of seal as necessary. If seal disappears, as it sometimes does with all purpose flour, do not worry.
XIV. Place the shaped piece of dough, sealed side up, at one end of the flour rubbed canvas, leaving a free end of canvas 3 to 4 inches wide. The top will crust slightly as the dough rises; it is turned over for baking so the soft, smooth underside will be uppermost.
XV. Pinch a ridge 2 1/2 to 3 inches high in the canvas to make a trough, and a place for the next piece. Cover dough with plastic while you are forming the rest of the loaves.
XVI. After all the pieces of dough are in place, brace the two sides of the canvas with long rolling pins, baking sheets or books, if the dough seems very soft and wants to spread out. Cover the dough loosely with flour rubbed dish towel or canvas, and a sheet of plastic. Proceed immediately to the final rising, next step.
For the "Long Thin Loaves – Fincelles":
Follow the steps above but making thinner sausage shapes about 1/2 inch in diameter. When they have risen, slash as with the Batard.
 For the "Oval Rolls – Petits Pains, Tire-Bouchons":
Form like batards, but you will probably not have to lengthen them at all after the two foldings and sealings. Place rolls on a floured canvas about 2 – 4” apart and cover with plastic to rise. When they have risen, make either 2 parallel slashes or a single slash going from one end to the other.
For the "Small, Medium, or Large Round Loaves – Pain de Menage, Miches, Boules":
The object here is to force the cloak of coagulated gluten to hold the ball of dough in shape: the first movement will make cushion; the second will seal and round the ball, establishing surface tension.
I. Place the dough on a lightly floured surface.II. Lift the left side of the dough with the side of your left hand and bring it down almost to the right side.
III. Scoop up the right side and push it back almost to the left side. Turn the dough a quarter turn clockwise and repeat the movement 8 – 10 times. The movement gradually smooths the bottom of the dough and establishes the necessary surface tension; think of the surface of the dough as if it were a fine sheet of rubber you were stretching in every direction.
IV. Turn the dough smooth side up and begin rotating it between the palms of your hands, tucking a bit of the dough under the ball as you rotate it. In a dozen turns you should have a neatly shaped ball with a little pucker of dough, le cle, underneath where all the edges have joined together.
V. Place the dough pucker side up in a flour-rubbed canvas; seal the pucker by pinching with your fingers. Flour lightly, cover loosely and let rise to almost triple its size. After unmolding upside down on the baking sheet, slash with either a long central slash, two long central slashes that cross at right angles, or a semi-circular slash around half the circumference.
 For the "Small Round Rolls – Petits Pains, Champignons":
The principles are the same here as for the preceding round loaves, but make the cushion shape with your fingers rather than the palms of your hands.
I. For the second stage, during which the ball of dough is rotated smooth side up, roll it under the palm of one hand, using your thumb and little finger to push the edges of the dough underneath and to form the pucker, where the edges join together
II. Place the formed ball of dough pucker side up on the flour rubbed canvas and cover loosely while forming the rest. Space the balls 2 inches apart. When risen to almost triple its size, lift gently with lightly floured fingers and place pucker side down on baking sheet. Rolls are usually too small for a cross so make either one central slash or the semi-circular cut.
For the "Large Oval Loaf – Pain Boulot":
Follow the directions for the round loaves except instead of rotating between the balms of your hands and tucking to form a round loaf, continue to turn the dough from the right to the left, tucking a bit of each end under the oblong loaf. In a dozen turns you should have a neatly shaped oval with tow little puckers of dough, le cles, underneath where all the edges of have joined together.
I. Place the dough pucker sides up in a flour-rubbed canvas; seal the puckers by pinching with your fingers. Flour lightly, cover loosely and let rise to almost triple its size. After unmolding upside down on the baking sheet, slash with parallel slashes going diagonally across the top starting from the upper left and going to the lower right.
22. (The covered dough is now to rise until almost triple in volume; look carefully at its pre-risen size so that you will be able to judge correctly. It will be light and swollen when risen, but will still feel a little springy when pressed. It is important that the final rise take place where it is dry; if your kitchen is damp, hot, and steamy, let the bread rise in another room or dough will stick to the canvas and you will have difficulty getting it off and onto another baking sheet. It will turn into bread in the oven whatever happens, but you will have an easier time and a better loaf if you aim for ideal conditions.)
Preheat oven to 450 degrees about 30 minutes before estimated baking time.
 23. (This is only a description of the unmolding of the "Batard", but the unmolding process is the same no matter the shape of your loaf or loaves. The key to unmolding without deflating your bread is slow and gentle!his is only a description of the unmolding of The Batard but the unmolding process is the same no matter the shape of your loaf or loaves. The key to unmolding without deflating your bread is to do things slowly and gently! The 3 pieces of risen dough are now to be unmolded from the canvas and arranged upside down on the baking sheet. The reason for this reversal is that the present top of the dough has crusted over during its rise; the smooth, soft underside should be uppermost in the oven so that the dough can expand and allow the loaf its final puff of volume. For the unmolding you will need a non-sticking intermediate surface such as a stiff piece of cardboard or plywood sprinkled with cornmeal or pulverized pasta.)
Remove rolling pins or braces. Place the long side of the board at one side of the dough; pull the edge of the canvas to flatten it; then raise and flip the dough softly upside down onto the board.
24. (Dough is now lying along one edge of the unmolding board: rest this edge on the right side of a lightly buttered baking sheet.)
Gently dislodge dough onto baking sheet, keeping same side of the dough uppermost: this is the soft smooth side, which was underneath while dough rose on canvas. If necessary run sides of hands lightly down the length of the dough to straighten it. Unmold the next piece of dough the same way, placing it to the left of the first, leaving a 3 inch space. Unmold the final piece near the left side of the sheet.
 25. (This is only the description of the slashing for the Batard. All other slashes for the other shapes are described in Step 6: "Forming the Loaves". The top of each piece of dough is now to be slashed in several places. This opens the covering cloak of gluten and allows a bulge of dough underneath to swell up through the cuts during the first 10 minutes of baking, making decorative patterns in the crust. These are done with a blade that cuts almost horizontally into the dough to a depth of less than half an inch.)
Start the cut at the middle of the blade, drawing toward you in a swift clean sweep.
(This is not quite as easy as it sounds, and you will probably make ragged cuts at first; never mind, you will improve with practice. Use an ordinary razor blade and slide one side of it into a cork for safety; or buy a barbers straight razor at a cutlery store. For a 16 to 18 inch loaf make 3 slashes. Note that those at the two ends go straight down the loaf but are slightly off centre, while the middle slash is at a slight angle between the two. Make the first cut at the far end, then the middle cut, and finally the third. Remember that the blade should lie almost parallel to the surface of the dough.)
26. As soon as the dough has been slashed, moisten the surface either by painting with a soft brush dipped in cold water, or with a fine spray atomizer, and slide the baking sheet onto rack in upper third of preheated oven. Rapidly paint or spray dough with cold water after 3 minutes, again in 3 minutes, and a final time 3 minutes later.
(Moistening the dough at this point helps the crust to brown and allows the yeast action to continue in the dough a little longer. The bread should be done in about 25 minutes; the crust will be crisp, and the bread will make a hollow sound when thumped. If you want the crust to shine, paint lightly with a brush dipped in cold water as soon as you slide the baking sheet out of oven.)
 29. Cool the bread on a rack or set it upright in a basket or large bowl so that air can circulate freely around each piece.
(Although bread is always exciting to eat fresh from the oven, it will have a much better taste when the inside is thoroughly cool and has composed itself.)
Remarks:
Because it contains no fats or preservatives of any kind, French bread is at its best when eaten the day it is baked. It will keep for a day or two longer, wrapped airtight and refrigerated, but it will keep best if you freeze it – let the loaves cool first, then wrap airtight. To thaw, unwrap and place on a baking sheet in a cold oven; heat the oven to 400 degrees. In about 20 minutes the crust will be hot and crisp, and the bread thawed. The French, of course, never heat French bread except possibly on Monday, the baker’s holiday, when the bread is a day old.
After each bread session, if you have used canvas, brush it thoroughly to remove all traces of flour and hang it out to dry before putting away. Otherwise the canvas could become mouldy and ruin your next batch of dough.
Serving suggestions:
Eat this bread with cheese, pate, dried meat/sausages, savory and sweet spreads or alongside a bowl of soup. Use it to make toasts, bruschette, bread pudding or sandwiches.
 Etant donné la longueur du texte original, je n'ai malheureusement pas pu faire une traduction française de ce billet et je m'en excuse auprès de tous mes amis blogueurs francophones!!!
Voici les blogs où vous trouverez cette recette en version française:
chez Vibi de "La Casserole Carrée" (Canada)
chez Isa de "Les Gourmandises d'Isa" (Canada)

 For centuries, oat has been cultivated in the Noth of Scotland and it has always represented a healthy source of nourishment for Highlanders. This versatile cereal is very practical as it can be cooked/baked in many ways (bread, porridge, granola, cookies, patties, etc...). It has long been considered a poor people's/farmer's staple, but now, it is gaining unawaited popularity (within the gourmet world/culinary community) and has somehow become a little trendy as more and more food lovers are recognizing it's uncomparable culinary qualities, fascinating nutritional values and special flavor...
 "Oatcakes" are like the Scottish cuisine, substantial and simple, yet delightful. Both are made to brave this country's vivifying air and harsh weather. Those dry and coarse savory "cookies" might, at first, look very ordinary, but, in reality, they are extremely addictive and pleasant as they have a unique flavor that makes them extremely enjoyable. Contrarily to what you might think, "Oatcakes" don't taste at all like "Oat Cookies". With their interesting and refined nutty aroma as well as their characteristic lardy savor, they capture all our attention. Not to mention that their flaky and crisp texture is just simply wonderful!
 ~ Otacakes ~
 Method:
 Remarks:
 ~ Otacakes (Palets A l'Avoine) ~
 Méthode:
 Remarques:


