Showing posts with label Indian Cuisine. Show all posts

Friday, November 16, 2012

TURKEY TIKKA MASALA - DINDE TIKKA MASALA


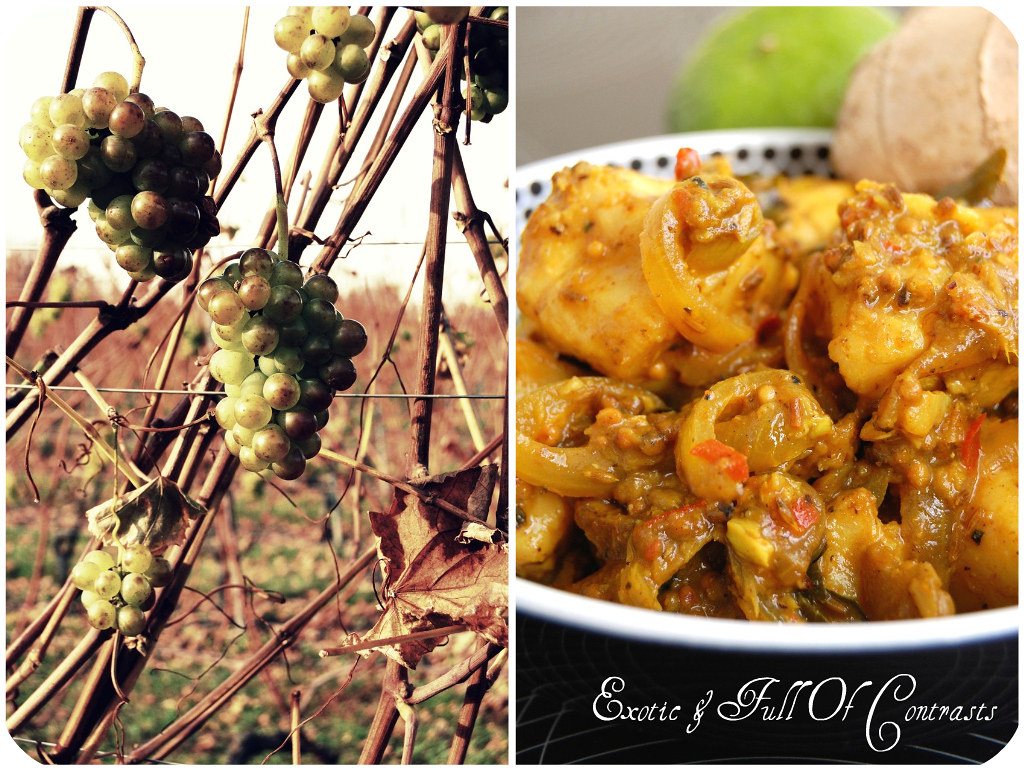
It was November - the month of crimson sunsets, parting birds, deep, sad hymns of the sea, passionate wind-songs in the pines. Anne roamed through the pineland alleys in the park and, as she said, let that great sweeping wind blow the fogs out of her soul.
― L.M. Montgomery, Anne of Green Gables
November is an in-between month. Neither is it exactly autumn anymore nor can we say that it is yet winter, hence it could be described, to some extend, as devoid of character and drab.  Nonetheless, despite its apparent insipidity, this epoch of the year is far from being dreadfully uninteresting or desperately morose. As a matter of fact, provided that you open your eyes and set aside your prejudices, you'll soon realize that there's something delightfully beautiful as well as totally romantic and dramatic about the late fall season.

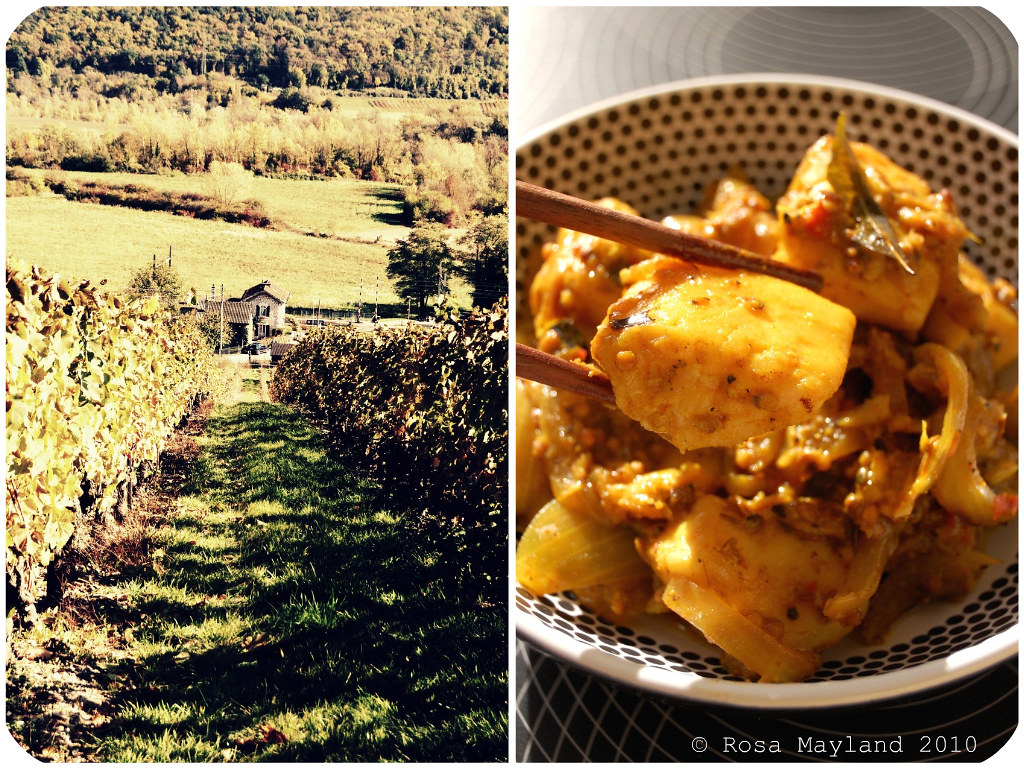
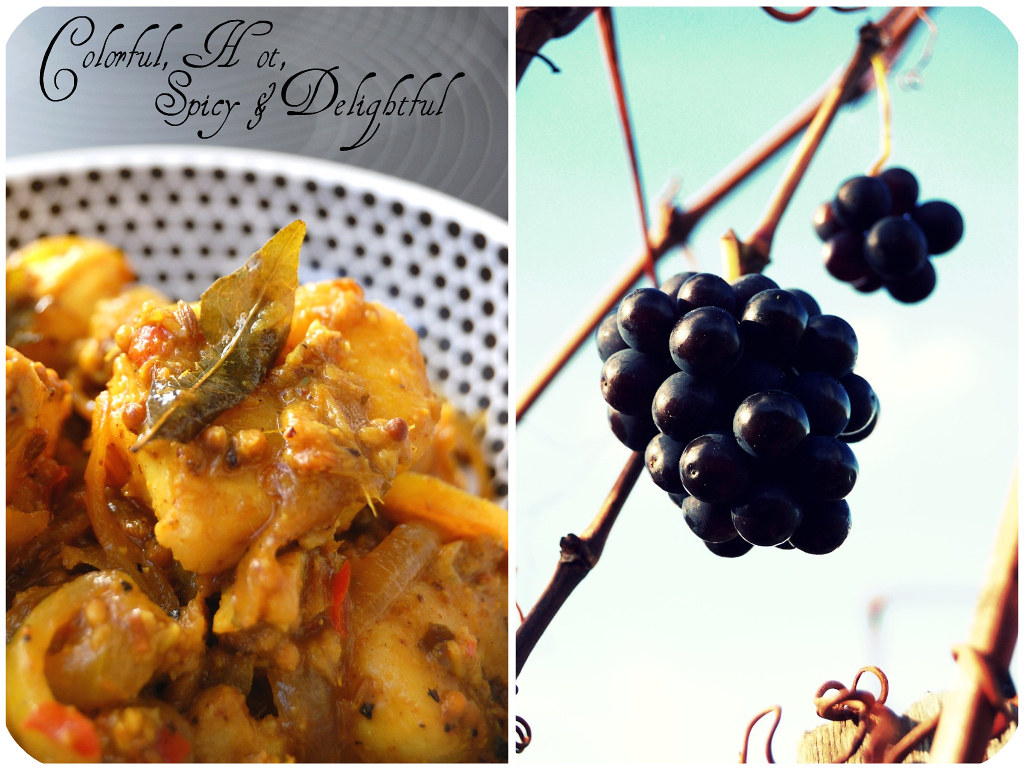
Endings and periods of transition are always moving, tragic and, at the same time, incredibly thrilling. Although nights are getting longer and the temperatures are dropping drastically, one cannot refrain from getting excited about the exhilarating scents of firewood and earthy smells of the ground, divinely envigorating crisp air, mad chirp of starlings filling the bushes and persistent croaking of crows, first snowfalls, threateningly black skies, thick mist rolling up the valleys and licking at the creases of the mountains, piercingly sharp sunlight, gloriously fiery and deep lilac sunsets and rusty hues of trees. Blissfully gorgeous sceneries and powerful atmospheres that make you cry and give you the impression of being alive. Mother Nature is the ultimate artist and her life-size chef-d'oeuvres cannot be equalled or leave you impassive.


With the arrival of the bitter cold and dreary weather as well as the long-lasting obscurity, our desire for cocooning grows bigger every day and our craving for meals that are rich, hearty, warming and homey becomes irrepressible. Spending evenings in the cosiness of our apartment or house and enjoying dishes that uplift our soul is just what we need when layers start to pile up under our coat and the lack of natural luminescence affects us physically (low energy), mentally (depression) and emotionally (mood swings).

Tikka Masala 8 3
Tikka Massala Autumn Leaves Lenk  1 2 bis
Although I try to feed healthily and rarely cook meat or anything hyper-nourishing during the week, it doesn't mean that I don't fancy seeing substantial dinners occasionally land on my table. Like any of you, I also love to indulge on less cholesterol-friendly eats such as "Saucisson And Gratin Dauphinois", "Boudin With Apples And Creamy Mashed Potatoes", "Cheesy Spaetzli Casserole", "Basler Mehlsuppe", "Chicken And Mushrooms In Creamy Saint-Marcellin Sauce", "Greek Pork Stew With Quinces" and "Toad In The Hole" or more exotic and invigoratingly spicy chow such as a good curry.

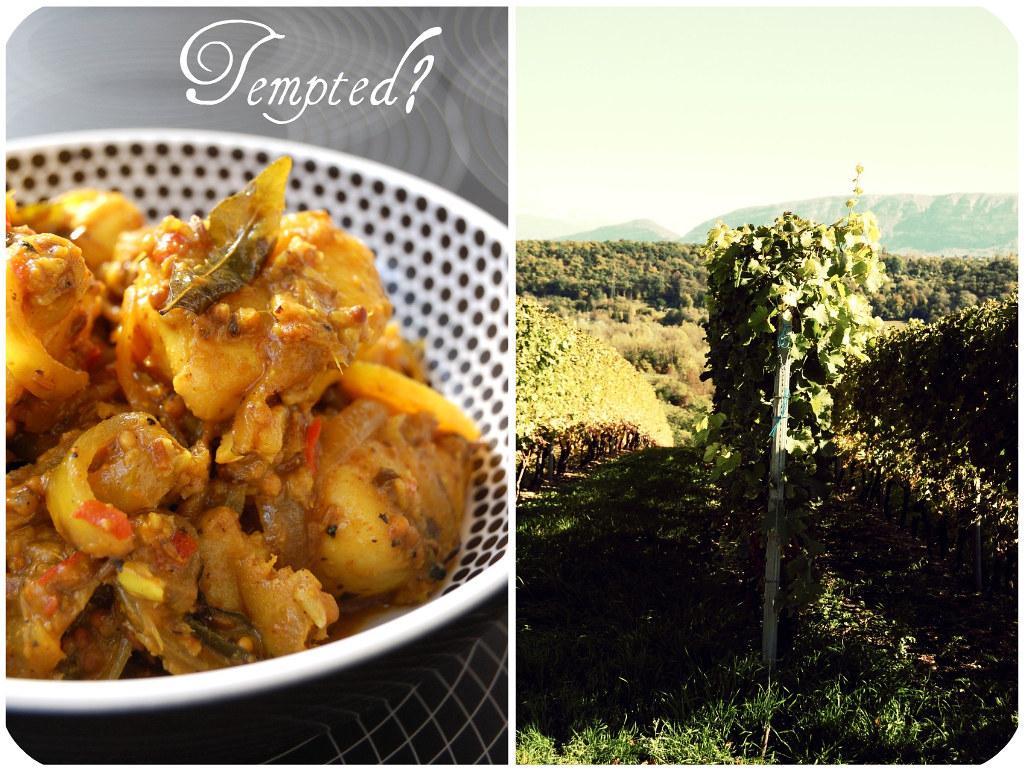
Speaking of which, I have to point out that the cuisine of Asia offers a vast variety of comforting specialities which not only raise your spirits high and fill up your stomach, but also tickle your taste buds wonderfully. One of those soul-soothing delicacies is "Tikka Masala" which I first got to taste in England - my grandmother prepared it with freshly caught North Sea cod which she bought from the local mobile fishmonger.


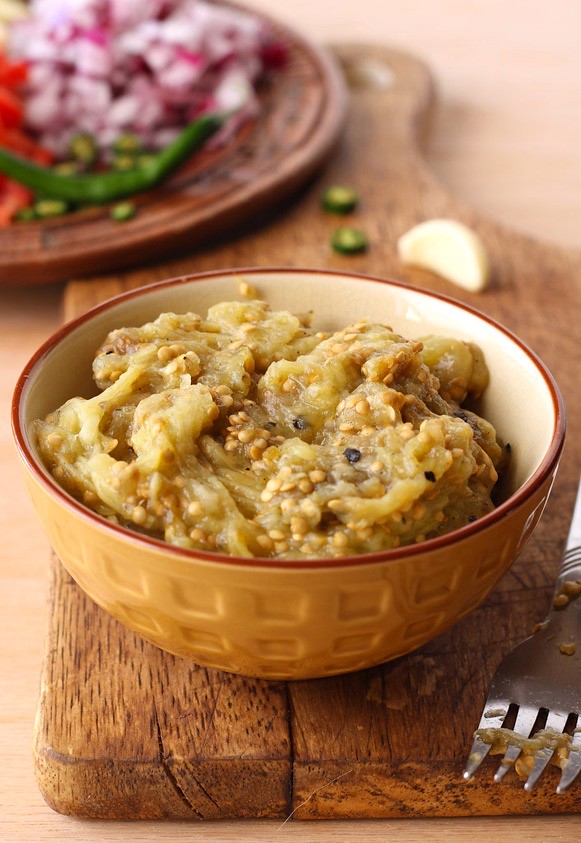
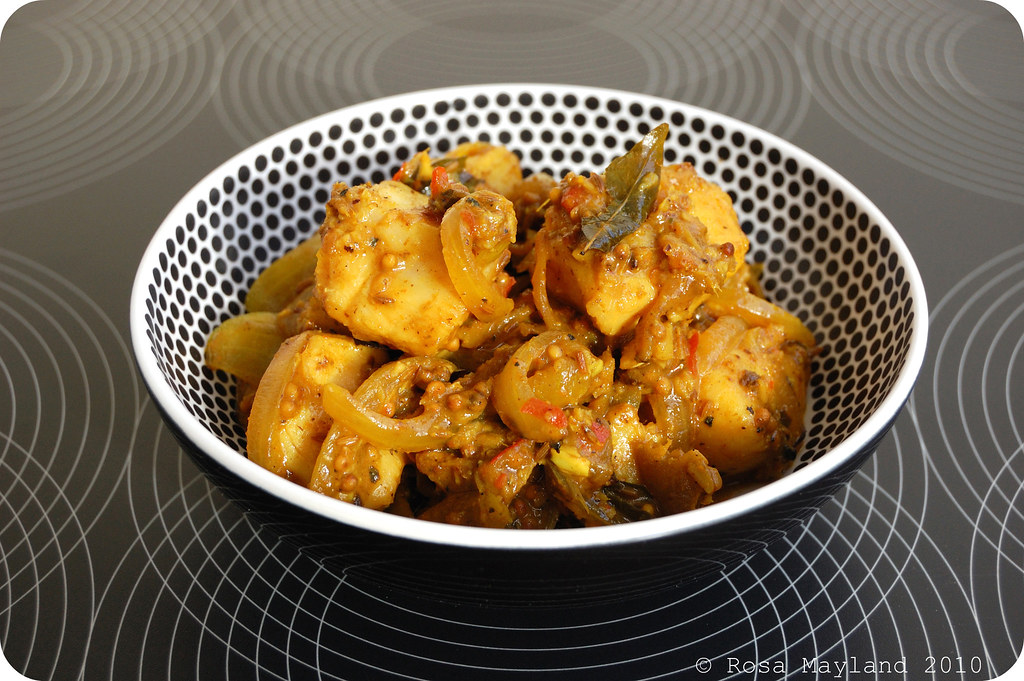
Different versions of this dish exist (it can be concocted with various meats, fishes and vegetables or even with paneer cheese), but "Chicken Tikka Masala" is by far the most popular of them all, especially in the UK' where it is undisputedly the nation's favorite "Indian" dish. A true British classic which transcends all generations, races, cultures and classes.

Tikka Masala 8 2 bis
And it isn't just our economy that has been enriched by the arrival of new communities. Our lifestyles and cultural horizons have also been broadened in the process. This point is perhaps more readily understood by young Britons,who are more open to new influences and more likely to have been educated in a multi-ethnic environment. But it reaches into every aspect of our national life.
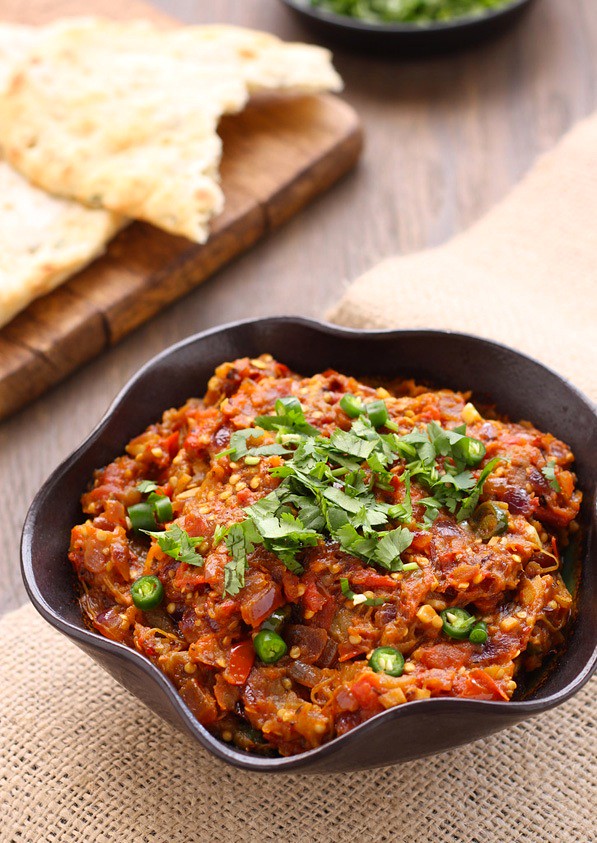
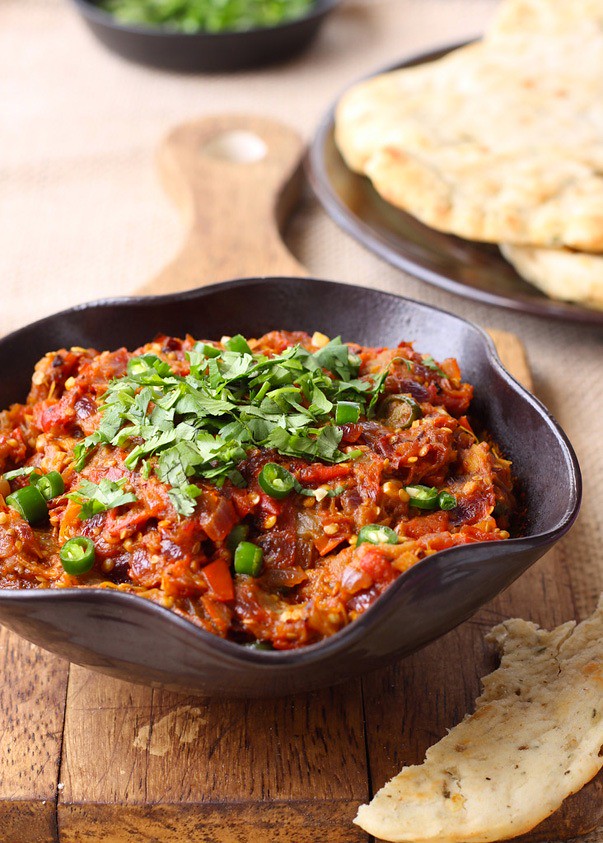
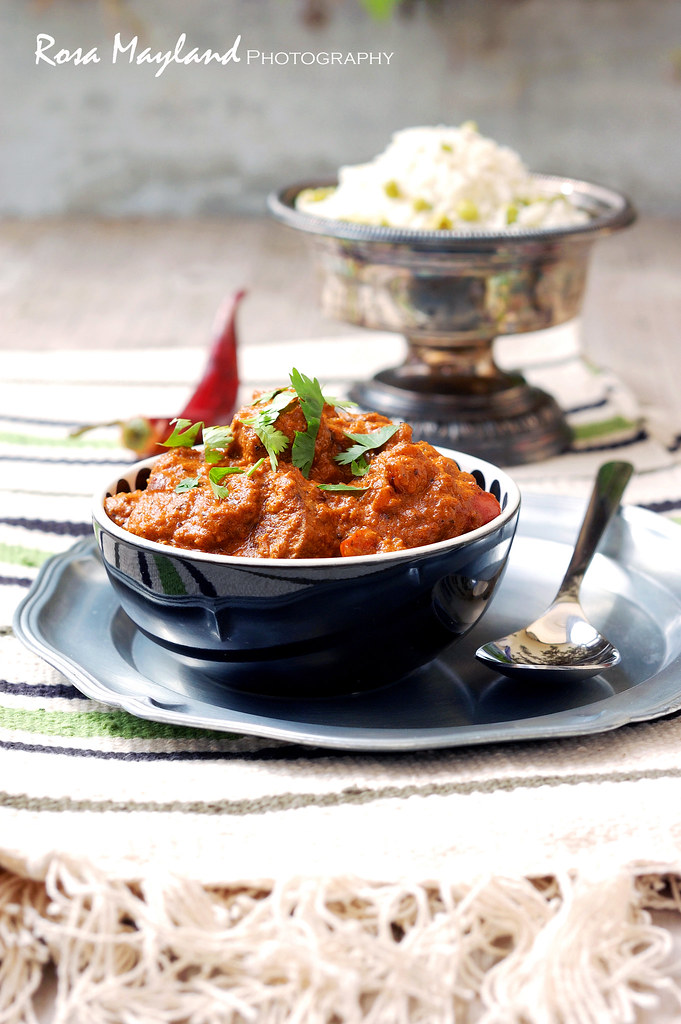
Chicken Tikka Masala is now a true British national dish, not only because it is the most popular, but because it is a perfect illustration of the way Britain absorbs and adapts external influences. Chicken Tikka is an Indian dish. The Masala sauce was added to satisfy the desire of British people to have their meat served in gravy.
-  Robin Cook, UK former Foreign Secretary
The origin of this creamy and tomatoey stew is highly debated and extremely controversial as nobody seems to know whether it is a street grub which hails from Dehli (Northern India) or if it dates back to the early 1970's and was invented by a Pakistani named chef Ali Ahmed Aslam (check out this article and that one) at his Glaswegian reastaurant. As a result many cuisiniers have tried to hijack its origin and claim credit for it (though without success). Until today its provenance remains a mystery, but that isn't what stops the Brits from eating this scrumptious casserole.

Anyway, why bother and argue about such trivial things? "Chicken Tikka Masala" blends the best of the East and West, and like any great fusion food, it is a true symbol of multiculturalism, tolerance and integration, thus it perfectly represents the precious multifacetedness of Great Britain. Something to be proud of and not to fight over...

Despite having been acquainted with "Tikka Masala" since my early childhood and being an immense fan of curries, the thought of reproducing this delectable fare in my kitchen has never crossed my mind until last year while visiting Prerna's fabulous blog, "Indian Simmer". Her pictures looked so droolworthy that I felt compelled to try her recipe without delay. Needless to say that it was a frank success and it has become a quintessential home meal.

Because I like sharing my coolest discoveries on "Rosa's Yummy Yums", I thought that you'd be happy to find my adaptation of Prerna's fantastic recipe here. Of course, as you know me, I can't abstain from adding my own personal touch to other's creations, so I substituted chicken thighs for turkey breast and for some extra kick and color, I replaced the double cream by sour cream and incorporated ground curcuma plus tomato paste to the sauce. Absolutely exquisite!

Turkey Tikka Masala
Recipe by Prerna at "Indian Simmer" & adapted by Rosa Mayland.

Serves 4.

 
Ingredients For The "Turkey Tikka":
500-600g Turkey breast meat, cut into cubes
1 Tsp Hot paprika
3/4 Tsp Ginger paste

3/4 Tsp Garlic paste
1 1/2 Tsp Coriander powder
1 Tsp Garam masala
1/2 Cup yogurt (any fat % is fine)
1 1/2 Tsp Lemon juice
Salt, to taste

2 Tbs Olive oil
Ingredients For The "Masala (Tomato Sauce)": 

1 1/2 Tbs Olive oil 
1 Onion, chopped
1 Tbs Ginger paste
1 Tbs Garlic paste
1 Tbs Onion powder
1 Tbs Coriander powder
1 1/2 Tsp Powdered black pepper
1 Tsp Garam masala
1 Tsp Powdered fennel seeds

1/2 Tsp Curcuma powder
1 Can (400g) of Diced tomatoes, pureed
2 Tbs Tomato paste 
3/4 Cup (180ml) Sour cream
Salt,to taste
Chopped cilantro, for garnishing

Tikka Massala 4 2 bis
Method For the "Turkey Tikka":
1. To prepare the marinade, mix all the spices together with the yogurt and lemon juice.
2. Add the turkey pieces.
3. Mix everything well. Cover the bowl and let it sit in the refrigerator for at least an hour (or overnight).

4. In a frying pan or wok, add the olive oil and stir-fry the turkey (in small batches) for about 4 minutes or until golden brown on each side (don't cook them through, though). Set aside.
Method For The "Masala/Tomato Sauce":
5. Pour the oil in a hot thick-bottomed pan, frying pan or a wok.

6. Add the chopped onion and stir-fry until translucent, then add the ginger and garlic paste. Turn the heat to medium and let the paste slowly cook for 1/2 a minute.
7. Add the onion powder and spices. Stir-fry for a few second, until fragrant.
8. Add the pureed tomato and tomato paste. Stir well.

9. Let the sauce simmer for about 15-20 minutes (stir occasionally scraping the bottom of the pan), or until the sauce is thick and ressembles a concentrated paste.
10. Add the cooked turkey cubes along with the drippings and the sour cream. Mix well and let the stew simmer for another 10-15 minutes.
11. Turn off the heat, cover with a lid and let the tikka masala sit for at least 10 minutes before serving (this helps the flavors to develop).
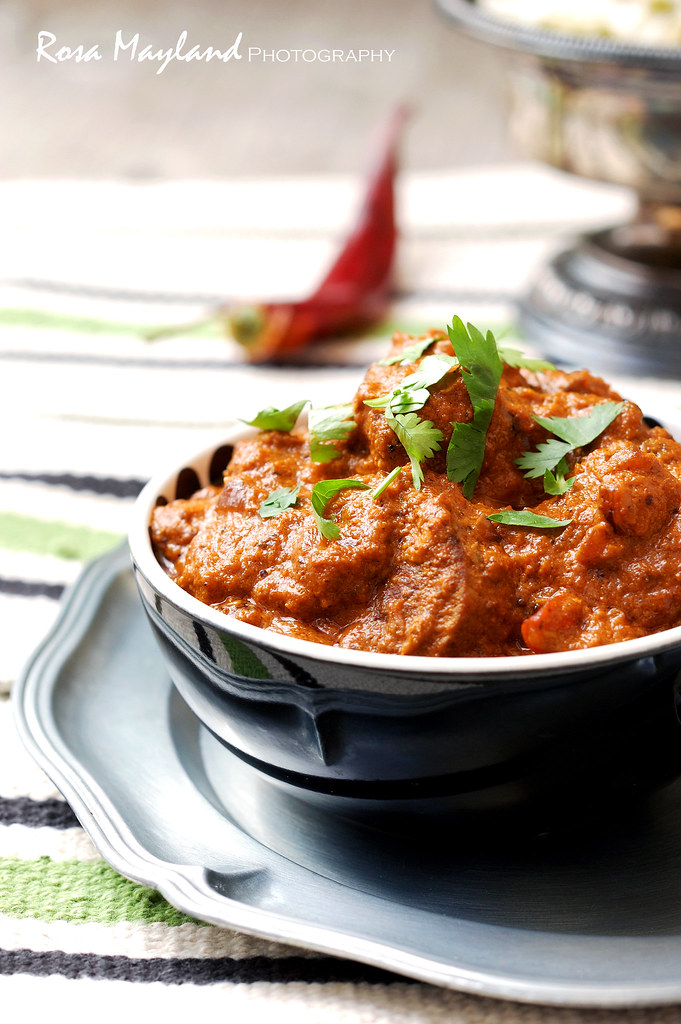
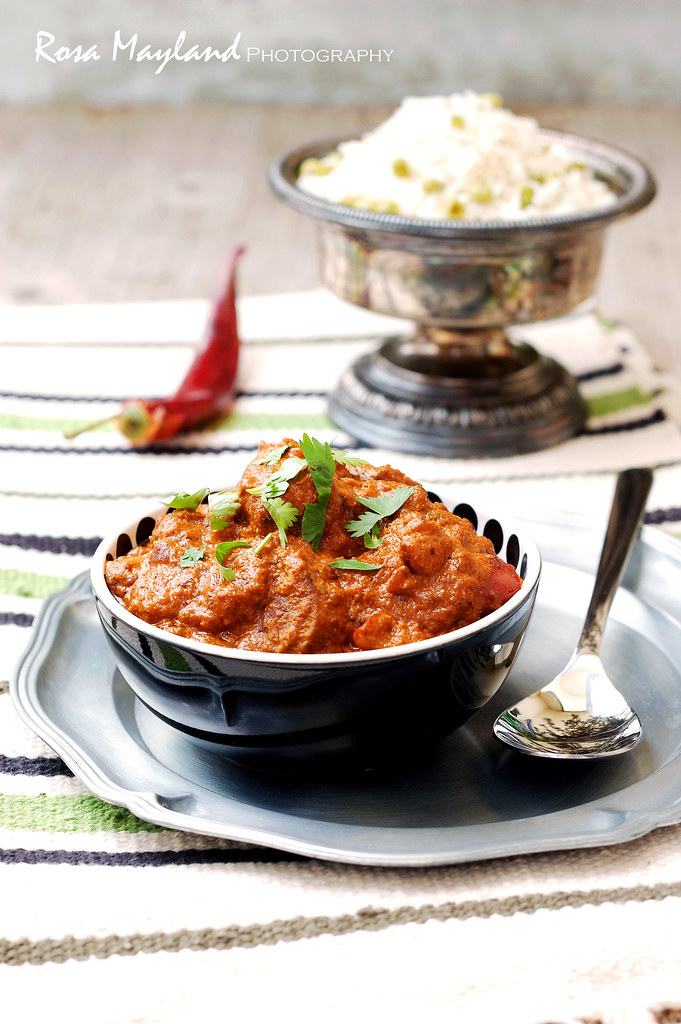
12. Garnish with the chopped cilantro and serve.


Remarks:

If you don't like turkey, try making this dish using 4 boneless and skinless chicken thighs or paneer (vegetarian) cut into cubes.
Instead of stir-frying the meat, you can also thread the turkey (or chicken/paneer) pieces onto skewers and then grill the skewered turkey (or chicken/paneer) until done or pop it into the oven for 15-20 minutes at a temperature of 200° C (400° F).

Serving suggestions:

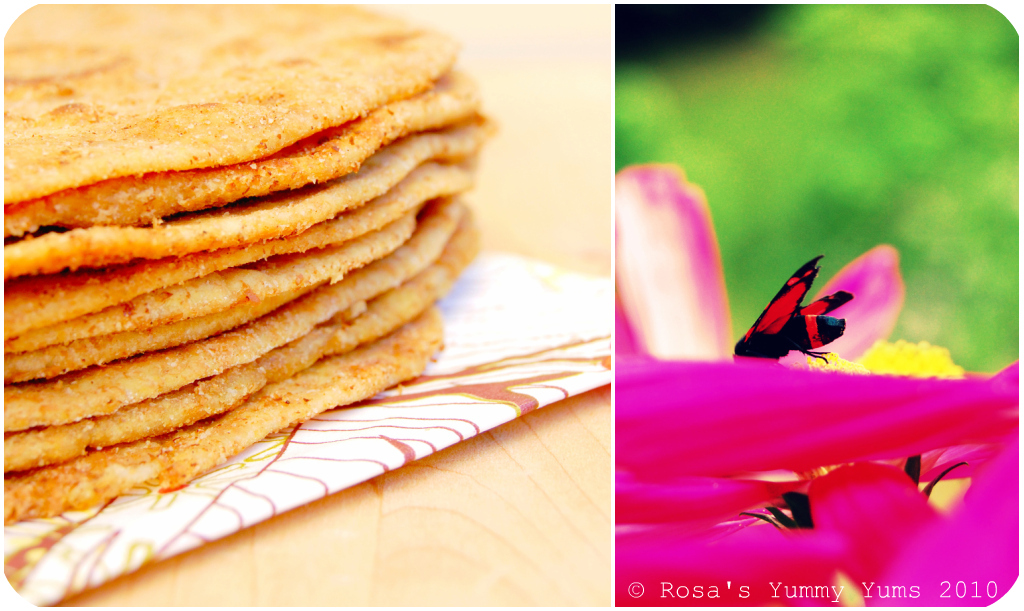
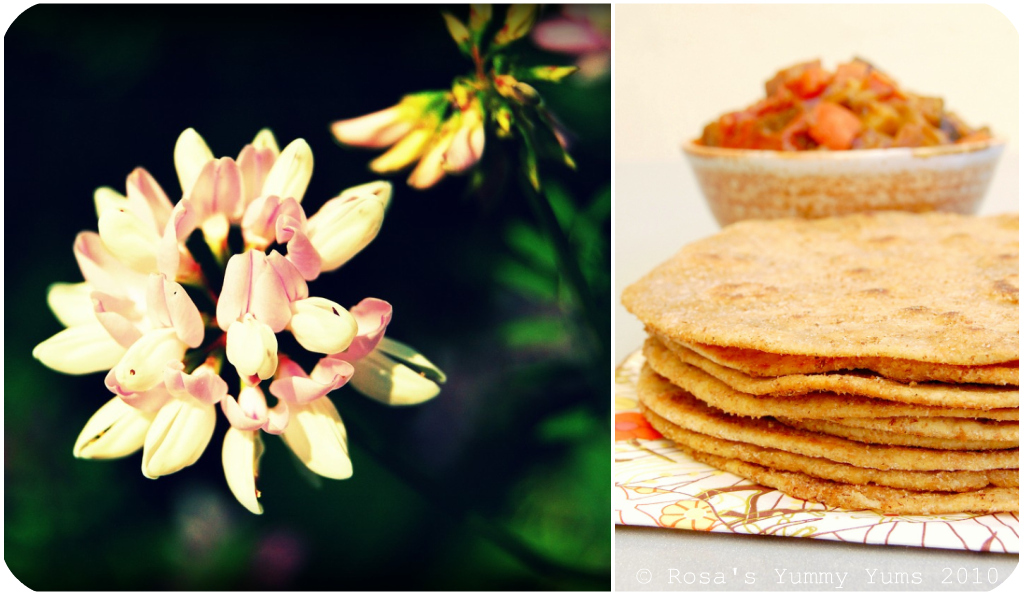
Serve with "Naans" (flatbreads), "Rotis" (tortilla-like pancakes) or "Cumin Scented Green Pea Pulao" (rice pilaf) and accompany with ice cold pale ale (blond beer).

Dinde Tikka Masala
Recette par Prerna de "Indian Simmer" et adaptée par Rosa Mayland.

Pour 4 personnes.

Ingrédients Pour La "Dinde Tikka": 

500-600g de Poitrine de dinde, coupée en cubes
1 CC de Paprika piquant
3/4 de CC de Pâte de gingembre
3/4 de CC de Pâte d'ail
1/2 CC de Coriandre en poudre 
1 CC de Garam masala 
1/2 Tasse de Yogourt (n'importe quel pourcentage de matières grasses)
1 1/2 CC de Jus de citron
Sel, selon au goût 
2 CS d'Huile d'olive
Ingrédients Pour le "Masala (Sauce Tomate)":
1 1/2 CS d'Huile d'olive
1 Oignon, haché 
1 CS de pâte de gingembre 
1 CS de Pâte d'ail
1 CS d'Oignon en poudre
1 CS de Coriandre en poudre
1 1/2 CC de Poivre noir en poudre 
1 CC de Garam masala
1 CC Graines de fenouil en poudre
1/2 CC de Curcuma en poudre
1 Boîte (400 g) de Tomates hachées, réduites en purée
2 CS de Concentré de tomate
180ml de Crème sûre/aigre
Coriandre fraîche, hachée (pour garnir)
Sel, selon goût

Tikka Massala 5 4 bis
Méthode Pour La "Dinde Tikka": 
1. Dans un bol moyen, mélanger ensemble, les épices, le yogourt et le jus de citron.
2. Ajouter les morceaux de dinde.
3. Bien mélanger le tout. Couvrir le bol et laisser reposer au réfrigérateur pendant au moins une heure (ou toute la nuit).
4. Dans une poêle ou un wok bien chaud, ajouter l'huile d'olive et faire sauter la dinde (par petites quantités) pendant environ 4 minutes ou jusqu'à ce que la viande soit dorée de chaque côté (mais pas cuite à point). Mettre de côter.
Méthode Pour le "Massala/La Sauce Tomate":
5. Verser l'huile dans une poêle, une casserole à fond épais ou un wok chaud(e). 
6. Ajouter l'oignon haché et faire revenir jusqu'à ce que celui-ci soit translucide, puis ajouter la pâte de gingembre et d'ail. Baisser le feu à moyen-doux et laisser cuire doucement la pâte pendant 1/2 minute.
7. Ajouter la poudre d'oignon et les épices. Les faire revenir pendant quelques secondes, afin que leur saveurs se développent.
8. Ajouter la tomate en purée et le concentré de tomate. Bien mélanger.
9. Laisser mijoter la sauce pendant environ 15-20 minutes (remuer de temps en temps en raclant le fond de la casserole), ou jusqu'à ce qu'elle soit épaisse et que presque toute l'eau se soit évaporée (un concentré de sauce).
10. Ajouter les cubes de dinde cuits avec le jus de cuisson et la crème sûre. Bien mélanger et laisser mijoter à feu doux pendant encore 10-15 minutes. 
11. Eteindre le feu, couvrir avec un couvercle et laisser le tikka masala reposer pendant au moins 10 minutes avant de servir (cela contribue à développer les saveurs).
12. Garnir avec un peu de coriandre fraîche et servir. 

Remarques:
Si vous n'aimez pas la dinde, vous pouvez faire ce plat avec 4 cuisses de poulet désossées (et sans peau) ou du paneer (végétarien), coupé(e)s en cubes.
Au lieu de dorer la viande à la poêle ou au wok, il vous est aussi possible d'enfiler les morceaux de poulet (ou dinde/paneer) sur des brochettes et les faire dorer au grill jusqu'à ce que la viande soit cuite ou au four à 200° C pendant 15-20 minutes.

Suggestions d'accompagnement:
Servir avec des "Naans" (pains plats), des "Rotis" (galettes ressemblantes à des tortillas) ou du "Pulao Au Cumin Et Petits Pois" (riz pilaf) et accompagner avec de la bière blonde bien froide.

Tikka Massala Autumn Leaves Lenk 2 1 bis

Friday, November 4, 2011

BAINGAN BHARTA OR SMOKY MASHED EGGPLANTS - A GUEST POST BY TANVI AT "SINFULLY SPICY"

Image1
Once again, I have the honor to share with you another guest post by a lovely blogger whom I hold in high regard and whose work I very much enjoy. This very special person is the delightful Tanvi of the very evocatively named blog "Sinfully Spicy".

This well-travelled native young woman hails from Dehli in India and now lives in USA's most fun city, Las Vegas. Besides baking, she loves to cook North Indian food in an instinctive manner and create fusion recipes influenced by her rich roots. Coming from a family of "super cooks", you'd think that she would also love to eat, yet weirdly it is absolutely not the case!

Tanvi is very talented both in her photography as well as in her cooking. There is absolutely no doubt about that. Being of Asian origin, she is naturally a spice addict and adores well-seasoned grub. Hence, blandness is a word which doesn't exist in her vocabulary.

This lady's
experementative, healthy, colorful, fragrant, traditional, homely, yet elegant everyday style dishes are just exhalirating and amazingly scrumptious looking. Each creation is gracefully as well as attractively staged, the specialities are always accompanied by interesting information and her pictures are outstanding in their purity and apparent lack of fussiness. Visiting her blog is like taking a one way ticket to buoyant India. Wonderfully desorienting and so exotic.

Thank you so much Tanvi for consenting to write this marvelous post for me and accepting to be my host. Your "Baingan Bharta" rocks and as soon as eggplants are back in season, I'll try that lipsmacking speciality!

~~~~~~~~~~~~~~~~~~~~~~

Image2
It’s a great pleasure to be guest blogging for Rosa of Rosa's Yummy Yums today. She has one of the most encouraging & kind blogger around, whom I have been lucky enough to be friends with. Depth of her writing, beauty of her lens & her enthusiasm has always been inspiring.It was a pleasant surprise when she wrote to me for a guest post. Thanks so much Rosa for inviting me to your blog today.

I am here to share one of my favorite winter recipes with her wonderful readers today. There are some things in life,which take you back to your roots no matter where you are in the world! My grandmother used to roast vegetables & bread amongst glowing charcoal pieces of her angithi (traditional indian brazier) while she kept herself warm during harsh north indian winters.We used to flock the angithi as kids to feed ourselves. Sitting miles away, the aroma which fills the house while roasting eggplants for this dish is one of those things I look forward to in my kitchen . It’s a trip down memory-lane which nurtures my heart & soul with the spirit of those days.

"Baingan" is Hindi for eggplant & "Bharta" translates to any kind of mash. No points for guessing - this is mashed eggplant with spices. Its an easy recipe originally from rural north india where a chulla (clay/mud cooking stove) is used to roast the eggplants which are then peeled, mashed and combined with oil & spices. If done the traditional way i.e roasting the eggplant in heat from burning coal or wood,the taste of this dish is divine & most authentic. I think, open grilling is the best way to handle eggplant.


The key thing to keep in mind is that you need to char the eggplants to death. Don’t worry about them getting burnt or looking ugly, the peel will go away but before that, it has to make the flesh tender, concentrate the juices & sugars within & infuse the smokiness. Grills, broilers or stove tops work great to do the job, just be ready for a big time cleaning if you choose to use the stove top as I do J The second important thing to ensure is that even though this is a mash, the texture of the finished dish has to be chunky; hence all the ingredients (even spices), which go in, are either coarsely chopped or pounded. In all "Baingan Bharta" is chunky, smoky & spicy mash!

The dish is best served with flatbread
s and a pickle /chutney / salad on side. You can serve it as a dip. I sometimes fill miniphyllo cups with bharta, top with some pepper jack cheese & bake to serve as appetizers. The ideas to eat are endless..just try your own way.

Image3
~ Baingan Bharta Or Smoky Mashed Eggplants ~
Recipe by Tanvi at "Sinfully Spicy".


Serves 2-3 people.

Ingredients:
1 Large eggplant (about 1lb)
1 Tsp Oil (for rubbing on the eggplant)
3 Tbs Mustard/olive oil

1 Cup chopped red onions
1 Inch Fresh ginger shoot, chopped
4 Cloves garlic, chopped
1-2 Thai green chilies, chopped (adjust to tolerance)
1.25 Cups Chopped tomatoes
1 Tsp Coriander seeds
3-4 Whole dry red chilies (adjust to tolerance)
1/2 Tsp Amchoor (dry mango powder)
1/2 Tsp Garam masala
Salt, to taste
1 Tsp Mustard/olive oil (for drizzle on top, optio
nal)
Cilantro and green chilies chopped (for garnishing)

Directions:
Wash the eggplant and dry the skin with a cloth.
Rub1 tsp of oil all over.

Use any one of the following methods to char the eggplant:
1. This is what I do:
Heat your stovetop on high. Char the whole eggplant, turning with the use of tongs to char on all sides, until the skin has blackened & the flesh is soft. This will take about 20-22 minutes. Keep a watch while you do this.
2. Preheat a grill to medium heat; you can slit the eggplant into half, grill skin side up for 25-30 minutes. If you plan to use an oven, preheat broiler to 325° F (170° C) and roast the eggplant for about 15-20 minutes until skin is burnt & starts to peel off.

Image4
While the eggplant is roasting, pound the coriander seeds and dry red chilies using a mortar & pestle. Set aside.
Once the eggplant has charred, using tongs, transfer it to a plate and let cool down for about 15 minutes. Peel off the charred skin from the eggplant.You can remove seeds if you want. Using a fork, mash the flesh. Set aside.

Heat oil on high in a heavy bottomed pan. When the oil is almost smoky, reduce heat to medium & add the chopped onions. Sauté for about 6-7 minutes or till the onions are translucent but not browned. Next, add the chopped ginger, garlic, green chilies and sauté for 30 seconds or till you smell the aroma. Add the coriander & red chill mixture next and sauté for another 30 seconds. Next, add the chopped tomatoes, set the heat on high again and cook the tomatoes for 7-8 minutes until they soften (but do not mush) and you see oil separating on sides of the pan.
At this point, add the mashed eggplant and salt to taste. Combine everything together, set heat to low and let cook for 3-4 minutes. You will see that the color of the mash deepens & few oil bubbles on the surface as it cooks.

Remove from heat and while still hot, add the dry man
go powder and garam masala. Mix well.

Garnish with loads of chopped cilantro, green chilies, drizzle with some raw mustard/olive oil and serve warm with naan/ chapati (flatbreads).
Enjoy!

Printable Recipe

Image5

Friday, December 3, 2010

ASSAMESE SOUR FISH CURRY - CURRY AIGRE DE POISSON

Sour Fish Curry Picnik collage 2 bis
A few months ago fellow foodblogger and expat (Hong Kong & London) Janet Ching from "Gourmet Traveller 88" who lives in Basel (Switzerland) kindly proposed to send me a complimentary copy of her self-produced book as an appreciation of my supporting her blog all along. It was with much excitement that I accepted her kind proposition...

A few days later the book arrived and I had a lot of pleasure going through it's pages. This little 32 pages cookbook is enjoyable and is full of delicious recipes that can be found on her blog. The vast majority of the courses presented are Asian-oriented (Chinese, Japanese, Indian, Korean and Vietnamese) and a minority of them are Western-oriented (Switzerland, Holland, Italian and French).

Picking out a main course that would be featured in an article was not an easy task as I fancied many of them. Thanksfully, as I am passionate about Asian cuisine, as I drool any time the word "curry" is pronounced and as I believe in seasonal cooking my choice was made a lot easier. Since a few dishes required summer veggies I opted for a recipe that would enable me to buy local produces and respect the environment. It is for that reason that I decided upon preparing "Assamese Sour Fish Curry". Not only did the picture of that dish attract me, but I also liked the idea of eating a spicy meal that would not be too heavy nor too fat and which would bring a little heat as well as comfort - much needed with this polar weather (snow and minus temperatures) we are having here at the moment.

"Assamese Sour Fish Curry" or "Masoor Tenga" hails from Assam in northeastern India where it is a very popular speciality (a note to the purists - of course this version is a little Westernized and different from the original LOL). This light curry is really easy to prepare, can be put together in no time at all and it tastes lipsmackingly good. It is quite peppery and hot, exhaliratingly spicy, delightfully sour and has a certain freshness thanks to the addition of lime juice. Perfectly balanced and flavored!

Sour Fish Curry 3 bis
~ Assamese Sour Fish Curry ~
Recipe adapted from " Discovering New Tastes And Rediscovering Long Lost Tastes" by Janet Ching.

Ingredients:

1 Tbs Coriander seeds

2 Tsp Cumin seeds
1/2 Tsp Ground tumeric
1 Tsp Black peppercorns
2cm Piece fresh ginger (10g), grated or chopped coarsely
2 Cloves garlic, grated or chopped coarsely
Sunflower oil
400g White firm fish (e.g. monk fish fillets or blue-eye cutlets), cubed
2 Medium brown onions, sliced thinly (hald moon)
1 1/2 Tsp Black mustard seeds
4 Dried or fresh curry leaves
1 Tsp Samabal oelek
1 Tsp Sweet chili sauce
180ml Water
1 Tsp Organic chicken stock powder
The juice of 2 limes
1 Tbs Fish sauce (or to taste - I added 5 Tbs)

Sour Fish Curry Picnik collage 4 bis
Method:
1. Using a small pan, dry fry the coriander seeds, cumin seeds and tumeric until fragrant, be careful not to burn them.
2. Form a paste by crushing the peppercorns, ginger and garlic with pestle and mortar.
3. Heat some oil in a large frying pan, pan-fry the fish fillet until cooked and lightly brown. Remove the fish from the pan and keep the oil.
4. Add a little more oil, stir fry the onions, mustard seeds and curry leaves until the onion becomes lightly brown and translucid.
5. Add the fried spices, keep stirring until fragrant.

6. Then, add the wet paste, the sambal oelek and the chili sauce. Stir.
7. Dissolve the chicken stock powder in the water and add into the pan, then add in the lime juice and fish sauce.
8. Bring the mixture to boil and then add the fish back into the pan. Simmer for about 5 mins or until the fish is cooked.

9. Serve.

Remarks:
The original recipe didn't contain sambal oelek or sweet chili sauce. Instead you can add 1 red chili that has been seeded, chopped and crushed to a paste in the mortar and pestle
.

Serving suggest
ions:
Serve with basmati rice or jasmine rice.


~~~~~~~~~~~~~~~~~~~~~~

Sour Fish Curry Picnik collage 3 bis
~ Curry Aigre De Poisson ~
Recette adaptée de " Discovering New Tastes And Rediscovering Long Lost Tastes" par Janet Ching.

Ingrédients:

1 CS de Graines de coriandre

2 CC de Graines de cumin

1/2 de CC de Curcuma en poudre

1 de CC de Graines de poivre noir
Un morceau de 2cm de Gingembre frais (10g), pelé et haché grossièrement
2 Gousses d'ail, hachées grossièrement
Huile de tournesol
400g de Poisson blanc à chair ferme (merlu ou beaudroie), coupé en gros cubes
2 Onions moyens, coupés fin
ement en demi-lune
1 1/2 de CC de Graines de moutarde noires
4 Feuilles de curry fraîches ou sèches
1 de CC de Samabal oelek
1 de CC de Sweet chili sauce
180ml d'Eau
1 de CC de Bouillon de poule bio en poudre
Le jus de 2 limes
1 CS de Sauce de poisson (ou selon goût- j'ai ajouté 5 CS)

Sour Fish Curry Picnik collage 1 bis
Méthode:
1. Dans une petite poêle, griller à feu doux les graines de coriandre, de cumin et le curcuma afin que les arômes se développent. Faire attention à ne pas les brûler.
2. Dans un mortier, réduire le poivre, le gingembre et l'ail en une pâte homogène.
3. Chauffer une grande poêle et ajouter un peu d'huile, puis faire griller les cubes de poisson jusqu'à ce qu'ils soient dorés de chaque côté. Retirer le poisson du feu et le transférer dans une assiette. Mettre de côté.
4. Ajouter un peu d'huile dans la poêle et faire revenir les oignons, les graines de moutarde et les feuilles de curry, jusqu'à ce que l'oignon soit translucide et légèrement doré.
5. Ajouter les épices grillées et bien mélanger jusqu'à ce qu'un parfum s'en dégage.

6. Ajouter la pâte (ail, gingembre et poivre), le sambal oelek et la sweet chili sauce. Mélanger.
7. Dissoudre le bouillon dans l'eau et l'ajouter à la poêle, puis faire de même avec le jus de lime et la sauce de poisson.
8. Porter à ébullition et ajouter le poisson, puis laisser mijoter pendant 5 minutes ou jusqu'à ce que le poisson soit cuit.

9. Servir.

Remarques:
La recette originale ne contient pas de sambal oelek ou de sweet chili sauce. Vous pouvez les remplacer pas un piment rouge qui a été au préalable nettoyé, haché et réduit en une pâte dans le mortier.

Idées de présentation:
Servir avec du riz thaï ou du riz basmati rice.

Sour Fish Curry Picnik collage 5 bis

Friday, July 9, 2010

CURRY & ONION CHAPATIS

Chapatis Picnik collage 1 Bis
During the summertime we all want to eat lighter dishes and we can't get bothered to steam up the kitchen by cooking for hours without end. Generally, we prefer refreshing foods that are fuss free. It is for that reason that most people particularly enjoy wraps which are not only delicious, but also very practical whether we are having a relaxed meal at home, a party, a picnic, organizing a happy hour or watching our favorite series/sports show on TV...

As I had made a ras-el-hanout ratatouille (home recipe) with all the lovely seasonal and regional vegetables (fresh garlic, onions, eggplants, zucchinis, red bell pepper and tomatoes) I had bought, I thought that it would be a great idea to use it as a filling in some kind of flatbread.

Although I love Mexican flour tortillas I wanted to make something else so I decided upon preparing "Chapatis" which we had not eaten for quite a while. I had made that Indian speciality a lot in the past, but had somehow forgotten about it. Time to go back to an old classic.

"Chapatis" are pan-fried, unleavened flatbreads which are also known under the name "Roti" and which hail from the Indian subcontinent. Similar versions of this fingerfoood can also be found in Africa (Kenya, Uganda, Ghana and Tanzania) and Turkestan. They are made with whole wheat flour, water (or milk), salt and a little ghee, and can be flavored as wished (onions, chilli, bell pepper, garlic, coconut milk, grated coconut, garam massala, etc...). Traditionally, "Chapatis" are used along with fingers to scoop up Indian foods such as vegetables, chutneys, raitas, stews and curries.

This time instead of following a recipe to the letter I prefered to invent mine on the basis of what I saw, tested in the past and read. I love "Onion Chapatis" and came to the conclusion that it would be great if I added some curry powder and a little garlic powder to them. The result was fantastic.

These "Curry & Onion Chapatis" were so fragrant, addictive and delicious. The flavor was exhalirating and the texture was heavenly. Pure Indian bliss!

Chapatis 3 ALONE bis
~ Curry & Onion Chapatis ~
Recipe by Rosa @ Rosa's Yummy Yums 2010.


Makes 10 chapatis.


Ingredients:
250g Whole wheat flour (+ more for rolling)
1 Tsp Sea Salt
1 1/2 Tsp Mild or hot curry powder
1/2 Tsp Garlic powder
1/3 tsp Chilli powder (optional)

A pinch Freshly ground black pepper
2 Tsp Ghee or melted butter
200ml Milk (see remarks)
1 Medium White onion, finely chopped
1/2 Tsp Sea salt
Ghee or melted butter to fry the chapatis


Method:
1. Put the Flour, salt, curry, garlic, chilli powder (if used) and ground pepper in a bowl. Whisk.
2. Add the milk and 2 tsp ghee.
3. Mix thouroughly in order to get a ball of dough.
4. Knead for about 10 minutes until you g
et a smooth dough.
5. Let the dough rest in a fresh place for about 30 minutes.
6. Meanwhile, mix the salt and onions together and let rest.

7. Knead again the dough thouroughly, then divide it into 10 pieces.
8. Squeeze out the liquid out of the onions.
9. Flatten the piece of dough into a 2.3 inches (6cm) round, add 3/4 tsp onions, fold the dough over and shape into a ball.

10. Roll out carefully into a 6.2 inches (16cm) round.
11. Grease a heavy-based frying pan
with ghee or melted butter and place over medium high heat.
12. Add one chapati at a time and cook until blisters appear, then turn and cook on t
he other side until golden brown.
13. Brush the chapati with a little ghee or melted butter and serve hot.

Chapatis Picnik collage 2 bis
Remarks:
Instead of using milk, you can use water or a mixture of milk and water. Keep in mind that milk makes the chapatis softer.
If the dough is too sticky, then add a little flour.
The more you knead the dough, the smoother the it becomes and the smoother the dough is, the softer the chapatis

Serving suggestions:
Serve those Chapatis with Indian vegetables (raw or strir-fried), chutney, raita, stew and curry. You can also fill them with whatever you like (ratatouille, grated cheese like cheddar, Philadelphia, fish, salad, colslaw, hummus, chilli con carne, etc...).

~~~~~~~~~~~~~~~~~~~~~~

~ Chapatis Curry et Aux Onions ~
Recette par Rosa @ Rosa's Yummy Yums 2010.

Pour 10 chapatis.

Ingrédients:
250g de Farine complète (+ pour abaisser la pâte)
1 CC de Sel de mer

1 1/2 CC de Poudre de curry doux ou fort
1/2 CC d'Ail en poudre
1/3 CC de Poudre de piment
1 pincée de Poivre noir moulu
2 CC de Ghee ou de beurre fondu

200ml de Lait (voir remarques)
1 Oignon blanc (moyen), haché finement

1/2 CC de Sel de mer
Ghee ou du beurre fondu pour cuire les chapatis

Chapatis Picnik collage 3 bis
Méthode:
1. Mettre la farine, le sel, le curry, l'ail, la poudre de piment (
si utilisée) et le poivre dans un bol, puis mélanger.
2. Ajouter le lait et 2 CC ghee.
3. Bien mélanger afin d'obtenir une boule de pâte.
4. Pétrir
la pâte pendant 10 minutes, jusqu'à ce qu'elle soit moelleuse.
5. Laisser reposer la pâte au frais pendant 30 minutes.

6. Pendant ce temps, mélanger le sel avec les oignons. Laisser mariner.
7. Pétrir la pâte quelques minutes encore et la diviser en 10 pâtons.
8. Presser les oignons afin que d
u liquide en sorte.
9. Applatir les pâtons afin d'obtenir un rond de pâte de 6cm de diamètre, ajouter 3/4 CC d'oignons et replier la pâte afin d'obtenir une boule.
10. Abaisser la pâte en une galette ronde de 16cm de diamètre.
11. Graisser la poêle à frire avec le ghee ou le beurre fondu et mettre à chauff
er à température moyenne (6 sur 10).
12. Ajouter un chapati et faire frire jusqu'à ce que des "cloques" se forment. Retourner le chapati et cuire jusqu'à ce que la galette soit dorée.
13. Peindre avec un peu de ghee ou beurre fondu et servir chaud.

Remarques:
Au lieu d'utiliser du lait, vous pouvez utiliser de l'eau ou un mélange des deux. N'oubliez pas que le lait rend les galettes encore plus souples et moelleuse.
Si la pâte est trop collante, alors ajoutez un peu de farine.
Plus vous pétrissez la pâte, plus les chapatis seront moelleux

Chapatis Picnik collage 5 bis
Idées de présentation:
Servir ces galettes avec des légumes (cuits ou crus), du chutney, de la raïta, du ragoût et du curry. Vous pouvez aussi les remplir avec ce qui vous plaît (ratatouille, fromage rapé/cheddar, Philadelphia, poisson, salade, coleslaw, Houmous, etc...).

Monday, September 24, 2007

CHICKPEA TERRINE

As far as I can remember, I've always enjoyed eating chickpeas (garbanzo beans) or any kind of pulse/legume as not only are they good for your health, but also very tasty and extremely multifaceted. But, it is only lately that I have discovered that little culinary jewel called "Chickpea Flour", "Gram Flour" or "Besan" in Indian...

Since the very day I bought me first bag of "Chickpea Flour" I've been under the spell of this fabulous high carbohydrates and protein-rich magical ingredient!

"Chickpea Flour" can be used in the Indian cuisine (to make a chickpea omelet/pancake called "Chilla", to spice up curries,
as a batter for deep-frying, as a soup thickener, as a binding agent in "Koftas" or "Kebabs", as a main ingredient in sweets, etc...). In fact, it is to the Indian kitchen what the egg is to the Western Kitchen and it can even be used as a face scrub and toner as well as a remedy for babies! Here, in our part of the world, it is very popular amongst the vegetarian, gluten-free (and egg-free/milk-free) and wholefood communities as well as in Italian cusine to make "Farinata" and in French cuisine (Mediterranean) to make "Socca" which are both a kind of savory pancake.

This unique flour is very flavorsome and ever so useful that it will soon become a must-have ingredient in your kitchen. Once you've tried it, there's no way you can forget it or snob it!

The recipe I am presenting today is gorgeous, cheap and very fastly prepared. This "Chickpea Terrine" is a wonderful vegetarian dish that is highly nourishing, healthy and above all, delicious. The use of "Besan" confers it an original nutty and soily/earthy taste that is very satisfying and which is pleasantly enhanced by the use of spices and the adition of sweet vegetables like the bell pepper and onion. Really scrumptious!

~ Chickpea Terrine ~
Recipe by Valérie Cupillard "Pâtés végétaux et tartinades" (see link) and freely adapted by Rosa @ Rosa's Yummy Yums.

Serves 4.

Ingredients:
1 Yellow bell pepper, seeded and finely chopped
1 Medium onion, finely chopped
2 Cloves garlic, crushed
5 Tbs Olive oil
2 Tsp Dried thyme
1/2 Tsp Paprika
1 Pinch Smoked paprika
1/2 Tsp Mustard (powder or paste)
1/2 Tsp Curry powder
A few drops Tabasco (red or green)
150g Chickpea flour
500ml Water
Salt, to taste
Pepper, to taste

Method:
1. In a frying pan, stir-fry the chopped onion in olive oil, then add the garlic and the chopped bell pepper.
2. Add all the spices and herbs.
3. Cook over medium heat for about 15-20 minutes, until the bell pepper is tender.
4. Meanwhile, put the chickpea flour in a pan and add the water.
5. Mix thouroughly until both ingredients are well blended.
6. Cook over low heat (stirring continuously) until the mixture thick
ens.
7. Salt and pepper to taste.
8. Turn off the heat and add the vegetables and mix well.
9. Pour into a greased cake mould.
10. Bake in the oven at 180° C (350° F) for about 35-45 minutes.
11. Cool on a rack and unmould the terrine.

Remarks:
For that recipe, you can use any bell pepper (red, green, orange, etc...) or replace it by 2 coarsely grated carrots (original recipe) that you'll also stir-fry.
If you wish, the chopped onion can be replaced by 2 finely chopped shallots (original recipe).
It is possible to use 1 teaspoon garlic powder instead of the 2 cloves garlic.
You can also add more curry powder (3 teaspoons instead of the 1/2 teaspoon) and ommit the thyme, paprika, smoked paprika, mustard as well as Tabasco (as in the original recipe).
The cooked chickpea mixture (water and flour) should have the consistency of a thick béchamel or custard.

Serving suggestions:
Cut the terrine into slices and eat warm or cold. It is ideal as a starter or as a healthy main course served with a "Ratatouille", a tomato sauce, a salad or vegetables.