Wednesday, May 31, 2006
QUICK TOMATO SAUCE FOR PIZZA
So I found a solution: a quick tomato sauce that needs no cooking and which is prepared in half a second! I invented this sauce one day when I decided to make a quick last-minute pizza and I must say that the result was very satisfying.
This tomato sauce is full of flavor, spicy and goes harmoniuosly well for pizza. It is a great substitution for cooked tomato sauce and I must say that you will not see any difference as it is bluffingly awsome!...
Ingredients:
4-5 Tbs Tomato purree
3 Tbs Ketchup
3 Tbs Water
2 Tbs Olive oil
2 Tbs Fish sauce
1 Tsp Red Tabasco or 1/3 Tsp Harissa
1 Tsp Worcestershire sauce
3 Cloves garlic, crushed
1 Tsp Onion powder
1/2 Tsp Italian dried herbs
1 Pinch paprika
Salt to taste
Pepper to taste
Sugar to taste (optional)
Method:
1. In a bowl blend all ingredients together.
2. Spread on your pizza dough.
Remarks:
Instead of fresh garlic, you can use 3/4 Tsp garlic powder.
For the herbs, I generally use either a pizza mix/Italian herb seasoning or dried basil, dried oregano, dried rosemary (ground) and dried marjoram.
If you don't have any fish sauce, then add the leftover oil of the tinned anchovies that you use to dress the pizza with or use equal amounts of light soy sauce.
Serving suggestion:
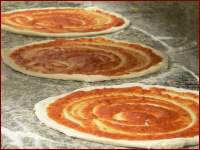
It is perfect if used to coat the base of the pizza.
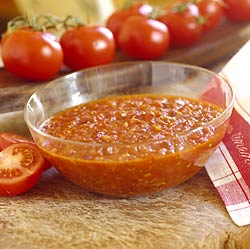
(Tomato Sauce -Pic by www.napastyle.com)
(Pizza -Pic by www.steinbackofen-schlemmerei.de)
PIZZA DOUGH
Actually, this recipe for "Focaccia" dough comes from Eric Treuille and Ursula Ferrigno's "Ultimate Bread" cookbook. I have slightly changed a few details and I divided the quantities by two...
Makes one portion dough (~26-30cm/10-12 inches)
Ingredients:
1 Tsp Dried yeast
150ml Tepid water
250g Plain (strong) white flour
1 Tsp Salt
2 Tbs Virgin olive oil
Method:
1. Sprinkle the yeast into 100ml of the water in a bowl.
2. Leave for five minutes and stir to dissolve.
3. Mix the flour and salt in a large bowl.
4. Make a well in the center of the flour and pour in the yeasted water.
5. Draw enough of the flour into the yeasted water in order to form a thick paste.
6. Cover the bowl with a towel and leave to sponge until frothy and risen, about 20 minutes.
7. Mix in the remaining flour, water and the olive oil to form a soft, sticky dough.
8. Turn the dough onto a floured surface and knead for about 10 minutes or until the dough is smooth, silky and elastic.
9. Place the dough into a oiled bowl and cover with a towel.
10. Leave to rise until doubled in size, 1 1/2-2 hours.
11. Knock back, "chafe" the ball of dough and roll out.
12. Dress your pizza (see recipe).
Remarks:
If you wish, you can substitute the amount of oil by water, but then your dough will be less supple and moist.
Serving suggestions:
Use it as a pizza dough or double the quantities and make a focaccia with this dough.
(Dough -Pic by www.italiancook.ca)
(Pizza -Pic by http://amuse-bouche.net)
Tuesday, May 30, 2006
PROBLÈME/QUESTION POUR HABITUÉS DE BLOG APPÉTIT
Monday, May 29, 2006
STORM ON THE SALEVE
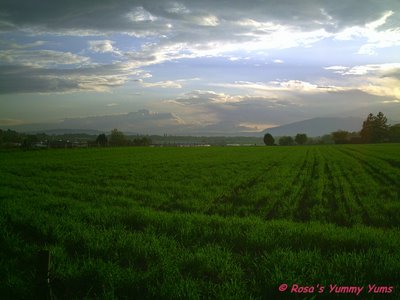
Sometimes, when we have a thunderstorm, it sticks on the Salève and it then looks quite dramatic...
Those thundery clouds are very vaporous, menacingly low and move very fastly around the mountain to create an unrealistic effect....
Saturday, May 27, 2006
WEEKEND CAT BLOGGING #51
This "Schweinli" (little pig in Swiss-German) is our love dispenser and I don't know what we would do without her generous display of tenderness.....
Friday, May 26, 2006
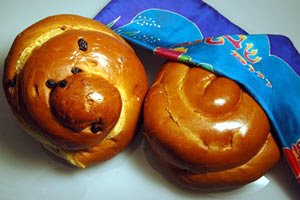
CHALLAH BREAD
The name “challah” is derived from Hebrew and it means “portion”. It refers to the portion of dough set apart for the high priests in the Temple of Jerusalem. It can have many shapes, each of which having a different symbolic according to the festive day on which it is served: Rosh Hashana's round/coiled loaves symbolize continuity, Yom Kippur's ladder and hand shaped breads symbolize the ascencion to greater heights and the desire to be inscribed in the book of life for the coming year, Purim's triangular loaves symbolize Haman’s ears (Haman the Agagite who with his wife Zeresh instigated a plot to kill all the Jews of ancient Persia ), Shavuot and it’s side by side two oblong breads represent the Tablets of law, Sabbath braided loaves symbolize truth, peace and justice. The poppy seeds symbolize the Manna (substance miraculously supplied as food to the Israelites in the wildness during the Exodus) that fell from heaven.
In biblical times, Sabbath bread was more like pita than the present day Challah we know.
Originally, this bread comes from Eastern European Jews who adopted it from a South Germany bread from the Middle Ages. Since then, Challah became the Jewish ritual bread in Germany, Austria, Bohemia, Poland, Eastern Europe and Russia. It arrived in America thanks to the Jews who emigrated. Now, Challah can be found in ethnic bakeries and food markets of all kinds.
Apart from having many different shapes, Challah bread can also be flavored in many different ways (pumpkin, raisins, saffron, cinnamon, orange, etc...).
It’s always a big pleasure for me to bake Challah as it’s one of my favorite breads. The fabulous aromas which fill the house when it is baked announce the forthcoming of a delicious breakfast!
Challah doesn’t only have a beautiful golden crust, but also an uncomparable texture and flavor. This delicacy is very fluffy and light, and tastes heavenly sweet.
I recommend those of you who love baking to try that bread at least once in your life; you’ll soon see that it will become a classic at your house!
This recipe was taken from Eric Treuille and Ursula Ferrigno's marvelous "Ultimate Bread" cookbook.
Ingredients:
500g Plain white flour
1/2 Tsp Salt
2 Tsp Dried yeast
200ml Water, lukewarm
2 Tbs Light runny honey
2 Eggs (~50g), lightly beaten
60g Unsalted butter, melted
1 Egg yolk, for the glaze
1 Tbs Water, for the glaze
Poppy seeds, to decorate
Method:
1. Sprinkle the yeast into the water in a bowl. Leave four 5 minutes and then stir to disolve.
2. Mix the flour and salt together in a large bowl, make a well in a centre of the flour and pour in the yeasted water.
3. Use a wooden spoon to draw enough of the flour into the yeasted water to form a soft paste.
4. Cover with a tea towel and leave to "sponge" until frothy and risen, about 20 minutes.
5. Add the honey, beaten eggs and melted butter to the flour well. Mix in the flour to form a soft dough.
6. Turn the dough out onto a well-floured surface and knead until smooth, shiny and elastic for about 10 minutes.
7. Put the dough in a buttered bowl, turning to coat evenly with butter. Cover with a tea towel. Leave to rise until doubled in size, about 2 hours.
8. Knock back the dough, then leave to rest for 10 minutes.
9. Divide the dough into three equal pieces.
10. Roll out each piece to form a 40cm (16 inches) long rope.
11. Form a plait with the ropes (see braiding technique).
12. Place on a baking sheet and cover with a tea towel.
13. Prove until doubled in size, about 45 minutes to an hour.
14. Brush with the egg glaze (yolk and water) and sprinkle with poppy seeds.
15. Bake in preheated oven (180°C/350° F) for 45 minutes until richly golden and hollow-sounding when tapped underneath.
16. Cool on a wire rack
Remarks:
If youn wish, you can divide the dough in order to make smaller breads.
Serving suggestions:
It can be served on Jewish festive days or for breakfast.
(Coiled Challah -Pic by www.challahconnection.com)
(Wine And Challah -Pic by www.jewish-art-and-gifts.com)
Wednesday, May 24, 2006
AROUND MY VILLAGE PART II
Tuesday, May 23, 2006
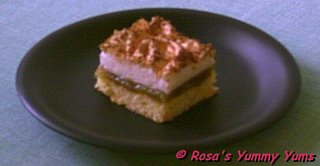
RHUBARB MERINGUE SLICES
Those "Rhubarb Meringue Slices" were really successful with their biscuit base, thickened rhubarb purree for middle part and airy meringue top sprinkled with grated coconut. No one can resist to the acidulated and sweet taste of those luscious squares!
Those slices of heaven melt in the mouth so beautifully that, for a second, you leave the world behind and float, like suspended in time, in an ecstatic state of blissful fulfillment...
Do try this recipe if you love sweet treats and rhubarb! You'll simply love it!
Ingredients for the crust:
63g (1/4 Cup) Unsalted butter
55g (1/4 Cup) Castor sugar
1 Egg (~50g eggs)
1 Tsp Vanilla extract
188g (1 1/4 Cup) Plain white flour
1 Tsp Baking powder
1/4 Tsp Salt
Filling:
3 Cups Fresh rhubarb, chopped
3 Tbs Water + 2 Tbs
110g (1/2 Cup) Castor sugar
2/3 Tsp Ground cinnamon
3 Tbs Cornstarch
Topping:
2 Egg whites (~50g eggs)
A pinch salt
110g (1/2 Cup) Castor sugar
23g (1/4 Cup) Grated coconut
Method:
1. Preheat the oven to 175°C (350°F) and grease a 20x20 cm (8x8 inch) square brownie tin.
2. In a medium bowl, cream together the butter and 55g sugar until fluffy.
3. Beat in the egg and vanilla extract.
4. Combine the flour, baking powder and salt.
5. Stir into the butter mixture until a stiff dough forms.
6. Press the dough into the bottom and 1,3 cm (1/2 inch) up the sides of the prepared pan
7. Bake crust for about 15 minutes or until firm.
8. Meanwhile, in a saucepan, combine the rhubarb, 110g sugar, cinnamon and 3 Tbs water.
9. Bring to a boil and cook until the rhubarb is tender, about 10 minutes.
10. Mix remaining 2 Tbs water with the cornstarch and stir into the rhubarb mixture in the pan.
11. Cook, stirring constantly, until the mixture has thickened.
12. Remove from heat and spread over the baked crust.
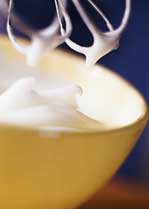
13. In a bowl, beat the egg whites together with the salt until peaks form (see meringue method here).
14. Gradually add the 110g sugar, continuing to beat the whites until stiff peaks form.
15. Spread over the layer of rhubarb sauce and sprinkle the grated coconut over the top.
16. Bake for 10-15 minutes in the preheated oven or until the merigue is golden brown.
17. Cool completely and cut into squares/slices.
Remarks:
If you want, you can use four spices or ginger powder instead of cinnamon.
It took me a little longer for my meringue to become golden, so you'll have to keep an eye on it and maybe bake it a little longer than 10 or 15 minutes...
Serving suggestions:
It is perfect if served as a dessert, but any occasion is good to eat those wonderful slices
(Meringue -Pic by http://whatscookingamerica.net)
Saturday, May 20, 2006
WEEKEND CAT BLOGGING #50
Generally, our little "Wistiti" (another of his names) blitzes up the cat tree like a crazy monster and nearly makes it fall down on the floor! See how destroyed the tree is...
His monkey sessions are always very noisy, nerving and chaotic as if he would have a ghost after him!!!
You will also find this picture as well as others on the great Eat Stuff blog from Sydney, Australia where you can discover Kiri's weekly pictures... If you also want to participate to Weekend Cat Blogging, then just leave your blog name, URL and permalink in a comment on Clare and Casey's site.
Friday, May 19, 2006
THE FARMER'S MARKET - PART I
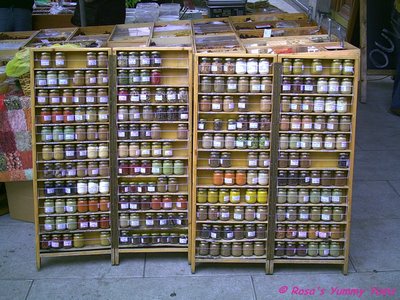
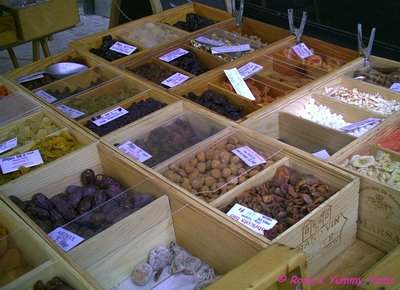
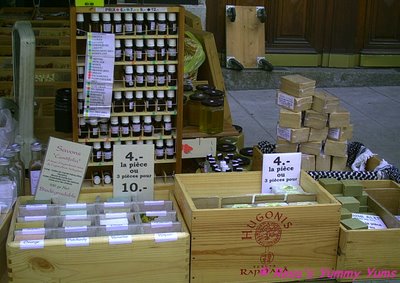
Every Wednesday and Saturday, on the Boulevard Helvétique in the center of the town of Geneva, there is a very interesting market where one can find many different things: fish, meat, bread, cheese, flowers, vegetables, fruits, Italian specialities, olives, spices, soaps, honey, wine, etc... This open market is situated just next to another market named "La Halle De Rive" which is covered and open six days a week. This market also offers a wide range of goods as it has more than twenty stalls dealing with various fresh products: fish, meat, cheese, bread, delicatessen products, Italian, Asian and Oriental specialities, etc...
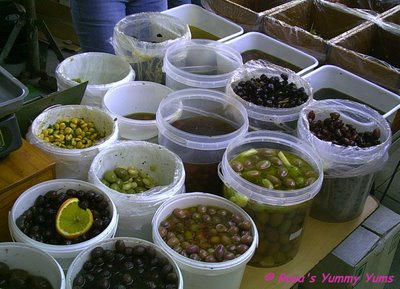
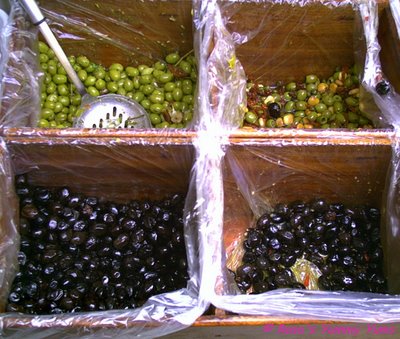
On the Boulevard Helvétique market, there is a stall I particularly cherish since I love spices, herbs, olives and Provencial types of products. It is held by a friendly Swiss-Chillean couple known under the name Stauffer-Villanueva. Both husband and wife go to sell their products separately on three different markets in Geneva and in Vaud (I think). So, on this particular market in Rive, it is the husband and his kind assistant who will serve you...
They sell various natural products like olives, oils, homemade preparations (anchoïade, tapenade, satanica paste,etc...), dry fruits, spices, honey, soaps, essential oils and natural incense sticks (Japanese). So, you can quite imagine how thrilled I am every time I go there as, knowing myself, I could just take the whole stall back home!!!
They have such a immense choice of flavors and mixes that I never know what to take. My favorite ones are garlic green olives, caper green olives, fennel green olives, salad mix green olives (with dried tomatoes, fava beans and capers), giant green olives with almonds... They also sell fava beans prepared in the same way as olives, sundried tomatoes in oil and capers. Needless to say that the beautiful smell given off by those products is wonderful!!!
You can also find many different seeds, dried herbs and dried plants (for herbal teas) such as thyme, sunflower seeds, licorice, curry leaves, rosemary, dried chillies, lavender and many more...
For those who live in Geneva or close to a market where this stall might happen to be, then I can only say one thing: don't waste your time with overpriced cheap products found in supermarkets and pay them a visit, you'll be totally bewitched by it!
Click here and here for further informations...
Saturdays only from 7h30-14h00
Marché de Rive
Boulevard Helvétique
1207 Genève
Switzerland
Wednesday, May 17, 2006
CHIANG MAI NOODLES (KHAO SOI)
As with most if not all Thai recipes (I'm an addict you see...), this dish is magnificently tasty as the combination of different spices and herbs are perfectly blended together in order to offer a well-balanced bouquet of stunning aromas: "Khao Soi" associates various different flavors together: sweet and sour, round and spicy, strong and delicate...
"Khao Soi" is not a difficult dish to prepare, but it's making does require a certain patience as there are various things to do before you can actually put everything together in the bowl. But taking the time to cook such a dish is very rewarding as the result will blow you off your feet!
Those "Chiang Mai Noodles" are absolutely de-li-cious and really to die for; a real treat for your palate! So, why not cook Thai food at home instead of going out to eat such a meal?!?... Bring the restaurant to you and be the chef, you'll not regret it one second!!!
This recipe is a medley of all the ones I had taken from the net; I have taken the best part of each in order to come up with this one...
Serves 2-3 people
Ingredients:
2 Tbs Oil and more for the noodles
300g Chicken breast, chopped
400ml Coconut milk
240-360ml (1 -1 1/2 Cup) Chicken stock
2 Cloves garlic, finely chopped
1 1/2 Tbs Home made or bought Thai red curry paste
1 1/2 Tsp Curry powder
1/2 Tsp Turmeric powder
1/2 Tsp Palm sugar
Fish sauce, to taste (enough to make it salty to taste)
Garnishes:
200g Flat or round egg noodles
1 Green/spring onion, thinly chopped
2 Shallots, very thinly sliced
Fresh coriander, chopped
Fried shallot flakes
Dried chilly flakes (optional)
1 Lime (or more), cut into 4 wedges
Method:
1. In a heavy pan, heat 1 Tbs oil, add the garlic. Saute until golden brown.
2. Add the curry paste, curry powder and turmeric powder and stir continuously for 1 minute, until fragrant.
3. Pour in 200ml of the coconut milk and let gently simmer until the oil starts to show.
4. Add another 100ml of the coconut milk and proceed as before.
5. Add the chopped chicken, the chicken stock and the leftover coconut milk. Stir.
6. Let it all gently simmer for 2 minutes.
7. Add the required fish sauce and brown sugar.
8. Over low heat, continue simmering (gentle boil) for about 10-15 minutes.
9. Meanwhile, bring a large pot of water to a boil.
10. Drop the noodles into the boiling water and cook until ready (see the explanations on the packet).
11. Pour the noodles into a colander and rinse with cold water. Drain well.
12. Pat dry 1/4 of the noodles.
13. Pour oil into a pan (2 inches/5cm deep) and heat until hot enough to fry the noodles.
14. Add the noodles and fry until crisp.
15. Remove from the pan onto absorbant paper and drain well.
16. Place a quantity of wet noddles in the bowl, pour over the chicken curry, add a quantity of fried noodles and top with the green onions, shallots, coriander, fried shallot, chilly flakes and place a wedge of lime on top of each serving (which you will squeeze yourself)
17. Serve hot...
Remarks:
When frying the curry paste, don't kill it by burning it. Just fry over low heat to release the fragrances.
If the broth is salty, be very careful when adding the fish sauce.
When simmering, do it over low heat otherwise the coconut milk might curdle!
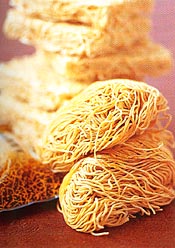
Use Thai "bah-mee" egg noodles, Chinese mien, or any kind of Asian egg noodle.
While frying the noodles, try to seperate the strands with the help of chopsticks so that they don't all stick together.
I recommend that you make your own "Red Curry" paste (recipes: 1, 2 & 3).
According to the fact that "Khao Soi" is quite spicy, I recommend you to have enough lime wedges to tame the heat of this dish!...
Serving suggestions:
If you enjoy a bit of alcohol, eat this dish accompanied by a very fresh bootle of Singha beer, otherwise just let your tastebuds do their work without the help of anything else... But, when eating hot food, it's best to avoid drinking as it makes it all the worse!!!
(Bah-Mee -Pic by www.royalthai-cuisine.com)
(Doi Suthep Temple -Pic Lionel Clavien www.trekearth.com)
Tuesday, May 16, 2006
AROUND MY VILLAGE
Monday, May 15, 2006
BRUNCH DU DIMANCHE MEME
BLOGGING-EVENT & ROUND-UP
Tous ces memes (meme= jeu où on se copie) qui circulent m'ont beaucoup inspiré. J'ai toujours du plaisir à y répondre et à faire un sorte que d'autres bloggers y participent...
C'est pour cette raison que j'ai décidé de créer un nouveau meme en relation avec le dimanche matin et la nourriture!
L'idée est que nous puissions tous voir votre petit-déjeuner or brunch typique, que vous nous donniez un apperçu détaillé de ce qui est sur votre table et que vous nous expliquiez pourquoi vous aimez ce moment privilégié. Si vous habitez dans un pays où le dimanche n'est pas un jour sans travail ou que vous ne faites rien de spécial en ce jour, alors j'accepte aussi que vous écriviez un billet sur le petit-déjeuner/brunch que vous prenez durant vos jours libres ou pendant vos vacances...
J'espère que ce meme va combler votre envie de "voyeurisme" sain en vous laissant entrevoir ce qui se trame à l'heure du petit-déjeuner/brunch, le dimanche matin, chez vos amis les food-addicts (ainsi que dans leurs assiettes)!!!
Le dimanche, généralement, on mange aux alentours de midi. Je ne dirais pas que nous petit-déjeunons car, en fait, nous brunchons.
Ce repas est fait pour que nous puissions tenir sans manger (enfin presque car nous savourons aussi de bonnes choses en cours d'après-midi, gourmandise oblige!) jusqu'au souper. C'est pourquoi nous mangeons des aliments consistants. On aime manger du sucré autant que du salé, et je trouve que c'est aussi important d'y ajouter un élément sain tel qu'un légume. En fait, ce brunch est assez suisse (fromage, pain, confiture, etc...)!
Je fais toujours mon propre pain car je trouve que c'est le meilleur que l'on puisse manger. C'est très difficile de trouver un pain acheté qui me plaît autant que le mien (sans vouloir prendre des airs supérieurs!)...
J'attends toujours le dimanche matin avec impatience car c'est le seul moment dans la semaine où on peut se relaxer en mangeant, profiter du balcon et du beau temps (en été) et goûter à plein de bonnes choses.
Voici ce que vous trouverez sur ma table:
. Du fromage, n'importe lequel tant qu'il a du goût et qu'il est assez puissant.
. Du pain (voir recettes) toujours fait maison et réchauffé (sorti du congélateur et ravivé).
. Du beurre car il sublime la saveur des autres aliments!
. Des légumes comme la tomate cerise (avec les saisons ça change).
. Du miel car il se marie à merveille avec le peanut butter.
. Du peanut butter car je ne peux jamais en avoir assez de cette pâte, surtout lorsqu'on l'associe avec du miel ou même du fromage!
. De la confiture faite maison par la mère de mon copain ou par moi-même.
. De la pâte de praline, faite maison (la recette sera très bientôt sur ce blog) qui va superbement bien avec une bonne brioche maison. On ne la trouve pas toujours sur notre table car je fais aussi du Lemon Curd (voir recette) ou une autre spécialité.
. Du Nutella, bien sûr! C'est une drogue car une fois qu'on commence, on ne peut pas s'arrêter!
Voici les bloggers que je choisis pour participer à ce meme (si vous voulez...):
- Ari at "Baking And Books" (USA)
- Baroness Tapuzina at "Baroness Tapuzina" (Israel)
- Bureka Boy at "Is THat My Buréka?" (Canada)
- Gracianne at "Un Dimanche A La Campagne" (France)
- Hélène at "Mais Qu'Est-Ce Qu'On Mange, Ce Soir?" (France)
- Incharlotte at "Dans L'Assiette De Mademoiselle Charlotte & Cie" (France)
- Ivonne at "Cream Puffs In Venice" (Canada)
- Rosa at "Living As Rosa" (USA)
- Ruth at "Once Upon A Feast" (Canada)
- Susan at "Food Blogga" (USA)
- Vanessa at "Confiture Maison" (USA)
- Zorra at "Kochtopf"
1. Créer un billet (posté sur votre blog) qui parle de votre typique brunch/petit-déjeuner dominical (ou durant vos vacances ou jours libres). Photographiez votre table et parlez-en.
2. N'oubliez surtout pas de mentionner le titre "SUNDAY BRUNCH MEME" dans votre billet et d'y ajoutez un lien vers mon blog (www.rosas-yummy-yums.blogspot.com).
3. Envoyez-moi un e-mail contenant le (perma)lien vers votre billet à mon adresse grandchamp@gmx.ch avant le 30 juin 2007.
Ce jeu est ouvert à tout le monde (pas qu'à ceux qui ont été désigné), alors merci de bien vouloir faire passer le message! J'attends vos billets avec impatience...
Saturday, May 13, 2006
WEEKEND CAT BLOGGING #49
You will also find this picture as well as others on the great Eat Stuff blog from Sydney, Australia where you can discover Kiri's weekly pictures... If you also want to participate to Weekend Cat Blogging, then just leave your blog name, URL and permalink in a comment on Clare and Casey's site.
Friday, May 12, 2006
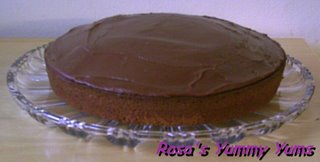
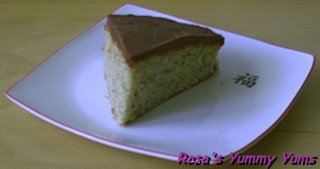
HAZELNUT CAKE
This "Hazelnut cake" is simply delicious and very tasty! It's fluffy texture is delightful and the combination of hazelnuts with chocolate is perfect. It's one of those cakes which will always be an all-time favorite!
This recipe comes from The Australian Women's Weekly "Quick-Mix Cakes" cookbook and was rearranged to meet my taste...
Ingredients:
125g Unsalted butter, at room temperature
1 Tsp Vanilla essence
220g (1 Cup) Castor sugar
2 Eggs (~50g)
225g (1 1/2 Cup) Plain white flour
1 1/2 Tsp Baking powder
A pinch of salt
180ml (3/4 Cup) Milk
70g (2/3 Cup) Ground hazelnuts
Chocolate icing (optional):
90g Dark chocolate, chopped
1 Tsp Vegetable oil
60ml (1/4 Cup) Water
320g (2 Cups) Powder/icing sugar
Method:
1. Peheat oven to 180°C (350°F).
2. In a big bowl, cream the butter together with the sugar and vanilla essence until light and fluffy.
3. Add the eggs, one at a time and beat until combined.
4. Stir in the sifted dry ingredients (flour, baking powder and salt) and the milk, alternately.
5. Incorporate the hazelnuts.
6. Pour the batter into a greased round cake pan.
7. Bake for about 45-50 minutes in the middle of the oven or until a thin skewer inserted in the center of the cake comes out clean.
8. Turn onto a wire rack and let cool.
9. For the icing , combine the chocolate, oil and water in a saucepan.
10. Stir over low heat until the chocolate is melted.
11. Gradually beat in enough sifted icing sugar to give a smooth, spreading consistency.
12. Top the cake with the chocolate icing.
Remarks:
Instead of castor sugar, you can use light brown sugar.
You can also replace the hazelnuts by the ground nuts of your choice, but the taste will then be different.
Serving suggestions:
Serve with a good cup of tea or coffee.
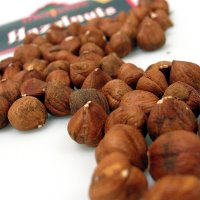
(Hazelnuts -Pic by www.melissas.com)
Wednesday, May 10, 2006
OSTRICH STEAK TARTAR
Generally, we all know the beefy version which is also awsome, but rarely do we think about using another kind of red meat. So, as I love ostrich meat, I decided to use it in order to change from the usual recipe!
Apart from being delicious and similar in taste to beef, ostrich meat is also very healthy. It is supposed to be one of the superior meats that exists. Like beef it is red meat and it contains even less calories, fat and cholesterol than white meat (chicken or turkey), but it is high on iron and protein...
This versatile "steak tartar" is really aromatic and wacky, yet very delicate and pleasant. Ostrich meat (mine is from Namibia) is sweet and is not so bloody-tasting as beef, but it is nonetheless full of character and rich in flavor.
This "steak tartar" recipe was entirely invented by myself in order to meet my own cravings for full-bodied and tasty kick ass food; this dish is not bland and you will see that you tastebuds will be put to contribution!!!...
Serves 2
Ingredients:
400-450g Ostrich fillet or steak, finely chopped or medium ground
1 1/2-2 Cans Anchovy fillets (~30-40g fish, drained) in oil, very finely chopped or medium ground (I used 2)
1-2 Big clove(s) garlic, crushed
1 Medium red shallot, very finely chopped
2 Egg yolks
2 Tbs Cognac
1 Tbs Red porto wine
2 1/2 Tsp Worcestershire sauce
1 Tsp Red or green Tabasco sauce (or more if desired)
3-4 Tbs Curled parsley, very finely chopped
1/2 Tsp Salt (or less depending on your taste)
Pepper to taste
A package toastbread
Method:
1. Mix all ingredients together so that they atre well blended.
2. Taste the mixture in order to see if it meets your taste and bring the modifications needed.
3. Cover well with plastic foil to avoid the meat from oxidizing, refrigerate for 2 hours.
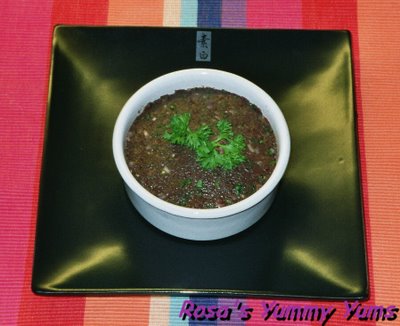
4. Mound on a pretty plate or place in a bowl, leave to rest another 30 minutes and then, decorate with a strip of parsley.
5. Toast the bread.
6. Serve.
Remarks:
Instead of ostrich meat, you can use beefsteak or rumsteak.
A tin of anchovy fillets weighs about 30g with the oil. Once you've drained the oil, you'll need the contents of two cans (~2 X 20g).
If you wish, you can use less anchovies depending on how tasty and salty you want your steak tartar to be.
Before you add salt or both cans of anchovies, taste the mixture, then you can add the amount you need.
Don't mix the ground meat too roughly in order to avoid packing it.
It is better to reserve the steak tartar mixture before serving as then, the aromas develop. But don't serve it too cold, otherwise the tastes are surpressed; eat your steak tartare at room temperature.
Serving suggestions:
Spread small quantities of the steak tartar on a slice of buttered toastbread.
(ostrich -Pic by www.dafyd.me.uk)
(Namib Desert - Pic by Colin Brenchley www.trekearth.com)
Monday, May 8, 2006
AN EVENING WALK
Along the path going down to the Jewish cemetery: looking left, some vineyards...
Further down the path: a field and trees bathed in the warm evening light...
When walking in the direction of the village of Troinex: green fields and the Jura mountain in the distance...
Saturday, May 6, 2006
WEEKEND CAT BLOGGING #48
You will also find this picture as well as others on the great Eat Stuff blog from Sydney, Australia where you can discover Kiri's weekly pictures... If you also want to participate to Weekend Cat Blogging, then just leave your blog name, URL and permalink in a comment on Clare and Casey's site.
Friday, May 5, 2006
RHUBARB UPSIDE-DOWN PUDDING
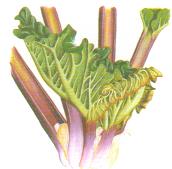
This humble plant, indigenous to Asia, might look a bit uninteresting at first with it's large leaves, but when taking the time to see it under a different light, it's stalks are marvelously reddish-pink and it is this colour that makes it very special once cooked. It's pretty pigmentation isn't the only characteristic that draws us to it, but also it's wonderful acidulated (oxalic acids) taste and the thousands of cooking possibilities it offers! And contrarily to what many people might think, rhubarb is not only used in the confection of pies or other baked goodies/desserts, but it associates itself very well with meat, fish and other savory dishes (yes, yes...)!
So, don't pucker when you hear the word "rhubarb" as since sugar is a basic staple in our kitchen (since the 17th century), there is no need to snob this wonderful natural product!...
Enjoy this special upside-down cak now as you won't be able to eat it all year round, because, in our latitudes, rhubarb is only available between april and june!!!
Serves 3-4 people
Ingredients:
1 Litre (2 Pint) buttered pie dish (21cm).
Base:
50g Unsalted butter
100g Light brown sugar
450g-470g Rhubarb, cut in 2cm (1/2 inch) cubes
1/2 Tsp Ground cinnamon
1/3 Tsp Ground ginger
Pudding mixture:
200g Plain white flour
1 1/2-2 Tsp Baking powder
1/4 Tsp Salt
100g Unsalted butter
100g Castor sugar
The rind of one lemon, finely grated
1 Pinch mace (~1/4 Tsp)
2 Eggs (~50g)
~9 Tbs Buttermilk
Method:
1. For the base, melt the butter and stir in the sugar.
2. Cover the bottom of the pie dish with this mixture.
3. Arrange the cubed rhubarb over the base.
4. Sprinkle with the cinnamon and ginger.
5. Preheat the oven to 190°C (375°F).
6. For the pudding/cake, sift the flour and salt into a bowl.
7. Rub in (cut in) the butter.
8. Add the sugar, mace and lemon rind.
9. Toss the ingredients lightly together.
10. Lightly beat the eggs and buttermilk together.
11. Mix to a fairly soft batter with the egg/buttermilk mixture.
12. Spread the pudding/cake batter over the rhubarb in the dish.
13. Transfer the dish in the centre of the preheated oven and bake for about 30 minutes.
14. Then, reduce the temperature to 180°C (350°F) and bake further for about 35 to 45 minutes, until a skewer inserted in the middle comes out clean.
15. Leave in dish for 5 minutes.
16. Turn the pudding/cake out on to a warm plate.
17. Eat straight away.
Remarks:
Instead of buttermilk, use milk.
You can also use five or 4 four spices instead of cinnamon and ginger.
Don't overbeat the batter; like with all cake batter, it doesn't like any kind harsh treatment otherwise it gets elastic.
Serving suggestions:
Eat as a dessert or main course and serve with condensed milk or double cream poured over your slice of pudding/cake.
(Rhubarb 1 -Pic by Unknown)
(Rhubarb 2 -Pic by http://images.foodnetworks.com)