Showing posts with label Coffee Cake. Show all posts

Friday, July 6, 2012

STRAWBERRY COFFEECAKE - GÂTEAU AUX FRAISES

Strawberry Cake 5 6 bis
Success is not final, failure is not fatal: it is the courage to continue that counts.
- Winston Churchill
Develop success from failures. Discouragement and failure are two of the surest stepping stones to success.
- Dale Carnegie
Failure, a terrifying and taboo seven letter word which makes most mortals shiver, gives us cold sweat and is surrounded by fear and shame. People dare mention it for it is a psychological weapon of mass destruction that has the power to annihilate every ounce of self-confidence that we possess, shatter our dreams in millions of pieces and break us down in a blitz. Like a dirty secret, it is whispered behing closed doors, in a hush-hush way as it is quasi-blasphemous to pronounce it aloud. It is the ugly monster hiding under our beds, the ghastly shadow lurking behind closed doors and the scary skeleton in the closet... 

In our extremely modern and highly competitive world where everything is based on the winner-crusher-stab-in-the-back mentality, failure is something that cannot exist and is denied, hence it is shunned and looked upon negatively. For those who believe in the sacro-saint conquerer system that is imposed to us by our shallow society and which is based on continuous achievement, performance and gain, downfall is pitiful and absolutely not an option. One is not granted the right to be defeated otherwise he/she is categorized as a sad loser and seen as a dirty misfit.

A disgraceful attitude which is discouraging and not helpful nor motivating as individuals who face ruin are stigmatized in such a manner that they rarely have the power to get up on their feet again. They are constantly deminished and reminded of their humiliating descent into the tenebrous abysses of decay. When your face is continually rubbed in the dirt, others tread on you and you are considered a deadbeat because you have tripped while walking on the path to victory, then how will you ever be able to start anew and arise from the ashes? Instead, a little motivation and encouragement would be welcome.
Failure is a detour, not a dead-end street.
- Zig Ziglar

Failures are finger posts on the road to achievement.
- C.S. Lewis

Failure is nature's plan to prepare you for great responsibilities.
- Napoleon Hill

An inventor fails 999 times, and if he succeeds once, he's in. He treats his failures simply as practice shots.
- Charles F. Kettering

If you're not failing every now and again, it's a sign you're not doing anything very innovative.
- Woody Allen
After all, we are just humans, not machines and we can't systematically reach our goals at the first attempt or be inveriably perfect. How boring would that be! Life is full of ambushes, so trials and errors are a part of the game, and staggering is normal. Sometimes, in order to attain success and spice up our lives, detours are inevitable. Defeat is not when you stumble, it is when you accept to crawl on the ground on all fours and you refuse to move on or when you are paralyzed by cowardice and self-loathing. No pain, no gain! Suffering - in small proportions - is needed to make progress.

Embracing and transcending failure is vital if you don't want to stay stuck in that purgatotry for alleged deadbeats. Victimizing or blaming yourself has no purpose as it will bring you nowhere. If you understand that you can only overcome screw-ups by analyzing why things went wrong and know that your brain or apprehensions are your biggest barriers to triumph, then you'll be able to find a solution to your problems and will definitely not follow the same road again.

The only real stumbling block is fear of failure. In cooking you've got to have a what-the-hell attitude.
- Julia Child
Once in a while, even the avidest of bakers or cooks will experience a kitchen disaster. There are times when all hell breaks loose and dishes don't work out as planned. Nothing more unnerving, irritating and distressing than a floppy recipe or being misslead by our assurance and let down by our concentration. A terrible curse for the poor person who has been slaving behind the stove and doesn't see his/her efforts rewarded.

Each of us has bad days and there's nothing exceptional about that, but unfortunately, hiccups generally seem to occur only at the wrong moment. Remember that Easter bread which refused to rise and was as hard as a bullet, that famous Christmas roast of yours that was as tough as a leather boot because you were blabbering madly and forgot it in the oven or that infallible birthday cake which errupted similarly to a volcano and spurted batter all down the sides of the pan? Oh, you could have teared out your hair with anger, wailed like a desperate banshee and ran away so much facing your guests was painful and embarrassing. Moments of pure desperation and solitude...

Anyway, it is not the end of the world. Our culinary misadventures are rarely unbearable and "catastrophies" are here to indicate where we went wrong and help us ameliorate ourselves. This is what creates experience and knowledge. Occasionally they even give unawaited results.

Take the example of the famous Tatin sisters who created the first "Tarte Tatin" by inadvertence. Had Stéphanie Tatin not left the apples cooking in butter and sugar for too long, she would have probably never been alerted to her mistake by the smell of burning and covered them with pastry in an attempt to rescue the situation. Passing her mistake off as a special, her pie made it into history.

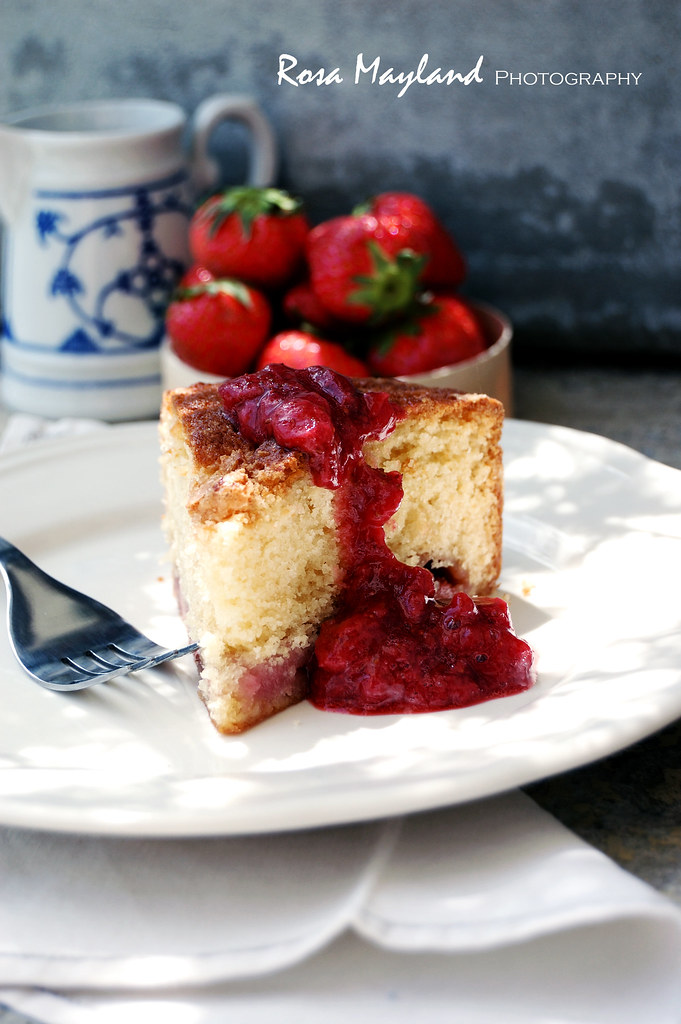
I'm not saying that all blunders lead to favorable outcomes, but I believe that we always can draw positive lessons from crises. For example, last week, I baked a simple "Strawberry Coffeecake" and the outcome was quite deceiving visually speaking. Instead of staying on top of the cake, the strawberries decided to sink to the bottom. So, as I wanted to know why this happened, I analyzed the situation and came to the conclusion that I was the one to blame because I decided to put my preparation in tin that was not big enough.* Audacity can be treacherous and play tricks on you. Damn!

Nonetheless, apart from being not too pretty, my creation was exquisite and I've had a lot of success with it. This buckle-like treat is moist on the inside and crisp on the outside, exhaliratingly fragrant, extremely fruity, not overly sweet and really easy to put together. A summery delight that will rejoice kids and adults alike, and will send you to strawberry heaven!

* Ok, maybe it wasn't entirely my fault. My oven door is broken and I have to keep it shut with a chair, so a temperature leak might also be in cause here...

Strawberry Coffeecake
Recipe adapted from Martha Stewart.

Serves 4-6.

Ingredients:
6 Tbs (90g) Unsalted butter, at room temperature, plus extra for the cake pan
1 1/2 Cups (191g) All-purpose flour 
1 1/2 Tsp Baking powder
1/2 Tsp Fine sea salt 
1 Cup +2 Tbs (210g + 30g) Castor/granulated sugar 
1 Large egg
1/2 Cup (120ml) Milk 
1 Tsp Pure vanilla extract
1 Tsp Orange zest puree 
1 Pound (450g) Strawberries, hulled and halved

Method:
1. Preheat the oven to 180° C (350°F).
2. Butter a 25cm (10-inch) cake pan or pie plate, or a 23cm (9-inch) deep-dish pie plate. 
3. Sift the flour, baking powder, and salt together into a medium-sized bowl.
4. Cream the butter and 1 cup of sugar in the bowl of an electric mixer on medium-high speed for about 2 minuttes or until pale in color, light and fluffy. Then, reduce the speed to medium-low and mix in the egg, milk, vanilla and orange zest puree. 
5. Reduce the mixer speed to low and gradually add in the dry ingredients, mixing until just combined.
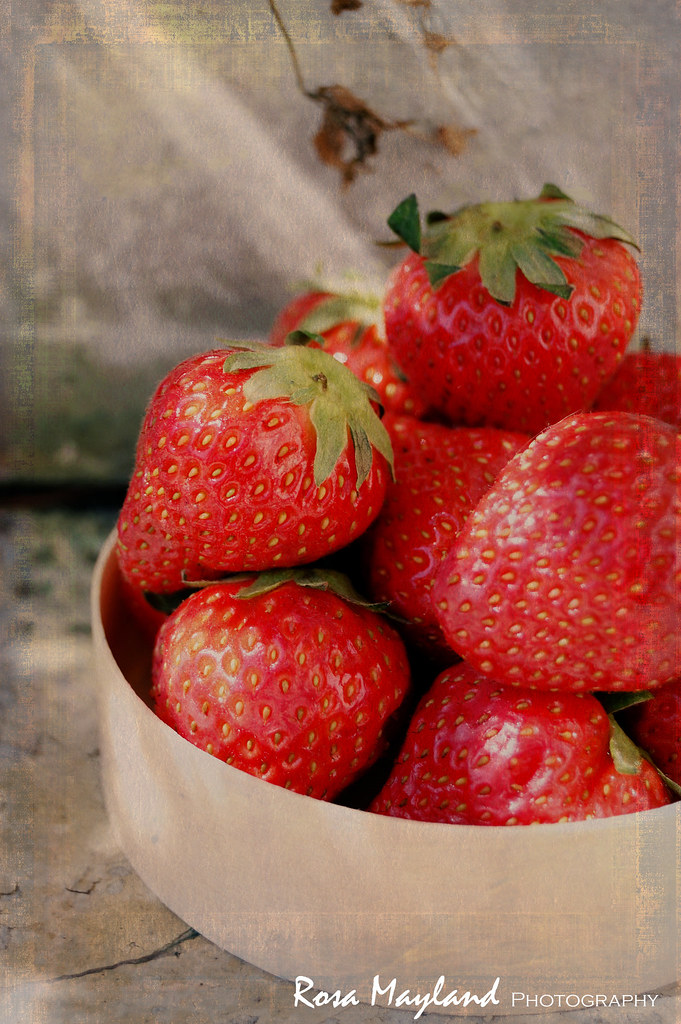
Strawberry Cake 3 3 bis
6. Transfer the batter to the buttered cake pan or pie plate.
7. Arrange the strawberries on the top of the batter, cut sides down, as closely together as possible (you may have to jam them in a little).
8. Sprinkle the remaining 2 tablespoons of sugar over the berries. 
9. Bake for 10 minutes, then reduce the oven temperature to 170° C (325° F) and continue baking the cake for about 50 minutes or until it is golden brown and firm to the touch and a tester inserted into iits center comes out clean.  
10. Let it cool in the pan or pie plate, on a wire rack.
11. Cut into wedges and serve.

Remarks:
The cake can be stored, well-wrapped in plastic wrap, at room temperature for up to 2 days.
The orange zest puree is optional - I highly recommend you to use it though.

Serving suggestions:
Serve for dessert or teatime, with a scoop of vanilla ice cream or a strawberry coulis and accompany by tea, sparkling wine (Champagne, Clairette de Die, Prosecco, etc...) or Belgian blond ale.
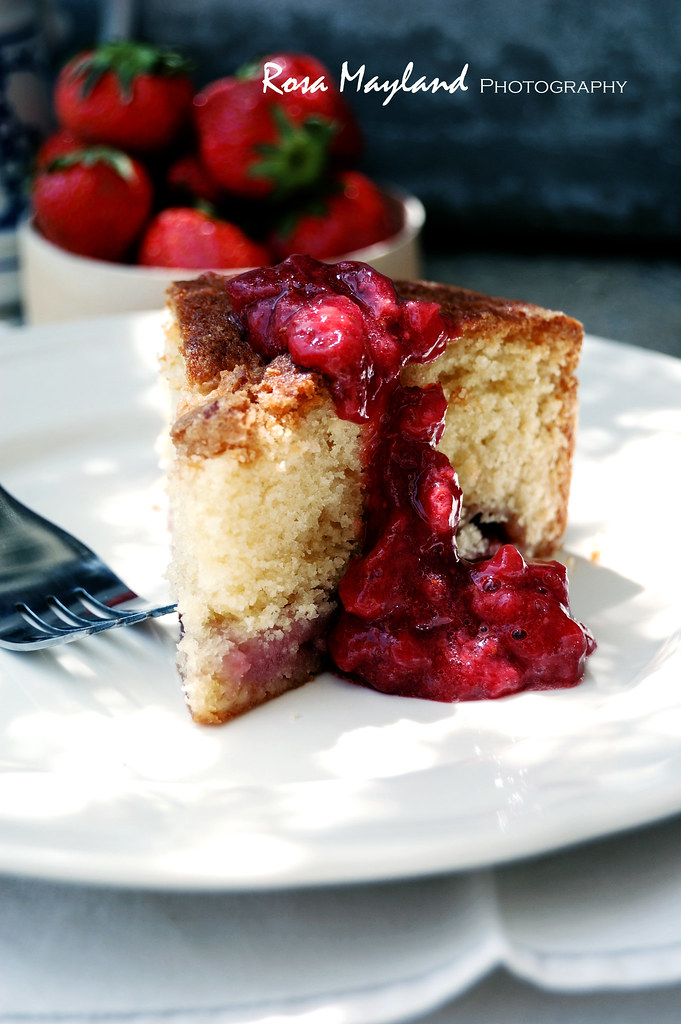
Gâteau Aux Fraises
Recette adaptée de Martha Stewart.

Pour 4-6 personnes.

Ingrédients:
90g de Beurre non-salé, à température ambiante (+ un peu pour le moule)
191g de Farine
1 1/2 CC de Poudre à lever
1/2 CC de Sel de mer fin
210g de Sucre cristallisé (+ 2 CS/15g pour soupoudrer le dessus du cake)
1 Gros oeuf
120ml de Lait
1 CC d'Extrait de vanille pure
1 CC de Zeste d'orange en purée
450g de fraises, équeutées et coupées en deux

Méthode: 
1. Préchauffer le four à 180 ° C.
2. Beurrer un moule à gâteau rond de 25 cm de diamètre ou un moule à pie de 23cm de diamètre.
3. Dans un grand bol, tamiser ensemble la farine, la poudre à pâte et le sel.
4. Dans le bol de votre batteur électrique, battre le beurre et le sucre à vitesse moyenne pendant environ 2 minutes ou jusqu'à que le mélange soit de couleur pâle et "mousseux". Puis ajouter le zeste, l'œuf, le lait, la vanille et les zestes. Mélanger.
5. A faible vitesse, incorporer graduellement les ingrédients secs (farine/poure à lever/sel).

6. Etendre la pâte dans le moule à gâteau ou à pie.
7. Disposer les fraises
aussi étroitement que possible sur le dessus de la pâte (côté coupé vers le bas).
8. Saupoudrer avec les 2 CS de sucre restantes.
9. Cuire le gâteau à 180°C pendant 10 minutes, puis réduire la température du four à 170 ° C et continuer à le cuire pendant environ 50 minutes, jusqu'à ce qu'il soit doré, ferme au toucher et qu'un cure-dent inséré en son centre en ressorte propre.
10. Laisser le cake refroidir dans le moule, sur une grille.
11. Couper en tranches et servir.

Remarques:
Le gâteau peut être conservé à température ambiante pendant 2 jours (bien l'emballer dans du film plastique).
La purée de zeste d'orange est facultative. Tout de même, je vous recommande fortement de l'utiliser car elle ajoute une note merveilleuse à ce gâteau.

Idées de présentation:
Servir à l'heure du dessert ou pour le goûter avec de la glace à la vanille ou un coulis de fraise et accompagner ce gâteau d'un thé, d'un verre de vin mousseux (Champagne, Clairette de Die, Prosecco, etc ..) ou d'une bière belge.
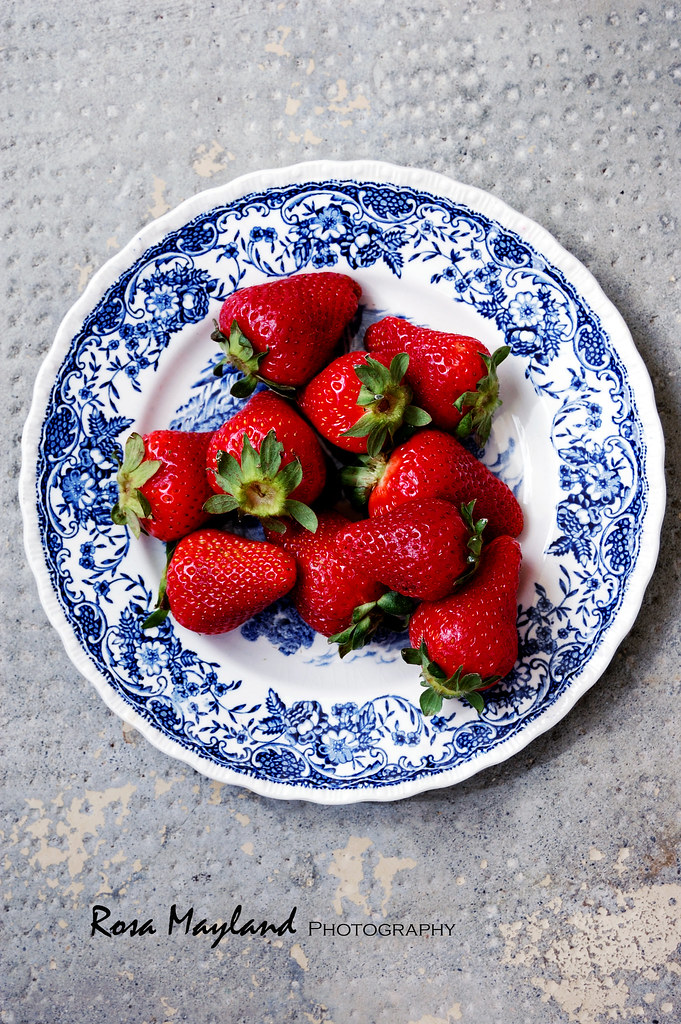
Strawberry Cake 9 5 bis

Friday, April 1, 2011

KORVAPUUSTIT - FINNISH CINNAMON BUNS

Korvapuustit Picnik collage 3 bis
Scandinavia is a place which's fascinating and tumultuous Viking past, unique culture, scenic grandeur and epic landscapes particularly speak to me. For some reason or another, I am mesmerized by the "land of the midnight sun". It could very well be due to the fact that I have Nothern roots and share berserker blood with its inhabitants. As a matter of fact, on my mother's side, I have English ancestors (some might have been Danish as well as Russian if you dig deep in the past) and probably also Danish origins thanks to my Swiss father (my family name seems to originate from Danemark). Anyway, Scandinavia has a certain romantic and nostalgic "je-ne-sais-quoi" that captivates my interest and touches my soul deeply...
In fact, my attraction to this penninsula dates since my early teenage years (quite a while now, LOL). My passion for this part of Europe started when I discovered Norwegian Black Metal in 1993, began to correspond with penpals who shared the same love for this sound-style and send letters all over the planet. Then, most people didn't have computers and the only way of keeping in touch was either by snail-mail or telephone.

It was an incredibly exciting period of my life because this
musical movement was at it's beginning, still very underground and unspoilt by the big labels who only think about money rather than art. The music I listened to was not sold in stores and most musicians used flyers (which were placed in our letters and endlessly passed around) in order to let people know of their existence. I was in contact with many bands, bought lots of demos as well as fanzines (the printed version of blogs - I also contributed to a few of them with articles and interviews) and traded loads of tapes. I really enjoyed the secretive atmosphere and the feeling of belonging to a "hidden" group of avant-garde and alternative people.

For me, NBM and nature are very closely related. It is synonymous with the mystique and magic of Norway."
- Peter Beste, Photographer

As a rule, Heavy Metal music (black, death, pagan, viking, folk, thrash, etc...) is very popular in the North of Europe. In Norway the Black Metal subgenre (the "2nd wave of BM" saw the light of day there at the beginning of the 199o) is quite possibly one of the country's n°1 musical/cultural export since the last 20 years and the negative tabloid coverage regarding the unfortunate events of the 90's didn't stop people from buying records or the Norwegian television channel NRK and medias from supporting this kind of Extreme Metal (live reports from festivals are made, documentary are being shown, musicians are being invited on TV shows, articles are posted on Norways's official site in the UK and photographies are being exhibited). Sweden, Danemark and Iceland have brought some amazing music and have a big scene too with very popular bands, but it's Finland that has the biggest Metal scene. It is the only country on the globe where Metal is mainstream (there are 3 million metal fans in a population of 5 million)...

"Why Heavy Metal? Perhaps it's something in our hearts and we are very passionate people!"
- Madame President of Finland

Nowadays, I still listen to a lot of Black Metal and Metal in general, but my love for Nordic culture has expanded to embrace other artistic genres. Lately I have discovered a growing interest for Scandinavian cinema which offers a big number of well-produced and refreshing films (nothing like the big Hollywood productions) as well as talented actors (Kristoffer Joner - one of my favorite, Aksel Hennie, Stellan Skarsgård, Alexander Skarsgård, Samuli Edelmann, Peter Franzén, Bjørn Floberg, Fares Fares, Mads Mikkelsen, Kim Bodnia, Torkel Petersson, Michael Nyqvist, Björn Starrin, etc... ) and filmakers. In addition to that, I have become extremely enthusiastic about their food and culinary customs. Being a foodie with an open mind and in constant search for novelty it is all naturally that I am strongly drawn to Scandinavia's unique cuisine and savors.

Korvapuustit 10 bis
Bamboo plate supplied by Restauranware.com (plastic plates & catering supplies).

Being an amateur baker and having heard many words of praise regarding Béatrice Ojakangas' "The Great Scandinavian Book Of Baking", her cookbook has been on my mind and I have been dreaming of possessing it since a while. Happily, after much aching for that masterpiece I finally bought it for my birthday last December. Even if it is not a new publication and although it is a softcover devoid of photos this
book is a real jewel. There are dozens of fabulous Norwegian, Swedish, Danish, Icelandic and Finnish recipes for delightfully hearty breads, divine yeasty coffeetime confections, rich and delicate cookies as well as cakes, scrummy pies and savory treats.

Until now, I have tested four specialities (Finnish "Rieska", "Pulla" and "Korvapuustit", and Norwegian "Butter Horns") and was really satisfied with the results. All were easy to bake, the measures were accurate and the methods were extremely straight-forward. Very encouraging. Now, I am looking forward to trying more of her awesome recipes.

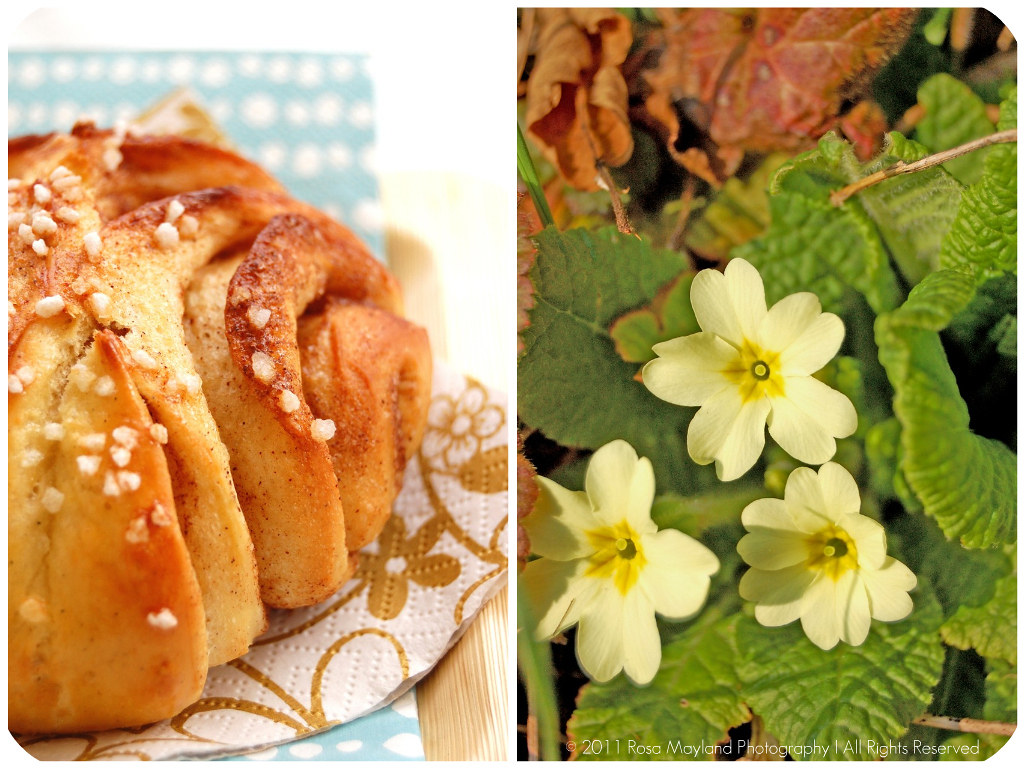
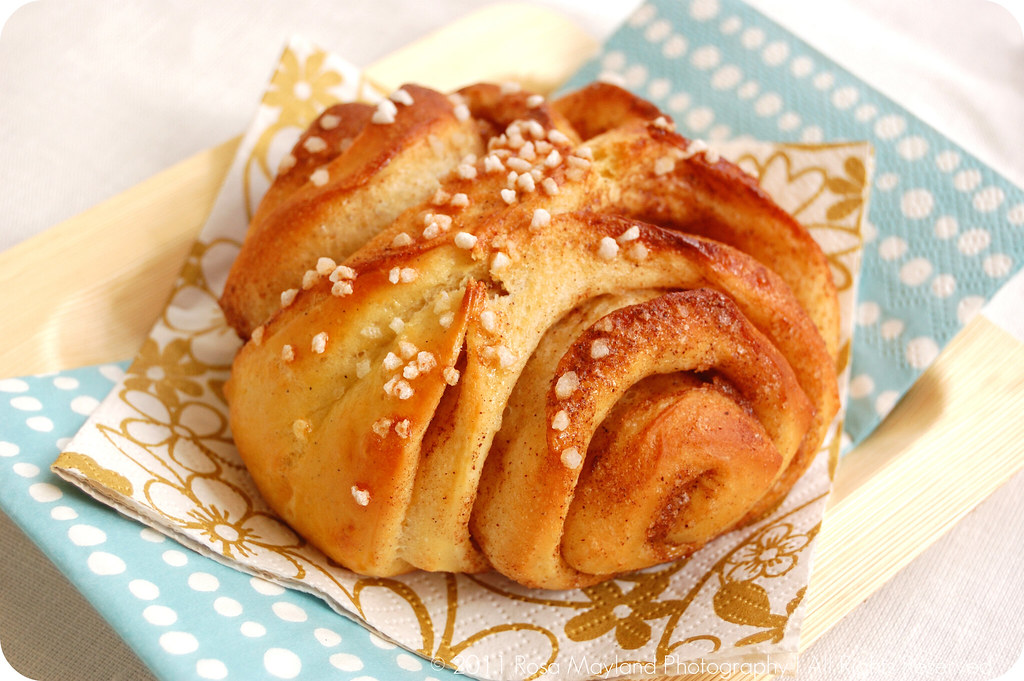
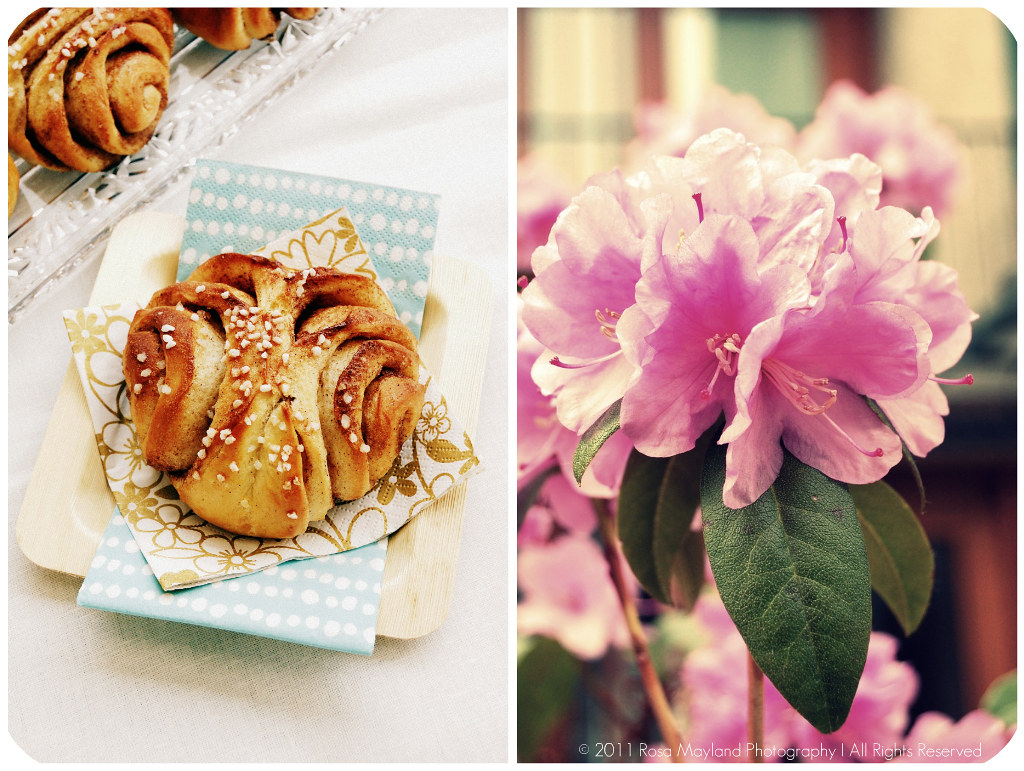
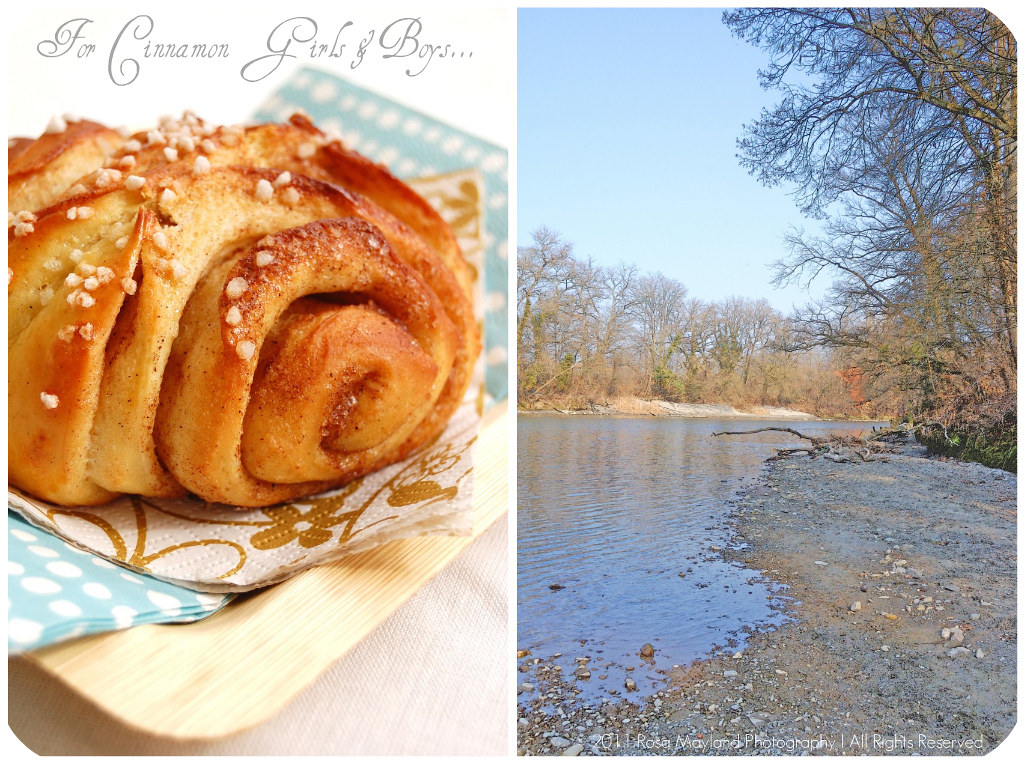
Today, I have decided to present you a Finnish pastry named "Korvapuustit" (also called "Kanelli Pulla" when turned on their side and not sitting on their bottoms) and which consists of cardomomy sweet yeast dough filled with sugar and cinnamon. In Finland, you'll find them in every café or bakery. They are very popular with both Finns and foreigners alike.

Those rolls are similar to Sweden's "Kanelbullar" and to the American "Cinnamon Rolls", yet they differ a little from both. The di
fferences lie within their ear-like shape (hence the name "Korvapuustit" meaning "little ear buns"), flavor (cardamom in the dough and a lot less sweet than their US counterpart), texture (less gooey than "Cinnamon Rolls") and size (relatively small compared to the oversized American rolls).

"Korvapuustit"
are damn good and extremely irresistible. Once you've eaten one you can be sure that you'll come back for more and will not stop gobbling dem babies until you are literally exploding and feel stuffed like a pig!

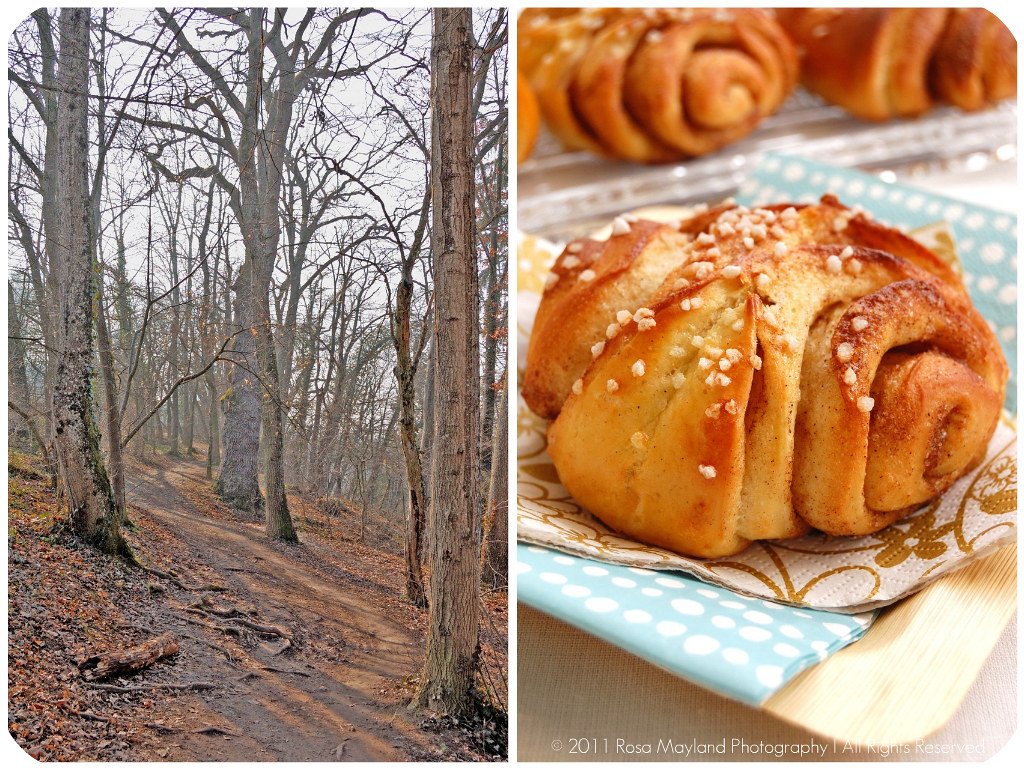
My coffee rolls were dreamlike, fabulously soft, gorgeously moist, wonderfully buttery, divinely spicy and soothingly sweet. One bite into these luscious bundle of pleasure will bring a smile on your face. An blissfull feeling will descend upon you and ecstasy will submerge you. Are you ready to get experience that?
There's no time to procrastinate, heaven is waiting for you so get busy baking!

Korvapuustit Picnik collage 1 bis
~ Korvapuustit ~
Recipe adapted
from "The Great Scandinavian Book Of Baking" by Beatrice Ojakangas.

Makes 10-12 rolls.

Ingredients For The "Dough":

1 Package (7g) Active dry yeast
1/2 Cup (120ml) Lukewarm water

1/4 Cup (60g) Unsalted butter, melted
1/4 Cup (50g) Castor sugar
1 Big egg, slightly beaten
1 Egg yolk
1/2 Tsp Fine sea salt
3/4 Tsp ground cardamom (optional)

2 1/4 -2 1/2 Cups (~ 300g) All-purpose flour
Ingredients For The "Filling":
1/4 Cup (60g) Unsalted butter, softened
1/4 Cup (50g) Castor sugar
1 Tbs Ground cinnamon
Ingredients For The "Glaze":

1 Egg, slightly beaten
1 Tbs Milk

Pearl sugar

Korvapuustit Picnik collage 2 bis
Bamboo plate supplied by Restauranware.com (plastic plates & catering supplies).

Method
For the "Dough":
1. In a large bowl, dissolve the yeast in the warm water and let stand 5 minutes.
2. Stir in the butter, sugar, egg, yolk, salt, cardamom and 2 1/4-1/2 cups flour, then knead until dough is smooth.
3. Cover and refrigerate 2 to 24 hours.
4. Turn out the dough onto a lightly floured surface and roll out to a rectangle of 30x60cm (12 inches by 24 inches).
Method For The "Filling":

5. Spread with the butter, then sprinkle with sugar and cinnamon.
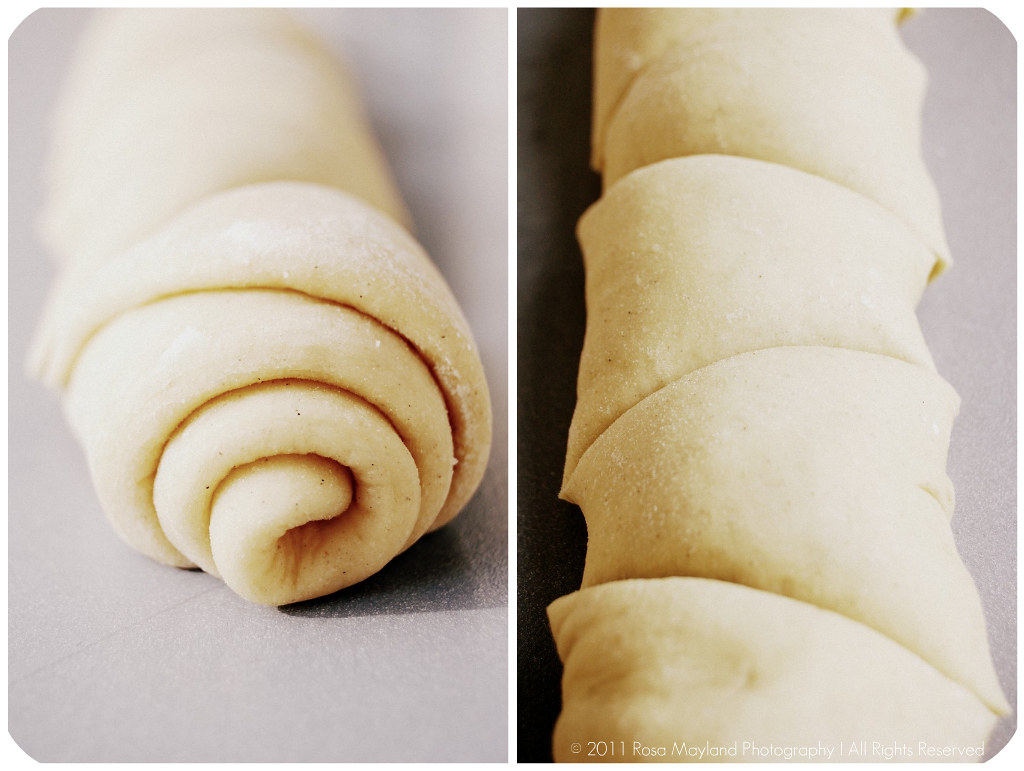
6. Roll up, starting from one of the 60cm (24-inch) side.

7. Cut the roll diagonally into 12 pieces (each piece will be about 1.3cm/½ inch on one side and 7.6/3 inches thick on the other side).
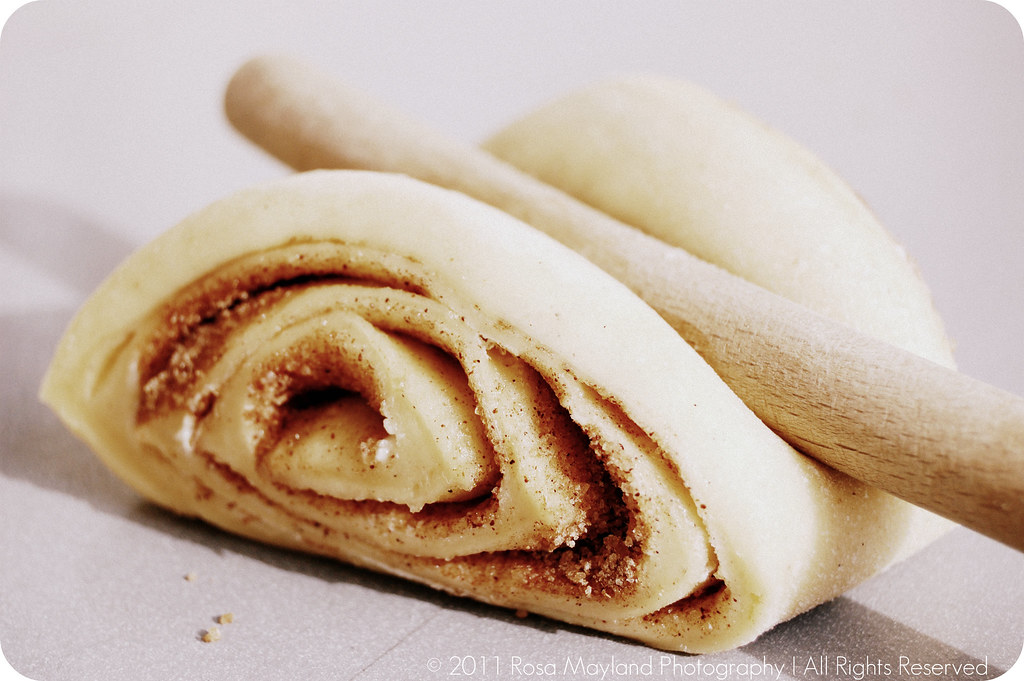
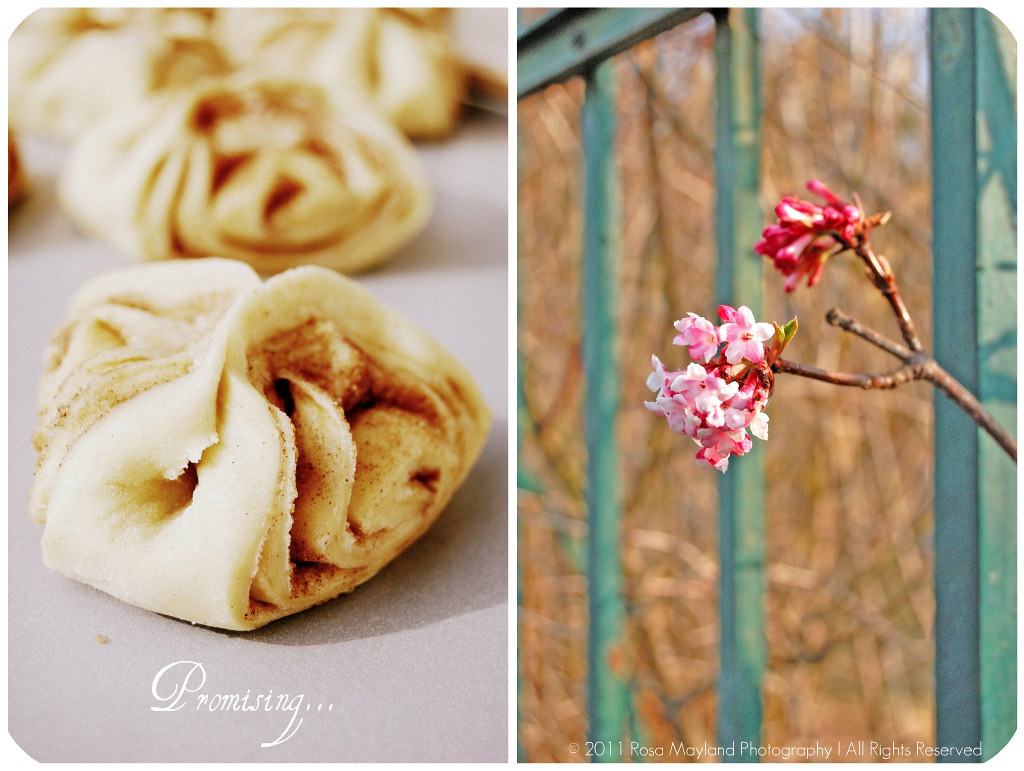
8. With two thumbs or the handle of a big wooden spoon, press down the middle of the side of each roll (by doing that the two cut edges will be forced upward/the rolls will resemble two “ears”).

9. Cover a baking sheet with parchment paper or lightly grease it.
10. Place the cinnamon ears on prepared baking sheets. Cover them with a humid towel.
11. Let rise for about 40 minutes, until the rolls are puffy and have doubled in size.
12.
Preheat the oven to 200° C (400° F) after 20 minutes of rising.

Korvapuustit 3.1 bis
Method For The "Glaze":
13. Once the rolls have risen, mix the egg and milk together.
14. Brush each roll with this mixture and sprinkle with the pearl sugar.

15. Bake for 8 to 10 minutes or until lightly golden.

Remarks:
You can replace the castor sugar by light brown sugar.
This recipe can be easily doubled.

Serving suggestions:
Eat those delicious rolls at any time of the day or night (!!!) and serve with a cup of good coffee or tea.

~~~~~~~~~~~~~~~~~~~~~~

Korvapuustit Picnik collage 6 bis
Bamboo plate supplied by Restauranware.com (plastic plates & catering supplies).

~ Korvapuustit ~

Recette adaptée de
"The Great Scandinavian Book Of Baking" par Beatrice Ojakangas.

Pour 10-12 brioches.

Ingrédients Pour La "Pâte":
1 Sachet (7g) de Levure sèche
120ml d'Eau tiède
60g de Beurre non-salé, fondu

50g de Sucre cristallisé
1 Gros oeuf, légèrement battu
1 Jaune d'oeuf
1/2 CC de Sel de mer fin
3/4 de CC de Cardamome en poudre (en option)

300g de Farine blanche
Ingrédients Pour La "Garniture":
60g de Beurre non-salé, mou

50g de Sucre cristallisé
1 Tbs Ground cinnamon
Ingrédients Pour La "Dorure":
1 Oeuf, légèrement battu

1 CS de Lait
Sucre perlé

Korvapuustit Picnik collage 7 bis
Méthode Pour La "Pâte":
1. Dans un grand bol, dissoudre la levure dans l'eau et laisser reposer pendant 5 minutes.
2. Ajouter le beurre, le sucre, l'oeuf, le jaune d'oeuf, le sel et la cardamome. Battre ensemble, puis ajouter la farine et pétrir jusqu'à obtention d'une pâte lisse et douce.
3. Couvrir et mettre au frigo pendant 2 à 24 heures.
4. Mettre la pâte sur une surface farinée et la rouler en un rectangle de 30x60cm.
Méthode
Pour La "Garniture":
5. Etaler le beurre mou et saupoudrer avec le sucre ainsi qu'avec la cannelle.
6. Rouler la pâte
pour en faire un boudin assez serré (en commençant par l'un des côtés de 60cm).
7. Couper le boudin diagonalement en 12 tronçons.

8. A l'aide de vos pouces ou du manche d'une grosse cuillère en bois appuyer au centre de chaque tronçon (de cette manière les côtés coupés sont exposés et les brioches ressembleront à des "oreilles").
9. Recouvrir une plaque de cuisson avec du papier sulfurisé.
10. Mettre les brioches sur plaque et couvrir avec un linge humide.
11. Les faire lever pendant environ 40 minutes, jusqu'à ce qu'elles aient doublé de volume.
12.
Vingt minutes avant d'enfourner les brioches, préchauffer le four à 200° C.
Méthode Pour La "Dorure":
13. Battre ensemble l'oeuf avec le lait.

14. Peindre chaque brioche avec la dorure et saupoudrer avec le sucre perlé.
15. Cuire 8 à 10 minutes ou jusqu'à ce que les brioches soient légèrement dorées.

Remarques:
Le sucre cristallisé peut être remplacé par du sucre brun clair.
Cette recette peut être facilement doublée.

Idées de présentation:
Mange à toute heure du jour ou de la nuit (!!!) et servir avec un bon thé ou café.

Korvapuustit Picnik collage 5 bis
Bamboo plate supplied by Restauranware.com (plastic plates & catering supplies).

Sunday, March 27, 2011

MERINGUE COFFEE CAKE - THE DARING BAKERS

dk-group-1
Where have the last weeks gone? Is it possible that April is knocking on our door and that spring has already arrived?! The end of the month is nearing again, yet it feels as if I baked my last Daring Bakers challenge yesterday and not four weeks ago. I have the impression that I'm perpetuously running after time and can never fully take pleasure in what I'm doing because I can't even enjoy the present moment to the fullest and constantly have to project myself in the future...

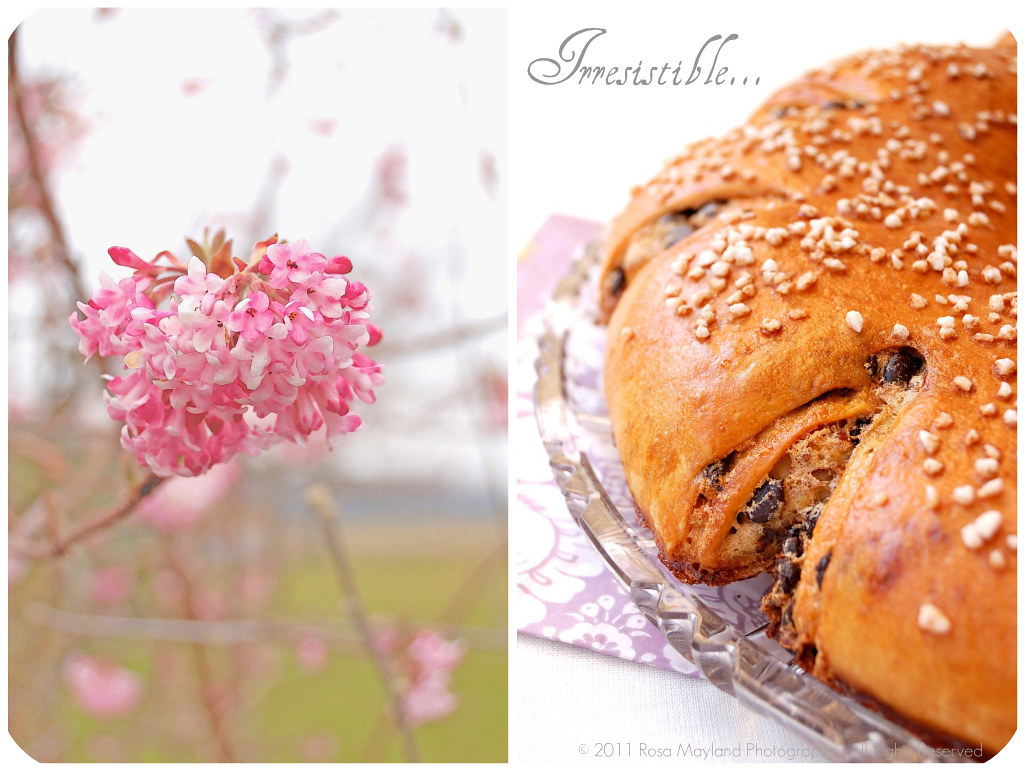
Anyway, when I discovered the new DB recipe and found out that two of my favorite foodblogger friends had chosen it I was really thrilled and was looking forward to getting my robust Kitchen Aid working as it sounded very promising! The March 2011 Daring Bakers' challenge was hosted by Ria of "Ria’s Collection" and Jamie of "Life’s a Feast" who challenged us to bake a yeasted "Meringue Coffee Cake".

Meringue Coffee Cake Picnik collage 1 bis
Being somebody with a strong penchant for pastries and anything bready, yeast risen coffee cakes represent the summum of pâtisserie bliss for me. I cannot resist such wonderful treats as they are extremely addictive and dreamlike. As a matter of fact, once I start eating one of those baked goodies you can be sure that I'll finish it in a flash and will not leave it to dry on the countertop (a blasphemy). If you want to make me happy, then consider baking or offering me a yummy rich bread (Panettone, Kougelhopf, Danish Pastries, Stollen, etc...). That'll immediately bring a smile to my lips and improve my mood. There is something so perfect, soothing and comforting about those soul-uplifting bakery items...

Well, speaking of droolworthy delicacies, I must make a confession regarding that subject. Those of you who have been following my blog Rosa's Yummy Yums since a while might be aware that I am an atypical and unique individual who separates herself from the flock, likes being different from the others, loathes what is mainstream, so-called trendy and boringly conventional. In this way, some of my wildest dreams are a far cry from other people's dreams. Mine are mostly food-oriented and say a lot about my enthusiasm for the culinary world as well as my attachment to all things gourmet.

My fantasies are extravagant and rarely transposable into the real world. They are like scenes out of one of Roald Dahl's burlesque, trippy, strange and delirious children's books. For example, I love to imagine that I am in one of the most fantastic, immense and amazing bakeries that can possibly exist, and a bit like the little boy Charlie Bucket in "Charlie And The Chocolate Factory" (minus the eccentric Willy Wonka and his Oompa Loompas) I am free to wander alone around the laboratory as well as the store and gobble anything I fancy. This not being reality, I would have the capacity to swallow as many creamy entremets, flaky croissants, warm pains au chocolat, melt-in-the-mouth Danish pastries, deliciously savory canapés, flavorful pork pate, luxurious ham croissants, heavenly éclairs, fruitilicious tartlets, comforting pies, exquisite cakes, fragrant breads, toothsome candies and exquisite chocolates as I wish. The ultimate orgy! Just thinking about it makes me drool incontrolably and puts me in a state of trance.

You might think that I've gone totally bonkers and lost my mind, but while som
e of you wish to own a luxury car, to possess jewels worth a fortune, to be a star in Holywood or to buy designer clothes (like any other woman I love clothes and jewels, but I could never spend a fortune on them) I prefer to daydream about having the opportunity to go on a quest for rare, gourmet and quality ingredients or be lucky enough to taste the most gorgeous dishes and gastronomic creations that this world has to offer.

As you can see I am incredibly passionate about food. Nothing can make me quite as cheerfuly as when I am in my matchbox-sized kitchen buzzing around like a high-spirited bee frolicking effortlessly from one flower to another as if it were a graceful ballarina dancing with incredible lightness and buoyancy. It is a pastime that I cherish as it keeps me sane and balanced...

Bread baking is a particularly healthy activity that can be compared to meditation or yoga. A certain dose of effort has to be put into the task, but method and concentration are also required. Dough needs love, care and attention in order to give good results. If you don't put your heart into the job, there is a big chance that you'll get a mediocre loaf. But, on the contrary, if you are having a blast then the final product will be perfect as it is quite impossible that things will go wrong.

Eventhough life left me a few psychological scars (death of my English grandmother and of my much cherished cat Fridolin, family harrassment, etc...) lately, I still love preparing delectable chows for my friends, boyfriend and myself as this enterprise relieves the tension, makes me feel good and has a positive effect on my soul.

So, although I am still mourning the passing of my granny and kitty, the prospect of putting together a "Meringue Coffee Cake" filled me with joy. I needed to savagely knead some dough in order to evacuated the sadness, stress, anger and frustration that I have been accumulating since the beginning of this year.

This challenge was ideal for take a break from my worries/sorrows as the fabrication of this sweet bread posed no problem and the whole process went smoothly. I got the job done in a relaxed and calm manner. No hysterical
effusions of a distempered brain were to be noticed and I didn't even pronounce the word "bloody hell" once (something very rare).

The recipe was followed to the letter, but as we were permitted to operate a few changes flavor-wise I decided to incorporate some ground tonka bean (not legal in the US) to the dough and to add orange zest to the filling. I also refrigerated my dough overnight and used more cinnamon than instructed.

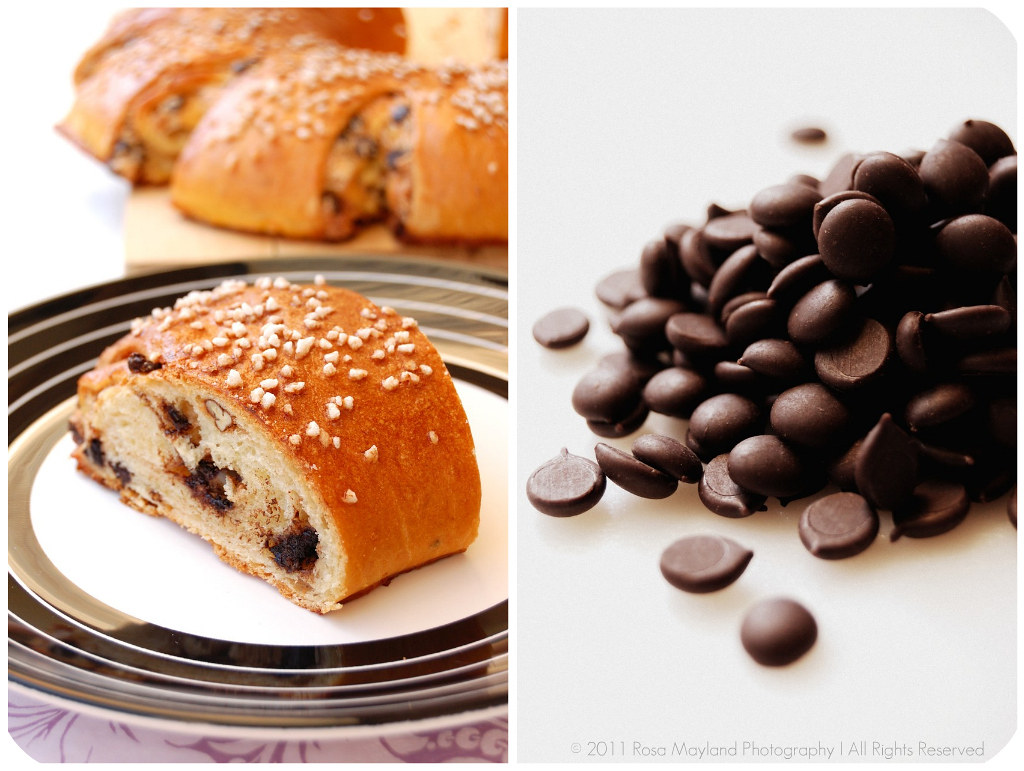
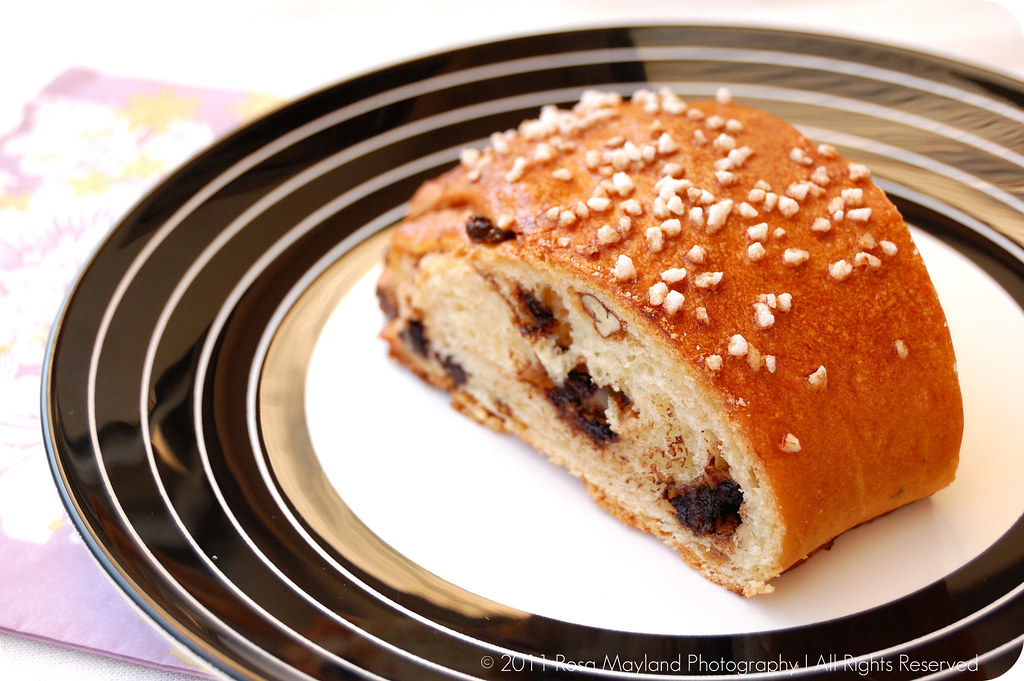
Oh, what a divine and exhalirating smell filled the apartment while my "Meringue Coffee Cake" was in the oven! Waiting for it to get fully baked and cooled was a real torture. I craved this beautiful, fluffy, moist, spicy, buttery and nutty brioche so much that I started pacing up and down my place like an agitated tiger in a cage. I felt as desperate as a dog having to sit quietly and watch his master having lunch. Terrible.

Thankfully, the evening came soon enough and I was finally able to sample
that droolworthy coffee cake. Biting into this soft, sweet and scrumptious slice of heaven I reached total zenitude and peace of mind...

This post was submitted to Yeastspotting.

Meringue Coffee Cake Picnik collage 4 bis
~ Meringue Coffee Cake ~

Makes 2 round coffee cakes, each approximately 10 inches in diameter.

Preparation time:
10 - 15 minutes preparation of the dough
8 – 10 minutes kneading
45 – 60 minutes first rise
10 – 15 minutes to prepare meringue, roll out, fill and shape dough
An additional 45 – 60 minutes for second rising
Baking time:
Approximately 30 minutes

Equipment required:

Measuring cups for dry ingredients
Measuring cup for liquid
Measuring spoons
Cutting board and sharp knife for chopping nuts & chocolate if using
2 large mixing bowls
1 small mixing bowl
1 medium mixing bowl for beating egg whites, preferably plastic or metal
1 medium saucepan
Electric mixer or stand mixer
Wooden spoon
Rolling pin
Spatula
Clean kitchen scissors or sharp knife
Plastic wrap & clean kitchen towel
Parchment paper
2 medium-sized baking trays (or 1 large if your oven is large enough)
Cooling racks
Serving platter
Vegetable oil to grease bowl

Meringue Coffee Cake 7 bis
Ingredients "For The "Yeast Coffeecake Dough":
4 Cups (600g/1.5 lbs.) Plain flour
1/4 Cup (55g/2 oz.) Grannulated sugar
3/4 Tsp (5g/¼ oz.) salt
1/4 Tsp Ground tonka bean
1 Package (2 ¼ Tsp/7g/less than an ounce) Active dried yeast
3/4 Cup (180ml/6 fl.oz.) Whole milk
1/4 Cup (60ml/2 fl. oz.) Water
1/2 Cup (135g/4.75 oz.) Unsalted butter, at room temperature
2 Large eggs, at room temperature
Ingredients For The "Filling":
1 Cup (110g/4 oz.) Chopped pecans
2 Tbs (30g/1 oz.) Light brown sugar
2 Tsp Ground cinnamon
Zest of one orange
1 Cup (170g/6 oz.) Semisweet chocolate chips or coarsely chopped chocolate
Ingredients "For The Meringue":
3 Large egg whites, at room temperature
1/4 Tsp Fine sea salt
1/2 Tsp Pure vanilla extract
1/2 Cup (110g/4 oz.) Grannulated sugar
Ingredients For The "Egg Wash":
1 Egg, beaten
Pearl sugar for sprinkling

Meringue Coffee Cake Picnik collage 2 bis
Method "For The "Yeast Coffeecake Dough":
1.
In a large mixing bowl, combine 1 ½ cups (230g) of the flour, the sugar, salt, tonka and yeast.
2. In a saucepan, combine the milk, water and butter and heat over medium heat until warm and the butter is just melted.
3. With an electric mixe r o n low speed, gradually add the warm liquid to the flour/yeast mixture, beating until well blended. Increase mixer speed to medium and beat 2 minutes.
4. Add the eggs and 1 cup (150g) flour and beat for 2 more minutes. Using a wooden spoon, stir in enough of the remaining flour to make a dough that holds together.
5. Turn out onto a floured surface (use any of the 1 ½ cups of flour remaining) and knead the dough for 8 to 10 minutes until the dough is soft, smooth, sexy and elastic, keeping the work surface floured and adding extra flour as needed.
6. Place the dough in a lightly greased bowl, turning to coat all sides. Cover the bowl with plastic wrap and a kitchen towel and let rise until double in bulk, 45 – 60 minutes ( the rising time will depend on the type of yeast you use).
Method For The "Filling":
7. In a small bowl, combine the cinnamon, sugar, zest, chocolate chips and nuts for the filling.
Method For The "Meringue":
8. Once the dough has doubled, make the meringue. In a clean mixing bowl (ideally a plastic or metal bowl so the egg whites adhere to the side - they slip on glass - and you don’t end up with liquid remaining in the bottom) beat the egg whites with the salt, first on low speed for 30 seconds, then increase to high and continue beating until foamy and opaque.
9. Add the vanilla then start adding the ½ cup sugar, a tablespoon at a time as you beat, until very stiff, glossy peaks form.
Method For "Assemling The Coffeecakes":
10. Line 2 baking/cookie sheets with parchment paper.
11. Punch down the dough and divide in half.
12. On a lightly floured surface, working one piece of the dough at a time (keep the other half of the dough wrapped in plastic), roll out the dough into a 51 x 25.5cm (20 x 10-inch) rectangle. 13. Spread half of the meringue evenly over the rectangle up to about 3/4cm (1/2-inch) from the edges.
14. Sprinkle half of your filling evenly over the meringue.
15. Now, roll up the dough jellyroll style, from the long side.
16. Pinch the seam closed to seal.
17. Very carefully transfer the filled log to one of the lined cookie sheets, seam side down.

Meringue Coffee Cake Picnik collage 3 bis
18. Bring the ends of the log around and seal the ends together, forming a ring, tucking one end into the other and pinching to seal.
19. Using kitchen scissors or a sharp knife (scissors are easier), make cuts along the outside edge at 2.5cm (6.3 inch) intervals (make them as shallow or as deep as desired but don’t be afraid to cut deep into the ring). Repeat with the remaining dough, meringue and fillings.
20. Cover the 2 coffee cakes with plastic wrap or a humid towel and allow them to rise again for 45 to 60 minutes.
21. Preheat the oven to 180° C (350° F).
22. Brush the tops of the coffee cakes with the egg wash and sprinkle with pearl sugar.
23. Bake in the preheated oven for 25 to 30 minutes until risen and golden brown (the dough should sound hollow when tapped).
24. Remove from the oven and slide the parchment paper off the cookie sheets onto the table. Very gently loosen the coffee cakes from the paper with a large spatula and carefully slide the cakes off onto cooling racks.
25. Allow to cool completely.


Remarks:
These are best eaten fresh, the same day or the next day.

Serving suggestions:
Just before serving, dust the tops of the coffee cakes with confectioner’s sugar as well as cocoa powder if using chocolate in the filling (if not using pearl sugar).
Eat for breakfast or afternoon tea.

~~~~~~~~~~~~~~~~~~~~~~

Etant donné que je suis en vacance et que je n'ai pas beaucoup de temps pour bloguer, je n'ai malheureusement pas pu faire une traduction française de ce billet et je m'en excuse auprès de tous mes amis lecteurs et blogueurs francophones!

C'est pourquoi je vous suggère de vous rendre sur le blog mentionné ci-dessous. Vous y trouverez cette recette en version française.

Chez Isa de "Les Gourmandises d'Isa" (Canada)

Meringue Coffee Cake Picnik collage 5 bis

Wednesday, February 11, 2009

CARDAMOM CRUMB CAKE

During the weekend, I'm always looking for easy to make, yet highly pleasurable treats that we'll be able to savor in front of our favorite series...

While going through my much-loved copy of Dorie Greenspan's "Baking Fom My Home To Yours", a streusel-topped cake attracted my attention with it's interesting combination of flavors and moist texture. It looked and sounded so good. I knew that I had to try it!

Although, at first glance, this crumb-topped coffee cake looks somehow plain, I wasn't at all disappointed as it is really not just an ordinary baked good. From afar, it looks just like any other cake and seems not to be too special, but once you take a bite from it, you immediately realise that it is unique and soul-upliftingly divine.

Dorie Greenspan's "Cardamom Crumb Cake" is heavenly. The unusual combination of cardamom, coffee, walnuts, vanilla and orange zest is just mindblowingly fantastic, and it's smooth as well as moist inside pairs perfectly well with the generous layer of cardamom-spiced, walnut-dotted crunchy topping.

A delicious cake for all occasions!

~ Cardamom Crumb Cake ~
Recipe from Dorie Greenspan's "Baking From My Home To
Yours" and adapted by Rosa @ Rosa's Yummy Yums.

Makes one cake or 8 servings.

Ingredients for the "Crumbs":
1/2 Cup (64g) All purpose flour

1/2 Cup (60g) Coarsely chopped walnuts
1/3 Cup (70g) Castor sugar
1 Tbs Grated orange zest
1/2 Tsp Instant espresso powder
1/2 Tsp Ground cardamom
1/2 Stick (4 tbsp/60g) Unsalted butter, cut into 8 pieces, at room temperature
Ingredients for the "Cake":

2 Cups (255g) All purpose flour

2 Tsps Baking powder
1/2 Tsp Salt

1 1/4 Tsps Ground cardamom
1 Tsp Instant espresso powder
2/3 Cup (140g) Castor sugar

2 Tbs Finely grated orange zest
1 Stick (8 tbsp/120g) Unsalted butter, melted and co
oled
2 Large Eggs (~63g)

1/2 Cup (120g/ml) Whole milk
1/2 Cup (120g/ml) Strong coffee, cooled
1 1/2 Tsp Pure vanilla extract or paste

Method for the "Crumbs":
1. Put all the ingredients except the butter in a bowl and toss them together with a spatula just to blend.
2. Add the butter and, using your fingers or the spatula, mix everything together until you have crumbs of different sizes.

3. Set the crumbs aside.
Method for the "Cake":
4. Center a rack in the oven and preheat to 200° C (400° F).
5. Butter an 20x20cm (8 inch square) pan, dust the inside with flour and tap out the excess. Put the pan on a baking sheet.

6. Whisk together the flour, baking powder, salt, cardamom, and espresso powder in a large bowl.
7. Turn the dry ingredients out onto a sheet of wax paper and put the sugar and zest in the bowl. Rub them together with your fingers until the sugar is moist and the fragrance of orange strong, then return the dry ingredients to the bowl and whisk to blend.
8. Put the remaining ingredients in another bowl and whisk them to blend.
9. Pour the wet ingredients over the dry and stir - don't beat - to mix.
10. Scrape the batter into the prepared pan and top with a thick, even layer of the crumbs. 11. Pat the crumbs ever so gen
tly into the batter.
12. Bake for 30-35 minutes, or until the cake has risen (it will crown), the crumbs are golden and a thin knife inserted in the center comes out clean.
13. Transfer to a rack to cool.

Remarks:
Why not replace the walnuts by pecans?
When mixing the butter with the dry crumb ingredients, remember that it's nice to have a few big pieces, so don't overdo it.
The crumbs can be made up to 3 days ahead, covered, and refrigerat
ed.
When mixing the wet ingrdients with the dry ones, stir only until you've got an evenly moistened batter.
Cut the cake in the pan, otherwise, if you transfer it to a serving plate, you'll lose some of the crumbs when you turn it over.
This cake is best served on the day it is made, but it can be airtight wrapped and frozen up to 2 months (once it defrosts, it benefits from a quick warm-up in a 180° C/350° F oven).

Serving suggestions:

Serve warm or at room temperature for
breakfast, lunch, brunch or dessert. You can even drizzle some flavored (cardamom, coffee or vanilla) glazing over the cake.

***************

~ Cake A La Cardamome~
Recette tirée du livre de Dorie Greenspan's "Baking From My Home To Yours" et adapt
ée par Rosa @ Rosa's Yummy Yums.

pour 1 cake ou 8 parts.

Ingrédients pour le "Streusel":
1/2 Tasse (60g) de Farine blanche/fleur
1/2 Tasse (60g) de Noix de Grenoble grossière
ment hachées
1/3 de Tasse (70g) de Sucre cristallisé
1 CC de Zeste d'orange
1/2 CC de Poudre à café (espresso) soluble
1/2 CC de Cardamome en poudre

60g de Beurre non-salé, coupé en 8 morceaux, à température ambiante
Ingrédients pour le "Cake":
2 Tasses (255g) de
Farine blanche/fleur
2 CC de Poudre à gâteau/lever
1/2 CC de Sel
1 1/4 de CC de
Cardamome en poudre
1 CC de
Poudre à café (espresso) soluble
2/3
de Tasse (140g) de Sucre cristallisé
2 CS de Zeste d'orange
120g
Beurre non-salé, fondu et à température ambiante
2 Gros oeufs (~63g)
1/2 Tasse (120g/ml) de Lait entier
1/2 Tasse (120g/ml)de Café fort, à température ambiante
1 1/2 CC d'Extrait ou de pâte de vanille pure

Méthode pour le "Streusel":
1. Mettre tous les ingrédients sauf le beurre dans un bol et bien mélanger.
2. Ajouter le beurre et, en utilisant les doigts, bien incorporer le
beurre afin d'obtenir une texture grossière s'apparentant à du sable grossier (grains de différentes tailles).
3. Mettre ce mélange de côté.

Méthode pour le "Cake":
4. Mettre une grille au centre du four et préchauffer à 200° C (400° F).
5. Beurrer un moule carré de 20x20cm et le saupoudrer de farine, puis
enlever l'excédent en tapant sur le dos moule.
6. dans un grand bol, mélanger ensemble la farine, la poudre à lever, le sel, la cardamome et la poudre de café soluble.
7. Mettre le sucre et le zeste d'orange dans un petit bol et les frotter ensemble avec les doigts afin que les zestes libèrent toutes leur saveur, puis transférer ce mélange dans le grand bol et bien mélanger.
8. Mettre tous les ingrédients restants dans un bol moyen et battre légèrement afin d'obtenir un mélange homogène.

9. Verser le mélange liquide sur le mélange sec et incorporer délicatement (sans battre ni trop mélanger) afin d'obtenir une pâte.
10. Verser la pâte dans le moule et saupoudrer avec le "streusel".
11. A
ppuyer légèrement sur le "streusel" afin qu'il adhère/colle bien à la pâte.
12. Cuire pendant 30-35 minutes, ou jusqu'à ce que la lame d'en couteau inséré dans le cake en ressorte propre.
13. Mettre sur une grille et laisser le cake refroidir.


Remarques:
Pourquoi ne pas remplacer les noix de Grenoble par des noix de pécan?
Quand vous incorporez le beurre au mélange sec pour le streusel, faites-le tout en faisant un sorte que le streusel soit pas trop fin.

Le streusel peut être fait 3 jours à l'avance et conservé au frigo dans un récipient bien étanche.

Quand vous incorporez les ingrédients mouillés aux ingrédients secs, ne mélangez pas trop - juste suffisamment afin que ça forme une pâte.
Coupez ce cake dans le moule. Si vous le transférez, vous risquez de perdre une grande quantité de streusel au cours de l'opération.
Ce cake est meilleur lorsqu'il est mangé le même jour. Par contre, il peur être bien emballé et congelé (pas plus de deux mois et, une fois, dégelé, passé au four à 180° C).

Idées de présentation:
Servir ce cake tiède ou à température ambiante, pour le petit-déjeuner, le brunch, le slunch, les quatre heures ou pour le dessert.

Vous pouvez même le servir avec un glaçage (qui fera office de sauce) à la cardamome, au café ou à la vanille.