Friday, April 30, 2010
MONTREUX LAKESIDE PROMENADE
Here is the last batch of pictures I took when I went to Montreux (Part 1 & Part 2). This time, I have focused more on the buldings that you can find there. Enjoy!
Tuesday, April 27, 2010
SUET PUDDING - THE DARING BAKERS
The April 2010 Daring Bakers’ challenge was hosted by Esther of "The Lilac Kitchen". She challenged everyone to make a traditional British pudding using, if possible, a very traditional British ingredient: suet.
~~~~~~~~~~~~~~~~~~~~~~~
- Black or white pudding which are both sausages. Black pudding is made with blood (English version of "Boudin"). White pudding is very similar to black pudding, but it does not include blood (English version of "Boudin Blanc").
- A generic word for dessert.
- Any sweet or savory dish cooked in a pudding bowl or pudding cloth and steamed, boiled or sometimes baked.
- An endearment i.e., "How are you today my pudding?".
English puddings have had a great reputation since the 17th century. One French visitor, the protestant exile François Maximilien Mission who came to England at the end of the 17th century wrote a very interesting description in his memoirs in which he was very lyrical about the unexpectedness and variety of English puddings (" Mémoires et observations faites par un voyageur en Angleterre" published in 1698). "They bake them in an oven, they boil them with meat, they make them fifty several ways: BL ESSED BE THAT WHO INVENTED PUDDING, for it is a manna that hits the palates of all sorts of people."
There are many different sweet or savory puddings (the possibilities are nearly endless), but all are made with the same basic ingredients such as flour, milk, eggs, butter or suet (mostly suet), sugar and fresh or dried fruits (if it is the sweet version) and meat or marrow (if it is the savory version). This comforting and homely dish adapts itself perfectly to the seasons and is extremely versatile. That's surely the reason why it has b een cherished by legions of people over the centuries.
Unfortunately, this gorgeous speciality has also become the first victim of mass catering and manufacture. It's reputation has suffered from the bad image given by the unappetizing, bad quality and industrially made puddings which have been commercialized in mass in supermarkets and served in chain restaurants since decades (that's how British food got most of it's bad reputation.). It is very saddening to see th at it's reputation has been dragged through mud and that it is rare nowadays to fin d somebody who actually makes that treat from scratch. Real puddings are so unique as well as delightful and have nothing to do with the bland, stuffy and extremely unhealthy versions that you can find in stores. Nothing compares to a luscious homemade pudding. Not only is it made with love, but also with a great deal of respect for the culinary traditions of Britain!
~~~~~~~~~~~~~~~~~~~~~~
Since I have officially become one of the biggest procrastinator (well, I'm also a chicken and "stress bag" LOL) on the planet, it is now in my habit to wait until the very last minute to gather up enough strength, courage and energy in order to get my sorry ass off my chair and into the kitchen! That is why you'll never fi nd my Daring Bakers' post up one minute after midnight anymore, but rather more than 20h hours after the official release date...
Anyway, when I had decided that it was about time for me to get started and once I could not have a lame excuse not to raise hell in the kitchen a ny longer, things got rolling and moving fast. My "Suet Pudding" dough was made in a zip and placed in it's personal "sweat lodge" for a few hours!Did you know that I had been meaning to make pudding since a very long time, but for no real reason the steaming process always daunted me a little? Not that I never steamed any food in my life, though. It was just one of th ose scares that had no reason for being. I mean, I have an electric steamer and a Chinese steamer which I very much use, but have not been able to make pudding until now. Go find out why... Yes, even the most daring of us bakers can have doubts and fear!
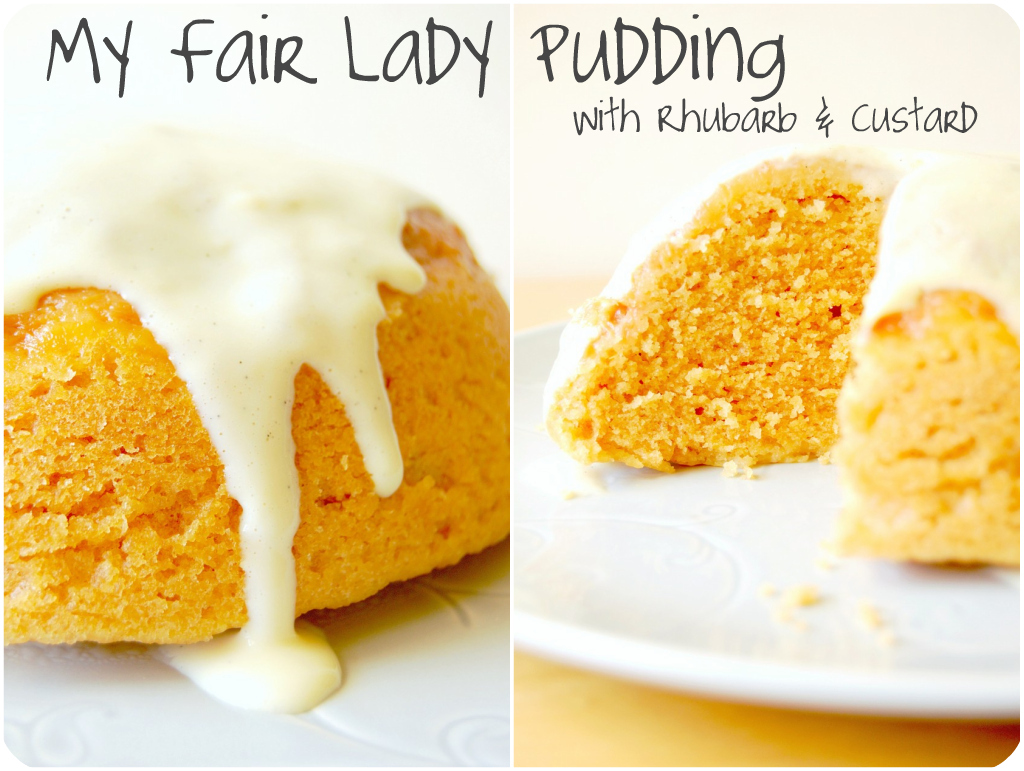
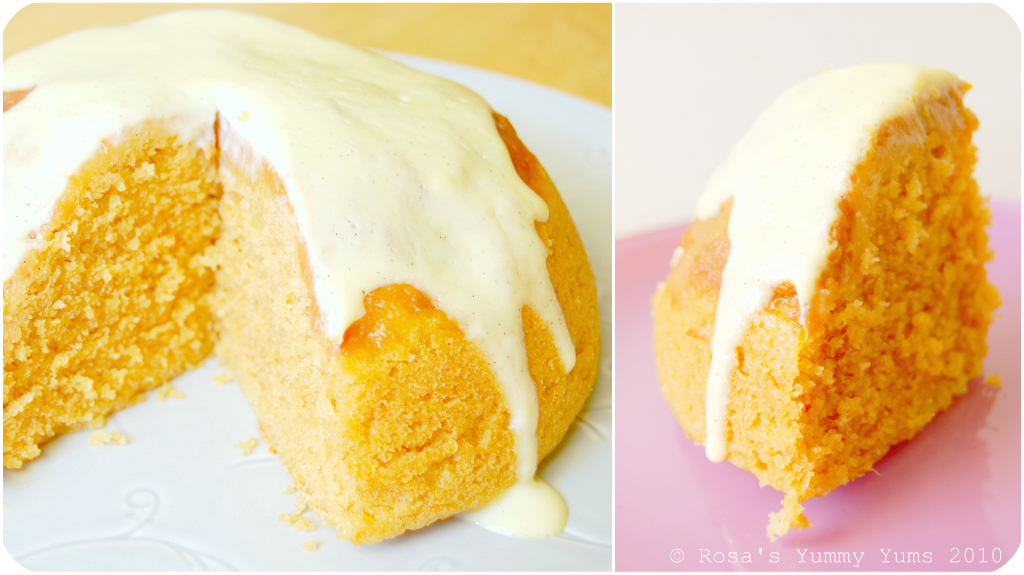
As we were free to choose the recipe that we w ere going to make, I decided to make the "My Fair Lady Pudding" which is a sponge type suet pudding containing lemon rind. I added some rhubarb (mixed with light brown sugar and a dash cinnamon) at the bottom and served it with "Custard Sauce".
This "Suet Pudding" is easy as Sunday morning and require no other skills than being incredibly patient (it has to get steamed for about 3 hours) and, although it might look not too attractive (and photogenic), boy, this dessert is to die for. The texture of that pudding is so smooth, fluffy and moist. Taste-wise it is really pleasant as it has a refreshing lemony aroma, an interesting nutty flavor (thanks to the suet used) and is not overly sweet. I really recommend you to serve it with custard sauce as it adds a dimension more to the pudding (it goes from delicious to lipsmackingly scrumptious). Heaven in a bowl!
I wish to thanks Esther for having chosen that great British treat and for making me realize there's no reason to fear pudding. I will certainly make this goodie on a regular basis now!
~ Suet Pudding ~
Equipment required:
• 2 pint (1 litre) pudding bowl or steam-able containers to contain a similar amount they should be higher rather than wide and lowTraditional pudding bowl
• Steamer or large pan, ideally with a steaming stand, upturned plate or crumpled up piece of kitchen foil
• Mixing bowl
• Spoon
• Measuring cups or scales
• Foil or grease proof paper to cover the bowl
• String
Ingredients:
100g (4 Oz) All-purpose flour
1/4 Tsp Sea salt
1.5 Tsp Baking powder
100g (4Oz) Breadcrumbs
75g (3 Oz) Caster sugar
75g (3 Oz) Shredded suet or suet substitute (i.e., Vegetable Suet, Crisco, Lard)
1 Large egg
6 to 8 Tbs Cold milk
Method:
1. Sift flour, salt and baking powder into bowl.
2. Add breadcrumbs, sugar and suet.
3. Mix to a soft batter with beaten egg and milk.
4. Turn into a buttered 1 litre (2 pints) pudding basin and cover securely with buttered greaseproof paper or aluminum foil.
5. Steam steadily for 2.5 to 3 hours.
6. Turn out onto warm plate.
Variants:
Add 75g/ 3oz currants and 25g/1 oz of mixed chopped peel with the sugar.
Syrup or Treacle or Marmelade Pudding
Put 2 Tablespoons of golden syrup, treacle or marmalade at the bottom of the bowl before adding pudding mix.
My Fair Lady Pudding
Add finely grated rind of 1 medium orange or lemon with the sugar.
Ginger Pudding
Replace the sugar with 100g/4oz of treacle, and add 1/2 tsp ground ginger.
Serving suggestions:
Serve with sweet sauce to taste such as custard, caramel or a sweetened fruit sauce.
Remarks:
The easiest way to steam a pudding is in a dedicated steamer as the water is kept away from the pudding so it can’t boil over. If, however, you don’t have a steamer use a pan large enough to easily fit the bowl you are cooking.
Don’t fill the water more than about a third of the way up the bowl or it may boil over and into the bowl. Keep an eye and top up as needed with boiling water.
You need to lift the bowl off the bottom of the pan. This can be done with a steamer stand, an upturned plate or even crumpled up kitchen foil — anything that can stand being in boiling water and lifts the bowl off the bottom of the pan will work.
Make sure you have a well-fitted lid on the pan as you want the steam to cook the pudding not to boil off.
Make sure you put a pleat in the foil or paper you cover the bowl with to allow for expansion and then tie down tightly with string. This is a bowl ready for the steamer, note the handle made from the string that also ties it together around the top (this makes it very much easier to lift out when hot and is well worth doing).
~~~~~~~~~~~~~~~~~~~~~~~
Etant donné la longueur du texte original, je n'ai malheureusement pas pu faire une traduction française de ce billet et je m'en excuse auprès de tous mes amis lecteurs et blogueurs francophones!
C'est pourquoi je vous suggère de vous rendre sur le blog mentionné ci-dessous. Vous y trouverez cette recette en version française.
Chez Isa de "Les Gourmandises d'Isa" (Canada)
Chez Vibi de "La Casserole Carrée" (Canada)
Friday, April 23, 2010
LEMON PARMESAN DIP - DIP AU PARMESAN
While leafing through my April issue, I came upon a dip idea that I found particularly interesting. This "Lemon Parmesan Dip" goes particularly well with asparagus (or any other spring/summer cooked vegetable) and is easily made.
This dip is very fresh, delightfuly tangy and has a wonderfully round Parmesan flavor. Very spring-like and lipsmackingly tasty. The perfect addition to your brunches or picnics!
~ Lemon Parmesan Dip/Dressing ~
Recipe taken from "Good Food" magazine and slightly adapted by Rosa @ Rosa's Yummy Yums 2010.
Ingredients:
The juice of one lemon
85g Unsalted butter, cut into small chunks
25g Parmesan, finely grated
A pinch garlic powder or 1/2 small clove fesh garlic, crushed (optional)
Salt, to taste
Pepper, to taste
Espelette pepper, for sprinkling over the top
Method:
1. Tip the lemon juice into a small saucepan.
2. Over a very low heat, add the butter.
3. Melt and stir the butter into the lemon juice until you have a smooth sauce.
4. Add the Parmesan, garlic and season to taste.
5. Set aside to cool a little (3minutes) and serve warm.
I added some garlic powder to give this sauce a bit more taste. However, you can leave it out. You could add some chopped fresh herbs just before serving (chervil, basil, cilantro).
Serving suggestions:
This sauce is made to accompany asparagus, but you can also use it as a salad dressing/dipping sauce for warm vegetables (fennel, bell peppers, tomatoes, etc...).
~~~~~~~~~~~~~~~~~~~~~~
~ Dip/Sauce Au Citron Et Parmesan ~
Recette tirée du magazine "Good Food"et adaptée par Rosa @ Rosa's Yummy Yums 2010.
Ingrédients:
Le jus d'un citron
85g de Beurre non-salé, coupé en petits morceaux
25g de Parmesan, finement râpé
Une pincée d'ail en poudre ou la moitié d'une petite gousse d'ail, écrasée (en option)
Sel de mer, à volonté
Poivre, à volonté
Piment d'Espelette, pour saupoudrer
Méthode:
1. Mettre le jus de citron dans une casserole.
2. Chauffer à basse température et ajouter le beurre.
3. Faire fondre le beurre et l'incorporer au jus de citron tout en le battant afin d'obtenir une sauce homogène.
4. Ajouter le parmesan, l'ail et assaisonner à volonté.
5. Faire refoidir 3 minutes et servir chaud.
Vous pouvez aromatiser cette sauce avec des herbes fraîches hachées que vous incorporerez juste avant de servir (cerfeuil, basilic, coriandre).
Idées de présentation:
Cette sauce est faite pour accompagner les asperges mais vous pouvez tout à fait l'utiliser avec d'autres légumes cuits (fenouil, poivrons, tomates, etc...).
Wednesday, April 21, 2010
MONTREUX LANDSCAPES
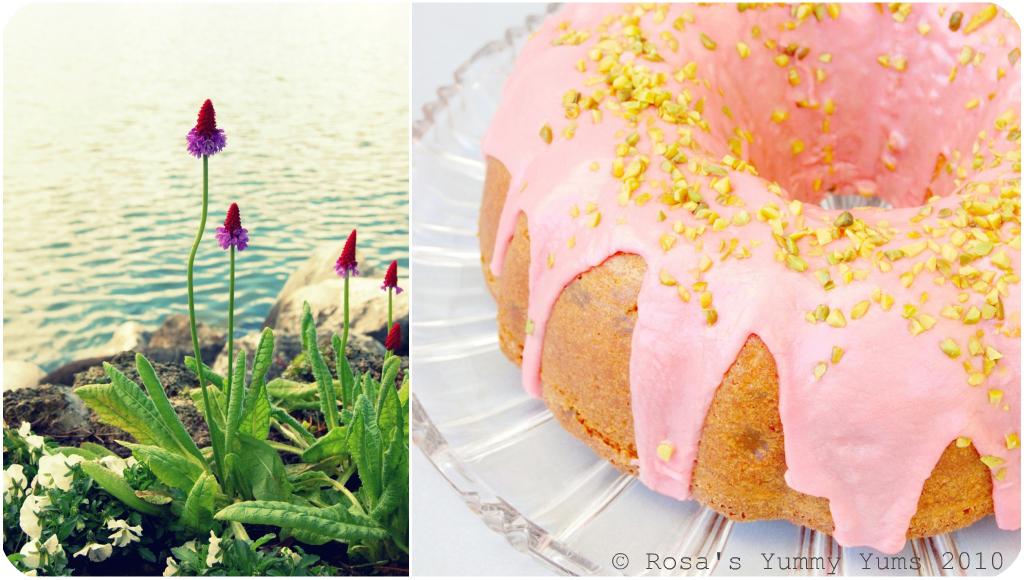
As promised, here are a few more pictures of my trip to Montreux. As you can see, spring had just started and nature was a lot less green than it is now...
I hope you'll enjoy them!
Sunday, April 18, 2010
WEEKEND CAT BLOGGING #254
This week, Salome at "Paulchens FoodBlog?!" (Austria) is happy to announce that he is hosting Weekend Cat Blogging #254...
To submit your kitty picture(s), you can either leave a message in his blog's comment section (with your permalinks) or contact him via e-mail without forgetting to give all the needed information.
Fridolin, still healthier than ever.
He is now a real "Freesssack" (glutton) and has now to be fed 5 times a day minimum!!!
We are so happy to see that he is doing well.
Saturday, April 17, 2010
SOURDOUGH BREAD - PAIN AU LEVAIN
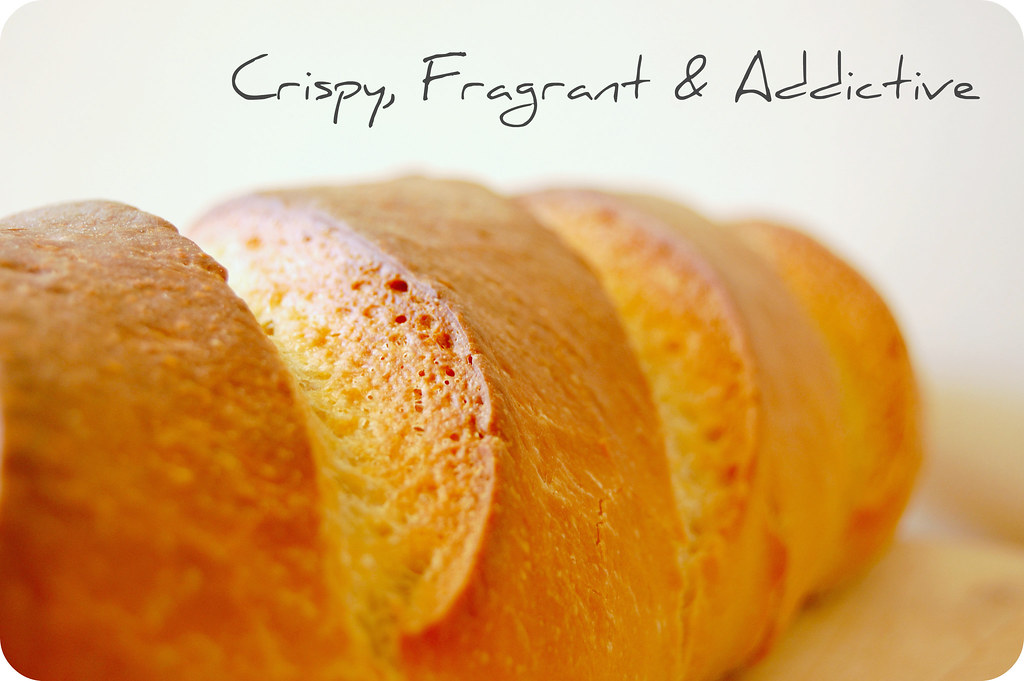
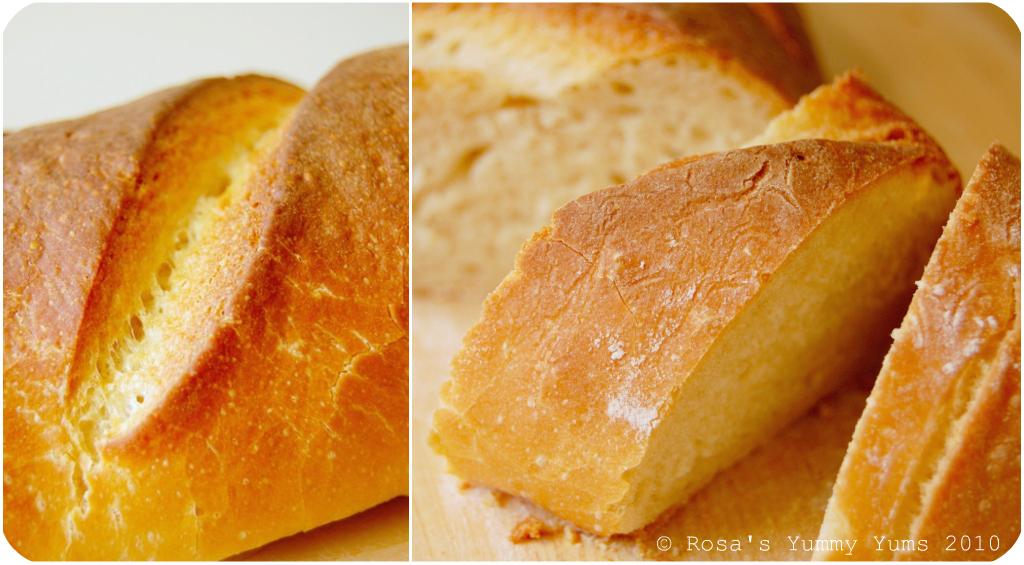
Most of the time I bake breads and don't have the occasion to take pictur es of them (no natural light left or no time to fuss around with my camera). Well, last Sunday, the sun was out and I had plenty of time to spend snapping pictures of my weekly "superstar" loaf!
As I had made sourdough starter using Beth Hensperger's recipe, there was no way that I was going to let it sit aimlessly on my counter or in my fridge. As usual, I went hunting for a recipe on the net and that's how I found that great The King Arthur Flour recipe that was published in their "The King Arthur Flour 200th Anniversary Cookbook".
Once you have prepared your sourdough starter, this bread is relatively easy to make, though it is time-consuming as the process takes about 7 to 8 hours (from the first rise to the baking). It is not the kind of bread you can make in a hurry. Somehow, you have to consider it like a little baby that needs all your attention and a lot of nurturing!
This recipe is perfect for all the people who are experimenting for the very first time with a sourdough starter. This bread is made with both a quantity sourdough starter and some yeast (the sourdough being included mainly for flavor). In that way, beginners will feel more comfortable and less stressed at the idea of baking with a sourdough starter. It is a good introduction to the sourdough process.
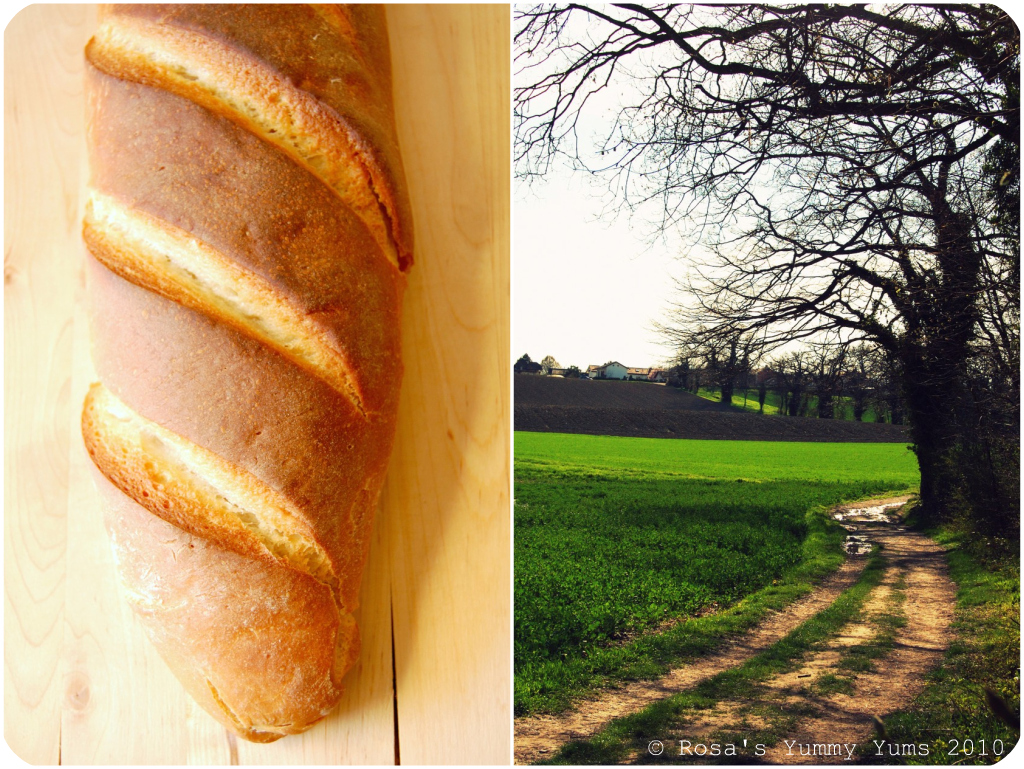
I'd say this "Sourdough Bread With Yeast" is halfway between 100% sourdough breads and the common fuss-free yeast-based breads. Even if you are a novice when it comes to baking with a sourdough starter, you might want to try this recipe as the end product is fantastic. You'll particularly enjoy the crispy crust, spongy as well as moist inside and fragrant, yet light sourdoughy taste. Excellent and made to suit you cravings for lipsmacking bread!
This post is submitted to Yeastspotting.
~ Sourdough Bread With Yeast ~
Recipe taken from "The King Arthur Flour 200th Anniversary Cookbook", p.5321.
Ingredients:
1/2 Cups Lukewarm water
1 Tbs Sugar
1 Tbs or packet Active dry yeast
1 Cup Sourdough starter
5 1/2 to 6 1/2 Cups Unbleached All-Purpose Flour
1 Tbs Sea salt
1 Tbs Vegetable oil
Cornmeal to sprinkle on baking pans
Method for the "Sponge":
2. Add the starter and stir. Gradually add 3 cups of flour, stirring until well mixed and smooth.
3. Cover the sponge and set it aside in a warm draft-free place for 4 to 5 hours.
Method for the "Dough":
1. Stir down the sponge. Stir in 1 cup of flour, the salt and oil.
2. Gradually add flour until the dough no longer sticks to the sides of the bowl.
3. Turn the dough onto a lightly floured board and knead for 3-4 minutes.
4. Let the dough rest while you clean out and grease the bowl, then continue kneading another 3-4 minutes or until the dough becomes smooth and elastic.
5. Add only enough flour to the board to keep the dough from sticking.
6. Place the dough in the greased bowl and let rise until doubled in bulk, 1-2 hours.
Method for the "Shaping & Baking":
2. Place them on a cornmeal-sprinkled baking sheet and let them rise for another 1-1 1/2 hours. 3. Toward the end of the rising period, place a baking pan on the oven bottom (or on the lowest rack) and preheat the oven to 230° C (450° F).
4. Just before baking, splash the tops diagonally every couple of inches, about 0.6cm (1/4 inch) deep and brush with cold water (I didn't brush mine).
5. Pour 2-3 cups of water into the pan, put the loaves on the rack above the steaming water and bake for about 25 minutes.
Serving suggestions:
This bread goes well with everything (jams, sweet/savory spreads, cheese, dried meat, stews, soups, etc...).
It is also ideal for preparing bruschette.
~~~~~~~~~~~~~~~~~~~~~~
~ Pain Au Levain Et a La Levure ~
Recette tirée du livre "The King Arthur Flour 200th Anniversary Cookbook", p.5321.
Ingrédients:
120g/ml d'Eau tiède
15g de Sucre
1 CS ou un sachet de Levure sèche
1 Tasse (~240g) de Levain
700g - 830g de Farine à pain
1 CS de Sel marin
1 CS d'Huile végétale
Farine de maïs pour saupoudrer la plaque
Méthode pour le "Poolish":
1. Dans un grand bol, mélanger le sucre l'eau et la levure afin de réveiller cette dernière. Laisser reposer 10 minutes ou jusqu'à ce que la levure soit mousseuse.
2. Ajouter le levain et bien battre. Ajouter 380g de farine et battre à nouveau afin d'obtenir un mélange homogène.
3. Couvrir le bol et laisser travailler/lever le poolish pendant 4 à 5 heures dans un endroit chaud et sans courants d'air.
Méthode pour la "Pâte":
1. Faire dégonfler le poolish et ajouter 130g de farine, le sel et l'huile. Mélanger.
2. Ajouter graduellement le reste de farine jusqu'à obtention d'une pâte qui ne colle pas sur les bords du bol.
3. Mettre la pâte sur une surface farinée et pétrir pendant 3 à 4 minutes.
4. Laisser la pâte se reposer pendant que vous nettoyez le bol et l'huilez, puis continuez à pétrir la pâte pendant encore 3 à 4 minutes ou jusqu'à ce qu'elle soit lisse et élastique.
5. Ne rajoutez pas trop de farine lors du pétrissage - seulement un peu afin que la pâte ne colle pas.
6. Mettre la pâte dans le bol huilé et laissez lever pendant 1 à 2 heures ou jusqu'à ce que la pâte ait doublé de volume.
Méthode pour le "Modelage et la Cuisson":
2. Les mettre sur une plaque saupoudrée avec de la farine de maïs et les laisser lever pendant 1 à 1 1/2 heures.
3. Vers la fin de ce processus, mettre une plaque de cuisson au dernier étage inférieur du four et préchauffer le four à 230° C.
4. Juste avant d'enfourner les pains, entailler les bâtards en diagonale, assez profondément (0.6cm).
5. Verser 2 à 3 tasses d'eau dans un récipien résistant à la chaleur et le placer le sur la plaque (niveau inférieur). Enfourner les pains et les cuire pendant environ 25-35 minutes.
Idée de présentation:
Ce pain est fameux avec presque tout (confitures, tartinades sucrées/salées, fromage, viande séchée, ragoûts, soupes/veloutés, etc...).
Il est aussi parfait pour préparer des Bruschette.
Wednesday, April 14, 2010
MONTREUX LAKESIDE
Two weeks ago, my good friend Corinne and I spent the day together. We went to Montreux, took a walk on the lakeside and then we drove all the way to IKEA in Aubonne in order to have lunch and do some shopping...
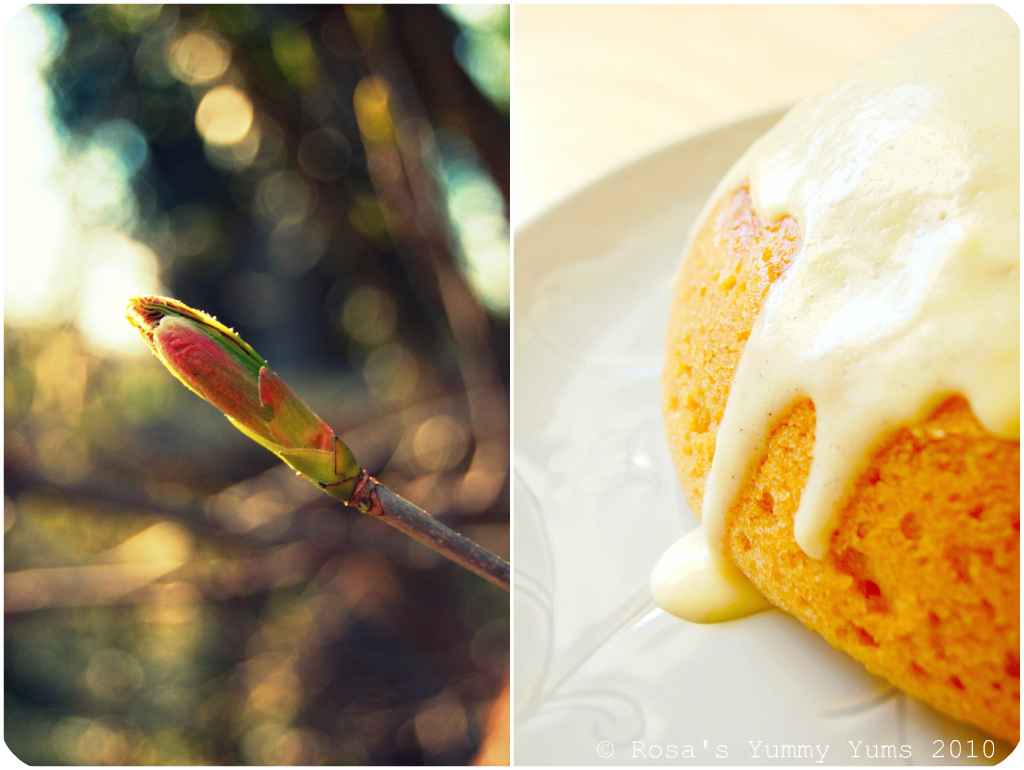
On that Thursday before Good Friday, spring had just sprung. Flowers were starting to bloom and leaves were still enclosed in their buds. This day started on a grey note, but as soon as we reached the promenade in Montreux, the clouds started to disappear and the sun came out of it's hiding place. The air was still very crisp, yet they rays of the sun warmed us a little.
As you can imagine, being the mad snapper that I am, I carried my camera with me a took a few pictures of the beautiful scenery that unfolded in front of our eyes.
After having walked for a good 40-50 minutes we decided that it was about time for us to have lunch as our stomachs were starting to growl. Some 15-20 minutes later we arrived at a chock-a-block full IKEA. The place was crammed with busy people, howling kids and strollers.
Like many of us, I really love IKEA's scrumptious Swedish Meatballs with French fries and lingonberry jam, so I had a small portion and goobled my dish greedily and with shining eyes. Boy, those small portions are far from being small and they are dirt cheap (my plate cost only 5 CHF instead of 7.50 CHF). I mean, I'm a big eater, but never have I ever felt empty after having eaten such a plating. On the contrary!
Once we had ingested our meal we went straight through the first level of the store and headed directly to the kitchen section. I love that area! It is impossible not to find something you'd like to take home. This time I was very good girl. I only bought two different items (a batch of four colored plastic starter bowls and four handleless coffee cups). Then, we drove back home.
To be continued...
On that Thursday before Good Friday, spring had just sprung. Flowers were starting to bloom and leaves were still enclosed in their buds. This day started on a grey note, but as soon as we reached the promenade in Montreux, the clouds started to disappear and the sun came out of it's hiding place. The air was still very crisp, yet they rays of the sun warmed us a little.
As you can imagine, being the mad snapper that I am, I carried my camera with me a took a few pictures of the beautiful scenery that unfolded in front of our eyes.
- Freddie Mercury statue -
After having walked for a good 40-50 minutes we decided that it was about time for us to have lunch as our stomachs were starting to growl. Some 15-20 minutes later we arrived at a chock-a-block full IKEA. The place was crammed with busy people, howling kids and strollers.
Like many of us, I really love IKEA's scrumptious Swedish Meatballs with French fries and lingonberry jam, so I had a small portion and goobled my dish greedily and with shining eyes. Boy, those small portions are far from being small and they are dirt cheap (my plate cost only 5 CHF instead of 7.50 CHF). I mean, I'm a big eater, but never have I ever felt empty after having eaten such a plating. On the contrary!
Once we had ingested our meal we went straight through the first level of the store and headed directly to the kitchen section. I love that area! It is impossible not to find something you'd like to take home. This time I was very good girl. I only bought two different items (a batch of four colored plastic starter bowls and four handleless coffee cups). Then, we drove back home.
To be continued...
Sunday, April 11, 2010
WEEKEND CAT BLOGGING #253
This week, Weekend Cat Blogging #253 is hosted by Breadchick and LB at "The Sour Dough" (USA)...
To submit your kitty picture(s), you can either leave a message in their blog's comment section (with your permalinks) or contact them via e-mail without forgetting to give all the needed information.
Friday, April 9, 2010
CARROT BUNDT CAKE - CAKE BUNDT
I have always been a big fan of carrot cakes (be they Swiss, American, Swedish, etc..., you name it!), but growing up as I child I very rarely got to eat that delicious speciality as my family didn't like that treat. And until now, at home, I never made any as "supposedly" my boyfriend doesn't like them...
Well, the other day, I was able to prove him that he did like carrot cake and that his aversion to this baked good was based on stupid preconceptions. Never had I seen a carrot cake hater GOOBLE a carrot cake with such enthusiasm LOL!
You see, with the arrival of spring, I had been craving carrot cake more than usual as I have been seeing it everywhere lately. Magazines, blogs, sites, stores, all present their own version. After seeing countless pictures of carrot cakes and having been deprived of that goodie for so long, it was impossible not to cave in. I HAD to bake a carrot cake no matter if I was going to be the only one eating it...
So, I looked a round and found a recipe that would both fulfill my carrot cake and Bundt cake (remember, I am also a Bundt cake amateur) cravings. Nicole Weston's blog "Baking Bites" offered the solution: a delightful "Carrot Bundt Cake" with icing.
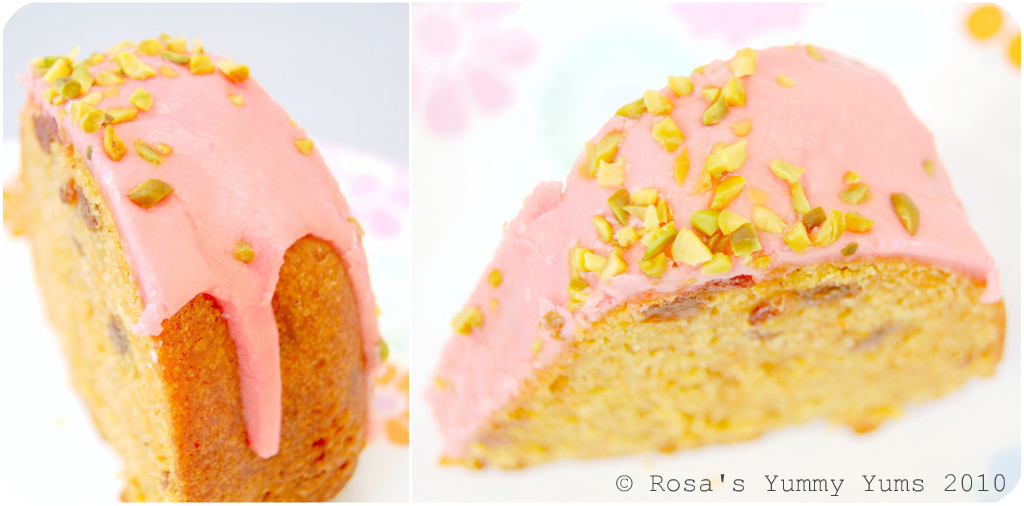
This "Carrot Bundt Cake" is without a doubt very delicious and is a lot fluffier than classic carrot cakes baked in sheet cake pans. It is incredibly moist, super tender without being chokingly compact, heavy or annoyingly wet. It also has a wonderful buttery taste and is perfectly spicy. Not forgetting that the orange flavored icing adds some extra oomph to it. A well-balanced and lipsmackingly luscious cake that will disappear fast!
~ Carrot Bundt Cake ~
Recipe taken from the blog "Baking Bites" (USA) and slightly adapted by Rosa @ Rosa's Yummy Yums 2010.
Makes 1 cake/serves 12-14.
Ingredients for the "Bundt Cake":
2 1/2 Cups All purpose flour
2 Tsp Baking soda
1/2 Tsp Sea salt
2 1/2 Tsp Ground cinnamon
1/2 Tsp Ground allspice
1/4 Tsp Freshly ground nutmeg
2 1/2 Cups Sugar
3 Large eggs
2/3 Cup Unsalted butter, melted and cooled
1/2 Cup Orange juice (fresh, if possible)
zest of one organic orange
1 Tsp Pure vanilla extract
3 Cups Shredded carrots (from about 4 large carrots)
1 Cup Raisins
Ingredients for the "Orange Glaze":
1 Tbsp Unsalted butter, very soft
2 Tbsp Orange juice
A few drops orange extract
1 Cup Powdered sugar
Food coloring
Method for the "Bundt Cake":
1. Preheat oven to 180° C (350° F). Grease and flour a 10-inch bundt pan.2. In a medium mixing bowl, whisk together flour, baking soda, salt and spices.
3. In the bowl of a mixer, whisk together sugar, eggs, butter, orange juice, orange zest and vanilla until smooth.
4. Pour the dry ingredients into the wet mixture and stir until almost combined. Stir in shredded carrots, followed by raisins (Batter should have carrots and raisins evenly distributed and no dry streaks of flour remaining).
5. Pour cake batter into prepared pan. Bake for 45-50 minutes, until a tester inserted into the center of the cake comes out clean.
6. Let cake cool in pan for 10 minutes, then turn cake out onto a wire rack to cool (cake will be dark on the outside from the caramelization of sugar against the pan; don’t worry if it looks a bit darker than you’d expect) completely before frosting.
Method for the "Orange Glaze":
1. Whisk all ingredients together until smooth. Add in a few drops more orange juice in the event that the frosting is too thick to pour easily.
2. Scrape glaze into a plastic bag and snip off the corner. Drizzle over finished cake (it is best to have the cake on a serving platter or on a wire cooling rack, where the excess can drip off if it runs down the sides of the cake) as desired.
Remarks:
You can replace the raisins by any other dry fruit or nut of your choice.
This cake can be left plain, but I find that the icing is a great addition.
Serving suggestions:
Serve this cake with whipped cream and a cup of coffee or tea.
~~~~~~~~~~~~~~~~~~~~~~
~ Cake Bundt Aux Carottes ~
Pour 1 cake/pour 12-14 personnes.
Ingrédients pour le "Cake":
320g de Farine blanche
2 CC de Bicarbonate de soude
1/2 CC de sel de mer
2 1/2 CC de Cannelle en poudre
1/2 CC de Poivre de la Jamaïque en poudre
1/4 CC de Noix de muscade en poudre
525g de Sucre cristallisé
3 Gros oeufs
160g de Beurre non-salé, fondu et à température ambiante
120ml de Jus d'orange (frais si possible) Le zest d'une orange bio
1 CC d'Extrait de vanille naturelle
315g de Carottes rapées finement (~4 grosses carottes)
158g de Raisins secs
Ingrédients pour le "Glaçage A l'Orange":
15g de Beurre non-salé, très mou
30g de Jus d'orange
Quelques gouttes d'extrait d'orange
120g de Sucre en poudre
Colorant alimentaire
Méthode pour le "Cake":
1. Préchauffer le four à 180° C. Beurrer et fariner le moule à Bundt (25cm de diamètre).
2. Dans un bol moyen, mélanger la farine, la bicarbonate, le sel et les épices.
3. Dans le bol d'un robot de cuisine, battre ensemble le sucre, les oeufs, le beurre fondu, le jus d'orange, le zest et la vanille afin d'obtenir un mélange homogène.
4. Incorporer les ingrédients secs au mélange et mélanger. Ajouter les carottes et les raisins secs (les raisins et la carotte doivent être bien distribués dans la pâte).
5. Verser la pâte dans le moule et cuire pendant 45-50 minutes, jusqu'à ce que la pointe d'un couteau enfoncée dans le cake en resorte sèche.
6. Faire refroidir le cake dans le moule pendant 10 minutes puis le démouler sur une grille afin qu'il refroidisse complètement avant de le glacer.
Méthode pour le "Glaçage A l'Orange":
1. Mélanger tous les ingrédients afin d'obtenir un glaçage homogène. Si le glaçage est trop sec, ajoutez un peu de jus d'orange.
2. Glacer le cake.
Remarques:
Si vous n'avez pas de moule à gâteau Bundt, alors un moule à Kougelhopf fera l'affaire.
Vous pouvez remplacer les raisins par d'autres fruits secs ou des noix.
Ce cake peut être servi sans glaçage bien que je pense que ça serait dommage car le glaçage se marie parfaitement au cake et ajoute une touche gourmande.
Serving suggestions:
Servez ce cake avec de la crème chantilly et une tasse de café ou de thé.
Wednesday, April 7, 2010
KIRMIZI BIBER - TURKISH CHILI FLAKES
Today, I am once again going to talk about another fabulous goodie that my friend Jessica (from Maryland) brought me back from her trip to Istanbul...
"Kirmizi Biber" are Turkish red pepper flakes (this name is also used to describe whole chili peppers). It is one of the most useful and popular spices in Turkish cooking. The flavor of this fine blend of chilli peppers ranges from mild and sweet (the version I have) to fiercely hot. The peppers are rubbed with olive oil and gently roasted until dark red giving it an unmistakable as well as unique flavour and aroma.
Try sprinkling "Kimzi Biber" over your dips (hummus, baba ganoush, tzatziki, etc...), sauces (tomato sauces), soups (hot yoghurt soup, tahini and chickpea soup, etc...), stews, vegetables (imam biyaldi, baked potatoes, etc...), salads, pasta (Italian or Turkish like Manti ravioli), cheese (halloumi, feta, fresh cheese), seafood (scallops, any fish, etc...), grilled meat (kebabs, steaks, etc...) or in your sandwiches (Turkish fish sandwich). It's unique smoky sweetness will enhance any dish with it's irresistibly round flavor. It is without doubt a very convenient condiment to have in the kitchen!
Sunday, April 4, 2010
WEEKEND CAT BLOGGING #252
This week, Nikita Cat at "Meowsings Of an opiniated Pussycat" (USA) are happy to announce that they are hosting Weekend Cat Blogging #252...
To submit your kitty picture(s), you can either leave a message in her blog's comment section (with your permalinks) or contact her via e-mail without forgetting to give all the needed information.
Fridolin is still doing very well.
It seems that what the healer did had a positive effect on him...
He is very active, full of energy, extremely talkative, hungry and fit like a baby kitty.
HAPPY EASTER!
It seems that what the healer did had a positive effect on him...
He is very active, full of energy, extremely talkative, hungry and fit like a baby kitty.
HAPPY EASTER!
Saturday, April 3, 2010
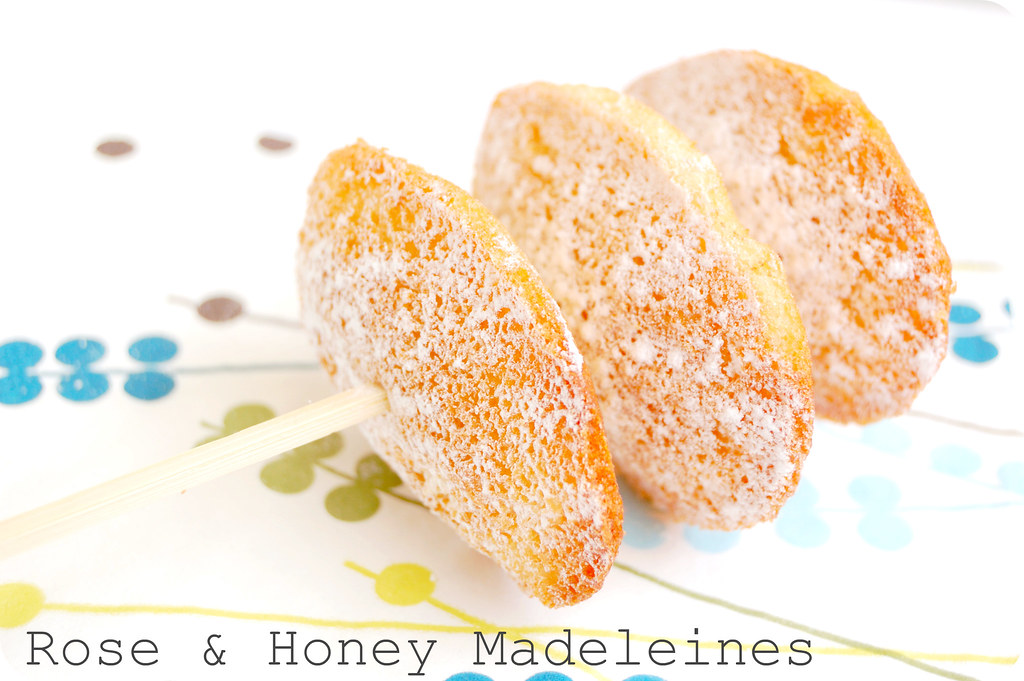
ROSE & HONEY MADELEINES
"She sent out for one of those short, plump little cakes called petites madeleines, which look as though they had been moulded in the fluted scallop of a pilgrim's shell. And soon, mechanically, weary after a dull day with the prospect of a depressing morrow, I raised to my lips a spoonful of the tea in which I had soaked a morsel of the cake. No sooner had the warm liquid, and the crumbs with it, touched my palate than a shudder ran through my whole body, and I stopped, intent upon the extraordinary changes that were taking place…at once the vicissitudes of life had become indifferent to me, its disasters innocuous, its brevity illusory…"
- Except taken from Marcel Proust's "In Search Of Lost Time" -
~~~~~~~~~~~~~~~~~~~~~~~~~~~
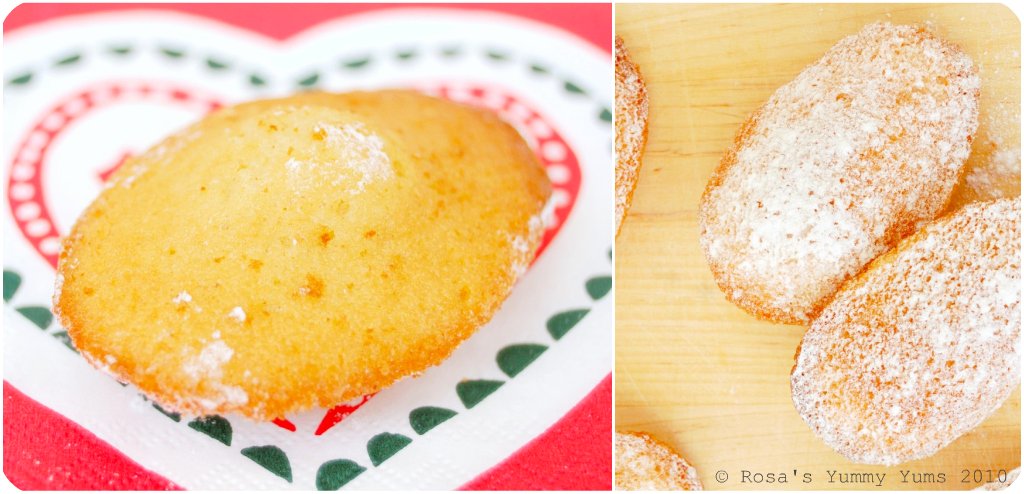
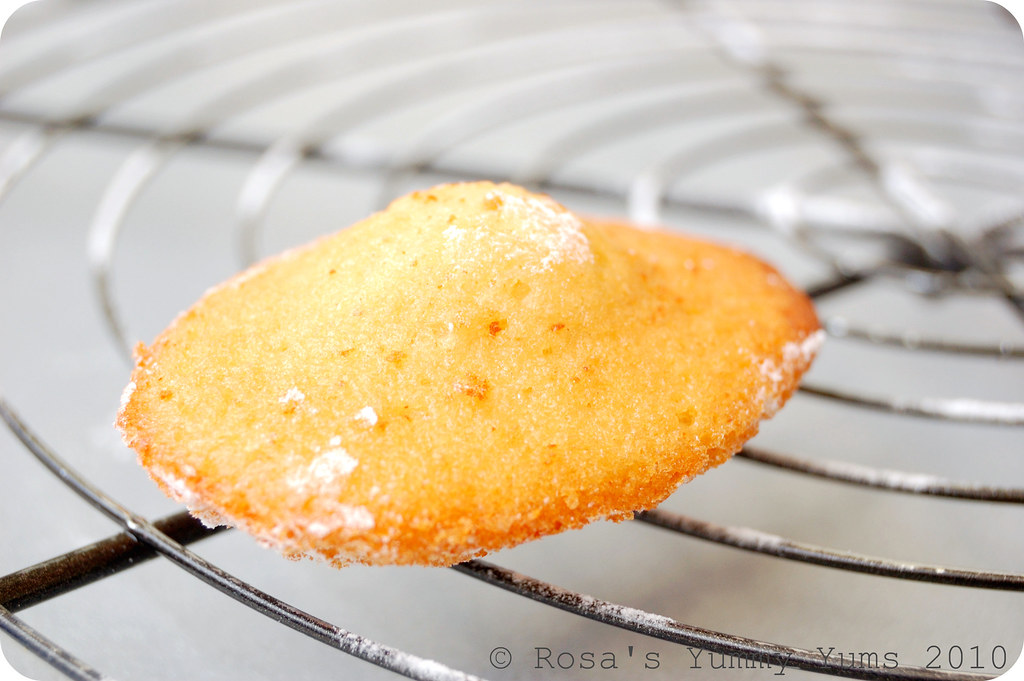
There is definitely something magical to that lovely and elegant treat. Whether it has something to do with it's cute shell shape or it's size, Madeleines will not leave you indifferent. They definitely have an attractive aspect and a winning pedigree!
Well, after having finaly bought a Madeleine pan, I thought that it was about time for me to stop dreaming about them and start experimenting with them. So, on Monday, I made the Génoise-style batter and waited for the next day to bravely get out my mould in order to bake my first batch of close to perfect Madeleines.
After some researching on the net, I decided to make Claudia Flemming's recipe which I freely adapted according to my cravings for spring-like flavors. Originally, her Madeleines are made with chestnut honey, but since I had none I used a normal type of runny honey. And as I wanted to add an extra dimension to them, I ground a few dried rosebuds that I added to the pastry.
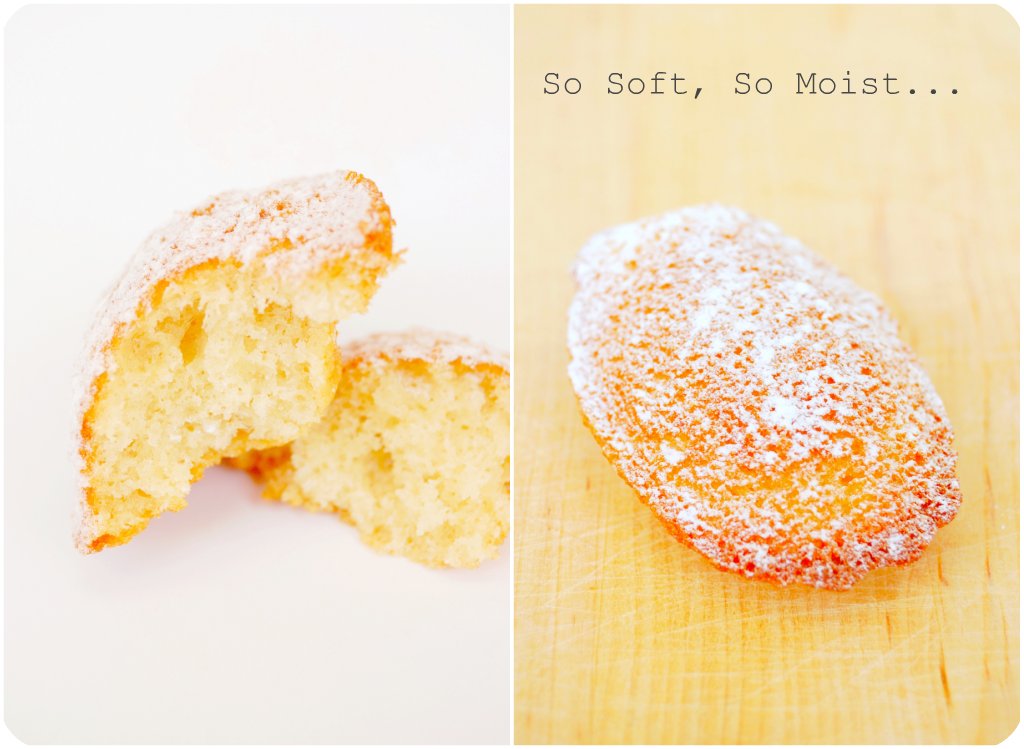
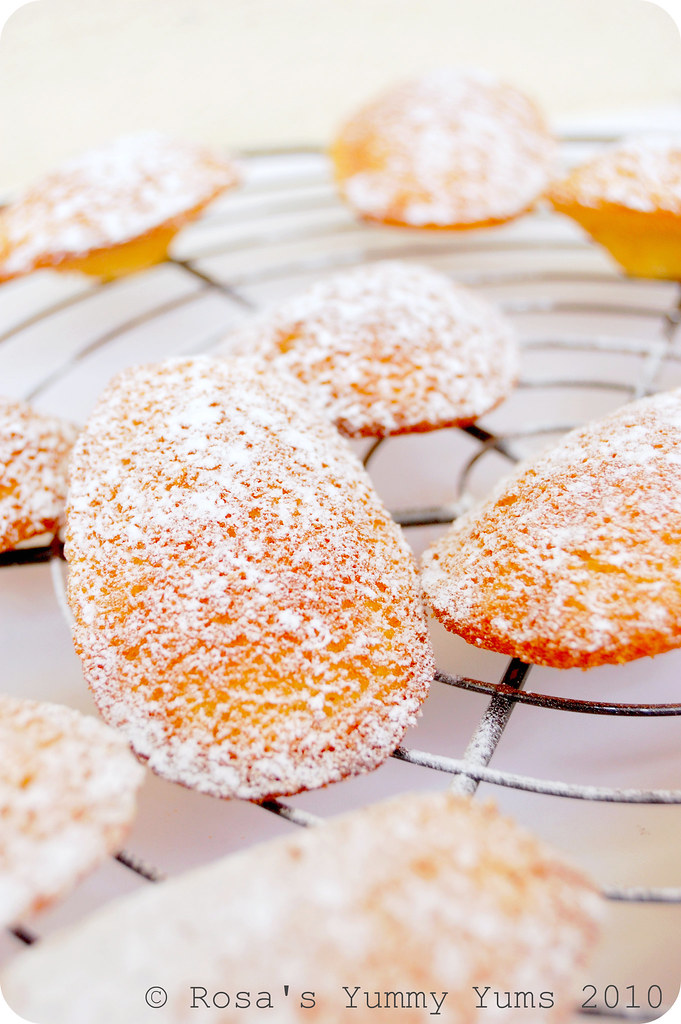
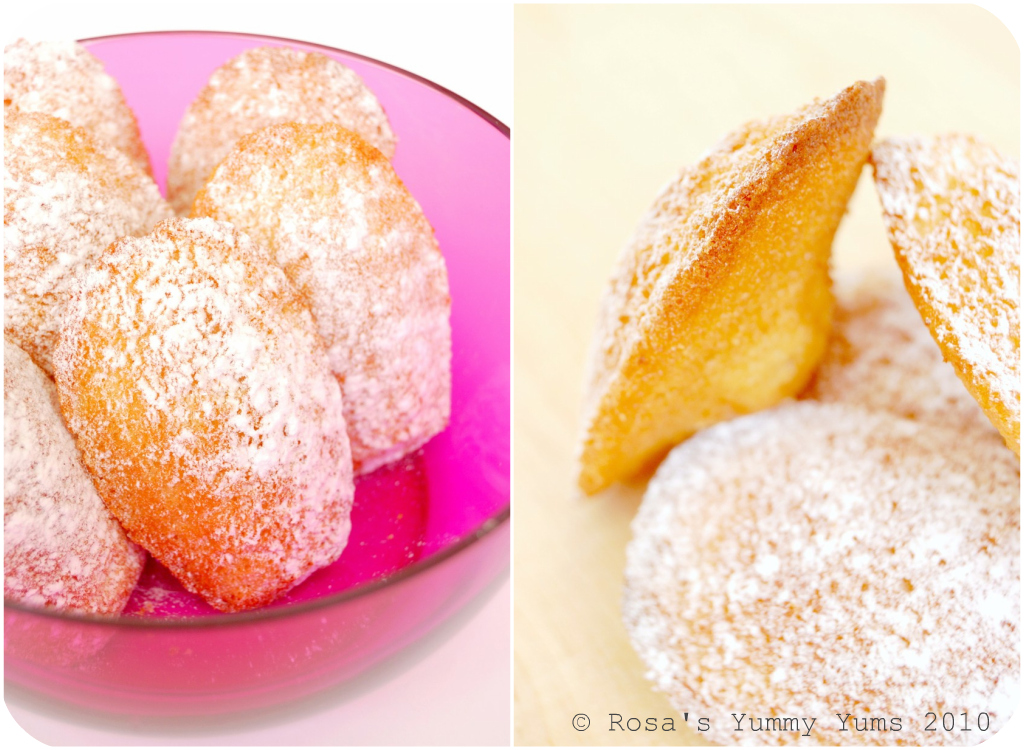
Those "Rose & Honey Madeleines" are very easy to make and taste so good. Texture-wise they are very moist, tender on the inside and slighty crispy on the outside. Taste-wise they have an extremely exhalirating and delicate flowery fragrance as well as a divinely sweet and pungent honey flavor. To die for and a perfect addition to your Easter table!
Recipe taken from Claudia Fleming's "The Last Course" and adapted by Rosa @ Rosa's Yummy Yums 2010.
Yields 2 dozen madeleines.
Ingredients:
12 Tbsp (180g/1.5 sticks) Unsalted butter, plus additional softened butter for the moulds
4 Large eggs
1/2 Cup Granulated sugar
2 Tbsp Firmly packed dark brown sugar
1/4 Cup Runny honey (strong flavored)
1 Cup All purpose flour
1/2 Cup Cake flour
2 Tsp Baking powder
1/4 Tsp Sea salt
2 Dried rosebuds, ground
Confectioners' sugar for dusting
Method:
1. In a small skillet over medium heat, melt the butter. Continue to let the butter cook until some of the white milk solids fall to the bottom of the skillet and turn a rich hazelnut brown, about 5 minutes. Strain the browned butter through a fine sieve into a small bowl.2. In the bowl of an electric mixer fitted with the whisk attachment, beat the eggs, both sugars, and honey until pale and foamy, 2-3 minutes.
3. Sift both flours, the baking powder, ground rosebuds and salt over the egg mixture and use a rubber spatula to gently fold in. Fold in the browned butter. Cover the batter and refrigerate for at least 8 hours, or overnight.
4. Preheat the oven to 200° c (400° F). Liberally butter the madeleine molds. Spoon or pipe the batter evenly into the molds. Bake for 5-7 minutes, until golden brown.
5. Transfer the pans to a wire rack to cool for 5 minutes then unmold the cakes and let them cool completely on the rack. Dust with confectioners' sugar before serving.
Remarks:
I recommend that you butter the pans, then dust them with flour and put them in the freezer for a short while before you pipe the batter in the moulds.
Serving suggestions:
Eat those Madeleines whenever you feel like it and don't forget to accompany them with a good cup of tea.
~~~~~~~~~~~~~~~~~~~~~~
~ Madeleines Au Miel Et A La Rose ~
Recette tirée du livre "The Last Course" de Claudia Fleming et adaptée par Rosa @ Rosa's Yummy Yums 2010.
Pour 2 douzaines de madeleines.
Ingrédients:
180g de Beurre non-salé, plus un peu de beurre ramolli pour beurrer les moules
4 Gros oeufs
105g de Sucre cristallisé
2 CS de Sucre brun clair
60g de Miel (au goût prononcé)
127.5g de Farine blanche
64g de Farine à gâteau
2 CC de Poudre à lever
1/4 CC de Sel de mer
2 Boutons de roses séchées, réduits en poudre
Sucre en poudre pour saupoudrer
1. Dans une petite poêle faire fondre le beurre à température moyenne. Continuer à cuire le beurre pendant 5 minutes jusqu'à ce que le lactose se teinte (couleur noisette) et tombe au fond de la poêle. Filtrer le beurre et réserver.
2. Dans le bol d'un robot, battre (avec le fouet pendant 2-3 minutes) les oeufs, les sucres et le miel jusqu'à obtention d'une mousse pâle.
3. Tamiser les farines avec la poudre à lever, la poudre de boutons de roses et le sel et ajouter à la mixture aux oeufs. Incorporer délicatement avec une spatule et laisser reposer au frigo pendant tout une nuit (ou 8 heures au moins).
4. Péchauffer le four à 200° C. Beurrer généreusement les moules à madeleines. Les remplir avec la pâte à l'aide d'une cuillèere ou d'une poche à douille. Cuire 5-7 minutes, jusqu'à ce que les madeleines soient dorées.
5. Transférer le moule sur une grille et laisser refroidir pendant 5 minutes avant de les démouler et de les faire refroidir complètement. Saupoudrer avec du sucre glace.
Remarques:
Je vous recommande de bien beurrer les moules et de les saupoudrer avec de la farine, puis de les mettre un petit moment au congélateur avant de les remplir.
Idées de présentation:
Mangez-les à toutes heures de la journée et n'oubliez pas de les accompagner d'une bonne tasse de thé.